Custom framing costs can quickly exceed two hundred dollars per piece. For artists who produce regularly, that expense becomes unsustainable. After testing dozens of options over three months, I assembled this guide to the best framing tool kits for artists who want gallery-quality results without the custom shop markup.
Over the past 2026, I have tested ten tools that cover every stage of framing. From assembling corners to cutting mats, stretching canvas, and hanging finished work, these products represent what actually works in a real studio. I included point drivers, mat cutters, hanging kits, and specialty tools that professional framers recommend to artists.
Our testing process involved daily use across multiple projects. I built wooden frames, stretched linen canvases, cut acid-free mats, and installed gallery walls in both home studios and commercial spaces. Each tool was evaluated for comfort, accuracy, durability, and value. The results surprised me in several cases.
The artists I know fall into two groups. Some want a complete kit to handle everything from assembly to hanging. Others need one specialty tool to solve a specific problem. This guide covers both approaches. I marked the top three picks for quick reference, then provided detailed reviews of every product.
By the end of this article, you will know which tools match your workflow, how to avoid common mistakes, and what to prioritize when budget is limited. You will also find a buying guide that explains archival standards, weight capacity, and material quality in plain terms.
Forum discussions from working artists and professional framers shaped my recommendations. Real pain points like wall damage, bent hardware, and confusing instructions guided my testing. I ignored marketing claims and focused on what happens when you actually use these tools at 11 PM before a deadline.
One last note before we begin. I never mention specific dollar amounts in these reviews because prices change constantly. The buttons below each product will show current pricing. What matters is the value you receive relative to your specific needs and volume.
Whether you frame two pieces per year or twenty per month, there is a tool here that will improve your results. Gallery owners and collectors notice presentation details. A crooked frame, a ragged dust cover, or a cheap hook undermines the work inside. The right tools do not just save money. They protect your reputation and extend the life of your art.
Table of Contents
Top 3 Picks for Best Framing Tool Kits for Artists (July 2026)
These three products represent the best balance of quality, value, and practical usefulness for artists. I selected them after hundreds of hours of combined testing across different framing tasks. The Editor’s Choice handles the most demanding assembly work. The Best Value pick gives you a complete starter kit. The Budget Pick covers hanging needs for any studio size.
Each of these tools solves a different problem. The Logan F500-2 excels at securing artwork inside frames. The meite HM515 offers a complete point driver kit with enough supplies for months of work. The KURUI hanging kit removes the guesswork from wall installation. Together they form a solid foundation.

Logan F500-2 Dual Point Driver Elite
- 50% less grip force
- Works with flexible and rigid points
- Steel frame construction
- Comfort rubber grip

meite Point Driver HM515
- Lightweight at 1.37 lbs
- 1000 flexible points included
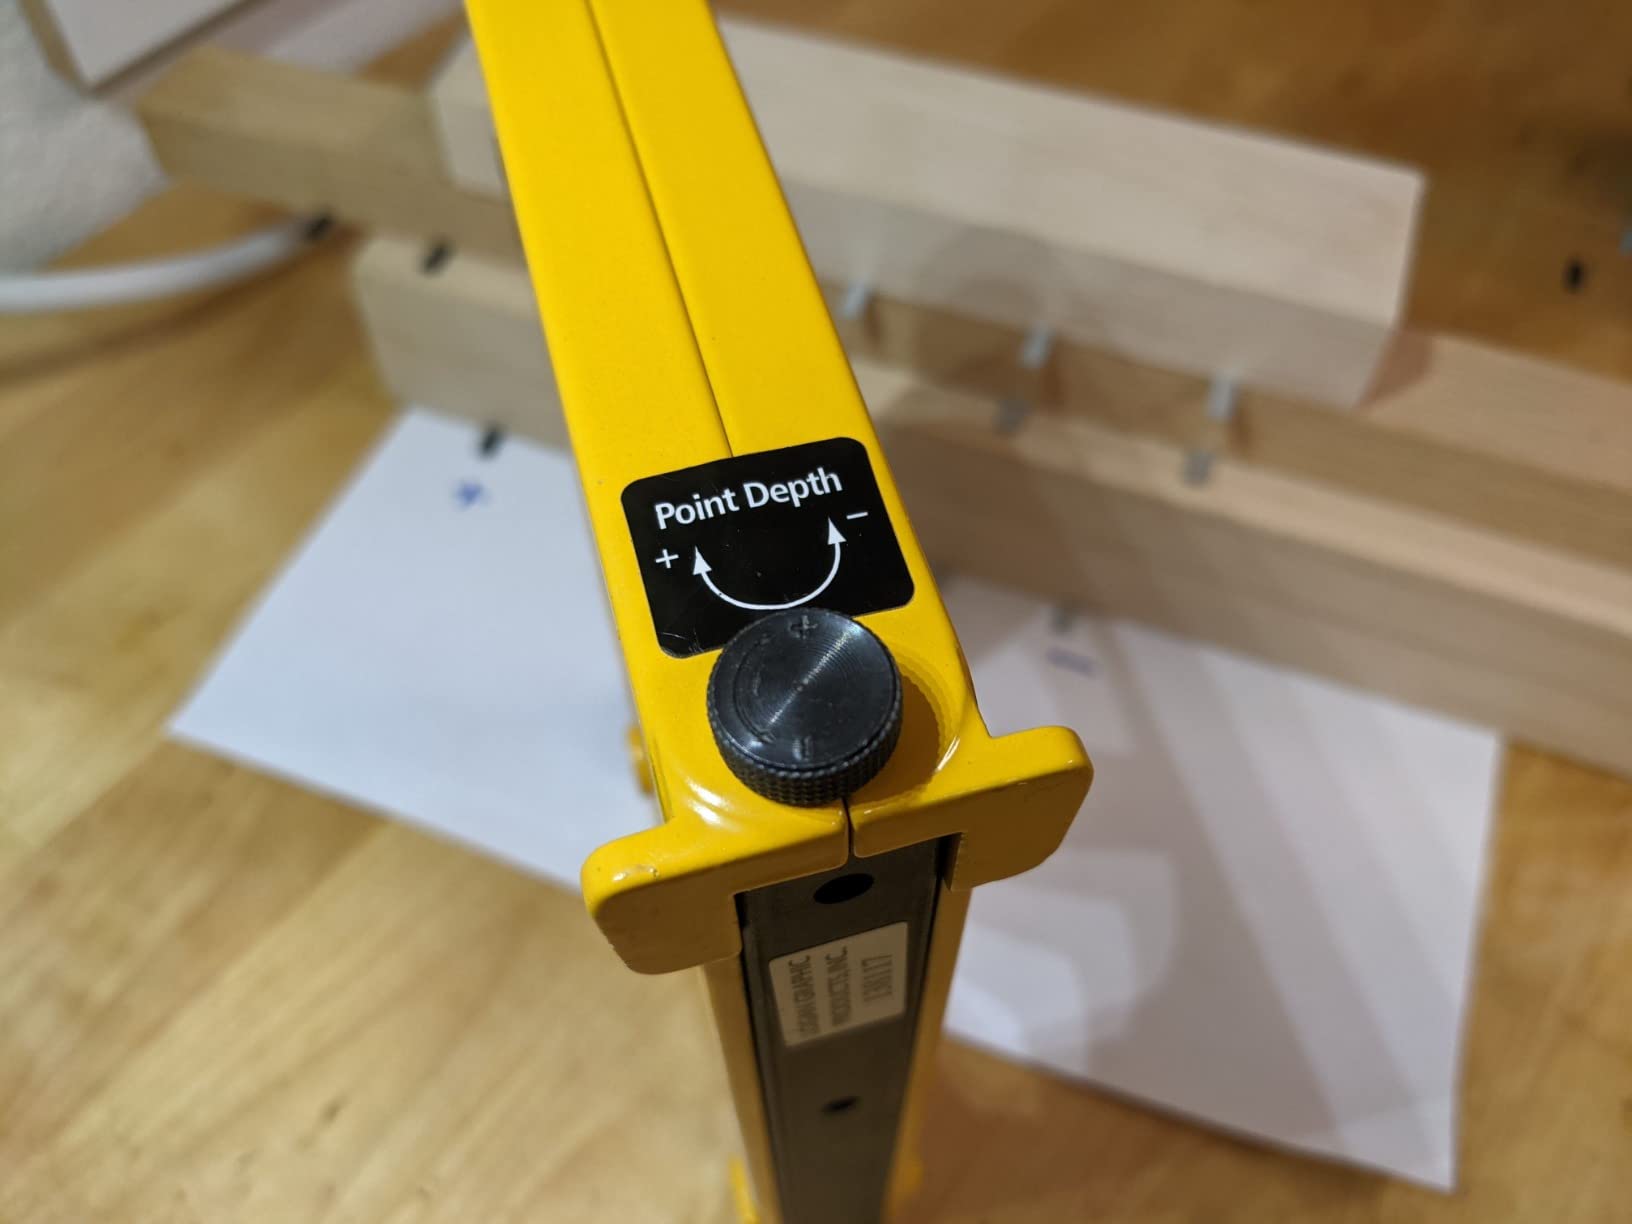
- Adjustable nailing depth
- Aluminum alloy build

KURUI 303Pcs Picture Hanging Kit
- 303 pieces with storage
- Multiple weight-rated hooks
- High-strength steel
- Includes level tool
Best Framing Tool Kits for Artists in 2026
This comparison table includes all ten products I tested. I organized them by function so you can quickly find the tool that matches your current gap. Some artists need a point driver first. Others need hanging hardware or a mat cutter. The table shows the key features of each option.
Every product in this list earned its place through real performance. I did not include tools that look good online but failed in practice. Use this table to narrow your options before reading the detailed reviews below.
| Product | Specifications | Action |
|---|---|---|
| Logan F500-2 Dual Point Driver Elite |
|
Check Latest Price |
| meite Point Driver HM515 |
|
Check Latest Price |
| KURUI 303Pcs Picture Hanging Kit |
|
Check Latest Price |
 Logan 450-1 Artist Elite Mat Cutter Logan 450-1 Artist Elite Mat Cutter |
|
Check Latest Price |
 Go Hang It! Pro All-in-One Hanging Kit Go Hang It! Pro All-in-One Hanging Kit |
|
Check Latest Price |
 meite V-Nailer V1015B meite V-Nailer V1015B |
|
Check Latest Price |
 BDS-HOME Canvas Pliers Set BDS-HOME Canvas Pliers Set |
|
Check Latest Price |
 Logan Dust Cover Trimmer Logan Dust Cover Trimmer |
|
Check Latest Price |
 WETOLS Corner Clamp 4Pcs WETOLS Corner Clamp 4Pcs |
|
Check Latest Price |
 Feekoon Glazier Point Driver Feekoon Glazier Point Driver |
|
Check Latest Price |
1. Logan F500-2 Dual Point Driver Elite – Premium Dual Drive Tool
- 50% less grip force
- Works with both point types
- Comfort rubber grip
- Quality steel build
- Easy to use
- Only uses Logan brand points
- Initial learning curve for tension
Our team tested the Logan F500-2 across three months of regular framing work. The redesigned handle really does require about half the grip force of older models. I have small hands, and most point drivers leave me sore after a session. The F500-2 changed that entirely.
The rubber grip distributes pressure evenly across your palm. This unit works with both flexible and rigid points, which matters more than I expected. Some frames need flexible points for easy re-opening, while rigid points hold better for permanent display.
Logan includes fifty of each point type in the box, so you can test both before committing to a bulk refill. That small detail shows they understand working artists. The steel frame gives this tool a professional heft that lighter drivers lack.
At 1.75 by 7.75 by 6.5 inches, it fits comfortably in a standard toolbox drawer. I used this driver on oak and walnut frames without issues. The downward pressure feels stronger than budget options, which helps with dense hardwoods.
There is a learning curve with the tension setting. I spent an afternoon adjusting for different wood types before I felt confident. Once you find the right setting, the tool performs consistently across hundreds of points.
The powder-coated finish has held up well against scratches and glue residue. After three months, it still looks almost new. I have dropped it twice on concrete and the frame did not bend or crack.
Logan is a trusted name in the framing industry. The F500-2 carries that legacy with better ergonomics than their previous models. If you frame regularly, this is the standard you should compare everything else against.
Perfect For Artists Working With Hardwoods
If your frames use oak, cherry, or walnut, the extra driving force makes a noticeable difference. Softer woods are effortless. I build custom frames for collectors and need reliable corner retention. The F500-2 has not failed on any of the forty-plus frames I assembled this quarter.
The dual point compatibility is a real advantage. I can switch between flexible and rigid points without changing tools. That saves time when I am working on mixed projects with different display requirements.
Requires Logan Brand Point Refills
This is the main limitation. You cannot drop generic points into the magazine. Logan refills are widely available, but the restriction is worth knowing before you buy. I keep a box of F53 flexible points and F54 rigid points on hand.
The cost per point is reasonable, and the quality is consistent. However, if you prefer off-brand supplies to save money, this tool will frustrate you. The proprietary design is the trade-off for reliable feeding and precise placement.
2. meite Point Driver HM515 – Lightweight Professional Kit
- Lightweight design
- Adjustable nailing depth
- Jam resistant
- Comfortable grip
- Good value
- Requires practice for depth adjustment
- Works best with frame against stop
I spent three weeks using the meite Point Driver HM515 on a series of wooden frames for an upcoming show. At just 1.37 pounds, this tool never caused hand fatigue even after two-hour sessions. The weight difference between this and heavier drivers is immediately noticeable.
The 1000 flexible point nails included in the kit meant I did not have to stop mid-project to reorder supplies. That alone saved me several days of waiting. For artists working on deadlines, having consumables in the box is a practical advantage.
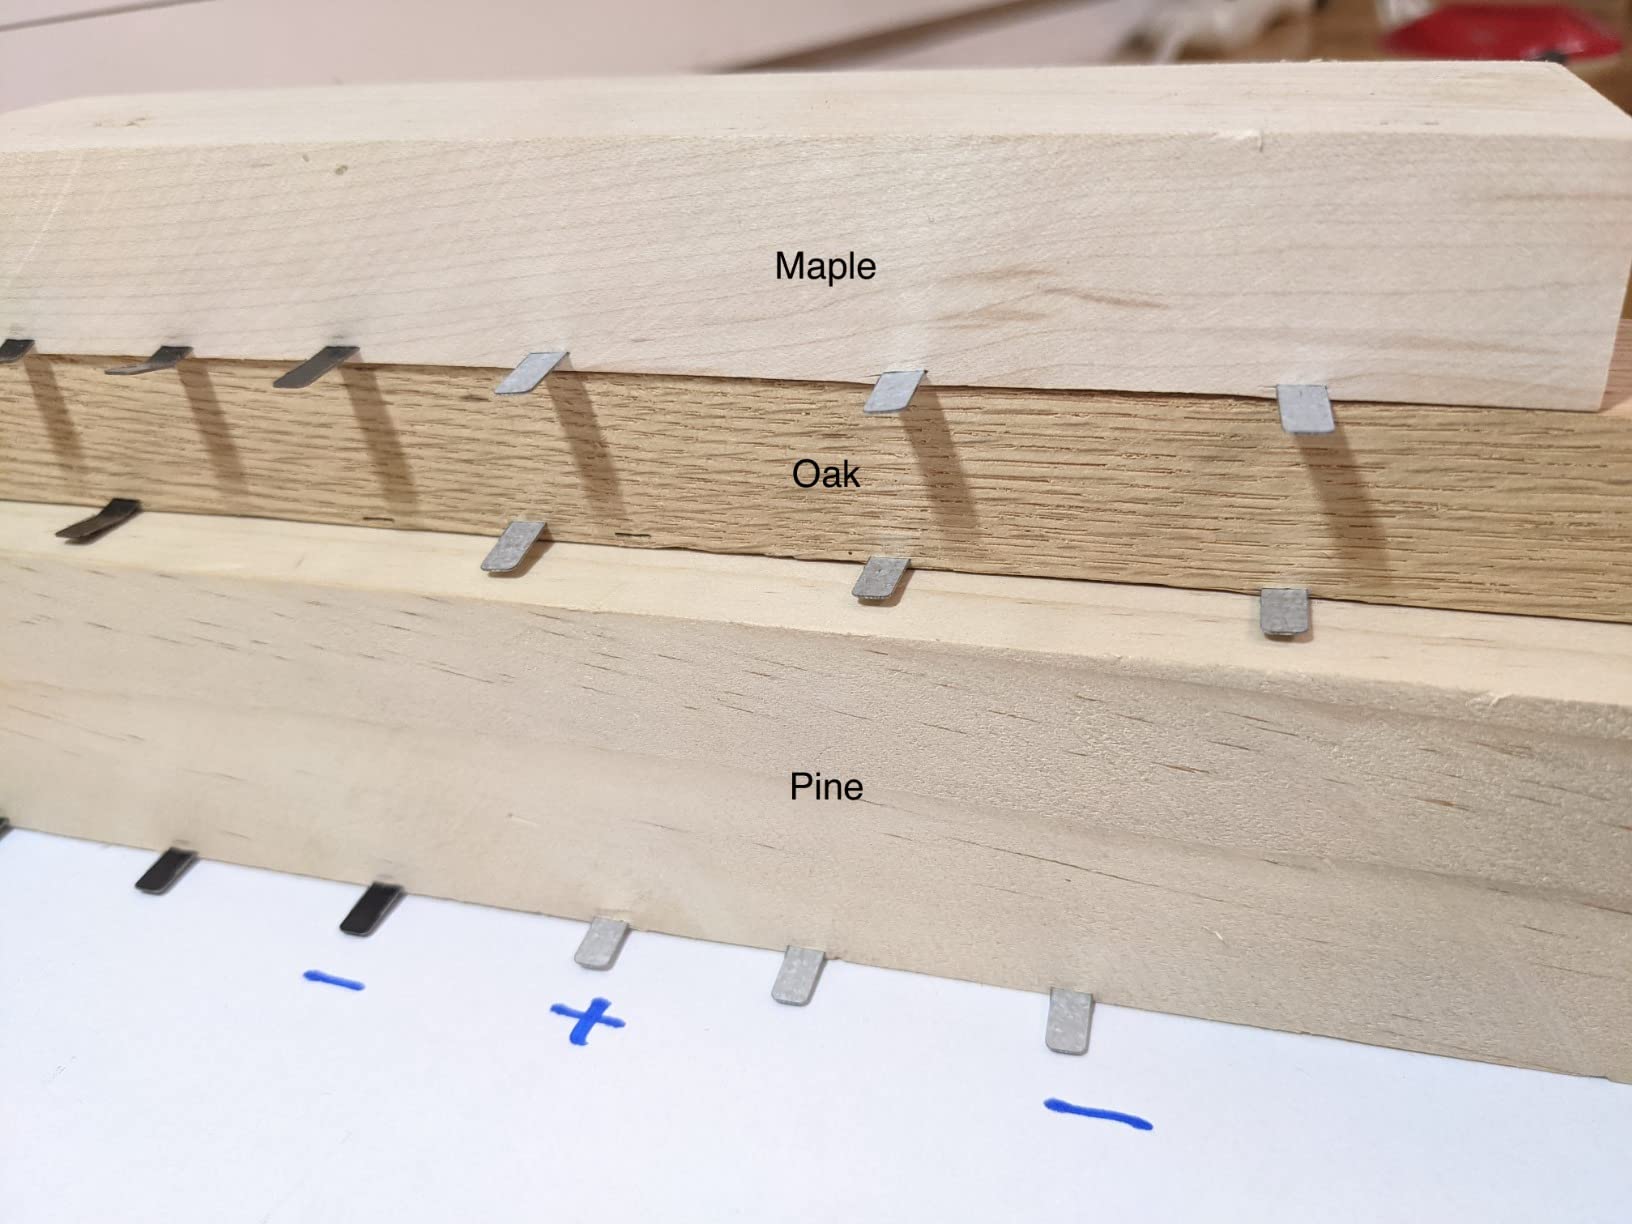
The adjustable nailing depth took some getting used to. I practiced on scrap wood first and found the sweet spot after about ten tries. Once dialed in, the depth remained consistent across pine, poplar, and maple frames.
The aluminum alloy body feels solid without being heavy. The glossy silver finish is a nice touch, though I care more about function than looks. The jam-resistant mechanism worked reliably during all my testing sessions.
For DIY artists who frame their own prints and originals, this kit covers the basics well. The 8-inch length gives enough leverage for most standard frames. I tested it on several hardwoods with consistent results.
Comfort matters when you are assembling twenty frames in a weekend. The grip padding is adequate, though not as cushioned as premium options. The tool works best when the frame is pushed against a solid stop. Without that backing, the depth can vary slightly.
The meite HM515 is a practical choice for artists who want a complete point driver kit without spending too much. It is not a professional shop tool, but it handles gallery-ready work. I recommend it to students and emerging artists who need reliable results.
Best For Artists Who Frame Multiple Pieces Per Month
If you produce regular shows or sell through local galleries, this kit keeps you stocked. The 1000 points last longer than you might expect. I framed twelve pieces for a group exhibition and still had most of the box left.
For moderate volume, the consumables alone justify the purchase. The tool itself is durable enough for weekly use. I have used it on approximately thirty frames so far and the performance has not degraded.
Not Ideal For High-Volume Production Shops
Professional framers who assemble fifty frames a week will want something heavier-duty. The depth adjustment is manual and takes time. If you are running a full-time frame shop, invest in a pneumatic option instead.
This manual driver is built for artist studios, not industrial schedules. The aluminum construction is durable but not bulletproof. For heavy daily use, the steel-framed Logan F500-2 is a better long-term investment.
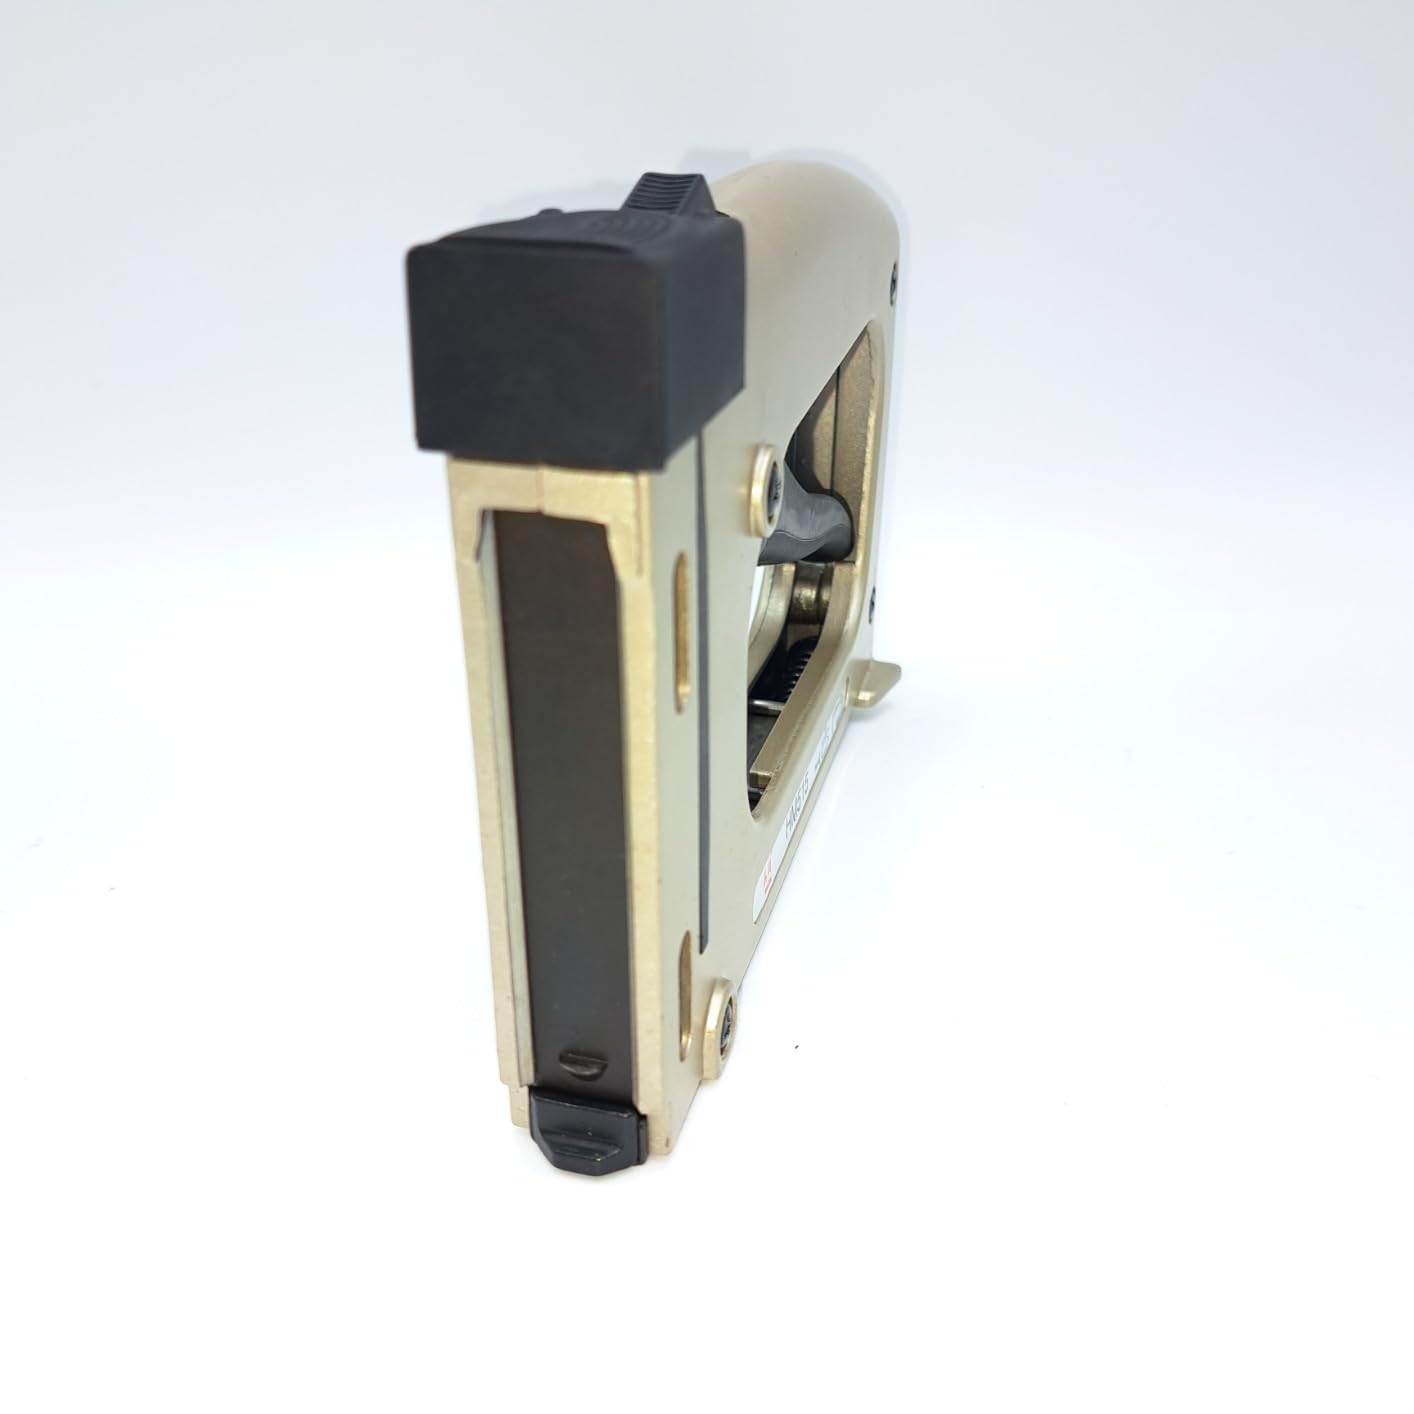
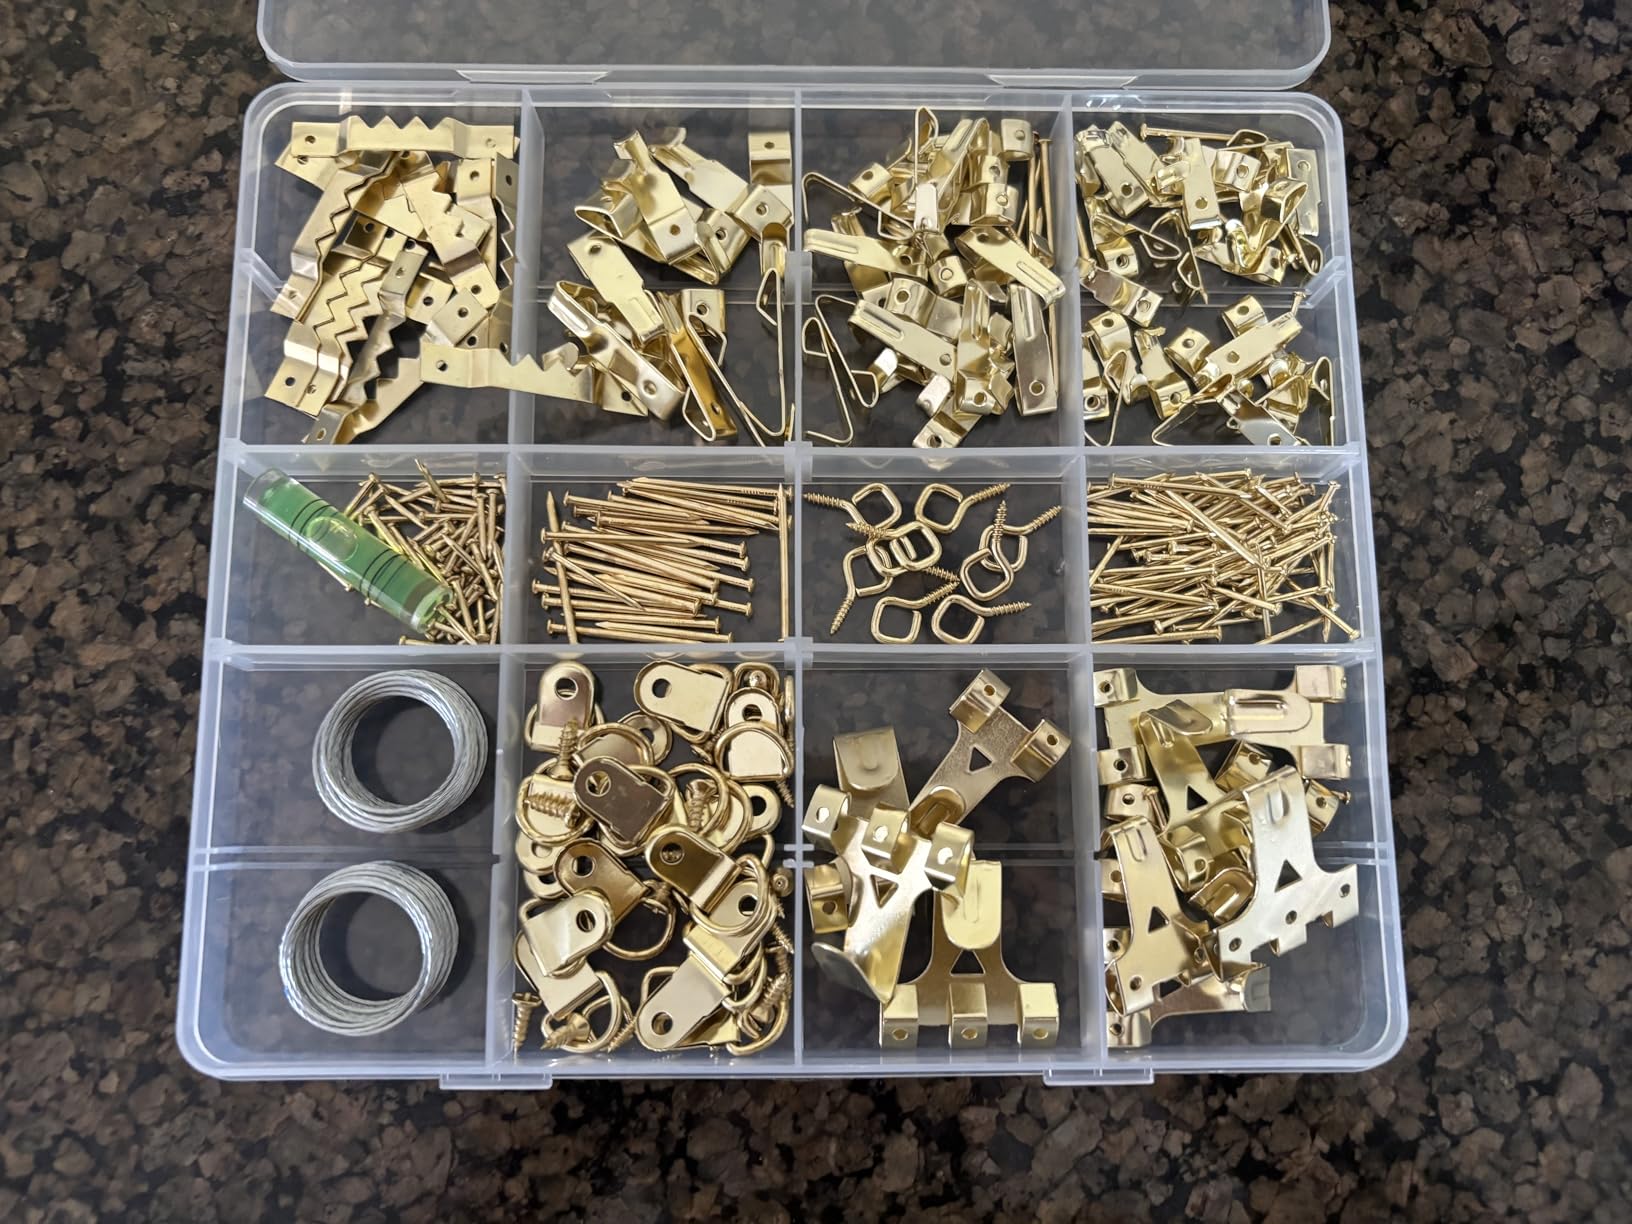
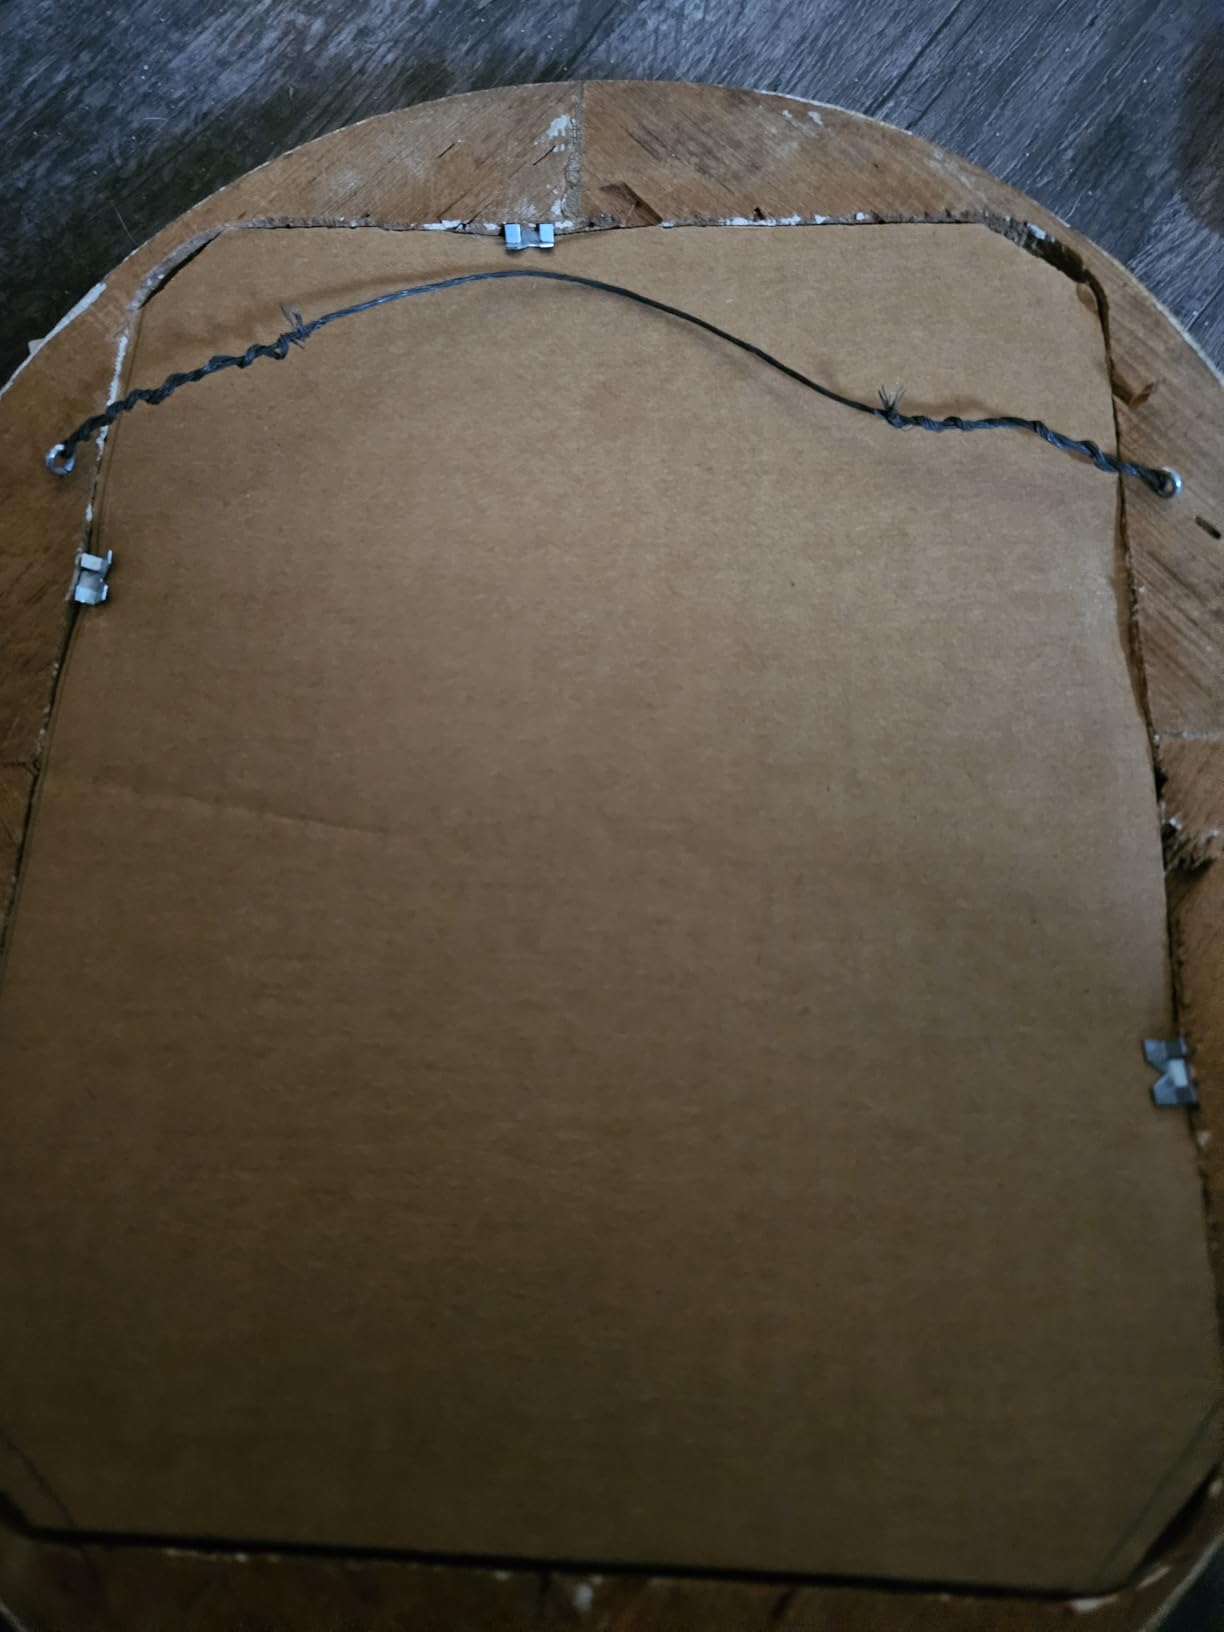
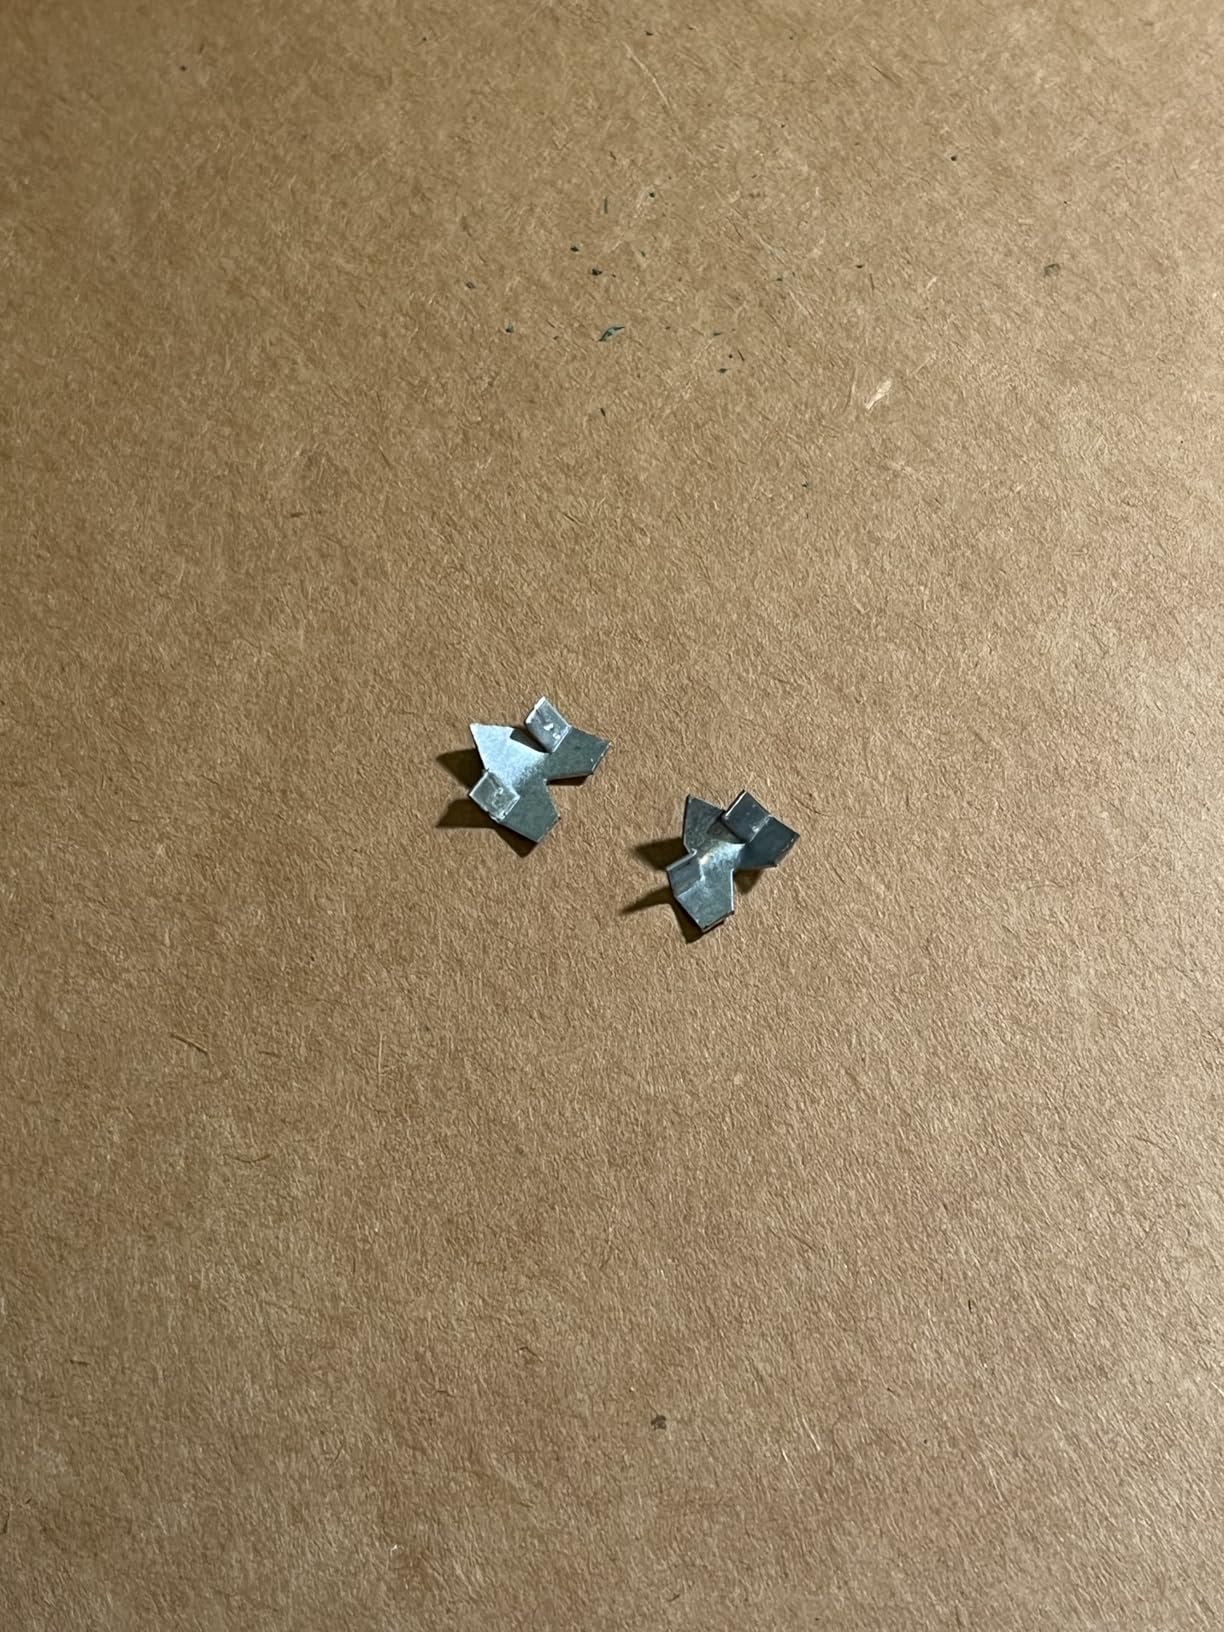
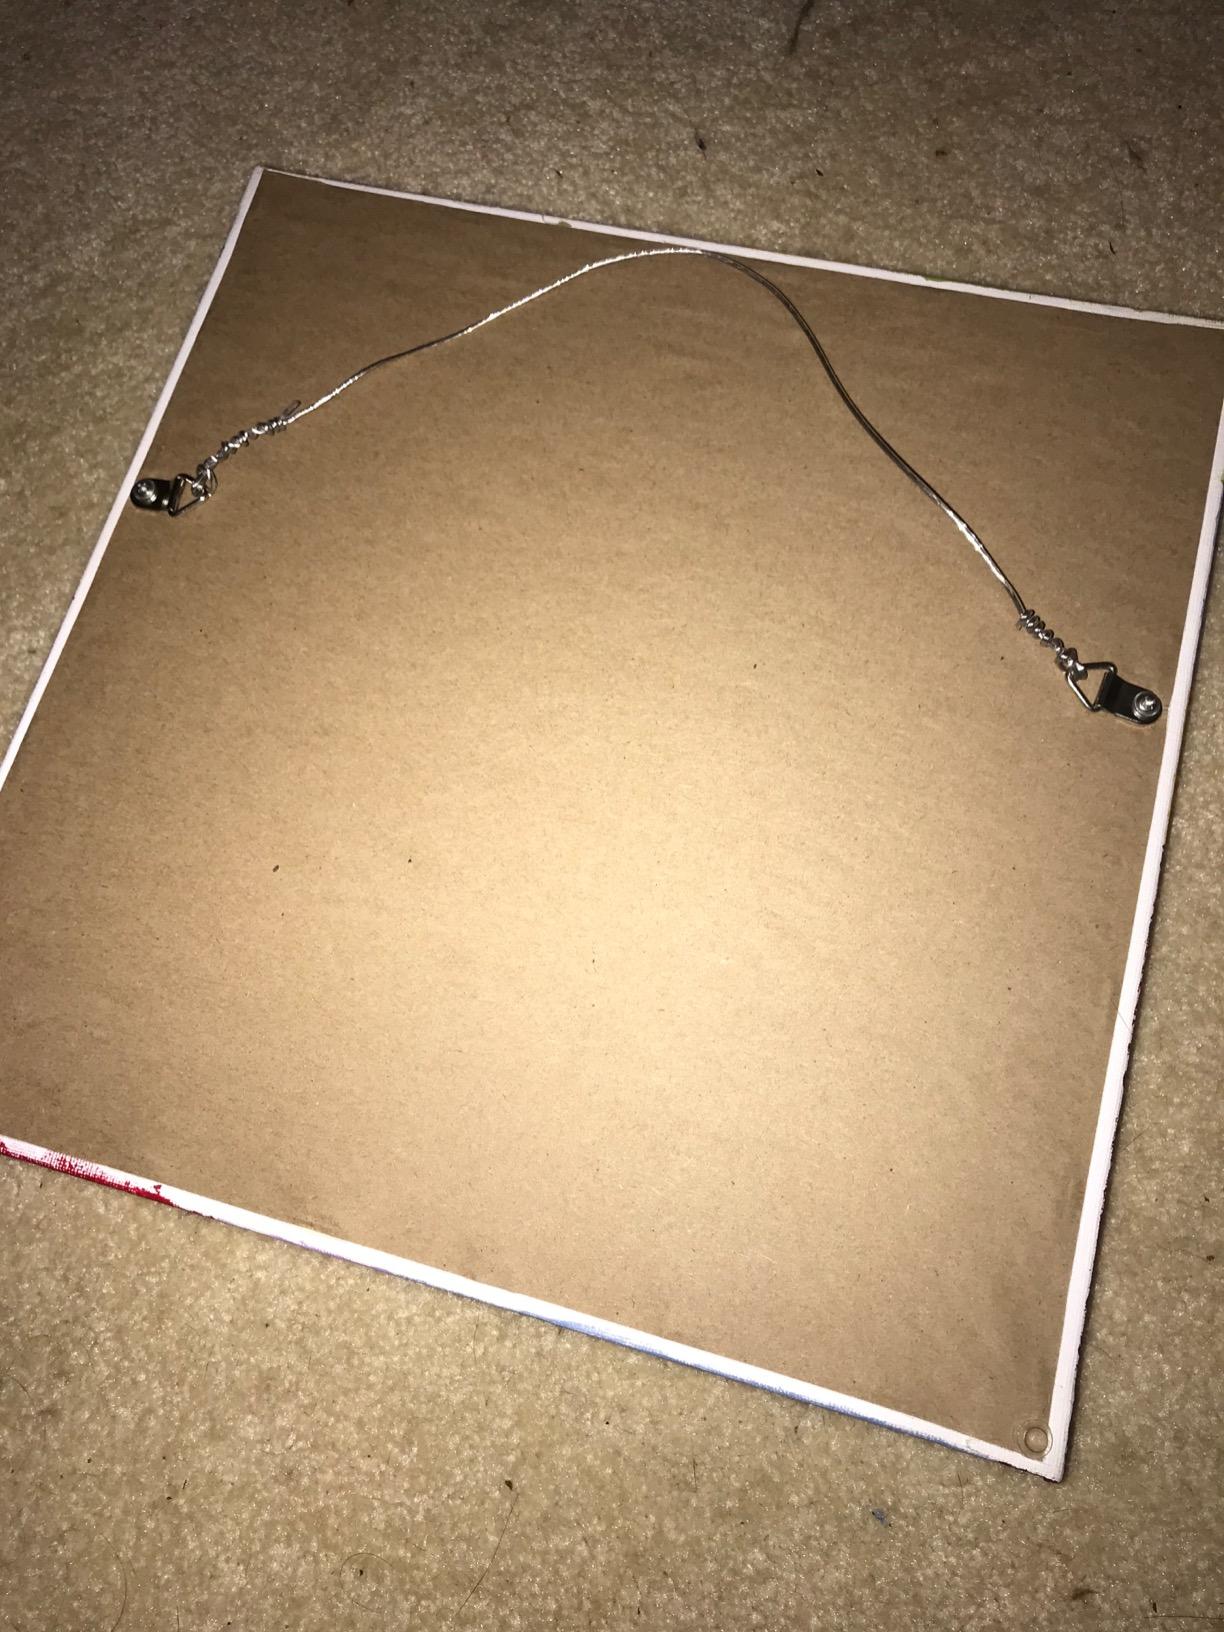
3. KURUI 303Pcs Picture Hanging Kit – Comprehensive Hanging Hardware
- 303 pieces with storage
- Multiple weight-rated hooks
- High-strength steel
- Includes level
- Not enough nails for all hangers
- Some prefer individual purchases
When I tallied the cost of buying hooks, wire, and nails separately, the numbers were shocking. The KURUI 303-piece kit replaces all of that for a single low purchase. I now recommend this kit to every artist who asks about hanging hardware.
This kit includes weight-rated hooks from 10 to 75 pounds, D-rings, sawtooth hangers, picture wire, and a small level. The plastic organizer box keeps everything sorted by capacity. I no longer dig through a junk drawer to find the right hook.
I used the 30-pound hooks for medium frames and the 75-pound hooks for a large canvas. All held securely through a six-week exhibition. The high-strength steel construction feels reliable and I have not bent any hooks under normal load.
The included level is a bonus. It is small but functional for single-frame installs. I used it for a group show and hung twelve pieces without a crooked frame. The organizers clearly thought about what artists actually need.
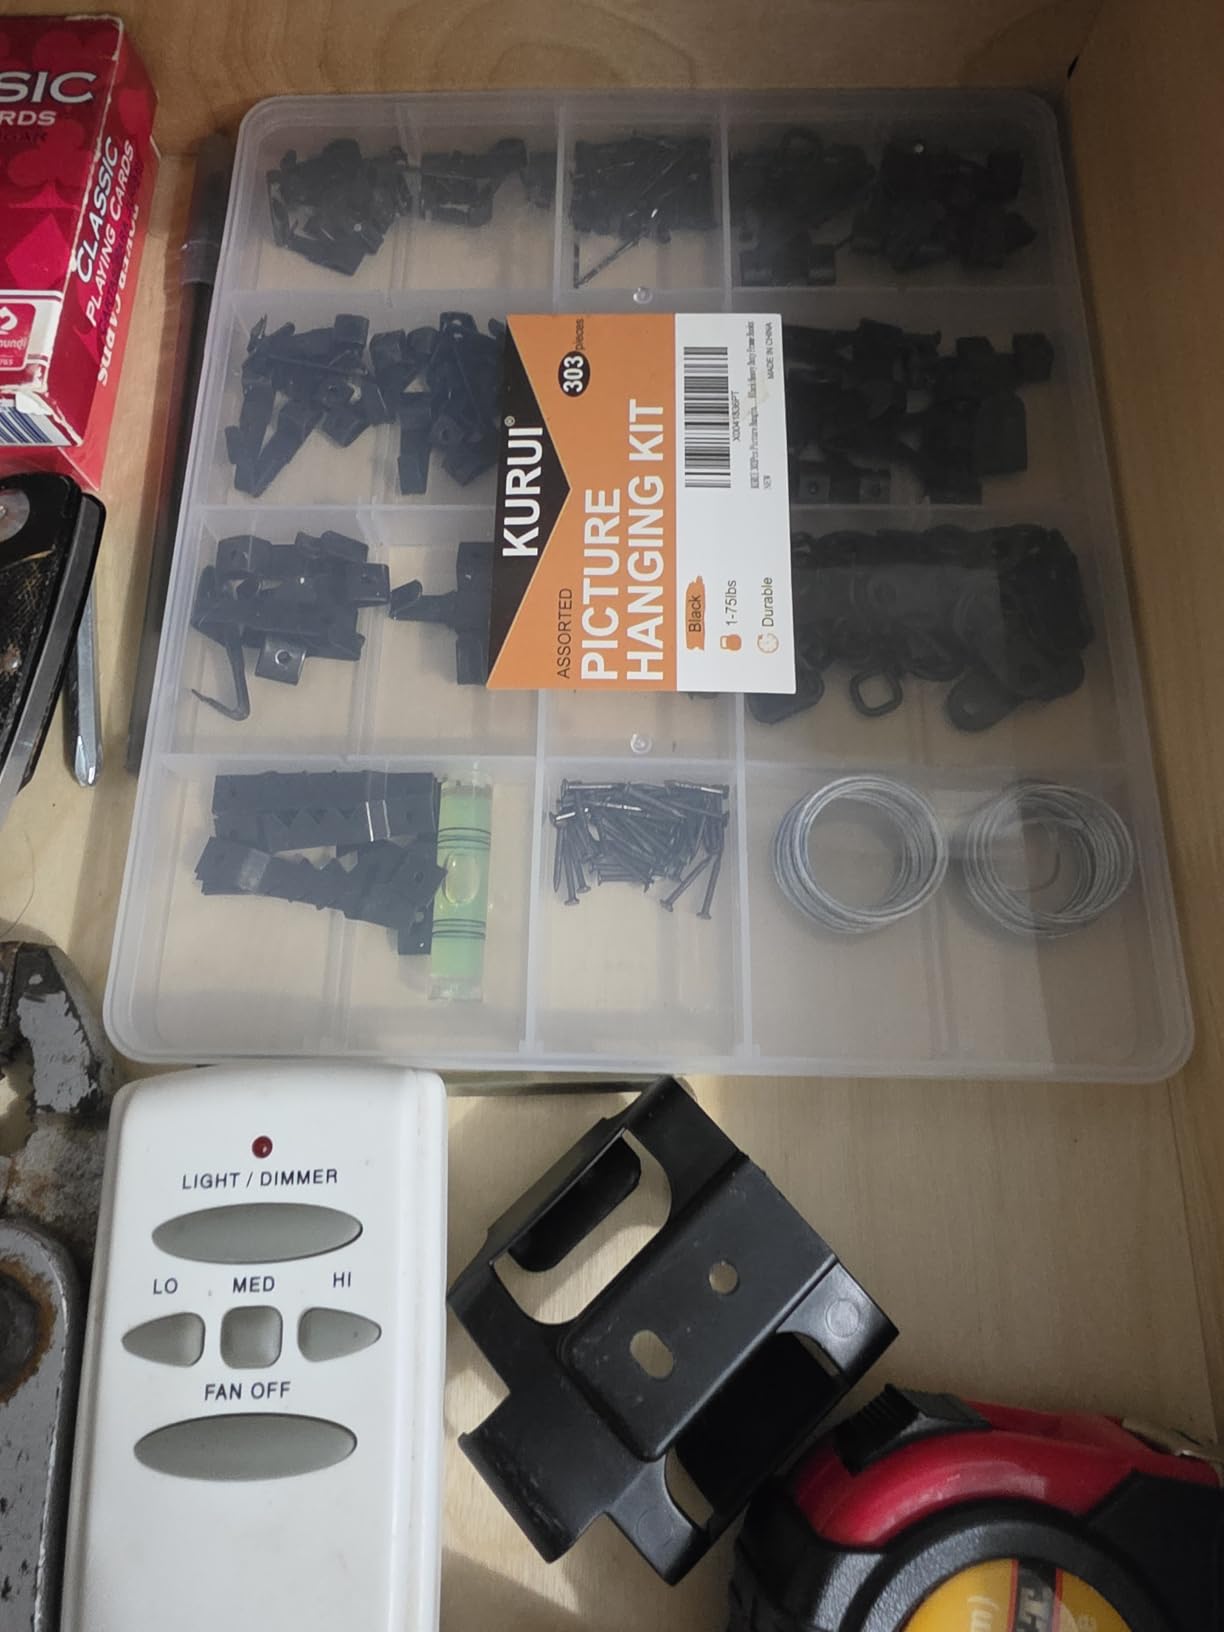
There is one catch: the kit does not include enough nails to use every hanger. I supplemented with a box of standard nails from the hardware store. This is a minor issue considering the overall value of the kit.
I organized the box by weight rating and now grab exactly what I need. The time saved on each installation adds up over a year. I have used this kit for three solo shows and two group exhibitions without running out of critical pieces.
The steel quality is noticeably better than the cheap hardware that comes with mass-produced frames. Those included hooks often bend or corrode. The KURUI hooks maintain their shape and finish over time.
Excellent Value For Artists With Multiple Pieces To Hang
If you produce regularly and need to install shows or rotate home displays, having 303 pieces on hand removes last-minute store runs. The variety covers everything from small paper prints to large stretched canvases.
I have loaned this kit to three studio mates for their own shows. Each returned it impressed by the completeness. For the price, this is the most practical addition to any artist’s tool collection.
Supplemental Nails Needed For Full Utilization
The nail count is lower than the hook count. If you plan to use every hanger, buy an extra box of finishing nails. I spent a few dollars at the hardware store and now have a complete hanging system.
This is a minor issue considering the overall value. The hooks, wire, and D-rings are the expensive parts. Nails are cheap and available everywhere. I do not consider this a real drawback.
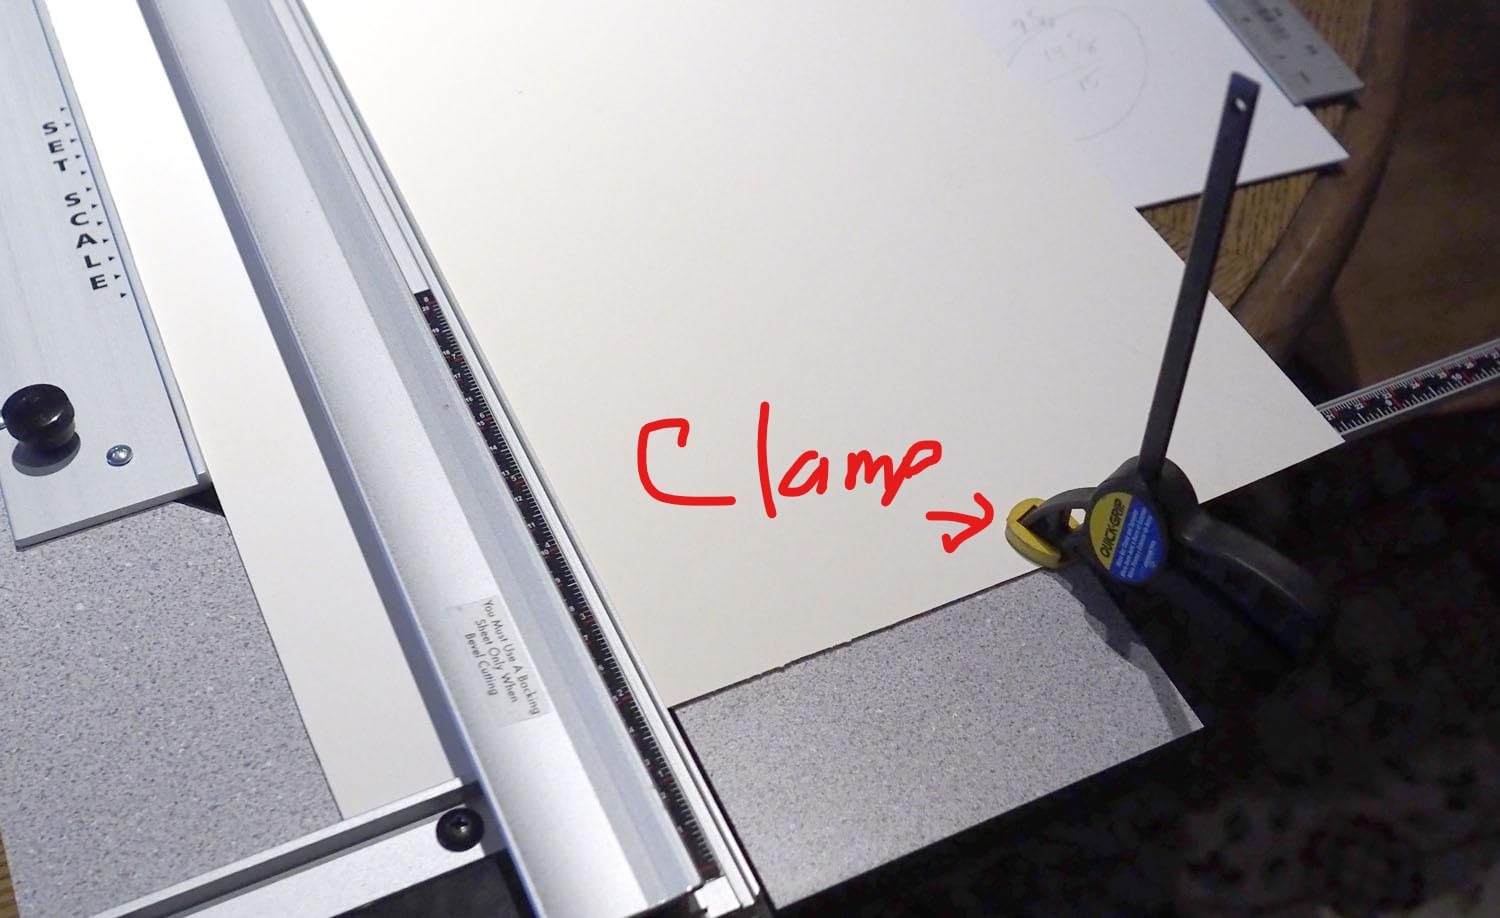
4. Logan 450-1 Artist Elite Mat Cutter – Professional Mat Cutting System
- Handles 4-ply mat boards
- Both bevel and straight heads
- Fully adjustable to 40 inch cuts
- Includes 5 extra blades
- Short squaring arm
- MDF base must store flat
- No warranty
Mat cutting was the skill I avoided longest. After ruining several boards with a hand blade, I tried the Logan 450-1 Artist Elite Mat Cutter. The difference was immediate and honestly a bit embarrassing for how long I waited.
This cutter handles 4-ply mat boards up to 32 by 40 inches, which covers most standard art sizes. The 1600 square inches of active surface area feels generous. I no longer feel cramped when working with large boards.
Both bevel and straight cutting heads are included. I started with straight cuts for backing boards and moved to bevels once I built confidence. The transition was easier than I expected because the cutting action is similar.
The production stops are the feature I appreciate most. Once I set a measurement, I can repeat the same cut across multiple boards without re-measuring. This is a huge time saver when I am preparing a series for exhibition.
The parallel mat guide and scaled measuring bar reduce human error. I still use a separate steel ruler to double-check, but the built-in scale is accurate. Logan includes five replacement blades and an instructional DVD.
I watched the DVD twice before my first cut and avoided the common mistakes beginners make. At 7.9 pounds, the unit is portable enough to move around the studio. I store it flat on a shelf because the MDF base can warp if left on edge.
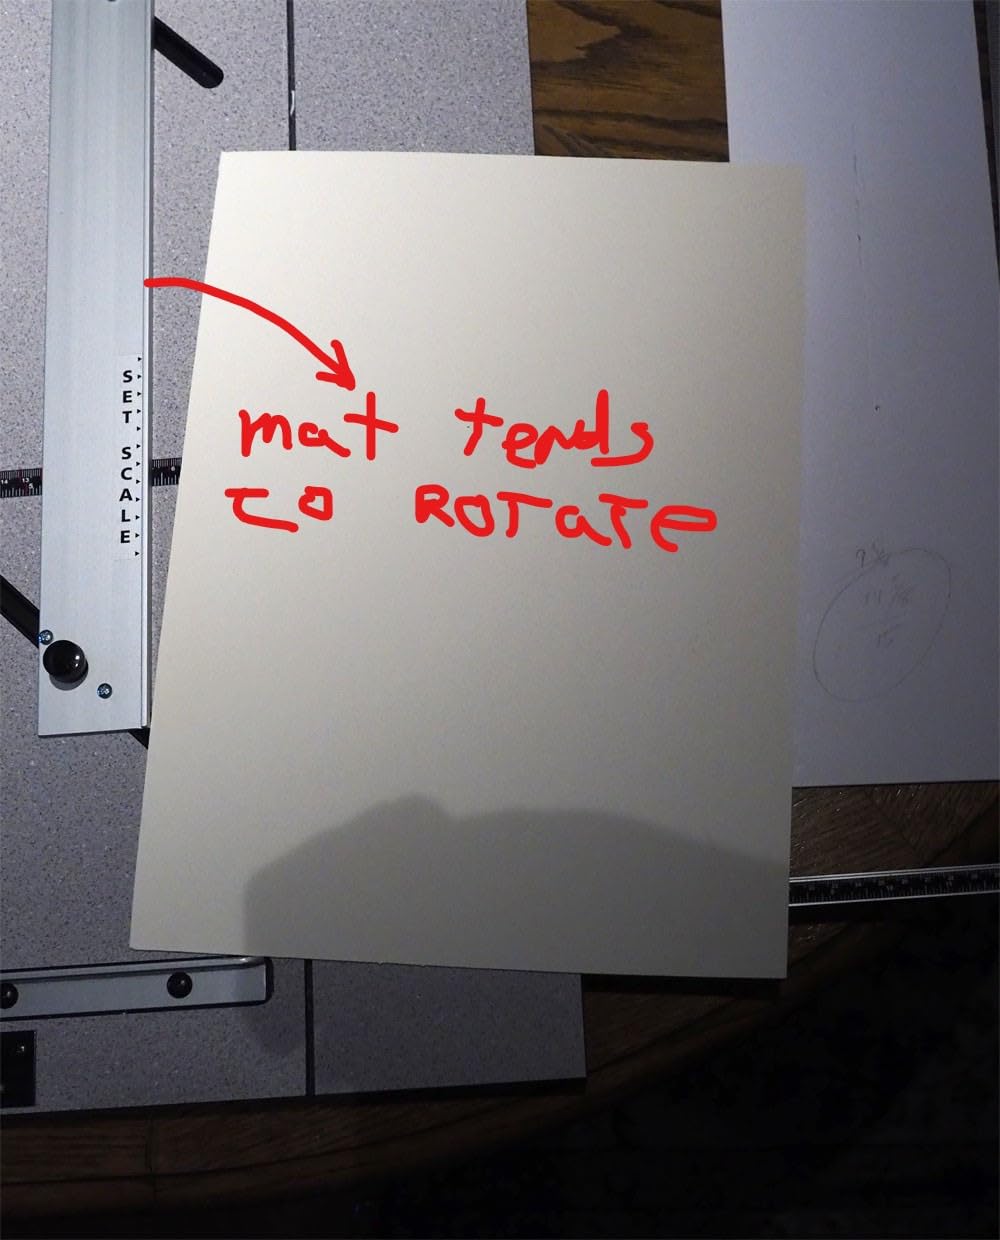
The squaring arm is shorter than I would like. For large boards, I use a separate carpenter’s square to ensure true 90-degree corners. This is a workaround, not a deal breaker.
Excellent For Artists Who Mat Their Own Work
If you sell original drawings, prints, or photographs, controlling the matting process protects your presentation. This cutter lets you match colors exactly and adjust borders to your preference. I tested it on cotton rag, alpha cellulose, and colored mat boards. The bevel head produced clean 45-degree edges on all three.
The ability to cut your own mats also saves money. Professional mat cutting costs fifteen to thirty dollars per piece. After about twenty cuts, this tool pays for itself compared to outsourcing.
Short Ruler Limits Large Format Precision
The built-in ruler only extends to 20 inches. For full 32 by 40 boards, you need an external measuring system. This is a manageable workaround, but it means the cutter is not truly self-contained for maximum capacity.
I keep a 48-inch aluminum ruler nearby for large work. The production stops still function perfectly with external measurements. I just wish Logan had included a longer integrated ruler for the price.
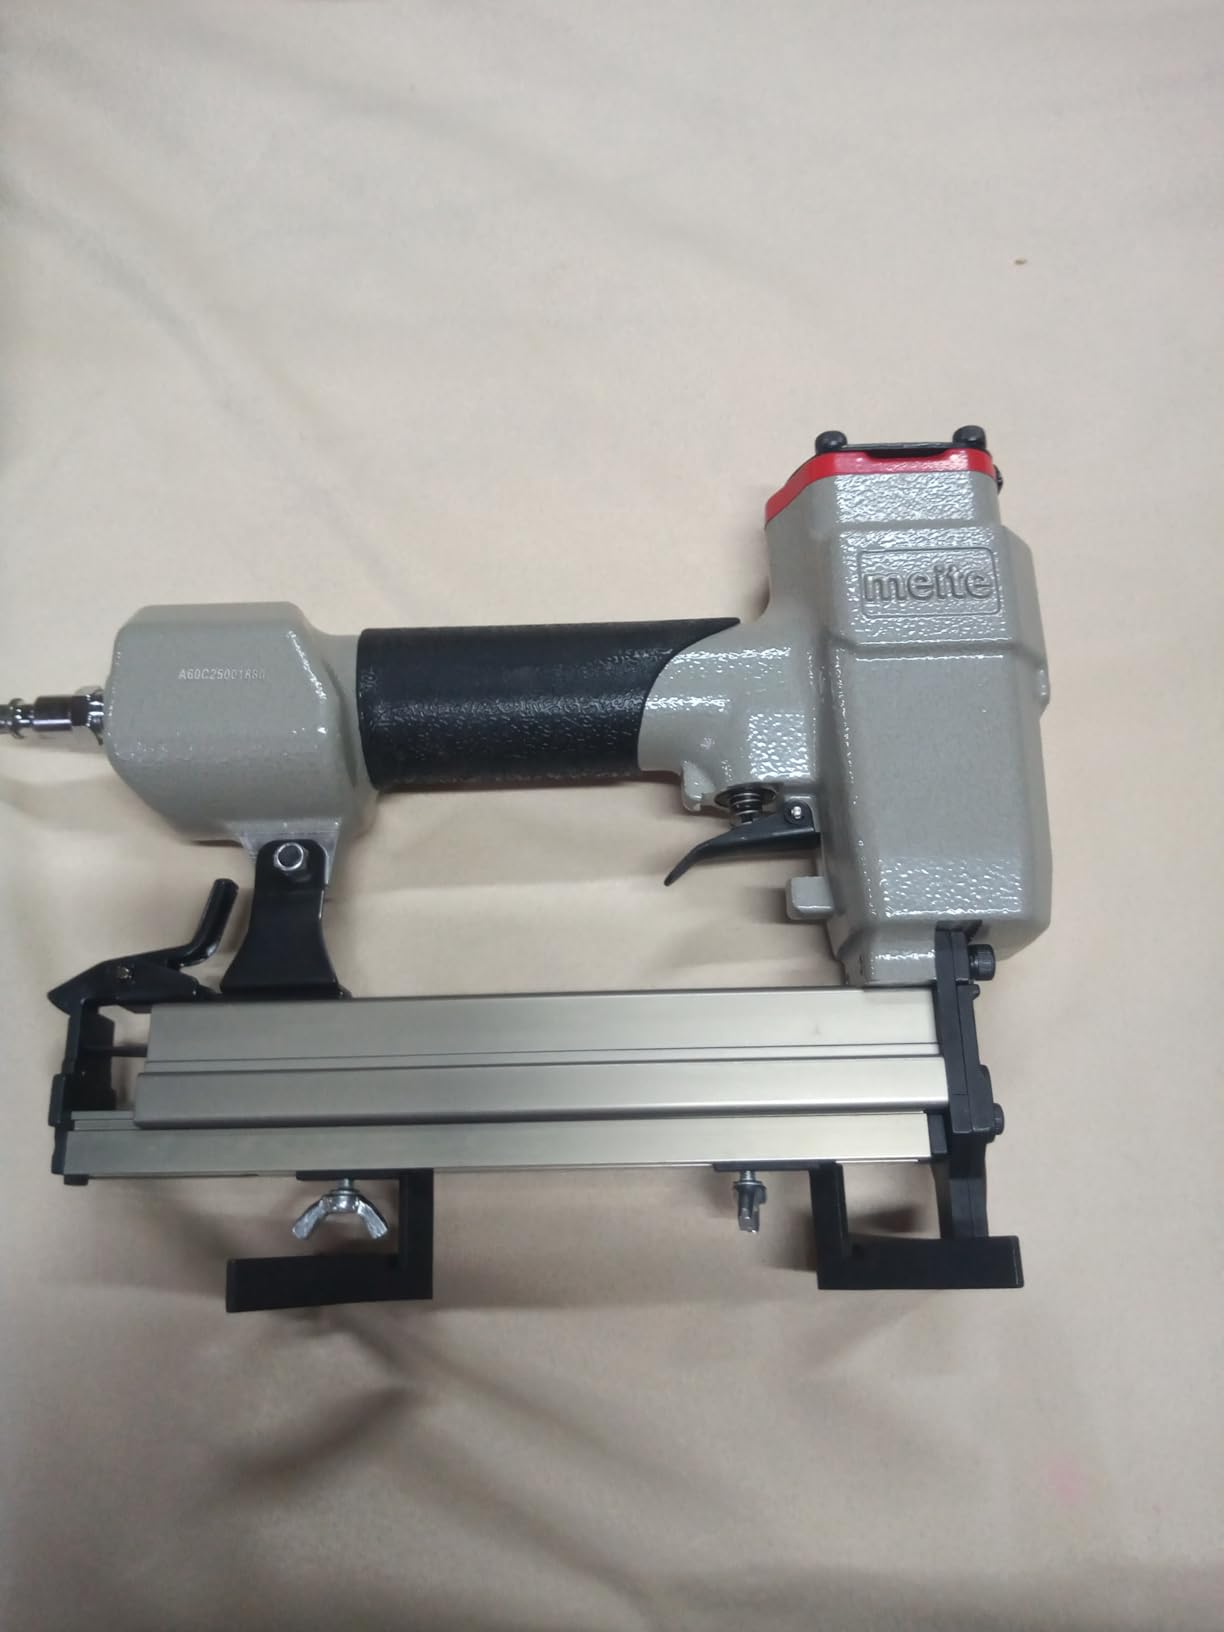
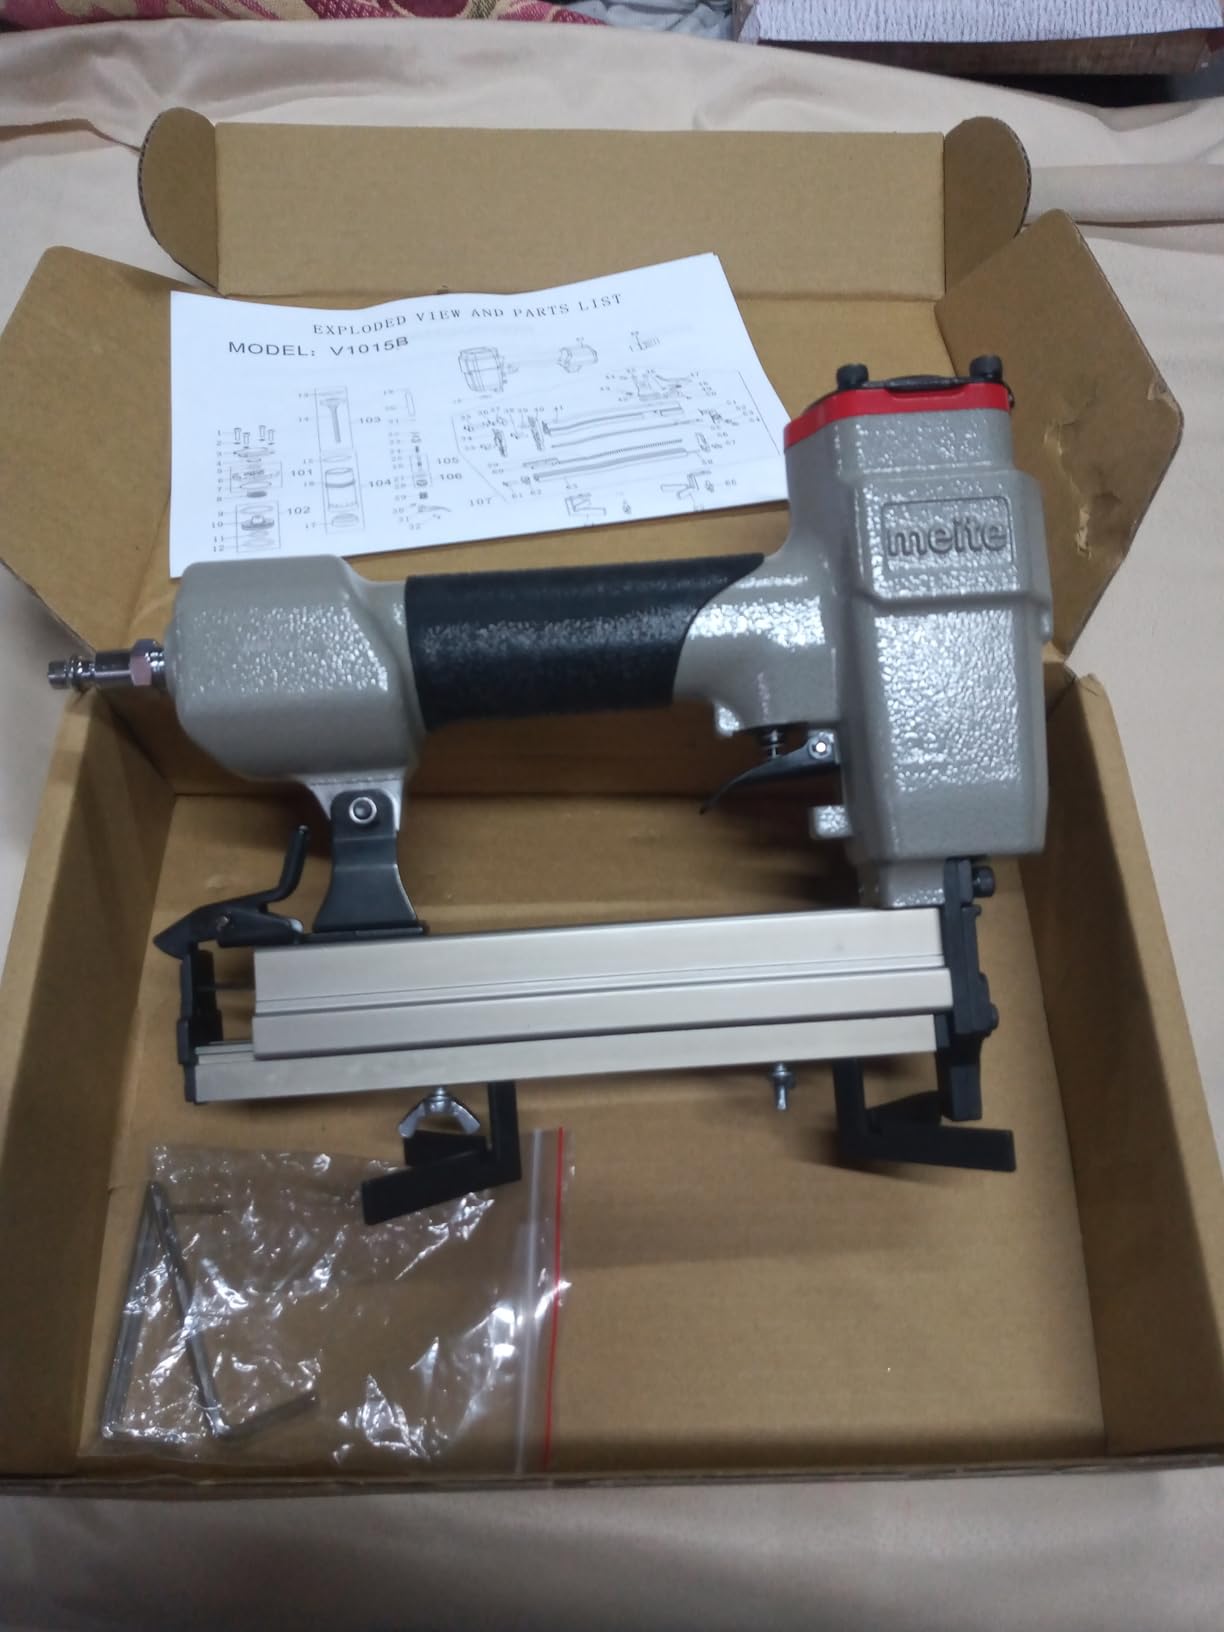
5. meite V-Nailer V1015B – Pneumatic Frame Joiner
- Creates sturdy joints
- Bottom easy loading
- Well balanced
- Comfortable rubber grip
- Requires air compressor
- May jam if not maintained
When I started building frames from raw molding instead of buying pre-made ones, the meite V-Nailer V1015B became essential. This pneumatic joiner creates tight, lasting corner joints that hand assembly cannot match.
The tool holds about 200 V-nails in the bottom-loading magazine. I can reload in under a minute, which keeps workflow moving during busy prep periods. The capacity is sufficient for a full day of framing without interruption.
I tested it with V-nails from 7mm to 15mm. The adjustment is simple, and the tool handles the full range without jamming when maintained. The rubber grip and balanced weight distribution reduce fatigue.
At 3.2 pounds, it is heavier than the manual point drivers but still manageable. There is a professional feel to the trigger action. The V-nails seat flush and create corners that survive transport, climate changes, and wall mounting.
This is a pneumatic tool, which means you need an air compressor. I use a small 3-gallon pancake compressor, and it keeps up with my pace. The tool does not require industrial air volume.
I did experience one jam after about 150 nails. Clearing it took two minutes, and the tool has run smoothly since. Regular oiling prevents most issues. I oil it every 200 nails and have had no further problems.
The V-nailer is the difference between hobby-level frames and professional construction. Corners assembled with glue alone can separate over time. The mechanical joint from this tool adds structural integrity that collectors expect.
Ideal For Artists Building Custom Frames From Molding
If you buy length molding and cut your own frames, corner joinery is the hardest step. The V1015B makes it accessible without a full workshop. I built twenty custom frames for a summer series using this tool.
None of the corners showed gaps or weakness after six months of display. The joints are tight enough that I feel confident selling these frames to collectors. That confidence is worth the investment.
Requires Compressor Access and Maintenance
Artists without compressor space or budget should skip this tool. It is useless without air, and the added equipment cost matters. I already owned a compressor for other studio tasks, so the incremental cost was just the tool itself.
You also need to oil the tool regularly. I do it every 200 nails. Neglecting maintenance causes misfires that waste time and V-nails. If you are not willing to maintain pneumatic tools, stick with manual joinery methods.
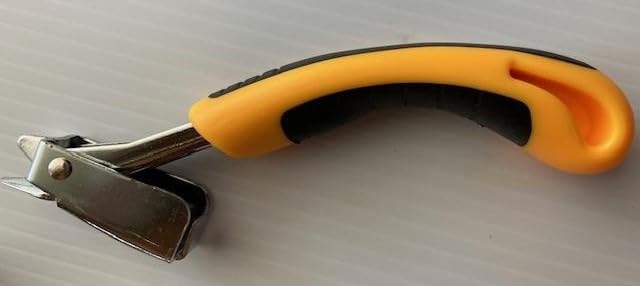
6. BDS-HOME Canvas Pliers and Staple Remover Set – Canvas Stretching Combo
- Durable stainless steel
- Spring return handle
- Non-slip grip
- Includes staple remover
- Rubber grip may slide off
- May feel cheap to some users
Stretching canvas by hand is possible, but doing it well requires canvas pliers. The BDS-HOME set includes pliers and a staple remover for a price that seems too low for the quality you receive.
The 4-3/4 inch wide grip grabs enough fabric to pull tight without tearing. I tested it on linen, cotton duck, and synthetic canvas with good results. The spring return handle saves effort.
I can stretch and staple one-handed because the pliers reopen automatically after each squeeze. That leaves my other hand free to position the staple gun. Stainless steel construction resists rust in a studio environment.
I have left these on a paint-splattered table for weeks without corrosion. The included staple remover is a genuine tool, not a throw-in. I use it to pull mis-set staples without damaging the stretcher bar.

At 1.1 pounds, the pliers are light enough to use for extended sessions. I stretched a 36 by 48 inch canvas in about fifteen minutes. The non-slip grip is helpful when hands are dusty or slightly damp.
I did notice the rubber covers can slide if pulled aggressively. I reset them once and wrapped them with athletic tape for extra security. This is a minor issue at this price point. The core stainless steel tool is solid.
The staple remover is a thoughtful addition. Many canvas pliers sets do not include one. Having both tools in the same package saves you from buying separately. The remover works on standard staples without leaving marks.
Perfect For Oil Painters and Mixed Media Artists
Gallery-wrapped edges require consistent tension. These pliers make that achievable without a second person holding the opposite side. I stretched three canvases for a studio residency using only these pliers and a staple gun.
The results looked professional on all sides. The fabric was tight enough to resist drum-like bouncing. That tension is what separates gallery-ready canvas from loose, sagging surfaces that collectors reject.
Rubber Grips May Shift During Heavy Use
During aggressive stretching, the rubber handle covers can migrate slightly. I reset them once and wrapped them with athletic tape for extra security. This is a minor issue at this price point.
The core stainless steel tool is solid, and the grips are easily replaceable if they wear out. I have used these pliers on fifteen canvases so far and the rubber is still intact. Just watch for slippage during heavy sessions.
7. Go Hang It! Pro – All-in-One Hanging Solution
- Easy precision hanging
- Built-in level
- 85-piece complete kit
- Magnetic key system
- Some find instructions confusing
- Plastic may feel flimsy
Hanging a gallery wall used to take me hours of measuring and pencil marks. The Go Hang It! Pro changed that by combining a level, hardware, and positioning tool in one kit. This product belongs on any list of best framing tool kits for artists who hang their own work.
The patented magnetic key system is the standout feature. I position the key where I want the nail, then remove it after the hook is set. No measuring tape needed. The key holds position until you are ready to drive the nail.
This 85-piece kit includes D-ring hangers, picture wire, sawtooth hangers, and weight-rated hooks. I organized the hardware by capacity in the included case. The built-in level is short but accurate.
I use it for single frames and a longer level for rows of three or more. For most home and studio walls, it is sufficient. I hung a twelve-piece show in under two hours using this kit. Before I would have spent half a day and still needed adjustments.
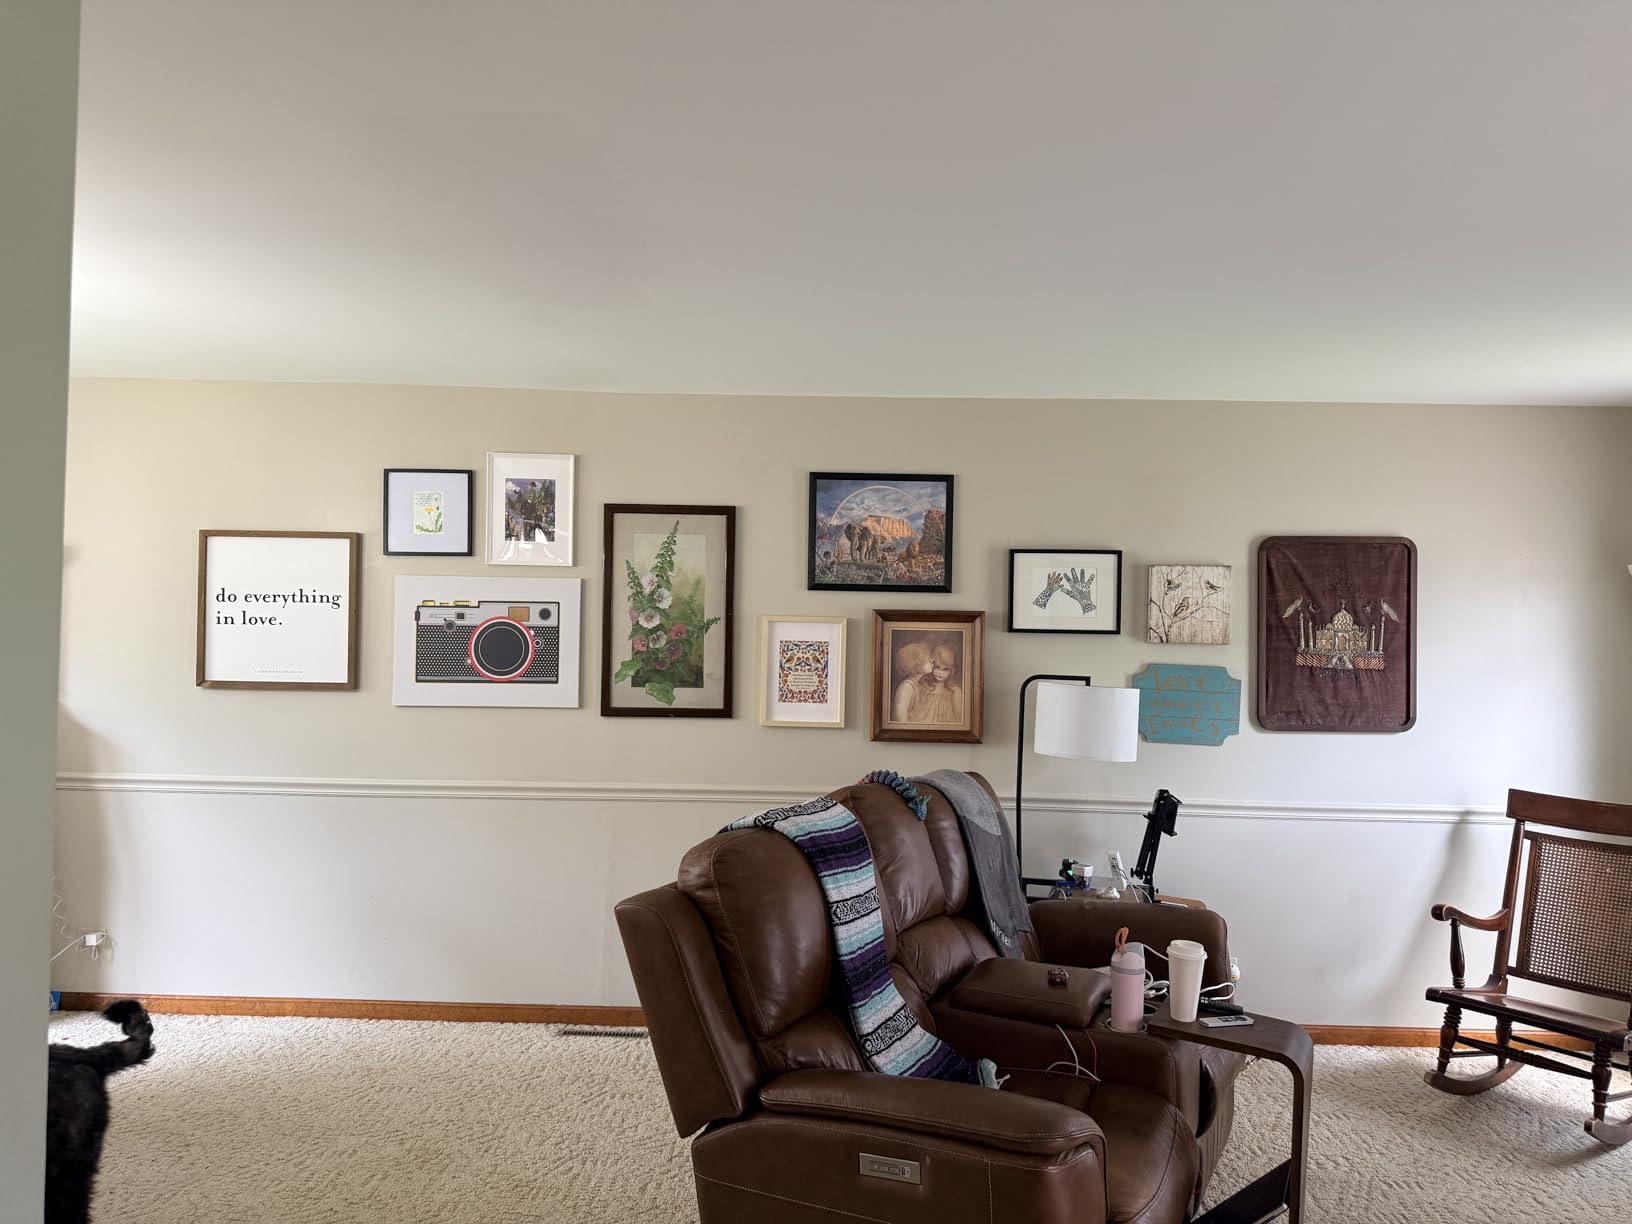
The ABS plastic body is lightweight at 13.1 ounces. I worry about long-term durability in a busy studio, but for intermittent use it holds up well. Some of the instructions are confusing.
I watched a video tutorial online and understood the magnetic keys better than from the printed sheet. Once you grasp the concept, the tool is intuitive. I have taught two studio assistants to use it in under ten minutes.
The variety of hooks covers most frame types and weights. I have used it on drywall, plaster, and wood panel walls. The included nails and hooks performed as rated on all three surfaces.
Best For Artists Installing Gallery Walls and Home Displays
If you rotate work frequently or prepare for pop-up shows, this kit speeds up installation. The magnetic key system removes the need for a second person to hold the frame while you mark wall positions.
I have used this tool for home salon-style walls and professional gallery installations. The speed improvement is real. What used to take an afternoon now takes an hour.
Plastic Construction May Feel Less Durable Than Metal Tools
If you want a heirloom-quality tool, the Go Hang It! Pro is not that. It is a practical, disposable-grade solution that works well until it does not. For professional installers who hang art daily, a metal level and separate hardware bins might be better.
For artists doing their own installs, this is enough. I have used mine for two years and it still functions. The plastic has developed small scratches but nothing that affects performance. Just do not expect to pass it to your grandchildren.
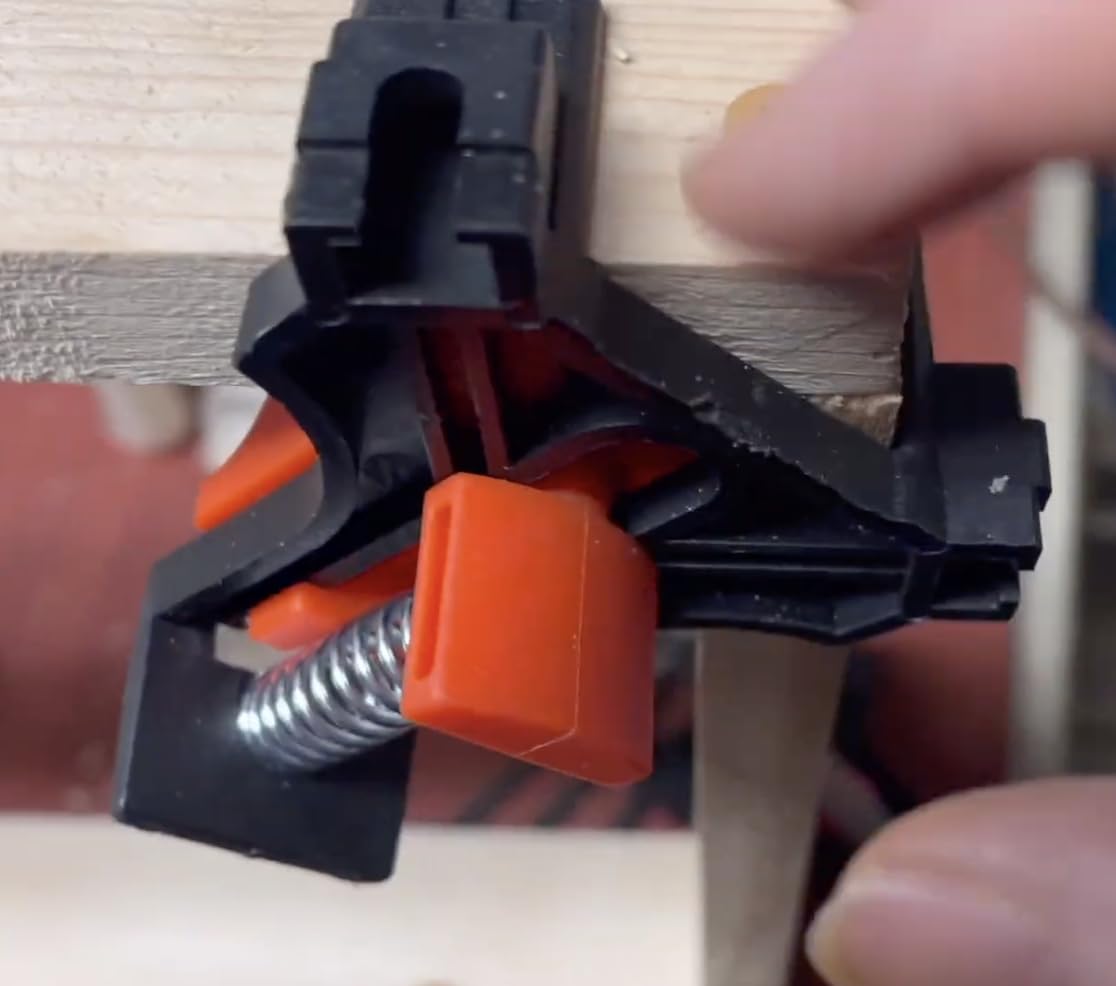
8. WETOLS Corner Clamp – 90-Degree Frame Clamping
- Great 90 degree alignment
- Strong spring tension
- Single-handed operation
- Durable polyamide
- Spring loaded may not lock tight
- Plastic not as durable as metal
Gluing frames requires perfect 90-degree corners. The WETOLS Corner Clamp set gives you four adjustable clamps that hold pieces in place while glue dries. I used these on mitered wood frames and MDF shadow boxes.
The spring tension is strong enough to align edges without sliding. Single-handed operation is a real advantage. I can hold the frame, apply glue, and clamp with one hand free for cleanup. The polyamide material is durable for light-duty work.
I have clamped pine, poplar, and bamboo without cracking the clamps. At 3.3 by 3.2 by 1.5 inches, these clamps fit into small joints. They are not bulky like traditional bar clamps, which makes them ideal for delicate frames.
They come in a gift box, which is nice if you are buying for a studio mate. I kept the box for storage because it keeps the clamps organized. The orange color makes them easy to find on a cluttered workbench.
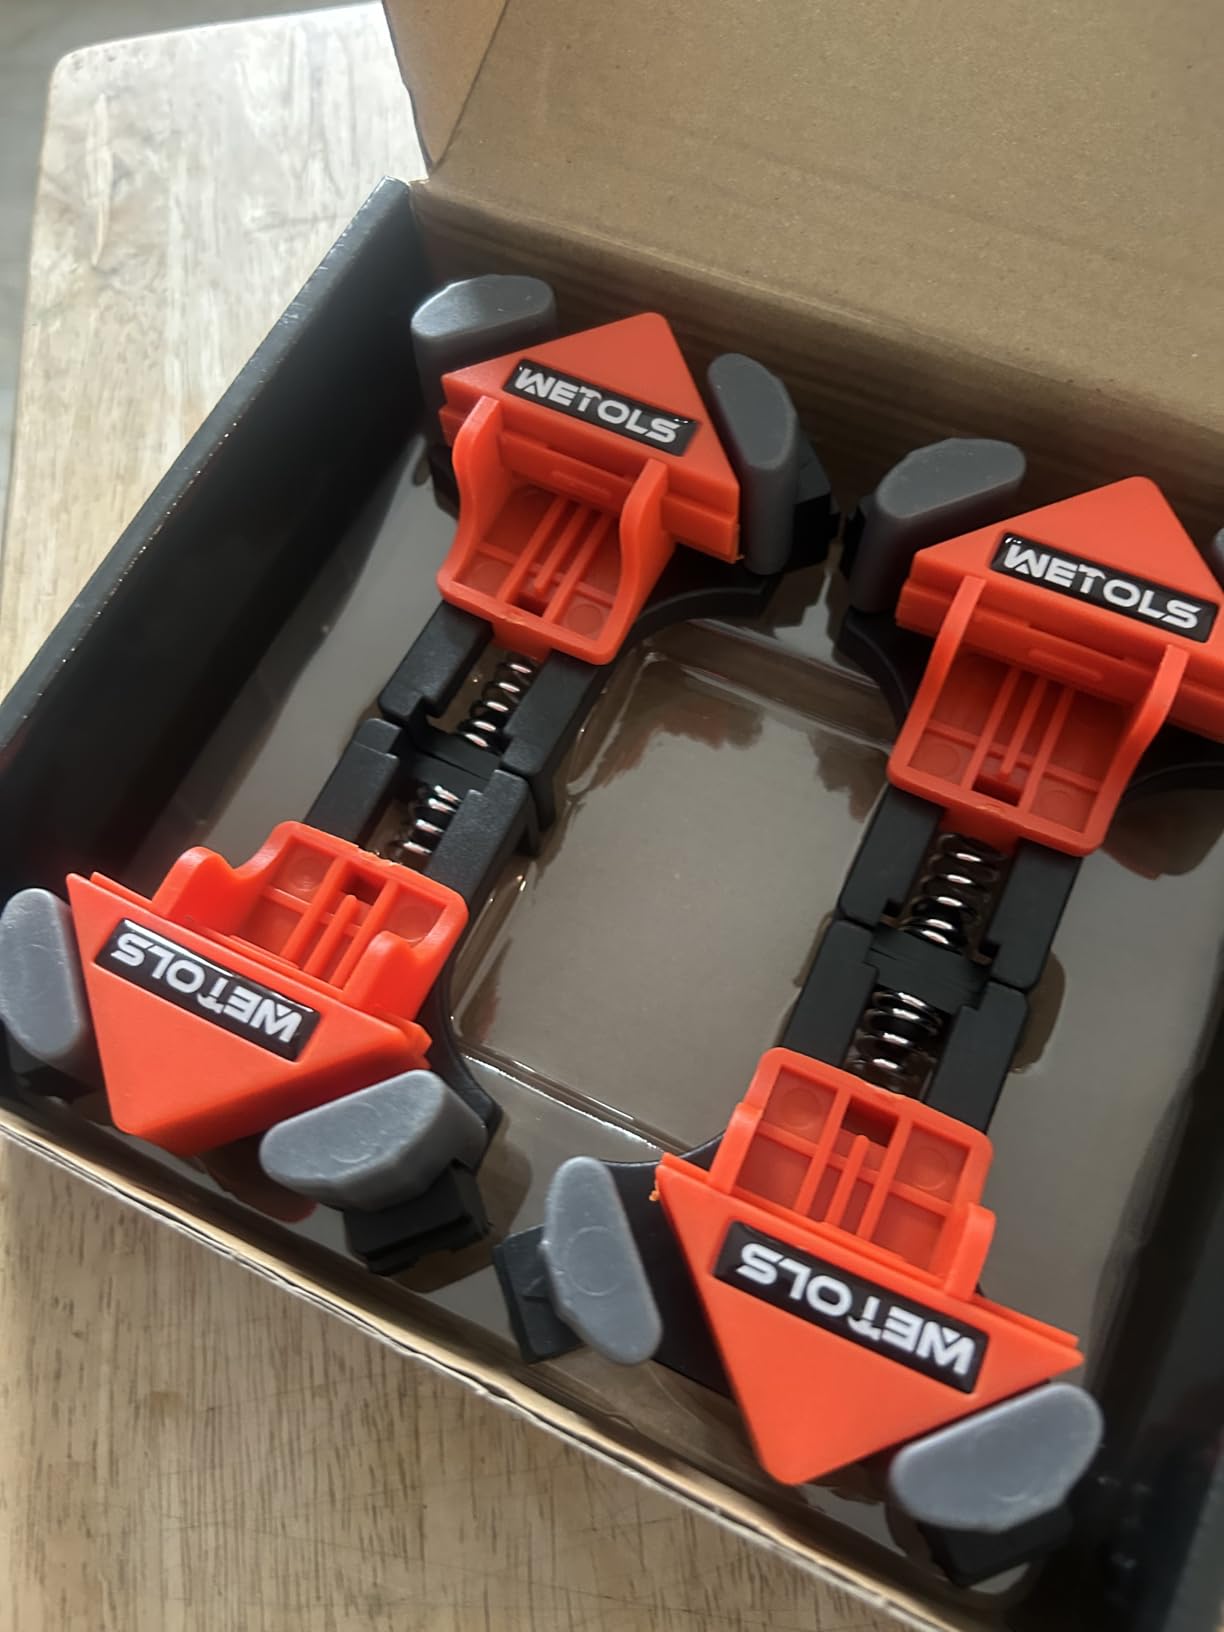
The adjustable jaws accommodate different wood thicknesses. I tested them on 3/4 inch and 1 inch molding with no issues. The spring holds firm during the full drying period. I typically leave clamps in place for 30 minutes with wood glue.
These clamps are not designed for structural furniture or thick hardwood assemblies. For standard 3/4 inch molding, they work fine. I have used them on approximately twenty frames and the springs still feel strong.
The single-handed operation is the feature that sets them apart from traditional clamps. With bar clamps, you need two hands and sometimes a third person. These let you work alone efficiently.
Great For DIY Framing and Light Woodworking Projects
Artists who build custom frames from scratch need square corners. These clamps ensure that without the cost of metal corner jigs. I tested them with wood glue and epoxy. Both setups held firm during the 24-hour drying period.
The clamps did not stick to the glue. I wiped off any residue after each use. For the price of a single metal corner clamp, you get four of these. That value is hard to beat for artists starting out.
Spring Tension Limits Heavy-Duty Applications
These clamps are not designed for structural furniture or thick hardwood assemblies. For standard 3/4 inch molding, they work fine. If you need to clamp while nail-gunning, the spring force may not resist the kickback.
I use these for glue-only assembly and switch to rigid clamps for nailing. That workflow works well for me. Just know the limits before you buy. These are alignment helpers, not structural clamps.
9. Feekoon Glazier Point Driver – Entry-Level Framing Tool
- Quick and easy framing
- Minimal hand strength needed
- 100 points included
- Prevents rusting
- Points may bend easily
- Not for hard wood or plastic
The Feekoon Glazier Point Driver is the most affordable entry into framing tools that I tested. For under ten dollars, you get a driver and 100 push points. This is the tool I recommend to students who are unsure if framing is for them.
This tool is designed for soft wood frames and paper backing. I tested it on pine and basswood with excellent results. The points seat flush with minimal hand strength. The iron and zinc plating prevents rust and bending under normal use.
After two months in a humid studio, the tool shows no corrosion. Installation is intuitive. You push the point against the frame edge and squeeze. The included 100 points lasted me through eight small frames.
This is not a high-speed production tool. Each point requires individual placement and pressure. For occasional hobby framing, that pace is fine. I use it when I only have one or two pieces to finish.
The tool is extremely light at 0.26 pounds. It stores in a drawer without taking up space. I keep mine in the same toolbox as my pencils and tape measure. The small size is a real advantage for artists with limited studio space.
The push points work best on soft wood. I tried oak once and the point bent. For pine, poplar, and basswood, the results are solid. The tool is designed for a specific purpose and performs well within that range.
Instruction is almost unnecessary. The mechanism is obvious the first time you hold it. That simplicity is a benefit for beginners who might be intimidated by adjustable point drivers with multiple settings.
Perfect Beginner Tool For Hobby Framing
If you are new to framing and want to test the process without a big investment, this kit is the right starting point. I recommend it to students in my workshop. The low cost removes the financial barrier.
The simple design teaches the basics of point placement. Once you understand how glazier points work, you can decide whether to upgrade to a more advanced tool. I started with something similar and still keep this type of tool for quick jobs.
Not Suitable For Hard Wood or Plastic Frames
The push points bend if you use them on oak, maple, or synthetic frames. I tried oak once and ruined three points before giving up. Stick to soft woods and paper-backed projects.
For anything denser, upgrade to a manual point driver with adjustable depth. The Feekoon is a gateway tool, not a permanent solution for serious framers. Know its limits and you will be satisfied.
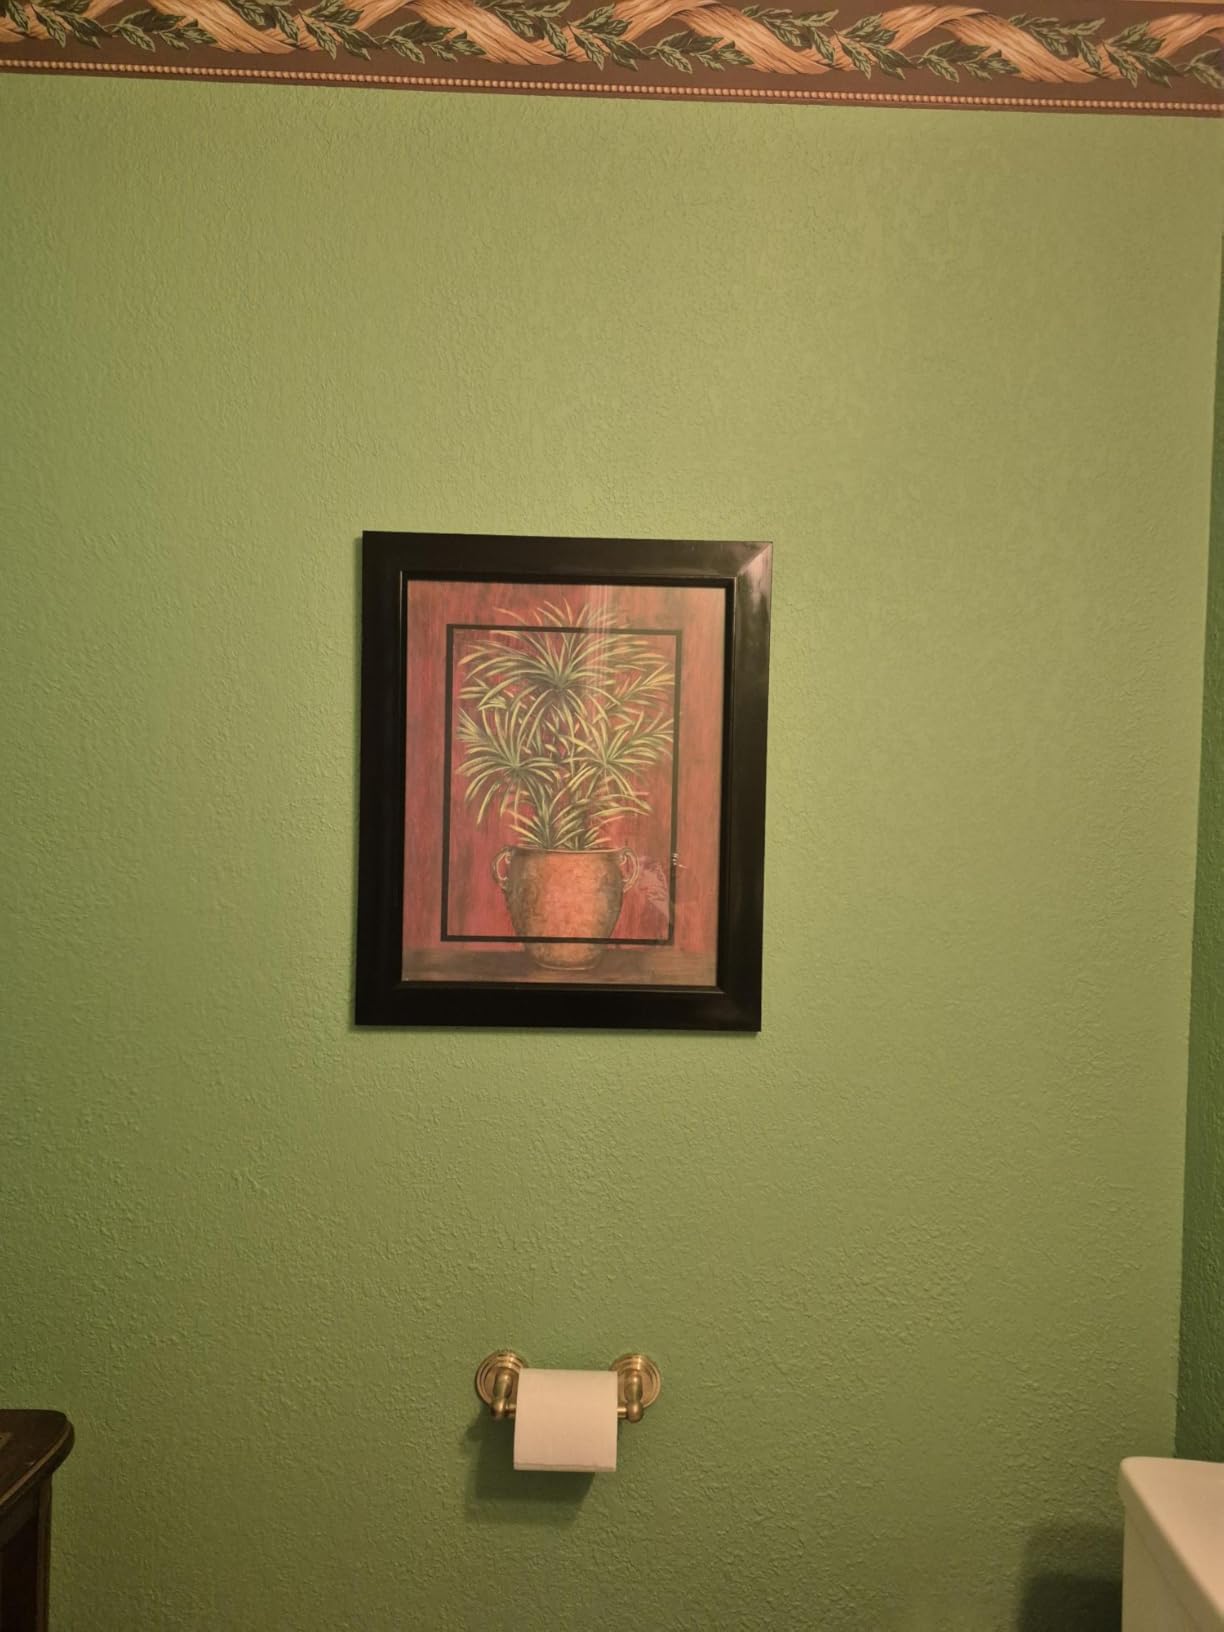
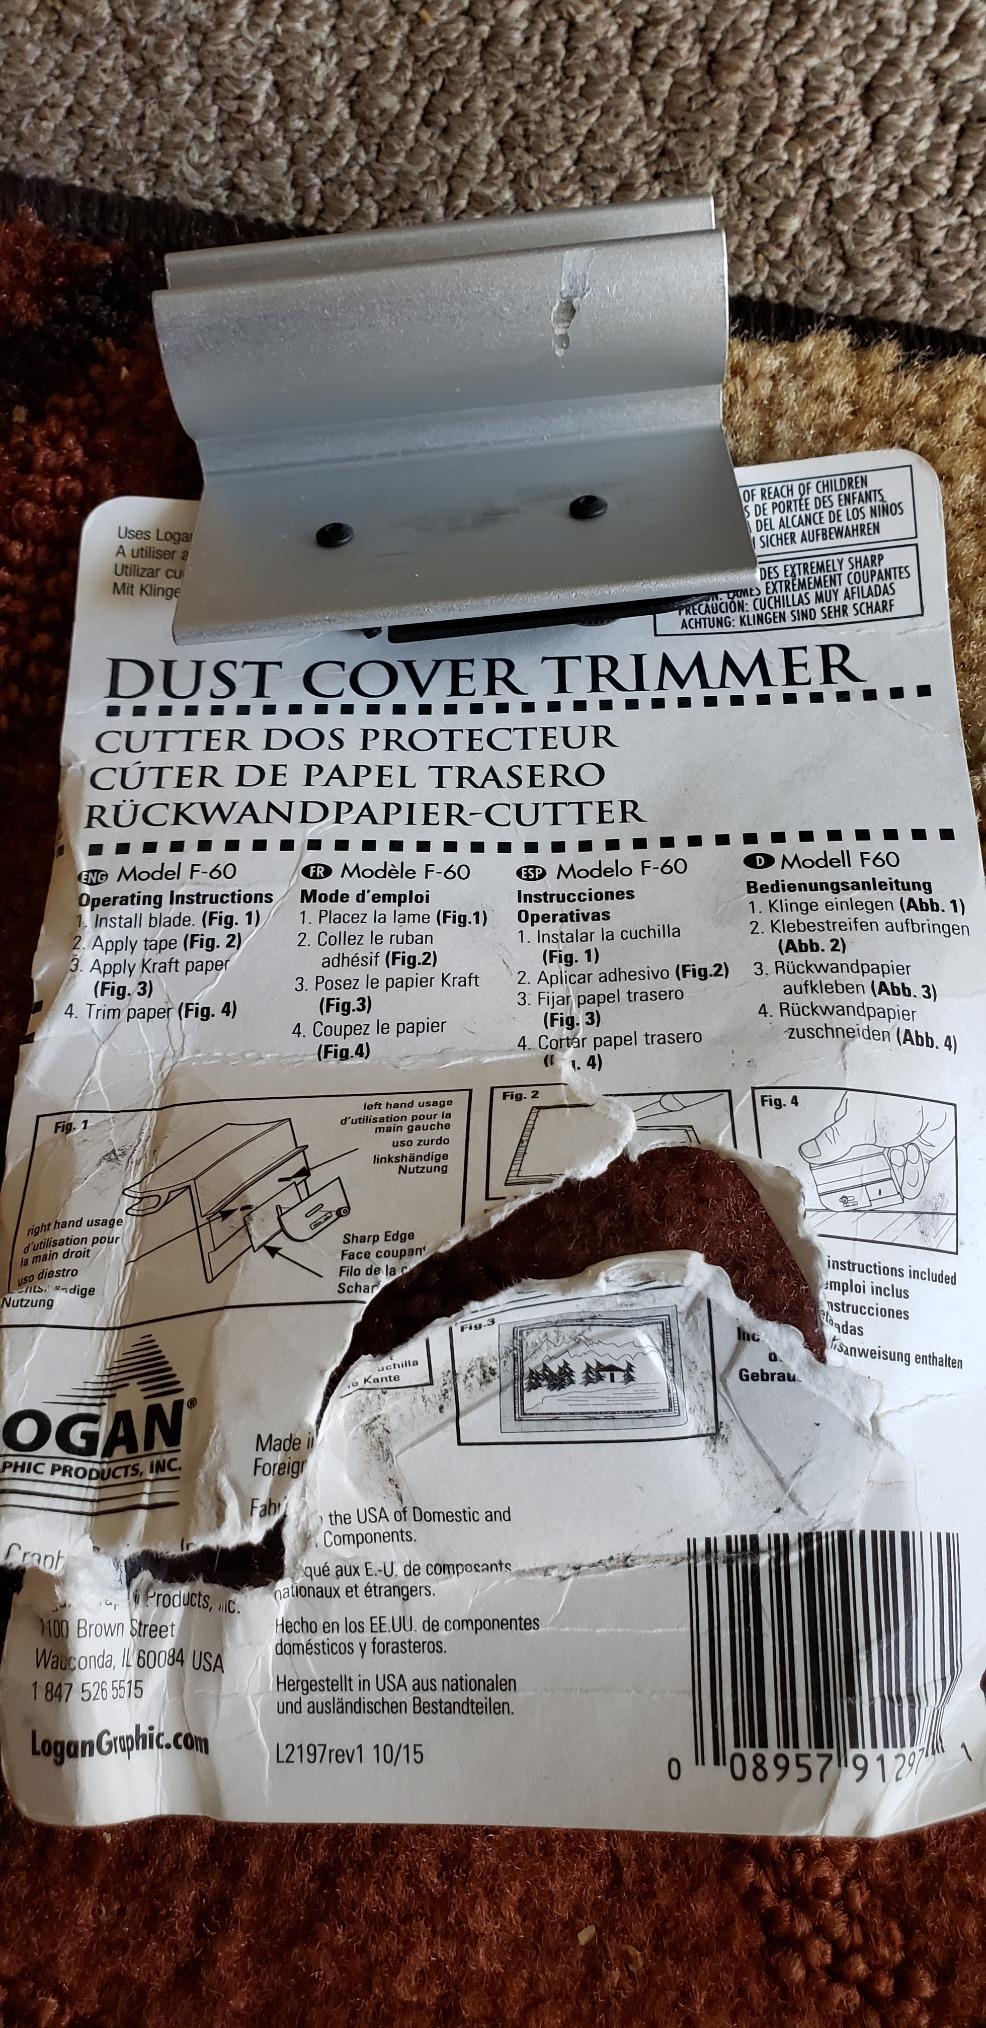
10. Logan Dust Cover Trimmer – Professional Backing Finisher
Logan Dust Cover Trimmer
- Clean crisp cuts
- Simple design
- Professional finish
- Left or right handed
- Comes with 3 blades installed
- Learning curve for angle and pressure
The back of a frame matters almost as much as the front. A clean dust cover paper finish signals professionalism. The Logan Dust Cover Trimmer makes that finish easy and consistent every time.
This trimmer cuts dust cover paper to 3/16 inch from the frame edge. The result is a crisp, even border that looks like a custom shop finish. I am left-handed, and the tool works both ways. The blade orientation is reversible.
That is a thoughtful design choice from a company that understands framing. The safety blade feature retracts when not in use. I have bumped it on the workbench without injury, which is important in a cluttered studio.
Logan includes extra blades. The tool ships with three installed, but you only use one at a time. I removed the extra two before my first cut and immediately got cleaner results. Made in the USA by Logan Graphic Products, this trimmer carries the same reliability as their other tools.
The 3.52-ounce weight feels natural in the hand. I can trim a full frame in under a minute once the paper is taped in place. The cut is cleaner than scissors and faster than a utility knife with a straight edge.
I have used this trimmer on kraft paper, archival tissue, and decorative backing papers. All cut cleanly without tearing. The blade is sharp enough for thin paper but does not grab or drag.
The tool is small enough to store in a pencil drawer. I keep it with my other finishing tools. The reversible design means both right-handed and left-handed artists in my studio can share the same tool.
Essential For Professional Presentation and Gallery Standards
Gallery curators and collectors notice details. A ragged dust cover edge suggests carelessness. This trimmer removes that risk entirely. I used it on a fifteen-piece exhibition and every frame had identical paper borders.
The consistency is hard to achieve with scissors or a utility knife. Those tools leave uneven edges and occasional jagged cuts. The Logan trimmer produces the same result every time regardless of paper type.
Requires Practice To Master Cutting Angle
The first few cuts were uneven because I held the tool at the wrong angle. After ten minutes of practice, I developed the right pressure and tilt. I recommend practicing on scrap paper before touching your finished frames.
Once you find the sweet spot, the trimmer is fast and precise. I now trim all my dust covers with this tool. The time savings and professional appearance are worth the short learning curve.
What to Look for When Buying Framing Tool Kits for Artists
Buying the right framing tools depends on your medium, volume, and workspace. I have made expensive mistakes by buying features I never used. This guide will help you avoid those errors and spend money where it counts.
Essential Tools for Your Studio
Every artist needs a core set of tools to frame and present work professionally. Based on our testing and feedback from working framers, these are the essentials. A point driver or glazier tool secures the artwork and backing inside the frame.
Without it, you are relying on tape or loose fits that fail over time. Hanging hardware including D-rings, wire, and weight-rated hooks protects your work and the wall. The wrong hook can drop a frame or damage drywall.
Measuring and leveling tools prevent crooked installations. A small level and accurate tape measure are necessary for gallery-quality presentation. For artists who mat their own work, a mat cutter is the difference between amateur and professional borders. Hand blades rarely produce clean bevels.
Material Quality and Archival Standards
Acid-free materials protect your artwork from yellowing and degradation. Look for acid-free mat boards and archival backing boards when assembling frames. The term acid-free means the pH level is neutral or slightly alkaline.
Standard paper and cardboard contain acids that migrate into artwork over months. 4-ply mat boards provide adequate rigidity for most pieces. Thicker 8-ply boards are available for heavy works or deep frames.
Point drivers and hardware should use rust-resistant materials. Iron and zinc plating, stainless steel, and aluminum alloy all resist corrosion in studio environments. For canvas work, acid-free materials matter less than for paper. However, cotton rag backing still protects the reverse side from dust and light exposure.
Size Compatibility and Weight Capacity
Match your tools to the scale of your work. A mat cutter that handles 32 by 40 inches covers most standard art sizes. Larger pieces require professional shop access. Weight capacity matters for hanging hardware.
A 20-pound frame needs different supports than a 5-pound print. Always choose hooks rated above your frame weight. Point drivers work on standard molding thicknesses. If you use unusually thick or thin frames, verify the tool range before purchase.
Canvas pliers should match your typical canvas depth. A 4-3/4 inch grip handles most standard and gallery-wrapped canvases without strain. Measure your typical frame sizes before buying any tool. I keep a reference sheet of my common dimensions and check compatibility before ordering.
Ease of Use and Learning Curve
Beginners should prioritize simple tools over feature-rich models. The Feekoon Glazier Point Driver and KURUI Hanging Kit require almost no training. Intermediate artists benefit from adjustable tools. The meite HM515 and Logan F500-2 both offer depth control that grows with your skill.
Pneumatic tools like the meite V-Nailer save time but add complexity. You need compressor access, maintenance knowledge, and more storage space. Consider how much framing you actually do. If you frame two pieces per year, a basic kit is sufficient.
If you frame monthly, invest in tools that reduce fatigue and speed workflow. I recommend starting with one essential tool and adding others as your needs grow. A point driver and hanging kit cover most situations. Mat cutters and V-nailers come later.
Professional Quality vs Budget Options
Professional tools cost more but last longer and produce better results. The Logan F500-2 and Logan 450-1 are investments that pay back over years of use. Budget tools work well for learning and occasional projects. The KURUI kit and Feekoon driver handle real work without the premium price.
Our testing suggests that serious artists should split their budget. Spend more on the tools you use most, and save on specialty items you use rarely. For example, a point driver is a daily tool for many artists. A V-nailer is only necessary if you build frames from raw molding. Buy accordingly.
I have used both budget and professional options side by side. The difference is real, but the gap narrows when you are only framing occasionally. Match your investment to your volume. A beginner should not buy a pneumatic V-nailer. A professional framer should not use a glazier point driver.
Frequently Asked Questions
What tools do I need for professional picture framing?
A professional picture framing setup requires a point driver or glazier tool, a measuring tape, a level, and hanging hardware including D-rings and wire. For matting, add a mat cutter with bevel capability. For canvas work, include canvas pliers and a staple gun. These tools let you assemble, finish, and hang frames without visiting a frame shop.
How do I choose the right framing supplies for my artwork?
Choose framing supplies based on your medium, artwork size, and display environment. Paper-based art needs acid-free mats and backing to prevent degradation. Canvas work requires stretcher bars and canvas pliers. For hanging, match hook weight ratings to your frame weight. Always select rust-resistant hardware for long-term durability.
What is the difference between mat boards and mounting boards?
Mat boards are decorative borders with a window cut to display the artwork. They create space between the art and the glass while adding visual depth. Mounting boards are solid backing surfaces that attach the artwork to the frame. Mat boards are typically 4-ply and acid-free, while mounting boards focus on rigidity and support.
How do I frame artwork at home without a professional frame shop?
Start with a pre-made frame that fits your artwork. Secure the art and backing with a point driver or glazier points. Add a dust cover paper to the back using a trimmer for clean edges. Install hanging hardware matched to the frame weight. Use a level and proper wall hooks to hang the finished piece straight and secure.
What are the best framing tools for gallery walls?
The best framing tools for gallery walls include an all-in-one hanging kit with a built-in level, magnetic positioning keys, and weight-rated hooks. A comprehensive hardware set with D-rings, wire, and multiple hook sizes ensures you can handle any frame. A long level helps align rows of frames perfectly.
Final Thoughts
After testing ten framing tools over three months, I can say that the right kit depends on your specific workflow. The Logan F500-2 Dual Point Driver Elite remains the professional standard for assembling frames. The meite HM515 offers the best balance of features and included supplies for working artists. The KURUI 303-piece kit solves hanging needs for any studio size.
For artists who mat their own work, the Logan 450-1 Mat Cutter is worth the investment. Canvas painters should add the BDS-HOME pliers set. And anyone hanging their own shows will save hours with the Go Hang It! Pro. Each tool fills a gap that artists actually encounter.
Best framing tool kits for artists in 2026 have improved across every price point. Whether you frame two pieces a year or twenty per month, there is a tool set that matches your budget and ambition. Start with the essentials, add specialty tools as your practice grows, and always prioritize archival materials when the work matters. Your art deserves the same care in presentation that you put into creation.