
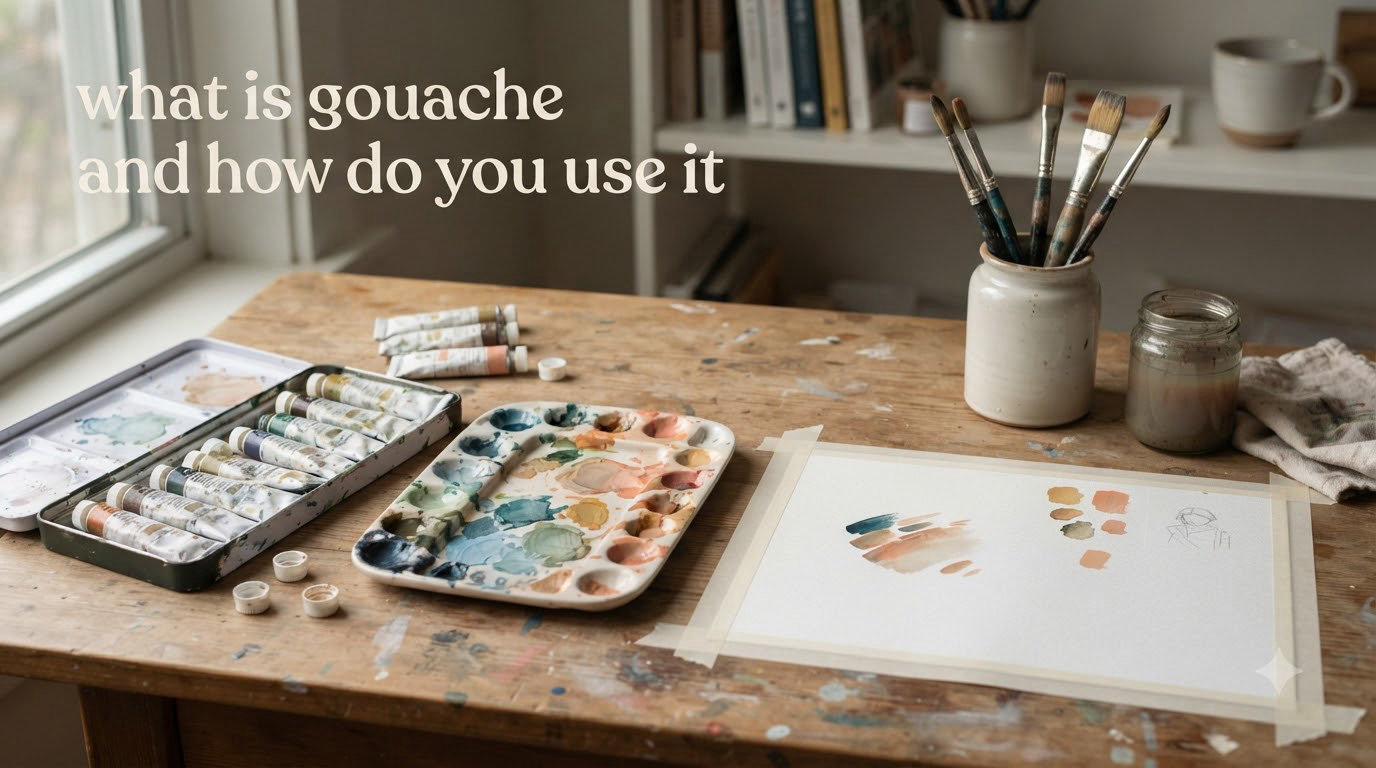
Gouache (pronounced “gwaash”) is an opaque, water-based paint made from natural or synthetic pigments suspended in a gum arabic binder. It dries to a smooth, matte finish and can be reactivated with water after it dries, giving you the forgiving nature of watercolor with the bold, opaque coverage closer to acrylic paint.
If you have been curious about what gouache is and how do you use it, you are in the right place. I have spent years working with this medium, and in this guide I will walk you through everything you need to know to get started. We will cover what gouache is made of, how it compares to other paints you may have tried, the core techniques that make gouache special, and practical troubleshooting tips that most beginner guides skip.
Gouache has seen a massive surge in popularity in 2026, and for good reason. It is forgiving, vibrant, and surprisingly accessible even if you have never picked up a brush before. Whether you are exploring painting as a hobby or looking for a new medium for illustration work, understanding gouache opens up creative possibilities that other paints simply cannot match. If you are stocking up on supplies, check out our guide to the best art supplies for beginners to round out your collection.
Table of Contents
What Is Gouache?
Gouache is a water-soluble paint that occupies a unique middle ground between watercolor and acrylic. At its core, it shares the same basic ingredients as traditional watercolor: pigment, water, and gum arabic as a binder. What sets gouache apart is a higher pigment load and the addition of an inert white pigment or chalk, which gives it that characteristic opacity.
Artists have used gouache for centuries, and its versatility makes it a favorite among illustrators, designers, and fine artists alike. The medium was widely used in medieval manuscript illumination and later became a staple in commercial illustration before the digital age. Today, it has found a passionate following among a new generation of painters who appreciate its vibrant, flat color and the ability to rework areas long after the paint has dried.
The defining trait of gouache is that it remains water-soluble even after drying. This means you can wet your brush and go back into a dried area to lift color, blend, or make corrections. That rehydratable quality is both its greatest strength and its biggest challenge, as I will explain in the troubleshooting section.
What Is Gouache Made Of?
Gouache consists of three primary components: pigment, a binder (gum arabic), and additives like calcium carbonate or chalk that increase opacity. The gum arabic acts as the glue that holds the pigment particles together and adheres them to your painting surface. The chalk or white filler is what gives gouache its covering power, allowing you to paint light colors over dark ones.
The quality of gouache paint depends heavily on the pigment concentration. Artist-grade gouache from brands like M. Graham, Schmincke, and Daniel Smith uses more pigment relative to binder, which results in more vibrant colors and better handling. Student-grade options use more filler, which can make colors appear chalky or less saturated.
One thing that surprises many beginners: gouache tubes can separate over time. The binder and pigment may split if a tube sits unused for months. This is normal and does not mean the paint is ruined. Simply knead the tube gently before opening, or mix the contents thoroughly on your palette to reincorporate everything.
Why Does Gouache Dry Matte?
The matte finish of gouache comes from the chalk and filler ingredients in the paint formula. Unlike oil paint, which dries with a glossy sheen, or acrylic, which can range from matte to glossy depending on the medium, gouache always dries flat. This matte quality is one of the main reasons commercial illustrators have historically favored it: the even, non-reflective surface photographs and scans beautifully without glare.
However, the matte finish also means gouache colors can shift slightly as they dry. Wet gouache appears darker and more saturated than its dried state. This value shift takes some getting used to, and experienced gouache painters learn to anticipate how a color will look once it dries rather than judging the result while the paint is still wet. It is one of those quirks that feels frustrating at first but becomes second nature with practice.
Gouache vs Watercolor vs Acrylic
One of the most common questions I hear from beginners is how gouache compares to the two paints they already know: watercolor and acrylic. Understanding these differences helps you decide when to reach for gouache and when another medium might be a better fit for your project.
Gouache vs Watercolor: Key Differences
Gouache and watercolor share the same base ingredients, but they behave very differently on paper. Watercolor is designed to be transparent. You build up color through multiple thin, translucent washes, relying on the white of the paper for your lightest values. Gouache, on the other hand, is opaque. You can paint light over dark, cover mistakes, and build up solid blocks of color.
Another major difference is layering. With watercolor, each layer stays relatively permanent once dry. With gouache, a wet brush can reactivate a dried layer underneath, which means you have to be more deliberate about how you build up your painting. This is why many gouache artists use a “tile and fill” approach rather than the wet-on-wet techniques common in watercolor.
In terms of vibrancy, both mediums can produce rich, saturated colors. But gouache offers a more solid, flat color application that many artists prefer for illustration and graphic-style work. Watercolor excels at ethereal, flowing effects and luminous washes that gouache cannot easily replicate.
Gouache vs Acrylic: What Sets Them Apart
Acrylic paint dries permanently and permanently. Once acrylic cures, it forms a plastic-like film that is waterproof and cannot be reactivated. Gouache dries but remains water-soluble. This single difference changes everything about how you work with each medium.
Acrylic is more durable and better suited for surfaces like canvas, wood, and outdoor murals. Gouache works best on paper and illustration board, where its delicate surface will not be subjected to wear. If you need a finished piece that can hang in a busy hallway or survive being handled, acrylic is the safer choice.
On the flip side, gouache is far more forgiving during the painting process. Made a mistake? Wet your brush and lift the paint. Want to tweak a color area hours later? You can. With acrylic, you are stuck with what is dried on the surface. That reworkability makes gouache an excellent learning medium for beginners who want room to experiment without fear of ruining a piece.
What About Acrylic Gouache?
Acrylic gouache adds another layer of confusion for beginners. Despite the name, acrylic gouache is not the same as traditional gouache. It is acrylic paint formulated to dry with a matte finish that mimics the look of gouache. Once it dries, it is permanent and waterproof, just like regular acrylic.
Brands like Holbein Acryla Gouache and Liquitex Acrylic Gouache fall into this category. They offer the flat, matte appearance of gouache without the reactivatable quality. Some artists prefer this because they do not have to worry about accidentally disturbing lower layers. But you lose the ability to rework areas, which is one of the main advantages of traditional gouache.
My recommendation for beginners: start with traditional gouache. Learn how the rehydratable quality works in your favor. Once you understand the medium, you can decide whether acrylic gouache suits your workflow better for certain projects.
How to Use Gouache: A Step-by-Step Guide
Learning how to use gouache does not require expensive equipment or years of training. The process is straightforward, but there are a few techniques and habits that make the experience much smoother. Here is the step-by-step approach I teach to anyone picking up gouache for the first time.
Step 1: Gather Your Supplies
You do not need much to start painting with gouache. At minimum, you need gouache paint (a basic set of 6 to 12 colors is plenty), a few round and flat brushes, watercolor paper (140lb/300gsm or heavier), two water containers, a palette for mixing, and paper towels or a rag for wiping your brush.
I always recommend starting with a limited color palette rather than buying a large set. A warm and cool version of each primary color, plus white, gives you everything you need to mix virtually any hue. This approach forces you to learn color mixing early, which is one of the most valuable skills you can develop as a painter.
Step 2: Set Up Your Palette and Workspace
Squeeze a small amount of each color onto your palette, spacing them out so you have room to mix between them. Many gouache painters prefer a palette with wells or compartments, like a ceramic palette or a folding travel palette. A white plate works fine too.
One critical tip from experienced gouache artists: consider using a stay-wet palette. This is a sealed container with a damp sponge or paper towel underneath a palette surface. It keeps your gouache from drying out during a painting session, which is one of the most common frustrations beginners face. You can buy one or make your own with a shallow container, a sponge, and parchment paper.
Keep your two water jars on opposite sides of your workspace. Use one for rinsing your brush between colors and the other for clean mixing water. This prevents muddy colors and keeps your paint vibrant.
Step 3: Mix Your Paint to the Right Consistency
Gouache can be used at various consistencies depending on the effect you want. For opaque coverage, use the paint straight from the tube or add just a drop of water. For thinner, more translucent applications, add more water until you reach a creamy, milk-like consistency.
The biggest mistake I see beginners make is adding too much water right away. Start thick. You can always thin the paint, but you cannot easily thicken it once water is mixed in. Aim for a consistency somewhere between heavy cream and yogurt for most applications. The paint should flow smoothly off your brush without being runny.
Test your consistency on a scrap piece of paper before committing to your actual painting. A quick swatch will tell you whether the paint is opaque enough for coverage or thin enough for the effect you are after.
Step 4: Apply Your First Layers
Start your painting with broader, thinner layers to establish the composition and main color areas. Think of this as blocking in your image. You are not going for detail at this stage; you are mapping out where everything goes and establishing the overall color relationships.
Work from large shapes to small details. Fill in your background and major color areas first, then work toward smaller shapes and finer details as you build up layers. Allow each layer to dry before applying the next one if you want clean, sharp edges. If you want softer transitions, you can work wet-on-wet, but be aware that this increases the risk of reactivating the layer underneath.
One technique that works especially well with gouache is the tiling method. Instead of blending colors together on the paper, you mix your colors on the palette and apply them as distinct, flat shapes that sit next to each other. This gives gouache paintings their characteristic solid-color, illustrative quality.
Step 5: Build Up Color and Detail
Once your base layers are down, start adding detail and refining your shapes. This is where the opacity of gouache really shines. You can paint light highlights over dark areas, correct mistakes, and add fine details without the underlying layers showing through (as long as your paint is applied thickly enough).
For fine details, switch to a smaller round brush and use slightly thicker paint. For soft edges and blending, use a clean, damp brush to gently feather the edge of a freshly painted area. The key is control: too much water will reactivate the layer beneath, so use a light touch.
Step back from your painting regularly. Gouache paintings often look different from a few feet away than they do up close. What might seem like a rough edge or uneven color at close range can look perfectly natural and painterly when viewed at the intended distance.
Essential Gouache Techniques for Beginners
Understanding a few core techniques will dramatically improve your results with gouache. These are the methods I return to again and again in my own work, and they form the foundation for everything else you will learn as you gain experience with the medium.
Opaque Layering
Opaque layering is the most distinctive technique in gouache painting. Because gouache is opaque, you can apply light colors on top of dark ones, which is something you cannot do with watercolor. This gives you the freedom to build up your painting in any order you like.
For successful opaque layering, apply each layer at a creamy consistency and let it dry completely before adding the next one. Applying a new layer while the one underneath is still wet is the number one cause of muddy colors and accidental reactivation. Patience pays off here.
Keep in mind that very thick layers of gouache can crack or crumble over time. If you need to build up a lot of layers, keep each one relatively thin rather than piling on thick paint. Multiple thin layers will give you better coverage and a more stable surface than one thick, heavy coat.
Staining (Thin Washes)
Staining is the technique of applying very diluted gouache in thin, translucent washes. When you add a lot of water to gouache, it behaves similarly to watercolor, allowing the paper surface to show through. This is useful for backgrounds, skies, and atmospheric effects.
For staining, dilute your gouache until it has the consistency of ink or very light tea. Apply it with a large, soft brush, working quickly so the wash goes on evenly. Because the paint is so thin, it will sink into the paper fibers and create a stained effect rather than sitting on top of the surface.
This technique is a great way to establish a background or underpainting before building up your more opaque layers on top. It is also one of the easiest ways to combine the luminous quality of watercolor with the solid coverage of gouache in the same painting.
Dry Brushing
Dry brushing creates textured, broken strokes that add visual interest and a sense of energy to your painting. To dry brush with gouache, load your brush with relatively thick paint and then blot most of the moisture off on a paper towel. Drag the brush across the paper surface, allowing the texture of the paper to create gaps in the stroke.
This technique works best on cold-pressed or rough paper, where the surface texture is more pronounced. On hot-pressed (smooth) paper, dry brushing produces less visible texture. Use a stiff-bristled brush for the most dramatic effect.
Dry brushing is ideal for painting foliage, animal fur, rough textures like stone or bark, and any area where you want to suggest detail without painting every individual element. Many experienced gouache artists love this technique for the organic, painterly quality it brings to their work.
Tiling Technique
Tiling is a technique where you apply gouache as distinct, flat shapes of color that fit together like puzzle pieces or tiles. Rather than blending colors on the paper, you mix each color on your palette and place it as a separate, solid shape next to its neighbors.
This method is especially popular among illustrators and artists who want a clean, graphic look. It takes advantage of gouache’s natural tendency to dry flat and even. The result is a painting made up of confident, distinct color patches that create form and depth through their relationships rather than through blending.
To practice tiling, start with a simple subject like a fruit or a landscape with clear, distinct shapes. Mix each color separately on your palette, test it on scrap paper, and then apply it to your painting as a clean, even patch. Work systematically, filling in one tile at a time, and watch your image come together piece by piece.
What Supplies Do You Need for Gouache?
Having the right supplies makes a significant difference in your gouache painting experience. The good news is that gouache does not require a massive investment to get started. Here is what I recommend for anyone setting up a gouache workspace for the first time.
Choosing the Right Paper
Paper choice matters more with gouache than many beginners expect. Because gouache is water-based, your paper needs to handle moisture without warping or buckling. I recommend 100% cotton watercolor paper at 140lb (300gsm) or heavier. Cotton paper handles water beautifully and provides a stable surface that will not deteriorate when you apply multiple layers.
Both cold-pressed and hot-pressed papers work well with gouache. Cold-pressed paper has a slight texture that can add character to your brushstrokes, while hot-pressed paper is smooth and ideal for detailed work and illustrations. Avoid regular printer paper or thin drawing paper, which will warp and potentially tear when wet.
Artist testimonials on forums consistently mention that switching to 100% cotton paper was the single biggest improvement they made to their gouache painting. The difference in how the paint handles, absorbs, and layers on cotton paper versus wood-pulp paper is noticeable from the first stroke.
Best Brushes for Gouache
Synthetic watercolor brushes are my top recommendation for gouache. They hold their shape well, spring back after each stroke, and are affordable enough that you can build a varied collection without overspending. Look for round brushes in sizes 2 through 10 and a couple of flat brushes for broad strokes and washes.
Natural hair brushes like sable also work beautifully with gouache, but they are considerably more expensive. Save those for when you know gouache is a medium you want to commit to long-term. For starting out, good quality synthetic brushes from an art supply store will serve you well.
Keep your brushes clean during and after painting sessions. Gouache can build up in the ferrule (the metal part that holds the bristles) and cause the brush to splay over time. Rinse thoroughly with clean water and reshape the bristles after each session. If you are looking for creative gift ideas for the artist in your life, a quality brush set paired with gouache makes a thoughtful present and pairs well with our guide to gifts for artists.
Palettes and Mixing Surfaces
A good palette gives you space to squeeze out your colors and room to mix. Ceramic palettes are popular because they are easy to clean and do not stain. Folding metal palettes with wells are great for portability. Some artists use old dinner plates or butcher trays with excellent results.
If you paint frequently, a stay-wet palette is worth the investment. These palettes have a moist surface that keeps your gouache workable for hours or even days. You can create a DIY version with a shallow container, a wet sponge, and a sheet of parchment paper on top. This solves one of the most common complaints about gouache: paint drying out on the palette before you finish your session.
Whatever palette you choose, clean it regularly. Dried gouache builds up over time and can contaminate your fresh colors. A quick rinse and wipe after each session keeps everything clean and ready for your next painting.
Common Gouache Problems and How to Fix Them
Every gouache painter runs into the same set of frustrations, especially in the beginning. The good news is that these problems all have straightforward solutions once you understand what is causing them. Here are the issues I hear about most often, drawn from real experiences shared by artists on forums and in my own practice.
Why Is My Gouache Crumbling?
Crumbling or cracking gouache almost always means the paint was applied too thickly. Gouache is not designed to be piled on in heavy, impasto-style layers like oil paint. When thick layers dry, the binder cannot hold all that pigment together, and the surface cracks or flakes off.
The fix is simple: work in thinner layers. If you need more opacity, apply two thin coats rather than one thick one. Each layer should be thin enough that you can see the paper texture slightly through the paint. Building up coverage gradually produces a more stable, professional-looking surface.
Also check whether your gouache has separated in the tube. If the binder and pigment have split, the paint may not have enough gum arabic to hold together properly. Knead the tube before opening, or thoroughly mix the paint on your palette to reincorporate the binder.
How to Keep Gouache from Drying Out
Gouache dries quickly on the palette, which is one of the most common complaints from beginners. A stay-wet palette is the most effective solution. The damp surface keeps your paint workable for extended sessions without constant rewetting.
If you do not have a stay-wet palette, mist your palette lightly with water from a spray bottle every 15 to 20 minutes. You can also cover your palette with a damp paper towel or plastic wrap between painting sessions to slow down the drying process.
Another tip: squeeze out only the amount of paint you need for your current session rather than loading your entire palette at once. Gouache that has been rehydrated multiple times can lose some of its handling quality. Fresh paint always performs better than paint that has been through several wet-dry cycles.
Accidentally Reactivating Layers
Because gouache remains water-soluble after drying, applying a wet brush over a dried area can reactivate the paint underneath and create muddy colors. This catches many beginners off guard and is one of the main reasons people find gouache frustrating at first.
The solution is to work with a controlled amount of water in your brush. When painting over dried layers, blot your brush on a paper towel first to remove excess moisture. Use quick, confident strokes rather than going over the same area repeatedly. The less time your wet brush spends on a dried layer, the less likely you are to disturb it.
Some artists also use a light spray of fixative between layers to reduce reactivation, though this changes the surface quality of the paint. Another approach is to work from background to foreground, applying your most detailed and precise layers last when you will not need to paint over them again.
FAQs
What is easier, gouache or watercolor?
Gouache is generally considered easier for beginners because you can paint light over dark and easily correct mistakes. Watercolor requires more planning since you cannot easily cover errors and must work from light to dark. However, gouache’s reactivatable nature means you need to be careful about layering without disturbing previous work, which takes practice to manage.
What are the disadvantages of using gouache?
The main disadvantages of gouache are: it remains water-soluble after drying so finished pieces are fragile and need protection, thick layers can crack or crumble, colors shift slightly as they dry, and it is not suitable for outdoor or high-traffic display without sealing. Gouache also dries quickly on the palette, which can be frustrating during long painting sessions.
Is gouache just acrylic paint?
No, gouache is not acrylic paint. Traditional gouache uses gum arabic as a binder and remains water-soluble after drying, meaning you can reactivate it with water. Acrylic paint uses a polymer emulsion binder and dries permanently waterproof. Acrylic gouache is a separate product that is actually acrylic paint formulated to dry matte, not true gouache.
Is gouache hard for beginners?
Gouache is not particularly hard for beginners, but it does have a learning curve. The main challenge is learning to control the water-to-paint ratio and understanding that you can accidentally reactivate dried layers. Most beginners get comfortable with these quirks within a few painting sessions. Starting with a limited color palette and practicing basic techniques like opaque layering and dry brushing helps build confidence quickly.
Why is gouache so difficult?
Gouache can feel difficult because of its reactivatable nature: wet paint can disturb dried layers underneath, creating muddy colors. The color shift between wet and dry states also takes time to anticipate correctly. Additionally, getting the right paint consistency requires practice, as too much water makes the paint transparent while too little makes it thick and hard to control. These challenges become manageable once you understand the medium’s behavior.
How to use gouache for the first time?
Start by squeezing a few colors onto a palette, add a small amount of water to reach a creamy consistency, and paint simple shapes on 140lb watercolor paper. Work in thin layers, letting each one dry before adding the next. Begin with a limited palette of 6 to 8 colors and practice mixing on the palette rather than on the paper. Focus on getting comfortable with how much water to use and how the paint feels on the brush before attempting complex subjects.
Can you reactivate dried gouache?
Yes, dried gouache can be fully reactivated with water. You can rewet dried gouache on a palette and use it again, or use a wet brush to lift and rework dried paint on your painting. This reactivatable quality is one of gouache’s defining features and a major advantage for making corrections. However, it also means you must be careful not to accidentally disturb dried layers when painting over them.
Wrapping Up: Your Gouache Journey Starts Here
Gouache is one of the most rewarding painting mediums you can pick up in 2026. It gives you the opacity and bold color of acrylic with the reworkability and convenience of watercolor, all in a fast-drying, easy-to-clean format that works beautifully on paper. Whether you are painting illustrations, landscapes, abstract pieces, or just exploring color for the fun of it, gouache meets you where you are and grows with your skills.
The key takeaways from this guide: gouache is an opaque, water-soluble paint made with gum arabic binder that dries matte and can be reactivated with water. It differs from watercolor in its opacity and from acrylic in its reactivatable nature. Start with a limited palette, use 100% cotton paper, work in thin layers, and be patient with the learning curve around water control and layer management.
Now that you understand what gouache is and how do you use it, the best thing you can do is start painting. Pick up a basic set, grab some paper, and give it a try. The medium rewards experimentation, and every painting teaches you something new about how the paint behaves. Once you have created a few pieces you are proud of, consider checking out our guide to artwork scanning equipment to digitize and preserve your gouache paintings for sharing online or printing.