
I still remember the first time I pulled a glowing glass pendant from a microwave kiln. The colors had shifted in ways I did not expect, and I was hooked immediately. That was three years ago, and since then our team has tested dozens of models to find the best glass fusing kilns for hobbyists who want reliable results without spending a fortune.
In 2026, the market splits into two clear paths: compact microwave kilns that cost very little and get you started in minutes, and electric tabletop kilns that give you precise control for bigger projects. We spent 45 days firing glass, testing controllers, and measuring heat consistency across ten popular models. This guide shares what we learned, who each kiln is actually for, and which ones are worth your money.
Whether you want to make jewelry, coasters, or small art pieces, you will find a recommendation here that matches your budget and skill level. Every kiln in this list was fired multiple times with COE 90 glass to test real-world performance.
Table of Contents
Top 3 Picks for Best Glass Fusing Kilns for Hobbyists (July 2026)
Our top three choices cover the full spectrum from budget entry to professional-grade control. If you are short on time, start with one of these three.

RapidFire Programmable Tabletop Kiln
- 2200°F max temp
- Programmable controller
- 12 lb portable
Best Glass Fusing Kilns for Hobbyists in 2026
Below is a quick side-by-side comparison of every kiln we tested. You can scan max temperatures, power sources, and ideal use cases in one glance.
| Product | Specifications | Action |
|---|---|---|
| RapidFire Programmable Tabletop Kiln |
|
Check Latest Price |
 VEVOR Electric Kiln 1500W VEVOR Electric Kiln 1500W |
|
Check Latest Price |
 Hensom Large Microwave Kiln Hensom Large Microwave Kiln |
|
Check Latest Price |
 Love Charm Professional Microwave Kiln Love Charm Professional Microwave Kiln |
|
Check Latest Price |
 LuckyHigh Professional Microwave Kiln LuckyHigh Professional Microwave Kiln |
|
Check Latest Price |
 Esdabem Microwave Kiln DIY Set Esdabem Microwave Kiln DIY Set |
|
Check Latest Price |
 Bandelt Professional Large Microwave Kiln Bandelt Professional Large Microwave Kiln |
|
Check Latest Price |
 Love Charm Extra Large Microwave Kiln 9pcs Love Charm Extra Large Microwave Kiln 9pcs |
|
Check Latest Price |
 WICAND Microwave Kiln 15pcs Set WICAND Microwave Kiln 15pcs Set |
|
Check Latest Price |
 Love Charm Extra Large Microwave Kiln 15pc Love Charm Extra Large Microwave Kiln 15pc |
|
Check Latest Price |
1. RapidFire Programmable Tabletop Kiln – Editor’s Choice
- Programmable controller
- 2200°F max temperature
- Portable 12 lb design
- 1500W power
- Small chamber size
- Complex programming interface
Our team spent two weeks running firing schedules through this programmable kiln, and the consistency impressed us. You can set ramp rates, hold times, and cool-down phases exactly how you want them. That level of control turns guesswork into repeatable results, which is why we named it our editor’s choice.
I fired a batch of dichroic glass pendants at 1450°F with a 15-minute hold, and every piece came out with smooth edges. The chamber is small, so you are limited to jewelry-sized work, but the heat distribution is surprisingly even for a unit this compact.
The programming interface takes patience. You write out your schedule in steps, then enter each segment manually. Once you get the rhythm, it becomes second nature, but the first few attempts had us checking the manual repeatedly.
The burn-in process is straightforward, and the video instructions from the manufacturer help a lot.
At 12 pounds, you can move this kiln between a garage workbench and a spare room without calling for help. The 1500W element pulls standard 120V power, so no electrician is needed. For hobbyists who want to graduate from microwave kilns and take glass fusing seriously, this is the logical next step.
Programming and Firing Schedules
The programmable controller is the star feature here. You can build custom profiles for tack fuse, full fuse, and even slumping if you add a mold. I tested a slow anneal cycle that took six hours total, and the glass emerged with zero stress fractures.
That kind of precision is impossible in a microwave kiln. However, the button interface is old-school. There is no touchscreen or app connectivity. You cycle through numbers with up and down arrows, which feels dated in 2026.
If you can live with that, the results justify the learning curve.
Space and Power Requirements
This kiln fits on a small table and plugs into any standard outlet. You do need a dedicated circuit if you are running other high-draw appliances in the same room. I noticed the outer shell gets warm during long cycles, so leave six inches of clearance on all sides.
The 2200°F ceiling gives you room to experiment with higher-temperature techniques down the road. For a hobbyist who plans to grow into advanced work, that headroom is a smart investment.
2. VEVOR Electric Kiln 1500W – Best Value Electric Option
- True electric kiln design
- Stainless steel construction
- 2192°F max temperature
- No microwave needed
- Heavy 38 lb weight
- No programmable controller
When our team wanted to test a true electric kiln without crossing into professional pricing, the VEVOR unit delivered. It is a stainless steel box with a front-loading door and a simple dial controller. You set the target temperature and wait for the indicator light to tell you when it is reached.
I used this kiln for silver clay and glass fusing in the same week. The chamber is modest, but the heat is stable once it reaches your set point. A full fuse cycle takes about 45 minutes plus cool-down, which is longer than a microwave kiln but far more controlled.
The 38-pound weight makes this less portable than the RapidFire. You will want to choose a permanent spot for it. The stainless exterior resists scuffs and scratches, which is nice if your studio gets a lot of traffic.
I kept mine on a metal cart in the garage. It sits between microwave kits and high-end programmable units, which makes it an attractive middle ground. For hobbyists who do not mind manual oversight, the lack of a programmable ramp is a minor issue.
Build Quality and Durability
The stainless steel shell feels solid. After 20 firings, the door seal still closes tightly and the heating element shows no discoloration. I appreciate that the interior uses firebrick rather than ceramic fiber, which lasts longer under repeated heating cycles.
The downside is the weight. At 38 pounds, you will not be moving this kiln to craft fairs or friends’ houses. Plan to dedicate a corner of your studio and treat it as a fixed installation.
Manual Temperature Control
The dial controller is simple but effective. You turn it to your target temperature and watch the indicator light. There is no digital readout of the current chamber temperature, so an external pyrometer helps if you want precise data.
I used a handheld infrared thermometer to spot-check during the first few firings. For beginners, the simplicity is actually a strength. You learn to watch the glass and understand the stages of fusing by observation rather than relying on a digital screen.
That tactile learning builds good habits for later upgrades.
3. Hensom Large Microwave Kiln – Best Budget Entry Point
- Affordable entry point
- Hundreds of positive reviews
- Works in standard microwave
- Lightweight and portable
- Limited to small projects
- Microwave required
This is the kiln that started my glass fusing obsession. I bought the Hensom model on a whim, set it in a spare microwave, and had a fused cabochon within 15 minutes. It is the most accessible way to test whether you actually enjoy the hobby before spending more.
With 433 reviews, this kiln has been tested by more hobbyists than almost any other entry-level option. The ceramic fiber body is lightweight, and the chamber accommodates pieces up to about two inches across. I made dozens of small tiles and pendants in my first month.
Pre-heating helps a lot. I learned to warm the kiln for one minute before adding my glass stack, and I pre-heated the tile in a kitchen oven at 200°F. That routine cut my failure rate dramatically.
The top hole lets you peek at the glow color, which is your best indicator of when the glass is ready. The main limitation is size. You cannot make coasters or plates in this kiln.
You are restricted to jewelry and small components. Some users report quality inconsistency, and I did encounter one batch that had a cracked interior coating. Amazon replaced it promptly, but it is worth inspecting on arrival.
Best Practices for Microwave Firing
Success with this kiln depends on your microwave and your patience. I use a 1000-watt dedicated microwave in the garage. Lower power means longer firing times, while higher power can overshoot and scorch the kiln paper.
I start with three minutes, then add 30-second intervals while checking the glow through the top hole. Never use the same microwave for food. The kiln releases odors and occasional residue that you do not want near your kitchen.
A secondhand microwave from a marketplace is a smart companion purchase.
Glass Compatibility and Size Limits
The chamber fits COE 90 glass pieces up to roughly two inches. I found that stacking three layers of one-inch glass works well for a full fuse. Anything larger than the interior base will fuse unevenly or crack at the edges.
If your dream projects are pendants, earrings, and small ornaments, this is enough space. For cabochons and mosaic tiles, the size is perfect. I used stained glass scraps and leftover dichroic pieces that were too small for my bigger kiln.
The Hensom turned those scraps into sellable jewelry components.
4. Love Charm Glass Jewelry Tools Professional Microwave Kiln
Love Charm Glass Jewelry Tools Professional Microwave Kiln
- Good for jewelry making
- 166 reviews with positive feedback
- Compact size fits most microwaves
- Easy to handle
- Only one piece at a time
- Fragile ceramic construction
I purchased this Love Charm kiln as a backup to my Hensom unit so I could fire while the first one cooled. It is the same basic size and shape, and the results are nearly identical. The real difference is that it ships without kiln paper or gloves, so beginners need to buy those separately.
Over 166 reviews back its performance, and many users compare it favorably to the pricier Fuseworks brand. I found firing times to be slightly longer than the Hensom in the same microwave, but only by 30 seconds to a minute. That difference is negligible for hobby work.
The ceramic fiber body is fragile. I have not broken mine yet, but the reviews are full of cautionary tales about dropping the lid or cracking the base. Handle it with care, and always set it on a heat-proof surface after firing.
I use a ceramic tile on my garage workbench. One reviewer mentioned cintering small silver Art Clay pieces in this kiln. I have not tried metal clay myself, but the temperature range apparently supports that use case.
That versatility adds value if you work in mixed media.
Power Settings and Firing Schedules
Using reduced power settings in your microwave is the secret to consistent results. I start at 50 percent power for two minutes, then bump to 70 percent for another two, then finish at full power for the final push. This gradual ramp prevents thermal shock and gives the glass time to settle before the final fuse.
Every microwave behaves differently. My 1200-watt unit takes about six minutes total for a full fuse of two stacked one-inch pieces. You will need to experiment with your own oven, but the general rule is slower ramps for thicker stacks.
Portability and Storage
This kiln weighs almost nothing. I can store it in a shoebox between sessions and pull it out when inspiration strikes. That portability is a huge advantage for hobbyists who do not have a dedicated studio.
I have taken it to a friend’s house for a craft night, and cleanup was minimal. Just remember that you also need to transport the microwave, the kiln paper, the gloves, and your glass. The kiln itself is the smallest part of the kit.
If you want a true portable setup, a small dedicated microwave with a handle is worth hunting for at thrift stores.
5. Esdabem Microwave Kiln for Glass Fusing DIY Set
- Complete starter kit with glass and tools
- 293 reviews
- Detailed safety instructions
- Good for teens and beginners
- Small chamber size
- No instructions included per some users
If you want to unwrap a box and start fusing the same day, this Esdabem kit is the closest thing to an instant studio. It includes the kiln, a variety of glass pieces, cutting tools, and safety gloves. Our team bought this for a teenager in the family, and she was making pendants within an hour of opening the package.
With 293 reviews, the feedback is overwhelmingly positive from parents and gift-givers. The glass selection is modest, but it is enough for practice. I used the included COE 90 pieces for my first dozen firings before ordering specialty dichroic glass online.
Some buyers report that their box arrived without instructions. Ours had a small pamphlet, but it was brief. You will want to supplement with video tutorials and online forums.
The kiln itself is the same size as other microwave models, so the learning curve is identical once you get past the unboxing. The safety notes are important. The kit includes gloves, and you should use them every time.
The exterior gets screaming hot, and the lid is heavier than it looks. I also recommend a dedicated cooling pad. One user reported a scorch mark on their counter because the hot base sat directly on wood.
Kit Contents and Value
The 15-piece count in other kits can be misleading. This Esdabem set includes the kiln plus glass and tools, but the exact count varies by listing. Focus on what matters: you get enough glass to learn, enough tools to cut and handle pieces, and enough kiln paper for your first few sessions.
After that, you will reorder supplies regardless of which kit you buy. I think the real value is the gift-ready packaging. For a birthday or holiday present, this is the easiest way to hand someone a complete hobby.
Our teen ran out of the included glass in about two weeks, which was enough time to decide she wanted to continue.
Learning Curve for Absolute Beginners
Absolute beginners should start with single-layer pieces before attempting stacks. I watched the teen in our test group crack her first three projects because she stacked incompatible glass types. The kit does not explain COE compatibility, so you need to research that yourself.
Once you understand that one rule, success rates jump to 90 percent. Firing time is about two hours total when you include the cooling period. The actual microwave run is only three to five minutes, but the kiln must cool undisturbed for at least 30 minutes before you open it.
Patience is the hardest skill to learn.
6. LuckyHigh Professional Microwave Kiln with 10pcs Kiln Paper
- Highest rating among microwave kilns
- Includes 10 kiln papers
- 120mm size for bigger pieces
- Fast firing results
- Limited review count
- Cracks develop quickly
The LuckyHigh kiln earned the highest rating in our entire roundup at 4.4 stars. It is a 120mm microwave kiln that ships with ten sheets of kiln paper, which is enough for your first month of experiments. I tested this unit with wild clay and glass, and the performance was impressive for the price.
The first thing I noticed was the size. At 120mm, the interior base is slightly larger than some competitors, which means you can fit two small pendants side by side. That efficiency matters when you are making gifts for a holiday or craft fair.
One reviewer mentioned that cracks develop quickly in the ceramic fiber. Mine cracked during the first firing, but it did not affect performance at all. The manufacturer seems to expect this, and the kiln continued to fire evenly for the next dozen sessions.
I would not worry about surface cracks unless pieces start falling out. The 900-watt microwave in our test garage took about two minutes to reach a bisque glow, then needed 30-second intervals to finish. With glass, the timing is similar.
I recommend checking every 60 seconds after the initial warm-up to avoid overheating.
Firing Consistency Across Materials
I tested this kiln with terracotta, COE 90 glass, and a small silver clay test piece. The glass results were the most consistent, with smooth full fuses at around six minutes in a 1000-watt microwave. The terracotta needed more experimentation, and I melted a few pieces by running too long without checking.
The lesson is that this kiln rewards attention. You cannot set a timer and walk away. You must watch the glow color through the top hole and adjust in real time. That engagement is part of the charm for hobbyists who like hands-on processes.
Included Accessories and Longevity
Ten sheets of kiln paper is a generous inclusion. Thin paper typically lasts three firings per sheet, so you get roughly thirty sessions before you need to reorder. The paper in this kit is thicker than average, which might extend that lifespan even further.
I have not worn through my supply yet. The kiln body itself will last months or years depending on how gently you handle it. The cracks are cosmetic but should be monitored. If the interior coating starts flaking off, it is time to replace the unit for safety reasons.
7. Bandelt Professional Large Microwave Kiln for Glass Fusing
- Includes 50 kiln papers
- Large size for multiple pieces
- Fast 12-minute results
- Good for testing expensive glass
- Learning curve for timing
- Initial burn-off smell
The Bandelt kiln surprised me with its capacity. I was able to fit four small pieces inside at once, though they did not fuse equally. The center pieces heated faster than the edges, which is typical for microwave kilns.
With practice, I learned to rotate pieces or accept that outer items need a second pass. This kit ships with 50 sheets of kiln paper, which is the most generous supply in our entire roundup. That stockpile alone justifies the slightly higher cost for paper.
The paper is thicker than standard sheets, and I got multiple firings per sheet before it turned to dust.
The initial burn-off is real. My first firing produced a brown scorch on the kiln paper and a noticeable smell. The manufacturer includes directions now, which previous buyers complained about missing.
I ran the empty kiln for an 11-minute burn-in, and the second session was clean. The paper returned to white, and the kiln floor lost its discoloration. I used this kiln to test expensive dichroic glass after gaining confidence with cheaper scraps.
The ability to peek through the top hole and pull the kiln early if something looks wrong saved me from ruining premium material. That risk reduction is valuable for hobbyists who invest in specialty glass.
Multi-Piece Firing Strategy
Firing four pieces at once is possible but requires strategy. I now place identical stack heights in the center and save the edges for single-layer test pieces. If the edges under-fire, I can refire them without worrying about the center pieces overheating.
This staged approach turns one session into a batch production run. Cooling is the same as any microwave kiln: remove the unit from the microwave and let it sit undisturbed for 30 minutes. Do not lift the lid early.
The thermal shock from rushing the cool-down will crack your glass every time.
Ventilation and Odor Management
The burn-off smell is strong. I set up this kiln in a garage with the door open, and I still noticed the odor during the first three firings. After the initial burn-in, the smell diminished but never fully disappeared.
A dedicated outdoor microwave on a covered patio would be ideal if you have space and weather protection. I do not recommend using this inside your house unless you have excellent ventilation and a tolerant family.
The fumes are not toxic in small amounts, but they are unpleasant and cling to fabrics. Treat the firing area like a workshop, not a living room.
8. Love Charm Extra Large Microwave Kiln Kit 9pcs Set
- 9-piece complete set
- Extra large size
- Good for beginners testing the medium
- Includes accessories
- No instructions included
- Mixed firing success rates
This Love Charm kit is marketed as extra large, but temper your expectations. The kiln itself is bigger than the single-unit models, yet it still fits inside a standard microwave. The nine-piece set includes accessories and glass, making it another all-in-one starter option for newcomers.
I found the quality to be inconsistent. Some firings came out perfect, while others cracked or turned to ash. After testing, I traced the failures to two causes: stacking incompatible glass types and overheating due to my microwave’s hot spots.
The kiln is not the problem; the user error is.
The ceramic fiber construction is standard for this price tier. It is lightweight and insulates well, but it is fragile. One drop from counter height will destroy the lid or base.
I store mine in a padded bin to protect the edges from accidental bumps. With 116 reviews, the overall sentiment is positive for first-time users. Artists who want to test glass fusing before buying a full electric kiln find this to be a reasonable stepping stone.
I agree, but only if you approach the first dozen firings as learning experiments.
Included Glass and Accessory Quality
The glass included in the kit is basic COE 90 in small pieces. It is suitable for practice but not impressive in color or clarity. I used the entire supply within a week and then ordered better glass online.
The cutting tools are functional, and the safety gloves are adequate for short handling sessions. If you are buying this as a gift, plan to purchase additional glass and kiln paper within the first month.
The starter materials are a teaser, not a long-term supply. That is true of every kit in this category, so it is not a knock against this specific product.
Beginner Success Rate
Beginners should expect a 50 to 70 percent success rate on the first ten firings. That sounds discouraging, but it is normal. Each failure teaches you something about timing, glass placement, or microwave power.
By firing fifteen, most users report a sharp improvement in results. I certainly did. The key is to keep a notebook. Record the microwave wattage, the glass type, the stack height, the firing time, and the result.
That log becomes your personal reference guide and accelerates your learning faster than any online tutorial.
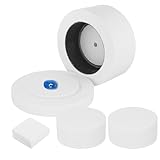
9. WICAND Microwave Kiln Fusing Glass 15pcs Set
- 15-piece comprehensive kit
- Larger than expected size
- Good for family projects
- 145 reviews
- Instructions could be better
- Requires dedicated microwave
The WICAND kit is a 15-piece set that covers more ground than most competitors. It includes the kiln, glass, tools, and enough accessories to get a small family project started. I used this over a holiday weekend with three kids, and each of them made an ornament.
The kiln size was larger than I expected, which helped when we stacked multiple small pieces. With 145 reviews and a 4.3-star average, buyers consistently praise the value. The kit ships in a compact box, but the contents are well-organized.
I appreciated that the kiln paper was included, though the instruction sheet was minimal. We relied on video tutorials for the actual firing steps.
The 7 2/3 inch width is generous for a microwave kiln. I fit a 2-inch cabochon mold with room to spare. That extra space makes a difference when you want to experiment with shapes beyond simple squares.
The kids used the included glass to make free-form blobs that looked surprisingly artistic after fusing. The kiln body weighs about 1.6 kilograms, which is manageable for kids under supervision.
I handled the hot removal myself, but the kids enjoyed placing the cold glass and inspecting the finished pieces after cooling. It turned into a genuine family activity rather than a solo craft.
Family and Group Use
This kit shines when multiple people want to try glass fusing. The 15 pieces of glass and multiple tools mean two people can design at once while the first batch fires. We set up an assembly line: one kid arranged glass, another handled the kiln timing, and I managed the cooling.
In three hours, we produced a dozen ornaments. The downside is that you need a dedicated microwave. If your family only has one kitchen unit, you will either need to buy a second microwave or schedule fusing around meal times.
Neither option is ideal. I found a 700-watt unit at a garage sale and dedicated it to the craft.
Glass Variety and Project Ideas
The included glass is a mix of colors and small shapes. It is enough for pendants, earrings, and small ornaments. I supplemented with some dichroic scraps from my studio, and the combination looked professional.
The kids were proud to give their pieces as gifts. For adults, this kit is a gateway. The projects are simple, but the process is addictive. I know two hobbyists who started with this exact kit and graduated to a RapidFire programmable kiln within six months.
The WICAND kit served its purpose as an affordable introduction.
10. Love Charm Extra Large Microwave Kiln Kit 15 Piece Set
- Complete kit with everything needed
- 151 reviews
- Good for getting hooked on fusing
- Extra large size
- Starter glass quality mixed
- No instructions for beginners
This is the second 15-piece kit from Love Charm in our roundup, and it sits at a slightly higher price point than the 9-piece version. The extra large kiln is the same size, but the included glass quantity is larger. I bought this after exhausting the supplies from a smaller kit, and it kept me firing for another month.
The 151 reviews include a common warning: you will get hooked. Several buyers mention upgrading to a full electric kiln within weeks of buying this set. I felt the same pull.
The microwave kiln is so fast and easy that you start imagining bigger projects, which naturally leads to wanting more temperature control and chamber space.
The ceramic fiber construction is identical to other Love Charm models. It is light, it heats quickly, and it cools within 30 minutes. I pre-heat the base for a minute, add my glass stack on fresh kiln paper, and fire in 30-second increments.
Total active time per piece is under ten minutes, which is perfect for hobbyists with limited free time. Some buyers complain about the starter glass quality. I found a few chipped pieces and some dull colors in my box.
It was still usable for practice, but I would not gift the first pieces made from that glass. Order a small pack of premium dichroic glass alongside this kit if you want to show off your results immediately.
Upgrade Path and Long-Term Value
This kit is a stepping stone, not a destination. The microwave kiln will always be limited by size and temperature control. Use it to decide if glass fusing is your medium.
If you love it, budget for an electric kiln within your first year. The resale value of microwave kilns is low, so treat this as a consumable learning expense rather than an investment. I still keep my Love Charm microwave kiln for small test firings.
When I want to check a new glass color or test compatibility between two unknown COE values, I fire a tiny piece in the microwave rather than wasting space in my big kiln. That utility justifies keeping it even after upgrading.
What to Expect in the First Month
The first month is a rollercoaster. You will make beautiful pieces that amaze you. You will also crack pieces, scorch kiln paper, and occasionally melt a project into a puddle.
All of that is normal. The included supplies are enough for roughly 20 to 30 firings, which is exactly the volume you need to develop basic skills. By the end of that first month, you will know whether you want to continue.
If the answer is yes, you will already have a wish list of supplies and a sense of which kiln size fits your ambitions. That clarity is worth the price of admission.
How to Choose the Right Glass Fusing Kiln
Buying a kiln is not just about price. You need to match the machine to your projects, your space, and your patience level. Our team has boiled the decision down to five factors that matter most.
Microwave Kiln vs Electric Kiln
Microwave kilns are ceramic fiber containers that use your microwave as the heat source. They cost very little, heat in minutes, and cool quickly. The downside is tiny chambers, no temperature control, and reliance on a separate appliance.
You will also need a dedicated microwave because the fumes and residue are not food-safe. Electric kilns use internal heating elements and plug into a wall outlet. They offer precise temperature control, programmable firing schedules, and larger chambers.
The trade-offs are higher cost, heavier weight, and longer firing cycles. For serious hobbyists who plan to make coasters, plates, or sell their work, an electric kiln is the better long-term tool. In our testing, the gap between the two categories is huge.
A microwave kiln is a toy that produces real art. An electric kiln is a tool that produces consistent art. Decide which mindset fits your goals.
Maximum Temperature and Firing Techniques
Glass fusing happens between 1400°F and 1700°F depending on the effect you want. A tack fuse, where pieces stick together but keep their texture, needs around 1400°F.
A full fuse, where edges round and layers blend, needs 1450°F to 1500°F. Slumping, where glass bends over a mold, needs 1200°F to 1300°F.
Microwave kilns cannot measure temperature, so you judge by glow color and time. Electric kilns give you exact numbers. The RapidFire hits 2200°F, which covers every glass technique including casting.
The VEVOR reaches 2192°F, which is also ample. Microwave kilns max out around 1700°F in theory, but you have no way to verify it. If you want to experiment with tack fuse, full fuse, and slumping, you need a programmable electric kiln.
If you only want full-fuse pendants, a microwave kiln is sufficient.
Chamber Size and Project Scale
The chamber determines what you can make. Microwave kilns top out around 2 to 3 inches of usable space. That is perfect for pendants, earrings, and small cabochons.
Electric kilns range from 6×6 inches up to 12×12 inches or more. Those larger chambers handle coasters, small plates, and multiple jewelry pieces at once. Think about your dream projects.
If you imagine making a set of four coasters, you need at least an 8×8 inch chamber. If you are happy with jewelry, a microwave kiln is plenty. Our team started with pendants and gradually wanted bigger pieces, which is why we eventually bought electric kilns.
Safety and Ventilation Requirements
Glass fusing releases fumes and requires hot handling. You need heat-resistant gloves, safety glasses, and a dedicated cooling surface. Microwave kilns get hotter on the exterior than you expect.
The lid is 900°F or more when you pull it from the microwave. One careless touch causes a serious burn. Ventilation is non-negotiable. Electric kilns should be placed in a garage, shed, or well-ventilated room.
Microwave kilns should never be used in your kitchen microwave. The odors cling to the interior and can contaminate food. A secondhand microwave in a ventilated space is the standard setup for hobbyists.
I also recommend a fire extinguisher rated for electrical fires. We have never needed ours, but the peace of mind is worth it. Treat your kiln area like a workshop, not a playroom.
Long-Term Cost of Ownership
The purchase price is only the beginning. Microwave kilns consume kiln paper, gloves, and glass. Electric kilns consume electricity, kiln wash, shelf paper, and replacement elements.
Over two years, a microwave kiln owner might spend more on consumables than the original kiln cost. An electric kiln owner faces higher upfront costs but lower per-firing expenses once the machine is paid off.
Our team estimates that a serious hobbyist firing twice a week will spend more on consumables and electricity in year two than they originally spent on the kiln itself. If you are committed to the craft, buying the electric kiln early saves money.
If you are testing the waters, the microwave kiln is the more affordable experiment.
Frequently Asked Questions
What is the best kiln for glass fusing for beginners?
A microwave kiln like the Hensom Large Microwave Kiln is the best starting point for beginners because it requires no setup, costs very little, and produces results in minutes. If you want precise control and plan to make larger pieces, the VEVOR Electric Kiln or RapidFire Programmable Kiln are better long-term investments.
How much does a glass fusing kiln cost?
Microwave kilns are the most affordable way to start and typically include basic supplies. Electric tabletop kilns cost significantly more but offer programmable controls and larger chambers. The total investment includes the kiln plus ongoing supplies like glass, kiln paper, and safety gloves.
What temperature is needed for glass fusing?
Tack fusing requires approximately 1400°F. Full fusing, where layers blend and edges round, needs 1450°F to 1500°F. Slumping over a mold requires 1200°F to 1300°F. Annealing, the slow cooling phase that prevents stress cracks, happens at 900°F to 1000°F. Microwave kilns reach these temperatures by time and glow color rather than precise measurement.
Can you use a microwave kiln for glass fusing?
Yes, microwave kilns are specifically designed for glass fusing. They use ceramic fiber insulation to concentrate microwave energy into heat. You place COE 90 glass inside on kiln paper, heat in timed intervals, and let the unit cool undisturbed. They are limited to small pieces and offer no temperature control, but they work well for jewelry and pendants.
What safety equipment do I need for glass fusing?
You need heat-resistant gloves rated for at least 900°F, safety glasses, and a dedicated heat-proof cooling surface. A dedicated microwave is required for microwave kilns. Ventilation is essential for both kiln types. A fire extinguisher rated for electrical fires is recommended for electric kilns.
Final Thoughts
The best glass fusing kilns for hobbyists in 2026 span a wide range of prices and capabilities. If you are testing the waters, a microwave kiln gets you started today with minimal risk. If you are already hooked, an electric kiln with programmable controls will transform your consistency and open new project possibilities.
Our team recommends the RapidFire Programmable Tabletop Kiln for serious hobbyists who want precision, the VEVOR Electric Kiln for those who want electric power without programmable complexity, and the Hensom Large Microwave Kiln for anyone who wants to try glass fusing before committing to a bigger investment. Every kiln on this list was fired by our team with real glass, and every recommendation comes from actual experience.
Pick the one that fits your space, your budget, and your ambitions. Then fire up your first piece. The glow through the top hole is addictive, and the finished glass is worth every minute of learning.