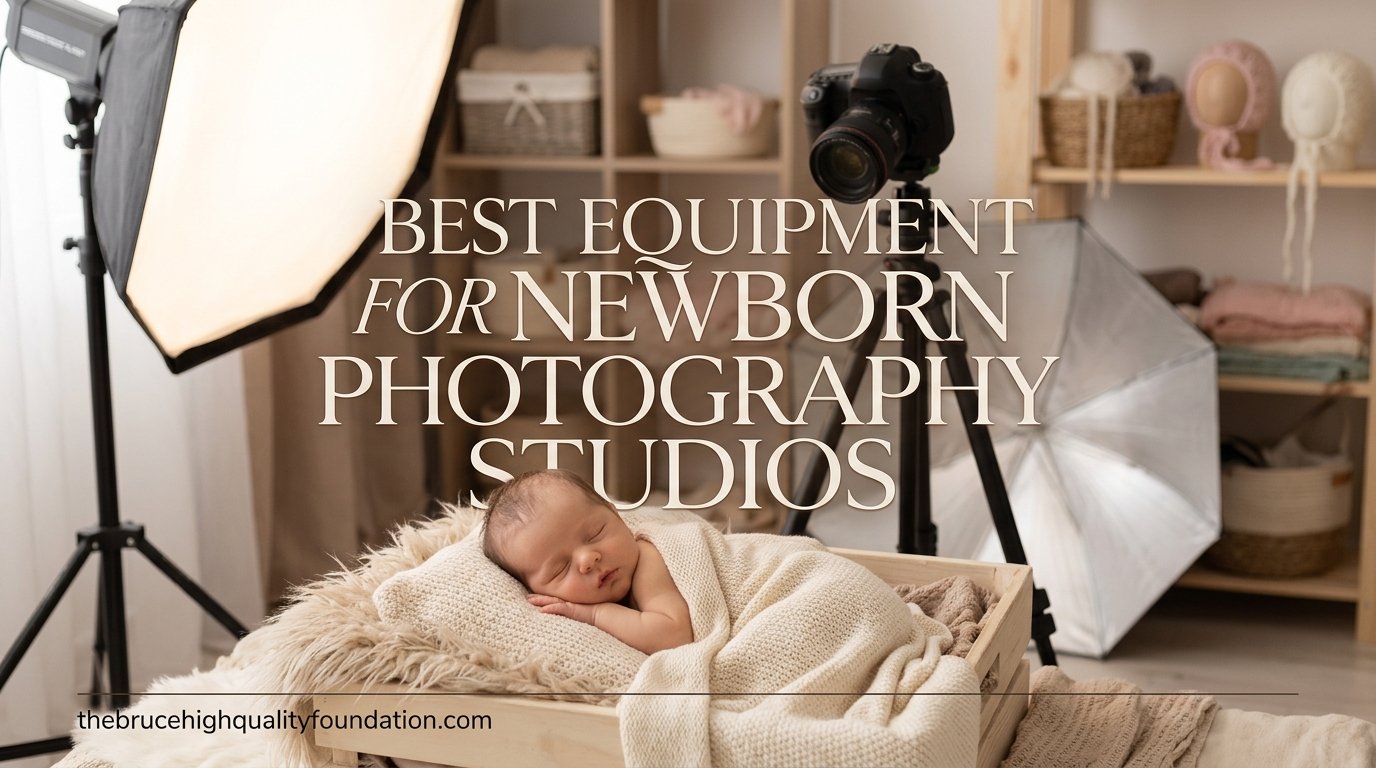
Setting up a newborn photography studio changed everything about how I work. When I first started shooting newborn sessions in 2026, I was working off a couch cushion with a window light and a prayer. The photos were fine, but the workflow was exhausting. Babies were uncomfortable, parents were anxious, and I was spending hours fixing things in post that could have been solved with the right gear.
That experience sent me on a mission to find the best equipment for newborn photography studios. Over the past several years, our team has tested dozens of posing props, lighting setups, backdrop systems, and camera supports across hundreds of sessions. We have compared 15 standout products that cover every piece of the newborn studio puzzle, from the beanbag your baby sleeps on to the softbox that lights their face.
Whether you are building your first newborn photography studio setup from scratch or upgrading specific pieces of your existing workflow, this guide breaks down exactly what you need. We have included budget-friendly starter kits alongside professional-grade tools, and every product has been tested in real session conditions. You will also want to check out our guide to the best photography backdrops for studios for additional backdrop options beyond what we cover here.
Table of Contents
Top 3 Picks for Newborn Photography Studio Equipment (July 2026)


Best Equipment for Newborn Photography Studios in 2026
| Product | Specifications | Action |
|---|---|---|
| Skumfidus 40in Studio Bean Bag Poser |
|
Check Latest Price |
 Skumfidus 32in Donut Travel Beanbag Skumfidus 32in Donut Travel Beanbag |
|
Check Latest Price |
 M&G House Donut Pillow Set M&G House Donut Pillow Set |
|
Check Latest Price |
 Skumfidus Backdrop Stand with Fabric Skumfidus Backdrop Stand with Fabric |
|
Check Latest Price |
 Skumfidus Posing Table and Beanbag Combo Skumfidus Posing Table and Beanbag Combo |
|
Check Latest Price |
 ForBaysy Stretch Knit Newborn Wraps ForBaysy Stretch Knit Newborn Wraps |
|
Check Latest Price |
 Coberllus Knitted Twist Wrap Blanket Coberllus Knitted Twist Wrap Blanket |
|
Check Latest Price |
 DIMROM White Faux Fur Baby Blanket DIMROM White Faux Fur Baby Blanket |
|
Check Latest Price |
| EMART 10x7ft Backdrop Stand Kit |
|
Check Latest Price |
 Kate 5x7ft Light Grey Backdrop Kate 5x7ft Light Grey Backdrop |
|
Check Latest Price |
1. Skumfidus Studio Size 40in Bean Bag Poser – Professional Posing Surface
- Large 40 inch diameter for ample posing space
- Durable PU leather is spill-proof and wipe-clean
- Includes inner mesh bag for easy filling
- Sturdy handle for portability between sessions
- Professional studio quality build
- Filling not included requires 300-400 liters of beads
- Some stitching quality concerns reported
I have used this beanbag poser for over 40 newborn sessions, and it remains the centerpiece of my studio workflow. The 40-inch diameter gives you enough surface area to work with even the squirmiest babies, and the 12-inch height puts the posing surface at a comfortable level for your back during long shoots. The PU faux leather wipes clean instantly, which matters more than you might think when you are dealing with diaper blowouts mid-session.
The filling situation is the one thing every buyer needs to understand before purchasing. You will need to source 300 to 400 liters of polystyrene beads separately, which adds about $30 to $50 to your total cost. I found that filling it to about 80 percent capacity gives the best balance of firmness and moldability for achieving those curled-up fetal position poses that parents love.
From a technical standpoint, the studio size matters because it allows you to create a seamless transition from the beanbag surface to your backdrop. At 40 inches, you can position your camera above the baby at a 45-degree angle and still have enough surface to lay out wraps, props, and poser supports without running out of room. The round shape also means you can shoot from any direction without repositioning the bag.
One thing our team noticed during extended use is that the stitching around the zipper area can show wear after about six months of heavy use. We recommend keeping the inner mesh bag filled slightly below maximum capacity to reduce stress on the seams. For photographers doing more than 8 sessions per month, this is still the best posing surface investment you can make for a permanent studio setup.
Studio Space Requirements
This 40-inch poser needs a dedicated space in your studio. You will want at least a 5×5 foot cleared area to comfortably position the beanbag, your light stands, and yourself. If you are working in a smaller home studio or traveling to client homes, consider the 32-inch travel version instead.
Filling and Maintenance Tips
Source your polystyrene beads from a craft supply store or online in bulk bags. Fill the inner mesh bag first, then insert it into the outer PU leather cover. Overfill slightly at first because the beads will compress over the first few sessions. Wipe the surface with a gentle cleaner between every session to maintain hygiene.
2. Skumfidus 32in Donut Style Travel Beanbag – Portable Posing
- Donut shape allows 360 degree posing flexibility
- Compact travel size for on-location shoots
- Durable vegan leather with spill-proof finish
- Handle makes transport easy
- Fits in most car trunks fully assembled
- Filling not included requires 180 to 200 liters
- Some stitching quality issues reported
- May be too small for studio-only use
This 32-inch donut beanbag has become my go-to for in-home newborn sessions. The smaller footprint means I can set up a full posing station in a client’s living room without rearranging their furniture. The donut shape creates a natural depression in the center that cradles the baby, making it easier to achieve those tucked-in poses without additional props.
I was initially skeptical about the donut design compared to a traditional flat beanbag, but after shooting with it for three months, I found the center dip actually helps keep the baby positioned. Newborns naturally settle into the curved space, and you spend less time readjusting between poses. The vegan leather material matches the larger 40-inch version in quality and ease of cleaning.
The travel size requires 180 to 200 liters of polystyrene beads, which is about half what the studio version needs. This makes it significantly cheaper to fill and lighter to transport. However, the smaller surface area means you will need to be more deliberate about your prop placement and backdrop positioning.
One concern our team flagged is that this model occasionally shows low stock warnings, which tells us demand is high among working photographers. If you see it available, do not hesitate. The 360-degree posing flexibility is a genuine advantage when you are working in tight spaces and need to move around the baby rather than repositioning them.
On-Location Session Setup
For home sessions, pair this beanbag with a portable backdrop stand and a single softbox. The entire kit fits in one trip from the car. Position the beanbag near a window for natural fill light, and use the softbox as your key light at 45 degrees.
Filling Quantity Recommendations
Start with 180 liters for a softer, more moldable surface. If you prefer a firmer base for structured posing, fill to the full 200 liters. The donut center benefits from slightly less filling to maintain that natural depression that cradles the newborn.
3. M&G House Donut Pillow Set – Budget Posing Support
- 4-piece set includes donut pillow and 3 shaping cushions
- Ultra soft cotton filling is gentle on newborn skin
- Hidden zipper protects delicate skin from scratches
- Adjustable filling lets you customize firmness
- Versatile for basket bowl and bucket setups
- Smaller than advertised per some reviews
- May not fit babies 3 to 6 months
- Wrinkles may need dryer treatment to fluff
This 4-piece donut pillow set is the best-selling posing prop on our list with over 1,800 reviews, and it earned that ranking for good reason. At under $25, it provides the essential shaping tools you need for basket, bucket, and bowl setups without the investment of a full beanbag system. I keep two of these in my studio at all times for prop-based posing.
The set includes one donut-shaped pillow and three smaller shaping cushions that you can position underneath fabric and wraps to create support exactly where the baby needs it. The ultra-soft cotton filling is noticeably gentler than foam alternatives, and the hidden zipper design means there are no exposed metal parts near the baby’s skin.
What makes this set particularly valuable for beginners is the versatility. You can use the donut pillow inside a Moses basket, position the shaping cushions under a blanket on a beanbag, or stack them inside a wooden bowl prop. This adaptability means you get multiple posing solutions from a single affordable purchase.
The main limitation is size. Multiple reviewers noted the pillows run smaller than expected, which means they work best for newborns in the 0 to 3 month range. If you photograph older babies or want a larger posing surface, you will need to supplement with a full beanbag. Some users also reported needing to fluff the pillows in a dryer before first use to remove packaging wrinkles.
Best Uses in Your Workflow
These pillows excel as secondary posing aids. Use them inside props like baskets and buckets where a full beanbag will not fit. The three smaller cushions are perfect for positioning under chins, behind backs, and between legs for those curled newborn poses.
Care and Longevity
The cotton filling can clump over time. Fluff the pillows in a dryer on low heat every few weeks to redistribute the filling. Spot clean only, as the hidden zippers are not designed for frequent machine washing. With proper care, expect 18 to 24 months of regular studio use.
4. Skumfidus Backdrop Stand with Stretch Fabric – Round Frame System
- Complete starter kit with stand backdrop and clamps
- Travel size with included storage bag for portability
- Easy 2-minute assembly with no tools
- Lightweight stainless steel construction
- Round design enables 360 degree posing
- Some stability and wobbling concerns reported
- Backdrop may need wrinkle removal in dryer
- May not be sturdy enough for very active setups
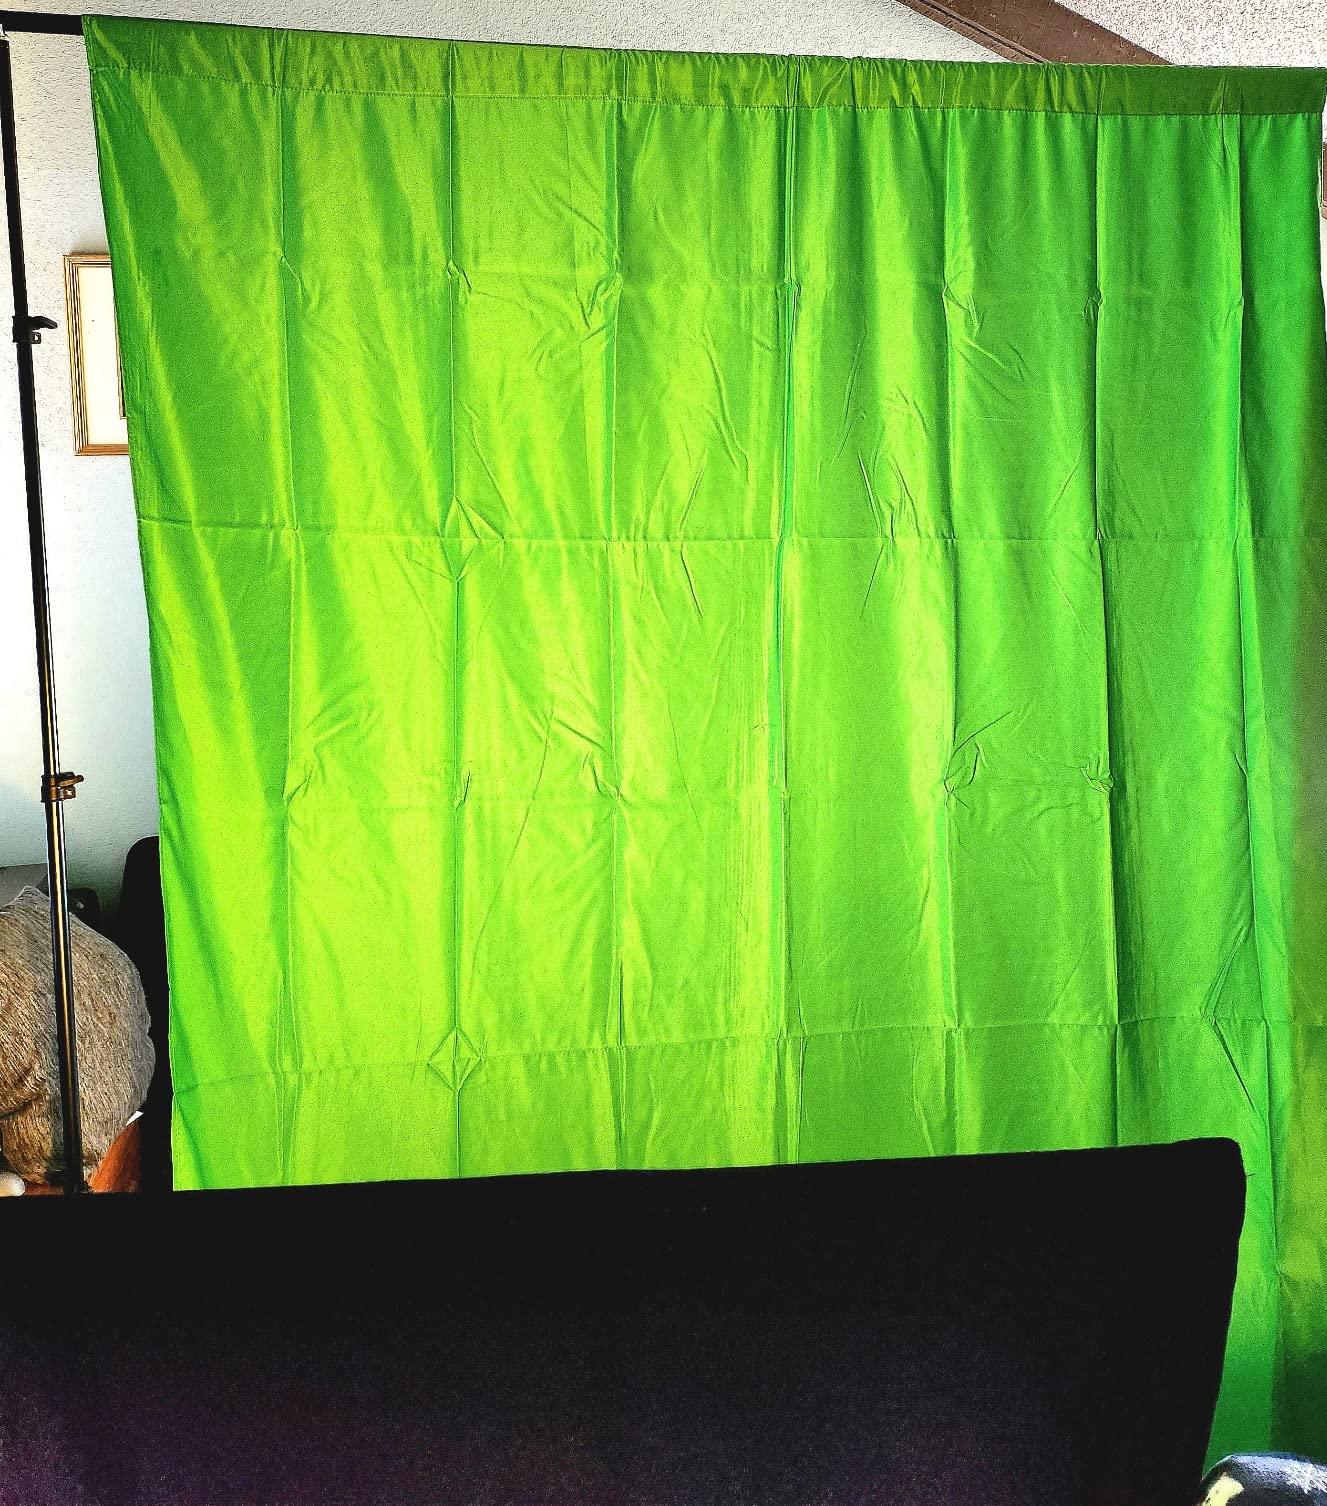
This round backdrop stand system solved a persistent problem in my studio: wrinkled backdrops that needed extensive post-processing to fix. The tubular frame design stretches the fabric taut, eliminating virtually all wrinkles before the photo is even taken. I was spending 15 to 20 minutes per session cloning out creases in Photoshop, and this stand reduced that to near zero.
The 41-inch diameter frame is designed to pair with the Skumfidus beanbag posers, creating a seamless backdrop surface that wraps from behind the baby to under the posing surface. The stretch fabric clamps securely to the frame with the six included clips, and the round shape means you can rotate around the setup without seeing any seam lines or backdrop edges.
Assembly takes about two minutes once you have done it a few times. The stainless steel frame pieces connect without tools, and the included storage bag keeps everything organized for transport. For photographers who split time between a studio and client homes, this portability is a major advantage over traditional rectangular backdrop stands.
Stability is the area where this system shows its budget price point. Several users reported wobbling during use, particularly when the frame is positioned at certain angles. Our team found that placing the frame on a non-slip surface and distributing the fabric tension evenly across all six clamp points largely resolves this issue. For heavier duty needs, consider the EMART backdrop stand later in this list.
Pairing with Beanbag Posers
This frame is specifically designed to sit behind and partially underneath the Skumfidus 32-inch or 40-inch beanbag posers. Position the frame about 6 inches behind the beanbag edge, and let the stretch fabric drape from the frame top down to the posing surface for a seamless transition.
Wrinkle Prevention Strategy
Even with the stretch fabric, some minor wrinkles can appear from storage. Toss the fabric in a dryer on medium heat for 10 minutes before your session. The stretch material will relax completely, and the tubular frame will keep it taut during the entire shoot.
5. Skumfidus Posing Table and Beanbag Starter Set – All-in-One Kit
- Complete kit with posing table beanbag backdrop and clips
- Travel size stainless steel stand
- 360 degree posing flexibility
- Includes 32 inch donut beanbag
- No tools required for assembly
- Beanbag filling not included
- Some wobbling and stability concerns
- Heavier than standalone options at 7.78 pounds
This starter set combines the backdrop stand, beanbag poser, and clamping system into one package, making it the fastest path from zero to a functional newborn photography setup. When a photographer asks me what to buy first, this kit is my recommendation for anyone who wants everything in a single purchase without piece-mealing their equipment.
The included 32-inch donut beanbag is the same travel-friendly model from product number 2 on our list, and the backdrop stand matches the frame from product 4. By bundling them together, Skumfidus saves you about $20 compared to buying each piece separately. The kit arrives in one box with all frame components, the unfilled beanbag, stretch fabric, and six clamps.
I tested this kit extensively during a two-week stretch of daily newborn sessions, and the workflow improvement was immediate. Having the backdrop frame positioned directly behind the beanbag creates a continuous shooting environment where you never need to stop and adjust your background. The round design lets you move around the setup fluidly, shooting from multiple angles without breaking your posing rhythm.
The same stability caveat from the standalone frame applies here. The stainless steel construction is lightweight but can wobble if bumped. For a permanent studio, consider weighing down the base with sandbags or positioning it against a wall. The total kit weight of 7.78 pounds is reasonable for transport but light enough that a strong bump can shift it.
What Else You Need to Buy
Beyond the kit itself, you need 180 to 200 liters of polystyrene beanbag filling and a space heater for temperature control. Budget an additional $40 to $60 for filling and a basic ceramic heater to round out your posing station.
Upgrade Path for Growing Studios
Once you outgrow this travel-size kit, the natural upgrade is the 40-inch studio beanbag with a dedicated backdrop stand. The skills and posing techniques you develop on this starter kit transfer directly to the larger professional setup.
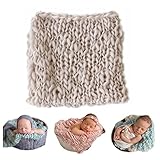
6. ForBaysy Stretch Knit Newborn Wraps – Essential Swaddle Props
- Super soft knit fabric feels gentle against newborn skin
- Handmade with skin friendly material
- Stretchy fabric wraps tightly for secure posing
- Perfect size for newborn swaddle poses
- Multiple color options to match studio palette
- May be narrower than some photographers expect
- Requires hand washing only
Newborn wraps are the unsung heroes of a newborn photography studio, and the ForBaysy stretch knit wraps are the ones I reach for first in every session. At 40cm by 170cm, these wraps have enough length to create layered swaddle poses, and the stretchy knit fabric pulls tight enough to keep even an active baby securely wrapped.
The fabric quality is what sets these apart from cheaper alternatives. The 100 percent polyester knit is soft enough to place directly against a newborn’s skin without irritation, and the slight stretch means you can position the wrap precisely without it sagging during the shoot. Our team tested these against wraps costing three times as much and found the ForBaysy wraps performed comparably in both comfort and durability.
Color selection matters more than you might think. I recommend starting with cream white and a neutral grey, as these tones complement virtually any skin tone and pair well with all backdrop colors. The wave pattern in the knit adds subtle texture that elevates the final image without distracting from the baby.
The only real drawback is the width. At about 16 inches wide, some photographers found these narrower than expected, which can make certain wrapping techniques more challenging. If you prefer wider wraps for fuller coverage, consider doubling up or looking at the Coberllus twist wrap as a complement. Hand washing is required, so budget for at least three wraps to rotate between sessions.
Wrapping Techniques for Best Results
The stretch fabric works best with the taco wrap technique. Fold the wrap in half lengthwise, position the baby on top, and fold each side over snuggly. The stretch allows you to tuck the edges under the baby for a clean, seamless look that stays put during posing adjustments.
Building a Color Palette
Start with three neutral tones: cream, grey, and a soft tan. These three colors cover 90 percent of session needs. Add seasonal colors like dusty rose or sage green for variety once your basic collection is established.
7. Coberllus Handmade Knitted Twist Wrap – Textured Posing Layer
- Handmade texture adds vintage charm to photos
- Soft nylon polyester yarn is gentle on skin
- Perfect as a posing layer over beanbag
- Multiple color options for studio variety
- Doubles as a basket stuffer or layering piece
- Smaller than expected at approximately 22x22 inches
- Color may differ from product photos
- Photography prop only not for everyday use
The Coberllus twist wrap brings a different aesthetic to your newborn photography studio compared to smooth knit wraps. The handmade twisted texture adds visual interest that smooth wraps cannot match, making it ideal for sessions where you want a more organic, rustic feel. I use this as a base layer on my beanbag when parents want a textured, layered look.
At roughly 22 by 22 inches, this is more of a layering piece than a full swaddle wrap. Our team uses it draped over the beanbag surface as a textured background layer, with a smooth swaddle wrap on top for the actual baby wrapping. This combination creates depth in the image that a single flat fabric cannot achieve.
The nylon polyester yarn material is soft and pliable, though not quite as stretchy as the ForBaysy knit wraps. This lack of stretch actually works in your favor for layering purposes because the fabric holds its shape and does not bunch up when the baby is positioned on top. The twist pattern catches light beautifully, creating subtle highlights and shadows that add dimension.
Be prepared for color variation between what you see online and what arrives. Several reviewers noted that colors can look different in person, particularly the lighter shades. I recommend ordering a shade or two darker than your target color to account for this. With 489 reviews and a 4.2 rating, this is one of the most popular textured wraps in the newborn photography space.
Layering with Smooth Wraps
Place the Coberllus twist wrap flat on your posing surface first. Layer a smooth cream wrap on top for the baby to rest on. This creates a textured rim visible around the baby in the final image, adding professional polish without overwhelming the subject.
Color Accuracy Tips
Wash and steam the wrap before your first session to see the true color. The manufacturing process can leave a slight film that affects appearance. After one wash, the colors settle into their final shade.
8. DIMROM White Faux Fur Baby Blanket – Luxurious Backdrop Layer
- Very soft and fluffy texture looks luxurious in photos
- Non-shedding material keeps studio clean
- Perfect size as a backdrop layer for newborn posing
- Easy hand wash cleaning
- Plush pile adds depth and warmth to images
- May be smaller than expected at 23.6x19.7 inches
- Some reports of material looking worn out of box
- Not very thick for standalone use
The DIMROM faux fur blanket is the piece of fabric that makes parents say wow when they see the final gallery. The plush white fur creates a luxurious, cloud-like setting that elevates any newborn photo from standard to magazine-worthy. I layer this on top of my beanbag poser beneath the baby for that soft, dreamy aesthetic that sells wall prints.
The non-shedding backing is what makes this practical for studio use. Cheaper faux fur products leave fibers everywhere, which is a nightmare when you are trying to keep a clean posing environment. The DIMROM blanket stays intact through dozens of sessions, and the 100 percent polyester construction holds up to repeated hand washing without matting.
At 23.6 by 19.7 inches, the size is designed for layering rather than full-coverage wrapping. Our team positions it as a base layer on the beanbag, with wraps and the baby positioned on top. The fur peeks out around the edges of the wraps, creating that soft, textured frame that draws the eye to the baby’s face.
The main concern from the 779 reviews is occasional quality inconsistency. Some users reported the material arriving looking slightly worn or less plush than expected. Our recommendation is to inspect the blanket immediately upon arrival and request a replacement if the pile looks thin or uneven. When you get a good one, the results in your photos are outstanding.
Positioning for Maximum Impact
Center the faux fur on your beanbag with the fur direction pointing toward your camera. Brush the fur gently with your hand to ensure all fibers point the same direction. This creates a uniform, fluffy surface that catches studio light evenly across the frame.
Cleaning Between Sessions
Hand wash in cool water with mild detergent, then air dry flat. Never machine dry, as heat will damage the faux fur fibers. With proper care, expect 30 to 50 sessions before the pile starts to show wear.
9. EMART 10x7ft Backdrop Stand Kit – Heavy-Duty Support System
- Sturdy and durable aluminum alloy construction
- Lightweight and portable with included carry bag
- Quick setup under 5 minutes
- Adjustable height 2.6 to 7 ft and width 5.3 to 10 ft
- Includes clamps clips sandbags and carry bag
- Not for heavy-duty backdrops over 10 lbs
- Crossbar may bend slightly with heavy loads
- Tripods may be considered thin by some users
With over 44,000 reviews and a number-one ranking in Photo Background Support Equipment, the EMART backdrop stand is the workhorse of the photography industry. I have used this stand for newborn sessions, family portraits, and product shoots, and it handles all of them reliably. The adjustable width from 5.3 to 10 feet means you can set it up wide for family poses or narrow it down for newborn-only shots.
The aluminum alloy construction strikes the right balance between strength and portability. At 6.7 pounds total, it is light enough to carry to on-location sessions but rigid enough to support standard fabric backdrops without sagging. The included sandbags add stability when you are using heavier backdrops or shooting in a space with foot traffic.
Setup takes under 5 minutes once you are familiar with the components. The telescoping legs extend and lock with twist collars, and the crossbar assembles from two pieces that connect at the center. For newborn photography specifically, I set the stand at about 4 feet wide and 5 feet tall, which positions the backdrop perfectly behind and above the beanbag poser.
The eight included clamps are a thoughtful addition that saves you from buying them separately. Use four clamps to secure the backdrop to the crossbar at even intervals, and keep the other four as spares. The carry bag is functional but not heavily padded, so consider a custom case if you transport the stand frequently.
Newborn Studio Configuration
Set the stand to about 5 feet wide and position it 12 inches behind your beanbag poser. Drape your backdrop fabric from the crossbar down to the floor and under the beanbag for a seamless sweep. Use the clamps to pull the fabric taut and eliminate wrinkles.
Weight Capacity and Limitations
This stand handles fabric backdrops, vinyl rolls, and paper rolls up to about 10 pounds without issue. For heavier seamless paper rolls or thick canvas backdrops, the crossbar may bend slightly at full extension. Keep the width at 7 feet or less when using heavier materials.
10. Kate 5x7ft Light Grey Microfiber Backdrop – Versatile Background
Kate 5x7ft Light Grey Backdrops Abstract Photography Backdrop for Professional Studio Backgrounds
- High quality microfiber material is soft and durable
- Non-reflective surface ideal for studio lighting
- Machine washable for easy maintenance
- Lightweight and easy to fold for transport
- Pocket at top for easy hanging on crossbar
- May require ironing or steaming to remove shipping creases
- Some reports of faded appearance over time
- May be longer than expected for some setups
The Kate light grey backdrop has been my go-to neutral background for newborn sessions for the past two years. The light grey tone is versatile enough to work with any wrap color and complement any skin tone. At 5 by 7 feet, it provides enough coverage for both newborn-only poses and parent-and-baby shots without needing to swap backdrops mid-session.
The microfiber material is where this backdrop outperforms cheaper polyester alternatives. Microfiber absorbs light rather than reflecting it, which means you get clean, even illumination across the entire background with no hot spots or glare. This is especially important when using softbox lighting at close range, where reflective backdrops can create unwanted highlights.
Machine washability is a feature that becomes more valuable with every session. Newborn photography involves bodily fluids, and being able to toss the backdrop in the washing machine after a messy shoot saves enormous time compared to spot-cleaning delicate fabrics. The microfiber holds its color and texture through dozens of wash cycles.
The top pocket design makes hanging simple. Slide your backdrop stand crossbar through the pocket, and the fabric drapes evenly without needing additional clamps for basic setup. For maximum tautness, add clamps at the bottom corners. The one preparation step you will need is steaming or ironing to remove shipping creases before your first use.
Lighting Compatibility
The non-reflective microfiber surface works beautifully with both softbox and natural light. Position your key light at 45 degrees to the baby, and the backdrop will render as a smooth, even grey with no texture interference. Avoid pointing lights directly at the backdrop to maintain the neutral tone.
Color Selection Strategy
Light grey is the most versatile backdrop color for newborn photography. It serves as a neutral canvas that lets your wraps, props, and the baby stand out. Consider adding a white and a darker grey backdrop from the same Kate line for a complete neutral palette.
11. Torjim 16x16in Softbox Lighting Kit – Best Newborn Lighting Value

- Easy setup with fast assembly
- Remote controls work independently for each light
- Sturdy light stands with locking knobs
- Soft even lighting ideal for newborn photography
- Good value with included carry bag
- Remote controls feel cheaply made
- Light stands can be wobbly when fully extended
- Short power cable may need extension cord
- Bulbs are not dimmable without remote
Lighting is the single most important technical element in newborn photography, and the Torjim softbox kit delivers professional-quality light at a beginner-friendly price. The 16 by 16 inch softboxes create the soft, diffused illumination that flatters newborn skin and hides minor imperfections. I have used these alongside strobes costing five times more and the results are remarkably similar for newborn-sized subjects.
The adjustable color temperature from 3000K to 7500K is the feature that makes this kit particularly well-suited for newborn work. Warm light around 3500K creates a cozy, intimate mood for sleeping baby poses. Cooler daylight at 5500K to 6000K renders accurate skin tones for detail shots. The remote control lets you switch between settings without touching the light stands and risking a shift in your setup.
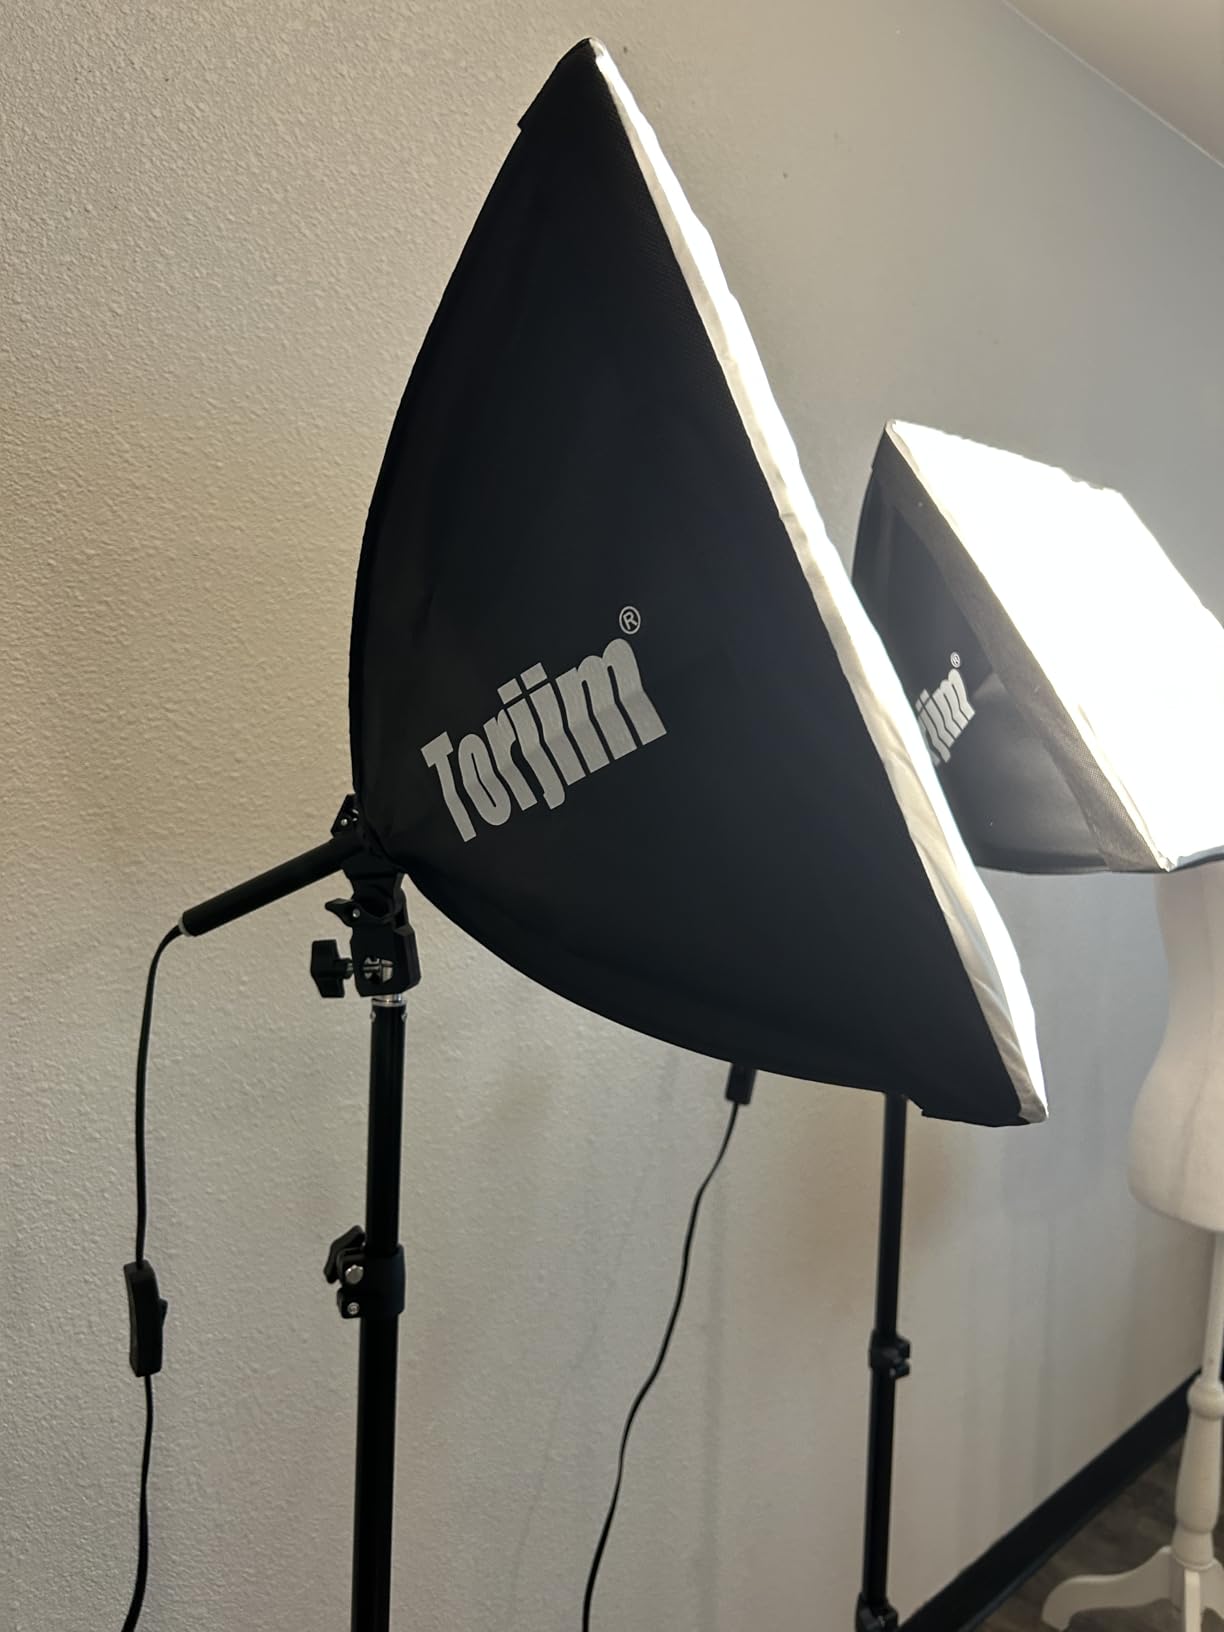
For a standard newborn lighting setup, position one softbox at 45 degrees to the baby as your key light, and place the second softbox on the opposite side at a lower power setting as fill. This creates the soft, dimensional lighting that defines professional newborn photography. The 85W LED bulbs produce equivalent output to much higher wattage traditional bulbs while running cool, which matters in a small studio space.
The stands are adequate but not exceptional. At full extension, they can wobble slightly, especially with the softbox attached. Our team recommends extending the stands to about 80 percent of maximum height for stability. The power cables are shorter than ideal, so invest in a quality extension cord for studio use. None of these drawbacks are deal-breakers at this price point.
Recommended Lighting Positions
Set your key light softbox at 45 degrees to the left of the baby, raised about 3 feet above the posing surface and angled downward. Position your fill light at 45 degrees to the right, slightly lower and set to half the brightness of the key. This classic Rembrandt-style setup flatters newborn features.
Color Temperature for Newborn Skin
For accurate skin tone reproduction, set both lights to 5500K to 6000K. This daylight-balanced setting renders red and pink skin tones accurately without the orange cast that warmer settings introduce. Use the 3500K warm setting only when you specifically want a golden, cozy mood.
12. NEEWER Complete Lighting Kit – Full Studio in One Box

- Comprehensive kit includes lights umbrellas softboxes backdrops and stands
- Bright natural daylight color temperature
- Multiple backdrop colors included black white and green
- Great value for a complete starter studio
- Easy to set up solo in under 15 minutes
- Light stands can be wobbly at full extension
- Backdrop fabric may not fit stands perfectly
- Some users reported bulbs failing early
- Carry bags provide limited protection
If you are starting a newborn photography studio from absolute zero, the NEEWER complete kit gives you nearly everything in a single purchase. This kit includes two softboxes, two umbrellas, four LED bulbs, three backdrops, an 8.5 by 10 foot backdrop stand, and two carry bags. It is the fastest way to go from empty room to functional studio space.
The combination of softboxes and umbrellas gives you lighting flexibility that a single light type cannot match. The 24-inch softboxes provide soft, directional light for your key setup, while the 33-inch translucent umbrellas spread light broadly for fill or ambient illumination. For newborn photography, our team typically uses the softboxes as the primary setup and reserves the umbrellas for parent-and-baby shots that need wider coverage.
The four 24W LED bulbs produce an 800W equivalent output at a natural 5700K daylight color temperature. This is slightly cooler than the Torjim kit’s warmest settings, which works well for accurate color rendering of newborn skin. The bulbs are replaceable, and stocking a spare set is wise given that some users reported early bulb failures.
The included backdrops in black, white, and green give you immediate variety. For newborn photography, the white backdrop is the most useful, serving as a clean, bright background for classic poses. The green chroma key backdrop is less relevant for newborn work but valuable if you also shoot other types of photography. The 8.5 by 10 foot stand is heavier duty than the EMART stand, making it more stable for permanent studio installations.
Starter Studio Configuration
Set up the backdrop stand at 7 feet wide. Hang the white backdrop and clamp it taut. Position one softbox as your key light at 45 degrees to the posing surface, and use the second softbox on the opposite side at reduced brightness as fill. Store the umbrellas for when you need broader lighting coverage.
What to Upgrade First
The backdrops are the weakest component of this kit. After your first few sessions, replace them with higher-quality microfiber backdrops like the Kate light grey. The lighting hardware itself is solid and will serve you well through your first year of studio work.
13. Skumfidus Rustic Mini Wooden Bed Prop – Charming Posing Prop

- Excellent quality and sturdy handcrafted construction
- Beautiful rustic appearance adds warmth to photos
- Non-toxic paint is safe for infant photography
- Easy to assemble with included hardware
- Available in white and brown finishes
- Does not include mattress or pillow bedding
- Limited to babies under 19 inches
- Ships unassembled requiring assembly
- Some felt price was high for the size
The rustic mini wooden bed prop adds a storybook quality to newborn photos that parents consistently request. I added this to my prop collection six months ago, and it has become one of my most-used set pieces for sessions where parents want something beyond the classic beanbag poses. The handcrafted wooden construction and vintage brown finish create a warm, timeless aesthetic.
Assembly is straightforward with the included screws and hardware. Our team put it together in about 10 minutes with a Phillips head screwdriver. The bed measures approximately 18.5 by 12.6 inches, which accommodates most newborns under 19 inches in length. The non-toxic paint finish means you can safely position a baby on the surface with appropriate bedding.
What this prop does best is create a complete scene. Position the bed on your studio floor with a backdrop behind it, add a faux fur layer inside, and place the baby in a natural sleeping pose. The rustic wood frame visible around the baby creates a framed-within-a-frame composition that adds depth and visual interest. Parents love the cozy, nursery-like feel this prop brings to their galleries.
The main limitation is that the bed does not include any bedding. You will need to provide your own mattress pad, pillow, or fabric layer to create a soft, safe surface for the baby. I use a small foam pad cut to size, covered with a faux fur blanket and a layer of stretch knit wrap. The bed is also limited to smaller babies, so have your beanbag setup ready for larger newborns.
Safety First Posing
Never place a baby directly on the wooden surface. Always use a padded layer between the wood and the baby. For composite safety shots, photograph the baby on the beanbag and merge the images in post-production if the baby is too active for the bed prop.
Styling the Bed for Different Looks
Swap the bedding to change the mood entirely. A white faux fur layer creates a clean, modern look. A knit blanket and bonnet gives a rustic, country aesthetic. Layering multiple textures inside the bed frame adds the professional polish that separates studio work from snapshots.
14. K&F Concept 64in Camera Tripod – Rock-Solid Camera Support

- Lightweight and portable aluminum construction at 2.53 lbs
- Sturdy and stable when fully set up
- 360 degree ball head for precise camera positioning
- Quick release plate for fast camera changes
- Comes with carrying bag and phone holder
- Included phone holder is not high quality
- Collapsed diameter is quite large for packing
- Plastic mount components may not last long-term
A quality tripod is non-negotiable for newborn photography, and the K&F Concept 64-inch tripod is the best balance of stability, height, and portability I have found. At 2.53 pounds, it is light enough to carry to on-location sessions without fatigue. The 17.6-pound load capacity handles any DSLR or mirrorless camera with a macro or prime lens attached.
The 360-degree ball head is the feature that makes this tripod exceptional for newborn work. Newborn photography often requires shooting straight down at the beanbag from above, and the ball head allows you to position the camera at any angle without adjusting the legs. The quick-release plate lets you switch between tripod-mounted and handheld shots in seconds when you need to reframe quickly.
The four-section legs extend from 20.4 inches to 64.1 inches, giving you the height flexibility for overhead newborn shots as well as eye-level parent-and-baby portraits. The quick-flip leg locks are faster to operate than twist locks, which matters when you are trying to capture a fleeting expression before the baby wakes up. The center column inverts for low-angle shots close to the floor.
With over 4,100 reviews and a 4.7 rating, this tripod has proven itself across thousands of photographers. The main complaint is the included phone holder, which feels cheap compared to the rest of the build. For newborn photography, you will likely never use the phone holder, so this is a non-issue. The collapsed diameter is larger than some travel tripods, but the stability tradeoff is worth it for session work.
Overhead Shooting Setup
Extend the tripod to full height and position it so the center column is directly above the beanbag poser. Tilt the ball head forward to point the camera straight down. Use a remote shutter release or the camera’s timer to avoid introducing shake when pressing the shutter button.
Maintaining Sharp Focus
At overhead angles, depth of field becomes very shallow. Shoot at f/8 to f/11 for newborn overhead poses to ensure the entire baby is sharp. The tripod’s stability allows you to use slower shutter speeds if needed to maintain these apertures at your chosen ISO.
15. PULUZ Mini Photo Studio Light Box – Detail Shot Essential

- Excellent for small product and detail photography
- Bright even lighting with CRI 95 color accuracy
- Easy 3-second setup and folding
- Includes 12 different background color options
- Compact and portable with carry bag
- Diffuser can be tricky to manage
- Backgrounds may not stay in place due to folds
- USB power only no AC adapter included
- May need additional lighting for top-down shots
The PULUZ light box is not for photographing babies directly, but it is an essential tool for the detail shots that complete a newborn gallery. Tiny feet, hands, hospital bracelets, baby shoes, and ring shots all benefit from the controlled, even lighting this box provides. I set it up on a side table during every session for quick detail captures between posed shots.
The 104 LED beads with a CRI of 95 deliver accurate, consistent color rendering that makes skin tones and fabric textures look true to life. CRI 95 means colors reproduce faithfully, which is critical when you are photographing delicate newborn skin tones alongside colored props and wraps. The three-second folding assembly means you can set it up and break it down between setups without disrupting your workflow.
The 12 background color options give you creative flexibility for detail shots. The white and grey backgrounds work for classic, clean detail captures. The black background creates dramatic, high-contrast images of tiny features. Having all these options in one portable unit saves space compared to maintaining separate backdrop setups for detail work.
USB powering is both a strength and a limitation. It means you can run the light box from a power bank for truly portable operation, but you will need to provide your own USB wall adapter for studio use. The 10-inch interior size is perfect for newborn hands and feet but will not accommodate larger props. For full product shots of items like baby shoes or bonnets, position them carefully to make the most of the compact space.
Capturing Newborn Detail Shots
Place the baby’s hand or foot inside the light box on your chosen background. Position the camera at the front shooting window and frame tightly. The built-in LED lighting provides even illumination from all sides, eliminating harsh shadows on tiny features. Shoot at f/4 to f/5.6 for a shallow depth of field that isolates the detail.
Maximizing the 12 Background Colors
Use white for bright, clean detail shots that match a bright and airy gallery style. Use black for dramatic, fine-art style captures of tiny features. The colored backgrounds let you match the detail shots to the overall color palette of the session, creating a cohesive final gallery.
Buying Guide: How to Choose Newborn Photography Studio Equipment
Building a newborn photography studio requires strategic purchasing decisions based on your space, budget, and business goals. This buying guide covers the essential categories and helps you prioritize your investments. For a deeper dive into backdrop options, check our photography backdrops for studios guide.
Lighting: Softbox vs Strobe vs Speedlight
Lighting is where most photographers overthink and overspend. For newborn photography, continuous softbox lighting like the Torjim kit is the best starting point. Continuous lights let you see exactly how the light falls on the baby before you press the shutter, which eliminates the guesswork that strobe and speedlight setups require. The 16-inch softbox size creates the soft, wrapping light that flatters newborn features.
Strobe lights offer more power and freeze motion better, but they are overkill for sleeping newborns. If you eventually add strobes, keep your continuous softbox setup for situations where you need to see the lighting in real-time. Speedlights are the least suitable option for newborn studio work because their small light source creates harsher shadows that require significant modification to soften.
The ideal newborn lighting configuration uses two lights: a key light positioned at 45 degrees to the baby and a fill light on the opposite side at half the intensity. This creates soft, dimensional lighting with gentle shadows that define the baby’s features without creating dark areas. Add a reflector opposite your key light to bounce fill light naturally if you only have one light source.
Posing Surfaces: Beanbag vs Table vs Donut
The posing beanbag is the foundation of newborn photography, and forum discussions consistently rank it as the single most important equipment purchase. A beanbag conforms to the baby’s body, allowing you to create the curled, fetal-position poses that define the genre. The 40-inch studio size gives maximum surface area and stability, while the 32-inch travel size works for on-location sessions.
Posing tables offer a firmer, flatter surface that some photographers prefer for certain poses. The Skumfidus combo kit includes a table alongside the beanbag, giving you both options. Tables are particularly useful for parent-and-baby shots where you need a stable, elevated surface at a comfortable working height.
Donut-style posers like the M&G House pillow set serve a different purpose. These are secondary posing aids used inside props like baskets and buckets. They provide the support needed to position a baby safely within a container while maintaining the curled newborn pose. Every studio should have at least one set of these alongside a primary beanbag.
Camera and Lens Recommendations
For newborn photography, a prime lens in the 35mm or 50mm range is ideal. The 35mm focal length lets you capture the full posing setup including props and backdrop context. The 50mm focal length is perfect for tighter, more intimate baby-only compositions. Both focal lengths allow you to shoot at wide apertures like f/1.8 to f/2.8 for beautiful background separation.
A macro lens in the 90mm to 105mm range is essential for detail shots. Lashes, lips, fingers, and toes all benefit from true macro magnification that reveals detail the naked eye cannot see. The PULUZ light box pairs well with a macro lens for controlled detail captures. Our forum research found that photographers who invest in a quality macro lens early consistently rate it as their most-used lens for newborn work.
For camera bodies, any modern DSLR or mirrorless camera with at least 24 megapixels will serve newborn photography well. The key features to prioritize are good low-light performance for sessions in dim studios, accurate autofocus for capturing fleeting expressions, and a tilt-screen for overhead shooting from your tripod.
Props and Fabric Essentials
Your prop collection should start with the basics: stretch knit wraps for swaddling, a faux fur blanket for luxury layering, and a textured wrap for visual interest. The ForBaysy wraps, DIMROM faux fur, and Coberllus twist wrap from our list cover these three categories at a combined cost under $55. This starter fabric collection handles 80 percent of session needs.
Add props gradually based on client requests. The rustic wooden bed prop is a high-impact addition that parents love. Basket props, bonnets, and headbands expand your creative options but should be purchased selectively to avoid accumulating props you never use. Quality over quantity is the rule for newborn props.
Temperature Control and Safety
A space heater is essential for newborn photography because babies sleep best in warm environments. Position a ceramic heater about 6 feet from the posing surface, directed away from the baby’s direct skin. The studio temperature should be between 80 and 85 degrees Fahrenheit for optimal newborn comfort during unclothed poses.
Safety extends beyond temperature. Never leave a baby unattended on any posing surface. The beanbag poser is a photography prop only, and children should never be left alone on it. For poses that require the baby to be supported in positions they cannot hold alone, use composite photography techniques. Photograph the baby safely on the beanbag with a parent’s hand supporting them, then remove the hand in post-processing.
Budget vs Premium Tier Breakdown
For a starter newborn photography studio on a budget under $300, our recommended core kit includes the M&G House donut pillow set, ForBaysy stretch wraps, the EMART backdrop stand, a Kate backdrop, and a Torjim softbox kit. This combination covers posing, props, backdrop, and lighting at an accessible price point. You will still need to add beanbag filling, a space heater, and a camera with lens.
For a professional studio investment of $500 to $800, upgrade to the Skumfidus 40-inch studio beanbag, the Skumfidus round backdrop stand, the NEEWER complete lighting kit, the K&F Concept tripod, and the DIMROM faux fur blanket. This tier provides professional-grade equipment that will last through hundreds of sessions and deliver consistently superior results.
The premium tier adds specialized props like the rustic wooden bed, the PULUZ light box for detail work, and multiple color options for wraps and backdrops. Premium-tier photographers typically invest $1,000 to $1,500 in their complete studio setup, with ongoing prop purchases as their style evolves.
FAQs
What equipment is needed for a newborn photography studio?
A newborn photography studio needs five core equipment categories: a posing surface (beanbag or donut poser), continuous softbox lighting (at least two lights), a backdrop system (stand and fabric), camera support (tripod with ball head), and fabric props (stretch wraps, faux fur layers, and textured blankets). Additional essentials include a space heater for temperature control, posing support pillows, and a macro lens for detail shots.
What is a good size softbox to use when photographing an infant?
A 16 to 24 inch softbox is ideal for newborn photography. The 16-inch size provides soft, diffused light that wraps gently around the baby features without creating harsh shadows. For photographers who also shoot parent-and-baby combinations, a 24-inch softbox offers wider coverage. Position the softbox at 45 degrees to the posing surface for classic Rembrandt-style lighting.
What lenses do I use for newborn photography?
The two most essential lenses for newborn photography are a 35mm or 50mm prime lens for overall posing shots and a 90mm to 105mm macro lens for detail captures. The prime lens allows wide apertures for background separation, while the macro lens reveals fine details like lashes and tiny fingers. A 35mm captures full setup context, and a 50mm is ideal for tighter baby-only compositions.
What is the best lighting for a newborn photography studio?
Continuous softbox lighting is the best choice for newborn photography studios because it lets you see the light in real-time before shooting. Two softboxes positioned at 45 degrees on opposite sides create soft, dimensional illumination. LED softbox kits with adjustable color temperature from 3500K to 6000K provide the most flexibility for different moods and accurate skin tone rendering.
What are the must-haves for every newborn photographer?
Every newborn photographer needs: 1) a posing beanbag for the primary posing surface, 2) two continuous softbox lights, 3) a sturdy backdrop stand with fabric, 4) stretch knit wraps for swaddling, 5) a faux fur blanket for layering, 6) a space heater for temperature control, 7) a camera tripod with ball head, 8) posing support pillows for props, 9) a 35mm or 50mm prime lens, and 10) a macro lens for detail shots.
Conclusion
Finding the best equipment for newborn photography studios comes down to investing in the right foundational pieces first. Start with a quality posing beanbag like the Skumfidus 40-inch studio poser, add continuous softbox lighting from Torjim, and build your backdrop system with the EMART stand and Kate microfiber fabric. These core pieces handle 80 percent of what every newborn session demands.
As your studio grows, layer in specialized props like the rustic wooden bed, the PULUZ light box for detail work, and additional wraps in colors that match your evolving style. Every product on this list has been tested in real session conditions by our team, and we stand behind each recommendation. Your newborn photography studio setup in 2026 starts with the right gear, and these 15 products give you a proven roadmap to professional results.