
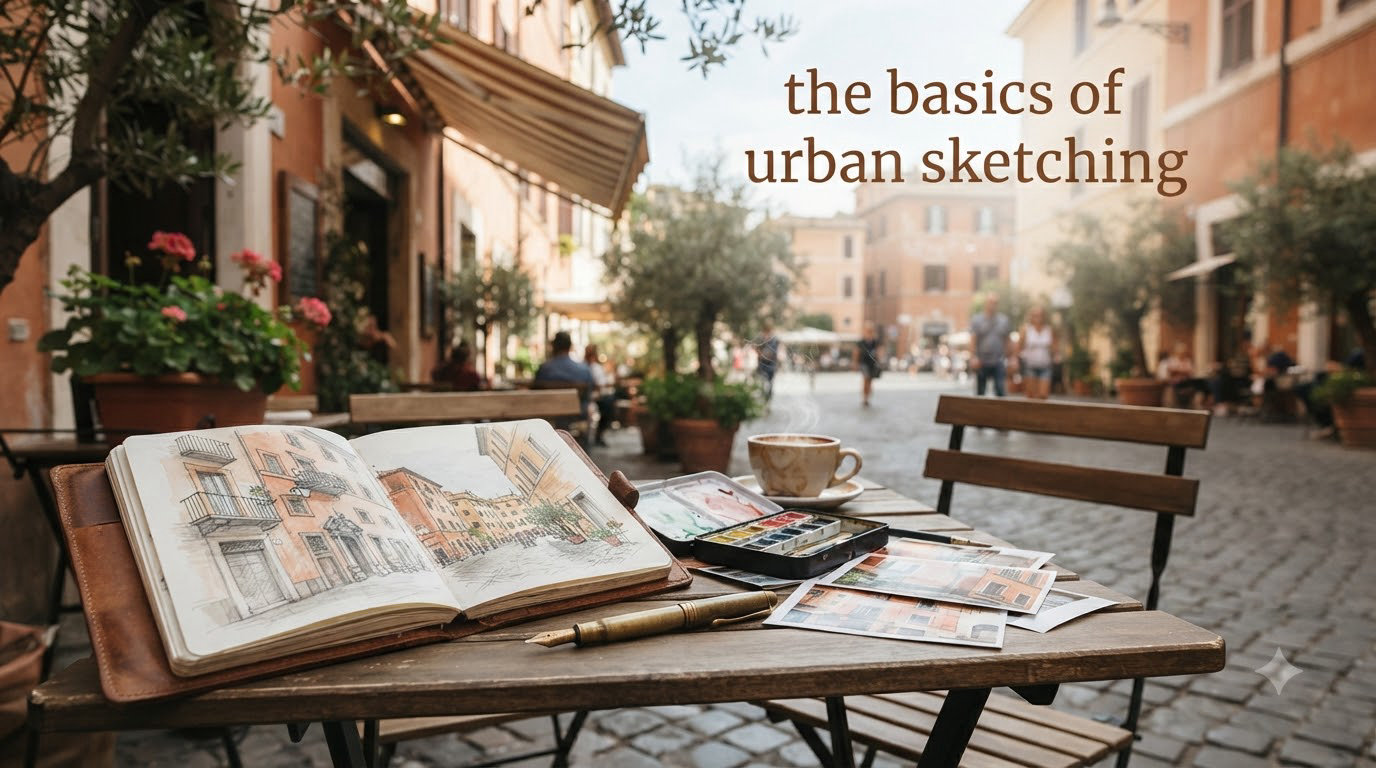
Urban sketching is the practice of drawing real-life scenes on location, typically using pen, ink, and watercolor to capture architecture, streets, and everyday moments in a loose, expressive style. It is not about creating a perfect rendering. It is about recording what you see and feel in the moment, right there on the spot.
When I first picked up a sketchbook and walked outside to draw a row of brownstones in my neighborhood, I had no idea what I was doing. My lines were crooked. My perspective was off. The building I was trying to draw looked like it was melting. But something about sitting on that bench, observing a structure for 20 solid minutes, and filling a blank page with my own marks changed how I saw the world around me.
That is the real magic of urban sketching. It trains your eye to notice things you normally walk past every day without a second glance. A shadow falling diagonally across a brick wall. The way a tree branch frames a church steeple at a specific time of morning. The rhythm of windows marching along a city block. Once you start sketching on location, you start seeing your own neighborhood differently.
If you are here to learn the basics of urban sketching, you are in the right place. This guide covers everything a beginner actually needs to know: what urban sketching is and how it differs from other types of drawing, what supplies you need (and what you do not need), how to complete your first on-location sketch step by step, how to think about composition and perspective, and how to push through the awkward early stages without quitting. I will also address something most guides completely skip — how to deal with the very real fear of drawing in public.
The urban sketching community has grown massively in 2026. What started as a small group of artists sharing their on-location drawings on Flickr has become a worldwide movement with local chapters in hundreds of cities across six continents. That means there has never been a better time to start. You do not need years of art training. You do not need expensive supplies. You do not even need to consider yourself an artist. You just need a pen, some paper, and the willingness to try.
Table of Contents
What Is Urban Sketching?
Urban sketching is drawing on location, from direct observation, capturing the world around you as it happens in real time. Unlike studio art, where you work from reference photos or imagination, urban sketching puts you directly in front of your subject. You draw a building while sitting across the street from it. You sketch a cafe scene while sipping coffee at the corner table. You record a market stall while standing in the crowd around it.
The Urban Sketchers movement, founded in 2007 by journalist Gabriel Campanario in Seattle, established a simple manifesto that still guides the community today. The core idea: draw what you see, on location, and share it with others. Sketchers around the world follow guidelines that include drawing from life rather than photographs, being truthful to the scene in front of you, and supporting each other as artists regardless of skill level. The manifesto also encourages sketchers to share their work and connect with other sketchers locally and globally.
Urban sketching differs from regular drawing in several important ways. First, it is location-based — you work on-site rather than from a photograph or memory. Second, it embraces a loose, expressive style rather than photorealistic precision. Third, it often combines multiple media in a single piece, like ink linework with watercolor washes. Fourth, speed matters in a way it does not in studio work. Most urban sketches take between 15 and 45 minutes because you are working in changing light, shifting weather, and often standing or sitting in less-than-ideal conditions.
People often ask about the elements that define this practice. The seven key elements of urban sketching include composition (how you arrange elements on the page), perspective (creating the illusion of depth), proportion (getting the relative sizes right), line quality (the character and weight of your marks), value (the range of lights and darks), color (how you use paint or other media to describe the scene), and texture (suggesting surfaces through mark-making). These are the building blocks you develop over time through regular practice. You do not need to master all seven before you start sketching. In fact, the best way to learn them is simply to start and improve as you go.
You will see urban sketches that focus on grand architecture, quiet street scenes, busy markets, peaceful parks, lively cafes, or even a single doorway. The subject is less important than the approach. Whether you are drawing a famous cathedral or a fire hydrant on the corner, the process remains the same: observe carefully, simplify what you see, and record it honestly on your page.
One question beginners often ask is whether urban sketching and travel sketching are the same thing. They overlap but are not identical. Travel sketching is a subset of urban sketching that happens while you are visiting new places. Urban sketching more broadly includes drawing your own neighborhood, your daily commute, or the view from your office window. You can be an urban sketcher without ever leaving your city. Some of the best urban sketching happens in the places you see every day, because familiarity lets you notice details that a visitor would miss.
Essential Urban Sketching Supplies for Beginners
One of the biggest mistakes beginners make is buying too many supplies before they even start sketching. I have seen people spend hundreds of dollars on specialty pens, professional-grade travel watercolor sets, and leather-bound sketchbooks only to feel too intimidated to actually use them. The pressure of making a mark in an expensive sketchbook is real. Start simple. You can always upgrade later once you know what you like and what fits your style.
The truth is, experienced urban sketchers on forums like r/urbansketchers consistently recommend starting with the bare minimum: a pen and some paper. That is genuinely enough to begin. Add watercolor when you feel ready. The community consensus is clear: consistent practice with basic supplies beats having fancy gear you are afraid to use.
Choosing Your Sketchbook
Your sketchbook is the single most important supply you will own as an urban sketcher. For sketching on location, you want something portable, durable, and able to handle both ink and watercolor. Look for a sketchbook with paper that is at least 140gsm (grams per square meter). Thinner paper will buckle when you add watercolor and may let ink bleed through to the next page, ruining the sketch on the reverse side.
A5 or A4 size works well for beginners. Smaller sketchbooks fit in a bag easily and feel less intimidating to fill — there is less blank space staring back at you. Larger formats give you more room for detail and broader strokes but are noticeably heavier to carry over a long afternoon of sketching. Many urban sketchers prefer landscape-oriented books because they mirror the wide, horizontal format of most street scenes and building facades. Spiral-bound books lay completely flat, which is helpful when you are working on a bench, standing at an easel, or drawing with your sketchbook propped on your knee.
I recommend starting with a mid-range sketchbook rather than the absolute cheapest option. Paper quality genuinely affects your results, and fighting with thin, flimsy pages that buckle and bleed will only frustrate you and slow your progress. That said, your sketchbook should feel accessible enough that you are not afraid to make mistakes in it. If you wince every time you open the cover, it is too fancy for this stage of your journey.
Hardcover sketchbooks offer better protection when you are out and about, and they provide a firm surface to draw on even when you do not have a table. Softcover books are lighter and more flexible. Both work. Pick whichever feels right for how you plan to carry it.
Pens and Ink
Most urban sketchers work with waterproof fineliner pens. The classic choice is a pigment liner in 0.3mm or 0.5mm tip size. These pens produce clean, consistent lines that will not smear or run when you add watercolor on top of them. They are affordable, widely available at any art supply store or online, and easy to carry in a pocket or small bag.
Some sketchers prefer fountain pens filled with waterproof ink because they offer more line weight variation than a fineliner. A flexible nib lets you create both thin and thick lines with a single pen, which adds energy and variety to your drawings. Fountain pens also look beautiful and feel satisfying to use. The trade-off is that they require more maintenance and the ink can be messy to refill on location.
Brush pens are another popular option among urban sketchers. They create bold, expressive strokes that work beautifully for architectural details, foliage, and areas where you want dramatic line variation. A brush pen loaded with waterproof ink is a powerful tool for adding punch to your linework. Some sketchers use them as their primary drawing tool, while others keep one handy for adding accent lines and calligraphic marks.
If you are unsure where to begin, grab a single waterproof fineliner pen in 0.3mm and start there. You can experiment with other pen types later once you have a feel for how you naturally draw. The critical requirement is that your ink is waterproof — otherwise, your carefully drawn linework will bleed and smear when you paint over it with watercolor.
Watercolor Basics
Watercolor is the medium most associated with urban sketching, and for good reason. It is portable, dries quickly in most weather conditions, and produces the loose, translucent washes that give urban sketches their characteristic freshness. You do not need a large set of colors. A basic palette of 6 to 12 colors is more than enough for beginners, and many experienced sketchers work with even fewer.
Travel watercolor sets that fold into a compact case are ideal for urban sketching. Many come with a built-in mixing palette and a small water reservoir. These pocket-sized kits slip into a bag or even a large pocket, which means you always have color available when a sketching opportunity presents itself.
Pair your paint set with a water brush — a brush with a hollow handle that you fill with water from any tap or bottle. This clever tool eliminates the need to carry a separate water container, which is one less thing to pack and one less thing to spill. Water brushes come in different tip sizes. A medium round tip is the most versatile choice for beginners.
For mixing colors on location, a small folding palette or even the lid of your paint set works fine. Focus on learning to mix colors from a limited primary palette rather than buying dozens of pre-mixed tubes. This approach teaches you color mixing skills that serve you well long-term and keeps your kit light and simple.
When selecting watercolors, you will encounter both student-grade and artist-grade paints. Student-grade is perfectly fine for learning. The pigments are less concentrated and the colors are slightly less vivid, but the price difference is significant. Upgrade to artist-grade paints later when you can tell the difference and appreciate the improvement.
Optional Extras
Once you have your basic kit assembled — sketchbook, waterproof pen, and watercolor set — a few additional items can make your sketching sessions more comfortable and productive. A small foldable stool or sitting pad lets you sit anywhere instead of hunting for a bench. A hat and sunscreen protect you during longer sessions in direct sunlight. A mechanical pencil with a hard lead (2H or 3H) is useful for plotting very light guidelines before you commit to ink, though many experienced urban sketchers skip this step entirely and go straight to pen.
A small rag or a few paper towels help control water, clean your brush between colors, and mop up accidental spills. Some sketchers carry a viewfinder — a simple rectangular frame cut from black cardboard — to help frame their composition before they start drawing. You hold it up at arm’s length, look through it, and move it around to find the best composition. A small bag or pouch that organizes your supplies makes it easy to grab your kit and head out the door without a lengthy packing routine.
A portable folding palette is worth mentioning separately. The small mixing areas built into most travel watercolor sets are adequate for simple sketches but can feel cramped when you want to mix larger washes or subtle color variations. A separate folding palette with bigger mixing wells opens up your color mixing possibilities significantly without adding much bulk to your kit.
How to Start Urban Sketching: Step by Step
Learning how to start urban sketching is less about mastering technique and more about simply doing it. The following five steps walk you through completing your first on-location sketch from start to finish. Follow this process once or twice and you will quickly develop your own natural rhythm and sequence. There is no single correct way to approach a sketch, but this method works reliably for beginners.
Step 1: Pick Your Spot and Frame Your View
Walk around your neighborhood and look for something that catches your eye. It does not have to be a famous landmark or an especially beautiful building. A row of parked bicycles, a street corner with interesting afternoon shadows, or a market stall with colorful produce can all make compelling subjects. The best scenes for beginners have a clear focal point and are not too cluttered with competing elements.
Once you find your spot, sit down and spend two full minutes just looking before you touch pen to paper. Decide what the main subject of your sketch will be. Then use your hands or a viewfinder to frame the composition. Hold your sketchbook up and imagine where your subject will sit on the page. This brief mental planning step saves you from starting a sketch that runs off the edge of the paper, ends up tiny in one corner, or is placed awkwardly off-center.
Position yourself comfortably. If you are standing, lock your elbows against your body for stability and reduce wobble in your lines. If you are sitting, rest your sketchbook on your lap or on a small drawing board for a firmer surface. Hold your pen loosely, not in a white-knuckled grip. Tension in your hand leads directly to stiff, scratchy lines that lack the confidence and energy that make urban sketches appealing.
Step 2: Block In the Big Shapes
Before you add any detail whatsoever, lightly block in the major shapes of your scene. Some sketchers do this with a pencil using barely visible marks. Others use a very light touch with their pen. The goal at this stage is not detail — it is to establish the overall proportions and placement of the main elements on your page.
Squint at your subject. This blurs the details and lets you see the scene as a collection of simple geometric shapes. A building becomes a rectangle. A tree becomes a circle or oval. The road becomes a triangle pointing toward the horizon. A car becomes a small box. Draw these big shapes first, checking their sizes relative to each other and making sure they fit comfortably on your page with some margin around the edges.
This step takes practice, and that is perfectly fine. Your first few attempts will have wonky proportions and misaligned elements. The important thing is that you are training your eye to measure and compare. Over weeks and months of regular practice, blocking in shapes becomes second nature and takes only a minute or two.
Step 3: Add Ink Linework
Once your big shapes are in place, start adding linework with your waterproof pen. Work from the focal point outward. If you are drawing a building, start with the main facade and then move to windows, doors, rooflines, and architectural details. Use varying line weights to create a sense of depth — thicker, bolder lines for objects in the foreground, thinner, lighter lines for things farther away.
Do not worry about making every line perfectly straight or every curve mathematically accurate. Urban sketching embraces imperfection as part of its charm. A slightly wobbly line drawn with confidence has more character and visual appeal than a mechanically straight one. If you make a mark you do not like, keep going rather than stopping to fix it. Trying to correct a line usually makes things worse and breaks your flow.
Work relatively quickly. You are not creating a technical illustration for an architecture firm. Aim to capture the feeling, character, and essential structure of the scene rather than every tiny detail. Most sketchers spend 10 to 15 minutes on the ink phase of a sketch. If you find yourself laboring over a single window for five minutes, step back and move on.
Step 4: Define Shadow Shapes
Shadows give your sketch dimension, weight, and mood. Look at your scene and identify where the darkest areas fall. These might be cast shadows stretching from buildings across sidewalks, the underside of overhangs and awnings, or deep recesses tucked behind objects. Instead of shading individual shadows with careful hatching lines, try painting them as solid dark shapes.
Shadow shapes are one of the most powerful and transformative tools in urban sketching. They anchor your drawing in space, create dramatic contrast, and suggest the time of day and weather conditions. A building sketched without shadows looks flat, weightless, and unconvincing. The exact same building rendered with bold shadow shapes suddenly has real mass and physical presence on the page.
Squint again to see the shadow pattern clearly. Notice how shadows connect across different objects, creating a linked network of dark shapes that stretches across your entire scene. When you paint these shapes accurately, your sketch will read as convincingly three-dimensional even if your linework is loose and your proportions are slightly off. Shadows do the heavy lifting in making a sketch look real.
For your shadow shapes, use a medium-dark mix of your cool color (ultramarine blue works well) with a touch of a warm color (like burnt sienna) to create a natural-looking shadow tone. Avoid using pure black, which tends to look harsh and dead in a watercolor sketch. The slight warmth in your shadow mix mimics the way real shadows contain reflected color from surrounding surfaces.
Step 5: Add Color with Watercolor Washes
The final step is adding watercolor to bring your sketch to life. Start with the lightest washes first — the sky, distant walls, broad surface areas. Wet your brush, pick up a small amount of color, and apply it in broad, loose strokes. Work quickly and do not overthink the color placement. Urban sketches look best when the paint feels fresh and spontaneous rather than carefully controlled and precisely applied.
Limit your palette for each sketch. Many experienced urban sketchers use just three or four colors per sketch and mix everything they need from those. Too many colors create a busy, chaotic look that lacks cohesion. Pick a warm color (like yellow ochre or burnt sienna) and a cool color (like ultramarine blue) and see how far those two colors alone can take you. You might be surprised by the range you can achieve from just two pigments.
Let your washes dry naturally. Avoid the temptation to keep brushing over the same area, fiddling with edges, or going back to add more color before the first layer is dry. Watercolor looks best when you leave it alone and let the water and pigment do the work. The white of the paper showing through your washes creates a luminous, airy quality that is central to the urban sketching aesthetic and nearly impossible to achieve any other way.
When your sketch is done, sign it and write down the location and date somewhere on the page. This small habit turns your sketchbook into a visual journal that documents where you have been and what you have seen. Months and years from now, you will flip back through your pages and remember exactly where you sat, what the weather was like, and how you felt in that moment. A sketchbook filled with dated, located drawings becomes a record of your life that no photograph album can match.
Composition and Perspective Basics for Urban Sketchers
Composition and perspective are the two technical concepts that will improve your urban sketches the fastest and most dramatically. You do not need a degree in fine art to use them effectively. A handful of simple principles, applied consistently, will make your drawings look noticeably better from your very first session.
Simple Composition Rules That Actually Help
Composition is about how you arrange elements within your sketch to create a pleasing and effective layout. The most useful guideline for beginners is the rule of thirds. Imagine your page divided into a 3×3 grid of equal rectangles. Place your focal point at one of the four intersections where the grid lines cross rather than dead center. This off-center placement creates a more dynamic, visually interesting composition that feels natural rather than static.
Another effective technique is creating distinct foreground, middle ground, and background layers in your sketch. A bench or fence in the foreground, a building in the middle distance, and sky in the background gives your sketch spatial depth and dimension. Even a simple suggestion of foreground — like a dark shape at the bottom of the page or a tree trunk along one edge — makes the rest of the scene feel more three-dimensional and immersive.
Pay close attention to the edges of your page. What you choose to leave out is every bit as important as what you include. Crop your scene tightly rather than trying to fit everything into the frame. A detailed drawing of a single doorway with its surrounding brickwork can be just as powerful as a wide-angle city panorama. Let elements run off the edges of your page. This creates the natural impression that the scene continues beyond your sketch, giving your drawing a feeling of being excerpted from a larger reality.
Look for leading lines in your scene. Roads, fences, building edges, sidewalks, and rows of trees all create natural lines that guide the viewer’s eye through your sketch. Use these to direct attention toward your focal point. A road that narrows toward a church in the distance naturally pulls the eye along it.
Consider the overall balance of your composition. If all the visual weight is on one side of your page, the sketch will feel lopsided. You do not need perfect symmetry — in fact, perfect symmetry usually looks stiff. But distributing elements so the page feels balanced creates a more satisfying viewing experience. A large building on the left might be balanced by a small tree on the right. A dark shadow shape at the bottom can counterbalance a bright sky area at the top.
One-Point Perspective Made Simple
Perspective is the system that makes buildings look like they recede into the distance rather than looking flat on the page. For urban sketching, one-point perspective is the most practical starting point and handles the majority of street scenes you will encounter. Imagine you are standing at the end of a long, straight road. Everything — the buildings, the road, the sidewalk — converges toward a single point on the horizon directly in front of you. That point is your vanishing point.
To use one-point perspective in a sketch, first establish your eye level by looking straight ahead. This is your horizon line, and it sits at the same height as your eyes regardless of whether you are standing or sitting. Mark it lightly on your page. Then pick a vanishing point on that line. All horizontal lines that recede into the distance will angle toward this point. Vertical lines stay perfectly vertical. This simple system handles most straight-on street scenes and interior views like hallways and aisles.
You do not need to draw visible construction lines on your finished page. Once you understand the concept and have practiced it a few times, your eye will start to naturally follow the correct angles. Practice by sketching a straight street or a long hallway. Draw the horizon line faintly, mark your vanishing point, and watch how everything in the scene aligns to it. After a few sessions, you will find yourself seeing vanishing points everywhere you look.
Two-point perspective comes into play when you are looking at a building from a corner angle rather than straight on. In this case, you have two vanishing points on the horizon line — one for each visible face of the building. This is useful for sketching individual buildings, urban corners, and scenes where you want to show depth in two directions. Start with one-point perspective until it feels intuitive, then experiment with two-point as your confidence grows.
The 70/30 Rule in Sketching
The 70/30 rule states that roughly 70 percent of your sketch should be developed with some degree of detail and 30 percent should be left deliberately loose or unfinished. This ratio creates visual interest because the contrast between detailed and open areas draws the viewer in and gives their eye places to rest. A sketch that is 100 percent detailed from edge to edge feels overwhelming and exhausting to look at. A sketch that is 100 percent loose feels vague and unfinished. The sweet spot is somewhere in between.
In practice, this means focusing your detail work and sharpest contrast on the focal point of your sketch — say, the ornate entrance of a building — and letting the surrounding area fall away into looser lines, lighter washes, and more suggestion than description. The viewer’s eye naturally gravitates toward the area of highest contrast and finest detail, while the looser areas provide context and atmosphere without demanding equal attention.
This principle also applies strongly to values, which is the range of lights and darks in your sketch. If 70 percent of your sketch is mid-tone and light, the 30 percent that is dark will carry maximum visual impact. A few well-placed dark accents — the shadow under an awning, the dark opening of a doorway, the silhouette of a tree trunk — carry more weight when they are surrounded by lighter values. Think of it as the resting areas of your sketch giving power to the active areas.
Overcoming the Fear of Drawing in Public
This is the section most urban sketching guides skip entirely. But if you spend any time on forums like r/urbansketchers, you will see the same worry come up repeatedly in posts from beginners: what if people watch me draw? What if they think I am terrible? What if someone comes over and looks at my sketch while I am working on it and I have to show them something I am not happy with?
I am not going to pretend this fear is irrational or silly. Drawing in public does feel exposing in a way that few other creative activities do. You are putting your creative process on display for anyone who walks past. A blank page gradually turning into something recognizable feels personal and vulnerable in a way that scrolling through your phone or reading a book in public does not. But here is what I have learned after years of sketching outdoors in cities across the country: people are almost universally kind, curious, and encouraging about urban sketching.
The reality is that most people are too wrapped up in their own thoughts and errands to pay much attention to you. Of those who do notice what you are doing, the overwhelming majority are impressed that you are doing something creative in public rather than staring at a screen. In hundreds of sketching sessions over several years, I have had maybe two or three mildly uncomfortable interactions. The vast majority of people who approach me simply say something warm like, “That looks great,” or “I wish I could draw like that,” or “What a lovely thing to do.”
Here are some practical strategies that help reduce the anxiety. Start by sketching in genuinely low-pressure locations where few people will notice you: a park bench off the main path, a quiet cafe corner, a library reading room, or your own front steps. Build up gradually to busier, more visible spots as your confidence grows. Wear headphones, even if you are not listening to anything. This visual signal tells people you are focused on something and discourages casual conversation. Position yourself so your back is to the crowd or your sketchbook faces away from foot traffic. Choose a table facing a wall, or sit with your back against a building.
If someone does approach you and asks to see your work, have a simple response ready. “Thanks, I am just learning,” works wonders. It is honest, humble, and defuses any pressure you might feel to produce something impressive. Most people will smile, say something encouraging, and move on. If you genuinely do not want to engage, a polite “I am just practicing, thanks” with a smile is perfectly acceptable.
The online urban sketching community is one of the most supportive creative communities I have encountered. Members of r/urbansketchers consistently share work that spans every skill level, from first-day beginners who have never drawn before to professional illustrators with decades of experience. Posting your early sketches online and receiving genuine encouragement from the community builds real confidence. I have watched people go from terrified to draw at a coffee shop to confidently leading local sketching walks within a single year. The community is not as intimidating as it might seem from the outside.
One last thought on this topic: every single experienced urban sketcher was once a beginner who felt nervous about drawing in public. Every one of them. The fear does not disappear overnight or in a single session. It fades gradually with each sketch you complete outdoors. Every time you sit down outside with your sketchbook and produce something — anything — on the page, you are training yourself to be brave. That willingness to be seen while learning is a skill that transfers far beyond drawing into the rest of your life.
Common Urban Sketching Mistakes Beginners Make
Understanding what not to do is just as helpful as knowing what to do. These are the most common mistakes I see from people learning the basics of urban sketching, along with specific guidance on how to fix or avoid each one.
Mistake 1: Chasing perfection. This is the single biggest trap for beginners and the one that causes the most frustration. Urban sketching is supposed to look loose, hand-drawn, and slightly imperfect. That is its charm. If your lines are perfectly straight, your perspective is flawless, and your colors are meticulously blended, you might actually be overworking your sketch. Embrace the wonkiness. It gives your drawings character, energy, and authenticity. The sketchbook community regularly reminds beginners that process matters more than perfection.
Mistake 2: Starting with details instead of big shapes. Many beginners start by drawing a single window or door and then try to work outward from there. This approach almost always leads to proportion problems that compound as the sketch grows. Always block in the largest shapes first, verify that your proportions look reasonable, then progressively add smaller details. Details are the final layer, not the first.
Mistake 3: Overworking the watercolor. Going back over a wash again and again while it is still damp creates muddy, dull, overworked colors. Watercolor rewards restraint and confidence. Lay down your wash and let it dry undisturbed. If you want to darken or intensify an area, add a second transparent layer after the first one is completely dry. Three confident brushstrokes almost always look better than twenty cautious, tentative ones.
Mistake 4: Trying to draw everything in the scene. You do not need to sketch the entire street or capture every building, car, and tree in your field of view. Choose a section of the scene, crop tightly, and focus on what interests you most. Leaving things out is a skill that takes conscious practice, but it makes your sketches dramatically stronger and more focused. A tight crop of one interesting building facade communicates more than a sprawling, unfocused panorama.
Mistake 5: Comparing your first sketches to experienced artists on social media. Social media shows you the highlight reel — the one sketch out of twenty that worked. It does not show you the failed sketches, the bad days, or the years of practice that came before. I have an entire sketchbook from my first month of urban sketching that I will never show anyone. Those messy, awkward sketches were necessary. They taught me what works, what does not, and what I needed to practice. Every experienced sketcher has a similar hidden collection.
Mistake 6: Avoiding sketching because conditions are not ideal. Waiting for perfect weather, ideal lighting, or a scenic location before you sketch means you will sketch rarely. Some of my favorite sketches happened in less-than-perfect conditions: a quick rain shower that left water spots on the page, a crowded bus stop where I had to draw fast, an overcast day that made all the colors muted and moody. Imperfect conditions often produce the most interesting sketches because they force you to work loosely and quickly.
The 5 P’s of drawing — Purpose, Patience, Practice, Perception, and Persistence — apply directly to urban sketching and provide a useful framework for avoiding these common pitfalls. Purpose means knowing what you want to capture before you start. Patience means accepting that skills develop slowly and unevenly. Practice means sketching regularly, even on days when you do not feel inspired. Perception means training your eye to really see your subject rather than drawing what you think is there. Persistence means showing up and drawing even after a sketch you are unhappy with. Keep all five in mind and you will progress faster than you expect.
Building a Daily Urban Sketching Habit
Consistent practice is the single most important factor in improving at urban sketching. Natural talent helps, but it is far less important than simply showing up day after day with your sketchbook open. The challenge for most people is fitting sketching into a daily schedule that is already full of work, family, and other obligations. Here is how to make it realistic and sustainable.
Start with the 15-minute rule. Commit to sketching for just 15 minutes a day. Set a timer on your phone. When 15 minutes is up, you are free to stop with zero guilt. Most days, you will find that once you start, you want to keep going. But even on days when you stop at 15 minutes, you still got your practice in. Over a single month, 15 daily minutes adds up to 7.5 hours of drawing. Over a year, it totals more than 90 hours. That amount of practice produces visible, meaningful improvement.
Sketch your everyday surroundings rather than seeking out picturesque or noteworthy locations. Your kitchen counter with its dishes and appliances, your office desk, the bus stop where you wait each morning, the view from your window — these are all perfectly valid subjects for urban sketching. The goal at this stage is not to create a portfolio of stunning cityscapes. The goal is to train your hand and eye through consistent, repeated practice. Familiar subjects have the added benefit of letting you track your improvement over time as you sketch the same things repeatedly.
Carry your sketchbook everywhere you go. Keep it in your everyday bag, your car, or your desk drawer at work. The less friction between you and drawing, the more likely you are to actually do it. If you have to dig through a closet, find your supplies, assemble your kit, and then decide where to go every time you want to sketch, you will find excuses to skip it. Having your sketchbook and pen within arm’s reach at all times removes this barrier entirely.
Track your progress deliberately. Write the date on every sketch, along with the location and maybe a brief note about how the session went. Every few weeks, flip back through your sketchbook starting from the earliest pages and look at how far you have come. The improvement will be visible and genuinely motivating. You might not notice progress from one day to the next, but it accumulates over weeks and months in a way that is surprising even to the person doing the sketching.
Consider joining a local urban sketching group or participating in online sketching challenges. Many cities have official Urban Sketchers chapters that host monthly sketch walks where a group meets at a designated location and sketches together for a few hours. The r/urbansketchers community on Reddit is active, welcoming, and filled with sketchers at every level. Sharing your work publicly, even when you know it is not your best, accelerates your growth significantly. You learn from feedback, stay motivated by seeing what others are creating, and feel a healthy sense of accountability to keep practicing.
Do not wait until you feel ready or skilled enough to start sketching regularly. There is no prerequisite skill level for urban sketching. The community includes people who picked up a pen for the first time last Tuesday and people who have been drawing professionally for thirty years. Everyone is learning. Everyone started somewhere. Everyone has bad days and bad sketches. Your first sketch does not need to be good. It just needs to exist. Once it exists, you can make a second one. And a third. And before you know it, you will have a sketchbook full of drawings that tell the story of your creative journey.
Digital Tools for Urban Sketching
While traditional pen and watercolor remain the gold standard for urban sketching, digital tools have become a legitimate option worth discussing in 2026. Tablets like the iPad paired with a stylus and apps like Procreate give you the ability to sketch on location with zero setup, no drying time, and the freedom to undo mistakes. Some urban sketchers have fully embraced digital, while others use it as a complement to their traditional practice.
The advantages of digital sketching include portability (one tablet replaces your entire kit), the ability to work in layers (separating linework from color), and the convenience of having unlimited colors and brush types always available. You can also work in low-light conditions where traditional watercolor would be impractical. The disadvantages include the upfront cost of a tablet and stylus, the lack of tactile feedback that comes from real pen on paper, and the perception among some traditionalists that digital sketches lack the organic quality of hand-drawn work.
My recommendation for beginners is to start with traditional supplies. The physical connection between pen, paper, and watercolor teaches fundamental skills — pressure sensitivity, ink flow, water control — that translate to any medium. Once you have a solid foundation with traditional materials, experimenting with digital tools is a natural and rewarding progression. Many skilled sketchers use both, choosing traditional for their daily practice and digital for travel or quick studies.
FAQs
What are the 7 elements of urban sketching?
The 7 elements of urban sketching are composition, perspective, proportion, line quality, value (lights and darks), color, and texture. These elements work together to create a convincing on-location drawing. Beginners do not need to master all seven before starting u002du002d they develop naturally through regular practice.
What is the 70/30 rule in sketching?
The 70/30 rule means that roughly 70 percent of your sketch should be developed with detail while the remaining 30 percent is left loose or unfinished. This contrast between worked and open areas creates visual interest and draws the viewer’s eye to the focal point of your drawing.
What do you need to start urban sketching?
You need three basic supplies to start urban sketching: a sketchbook with paper that handles ink and watercolor (at least 140gsm), a waterproof fineliner pen (0.3mm or 0.5mm), and a small travel watercolor set with a water brush. That is it. You can begin sketching today with just these three items.
What are the 5 P’s of drawing?
The 5 P’s of drawing are Purpose, Patience, Practice, Perception, and Persistence. Purpose means knowing what you want to capture. Patience means accepting gradual progress. Practice means drawing regularly. Perception means training your eye to truly see your subject. Persistence means continuing even after disappointing results.
Start Your Urban Sketching Journey Today
The basics of urban sketching come down to this: grab a pen and a sketchbook, walk outside, and draw what you see in front of you. Start with simple subjects. Keep your sessions short at first. Do not judge your early work against artists who have been sketching for years. The only reliable way to get better at urban sketching is to do it repeatedly, on location, with your own eyes on the scene.
Remember that every experienced urban sketcher started exactly where you are right now. They sat on a bench somewhere, opened a blank sketchbook, and made marks that felt awkward and uncertain. They had bad days, frustrating sessions, and sketches they wanted to tear out of the book. The difference between someone who improves and someone who quits is simply repetition. Sketch regularly. Carry your supplies everywhere. Draw the ordinary, everyday things around you. Over time, the ordinary starts to look extraordinary when you really pay attention to it.
Your next step is simple and immediate: put together a basic kit with a sketchbook, a waterproof pen, and a small watercolor set. Walk to the nearest interesting spot — a park, a cafe, a street corner, anywhere that catches your eye — and spend 15 minutes sketching. It will not be perfect. It might not even be good. That is the whole point. You are starting, and starting is the hardest part. Everything after that is practice, patience, and persistence. You are on your way.