
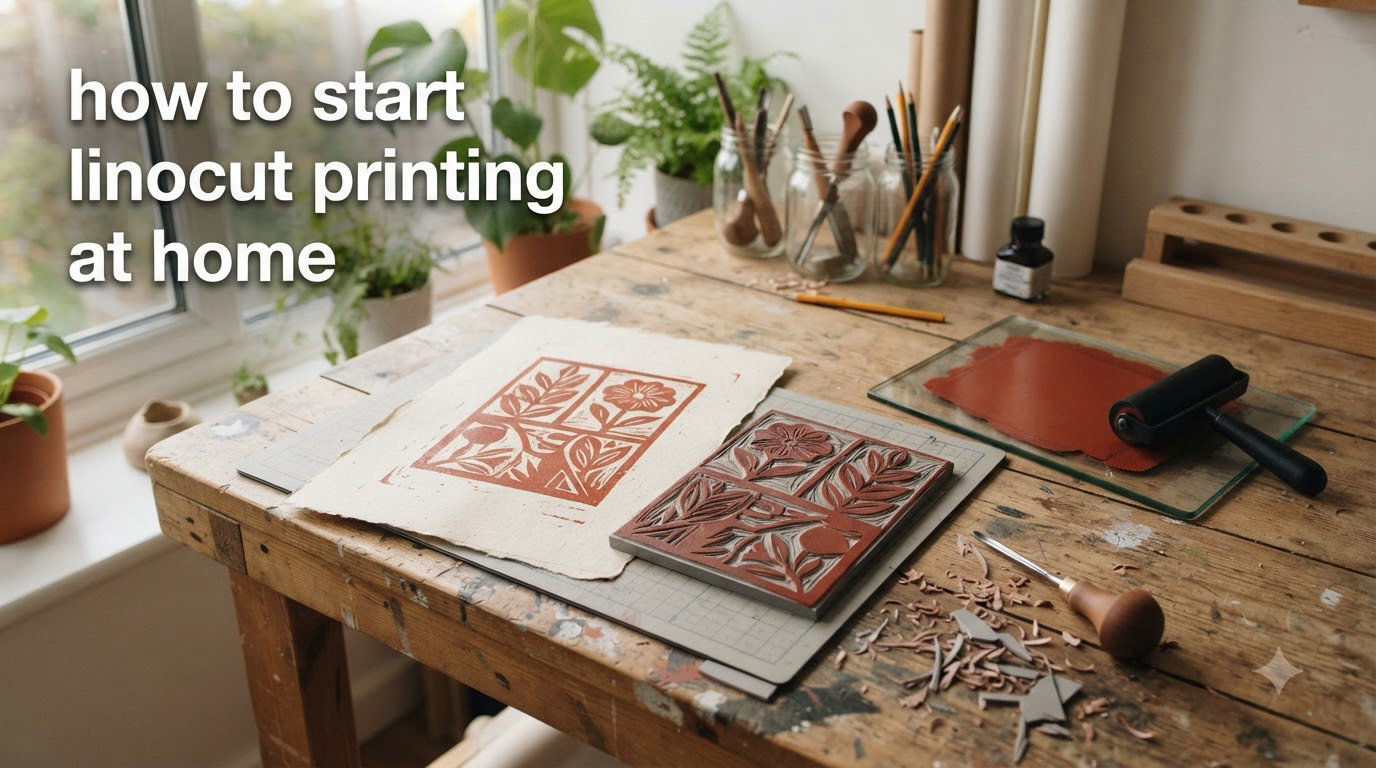
Linocut printing is one of the most approachable printmaking techniques you can learn at home. Unlike other art forms that require expensive equipment or toxic chemicals, linocut lets you create beautiful hand-printed artwork using simple supplies and your kitchen table. If you have been wondering how to start linocut printing at home, you will be pleased to know that getting set up costs under $50 and the learning curve is much gentler than you might expect.
In this guide, I will walk you through everything you need to know to begin your linocut journey. We will cover what linocut actually is, the supplies required, step-by-step carving and printing processes, and some expert tips that took experienced crafters years to discover. By the end, you will have all the knowledge needed to create your first linocut print.
Table of Contents
What is Linocut Printing?
Linocut is a type of relief printmaking where you carve a design into a block of linoleum, then roll ink over the remaining raised surface and transfer that image onto paper. The process is the opposite of what you might expect: you carve away the parts you do not want to print, keeping the areas that will receive ink and show up on your final print. This is why linocut belongs to the relief printing family, along with woodcut and rubber stamp making.
The technique became popular with artists in the early 20th century, particularly during the post-impressionist movement. Artists like Henri Matisse and later printmakers embraced linocut because linoleum is softer and easier to carve than wood, allowing for flowing lines and expressive mark-making that would be difficult to achieve in harder materials. Today, linocut remains a favorite among hobbyists, fine artists, and crafters alike because it delivers professional-quality results without requiring a studio space or specialized equipment.
The beauty of linocut lies in its simplicity. You do not need a printing press, a dedicated workshop, or years of training to get started. All you need is some linoleum, a few carving tools, ink, paper, and a couple of hours of creative time. The technique scales beautifully from simple greeting cards to gallery-quality fine art prints, making it perfect for beginners who want to grow their skills over time.
Types of Linoleum Blocks for Beginners
Not all linoleum blocks are created equal, and choosing the right type will significantly impact your carving experience. Understanding the differences between block types will help you select materials that match your skill level and project goals.
Grey lino is the traditional linoleum used in printmaking studios. It has a harder surface that requires more effort to carve but holds fine details beautifully. This is the material used in art schools and by experienced printmakers. The trade-off is that grey lino can be tough on your hands during extended carving sessions and may crumble if you hit knots or imperfections in the material.
Softcut (sometimes called soft lino) is a foam-backed material that cuts like butter. It is an excellent choice for beginners because it requires minimal pressure, reducing hand fatigue. Softcut works well for bold designs with larger carved areas but can struggle with very fine details. Many crafters use softcut for their first several projects before moving to traditional lino.
Speedy Carve is a brand name for a rubber-based block that carves extremely easily and has a fine grain that holds details better than softcut. It is more expensive than traditional grey lino but many beginners find the improved carving experience worth the extra cost. Speedy Carve is also more durable than softcut and produces cleaner prints.
Japanese vinyl blocks offer a middle ground between traditional lino and craft foam. They carve smoothly, hold fine lines, and produce consistent prints. Japanese vinyl blocks have become increasingly popular among home printmakers because they combine the best qualities of other block types.
Essential Supplies for Linocut at Home
Getting started with linocut printing requires surprisingly few supplies, and most of them are inexpensive. Here is what you will need to gather before your first carving session.
Linoleum blocks come in various sizes and thicknesses. A good starter size is 5×7 inches or 6×8 inches. Purchase at least two blocks so you can practice your carving on one before committing to a final design.
Carving tools are the most important investment you will make. A basic set should include both V-shaped cutters (for fine lines and details) and U-shaped gouges (for removing larger areas of material). Brands like Flexcut make excellent beginner sets that include multiple blade shapes. If your budget allows, Pfeil tools are considered professional grade and will last a lifetime. Forum users consistently report that starting with Flexcut and upgrading to Pfeil later is a smart progression path.
Block printing ink comes in several varieties. Water-based inks clean up easily with soap and water but can be tricky to master because they dry quickly and require more consistent inking technique. Oil-based inks (like Caligo) are preferred by experienced printmakers for home use because they stay workable longer and produce richer colors. Safe-wash inks offer a middle ground, cleaning up with soap but performing more like oil-based inks during printing.
A brayer (also called an ink roller) is essential for rolling out ink evenly on your inking surface before transferring it to the block. Look for a 4-inch or 6-inch rubber brayer with a comfortable handle. Inconsistent inking is one of the most common beginner mistakes, and a quality brayer helps significantly.
Paper for linocut printing should be sturdy enough to withstand burnishing (rubbing) without tearing. Printmaking papers like Somerset or Japanese washi papers work beautifully but can be expensive. Good alternatives include cartridge paper, rice paper, and even heavy sketch paper for practice runs. Experienced printmakers consistently recommend rice papers for their combination of durability and print quality.
Additional supplies include a pencil and eraser for drawing your design, transfer paper or carbon paper for moving your design onto the block, a glass or plexiglas slab for rolling out ink, a spoon or baren for hand printing, and old newspapers or cardboard to protect your work surface.
How to Carve Your Linocut Block
The carving process is where your design comes to life. Taking time to understand each step will help you avoid common mistakes that frustrate beginners.
Step 1: Create and Transfer Your Design
Start by sketching your design on paper. Simple bold shapes work best for your first linocut because they are easier to carve and print cleanly. Think about which parts of your design should be raised (printing) versus cut away (showing as white or background).
Once your sketch is complete, flip it horizontally before transferring. This reverses your design so it prints correctly. Use a pencil to trace over your reversed design, place transfer paper between your drawing and the linoleum block with the graphite side facing down, and firmly trace over all lines. The pressure transfers the graphite to your block.
Alternatively, you can draw directly onto the linoleum using a soft pencil. Some crafters prefer this method because it allows for more spontaneity and adjustment during the transfer process.
Step 2: Prepare Your Workspace
Good lighting is non-negotiable in linocut carving. You need to clearly see the lines you carved and identify any spots you might have missed. Position a bright lamp directly over your workspace and consider using a magnifying lamp if you struggle to see fine details.
Secure your linoleum block to your work surface using clamp, tape, or a non-slip mat. The block should not move while you are carving, or you risk slipping and making unwanted cuts. Keep your carving tools in a container so they do not roll off the table.
Step 3: Carve the Background Areas First
Always carve away the largest areas first, working from the outside in. Use a U-shaped gouge for these background removals. Hold the tool with both hands, blade angled slightly away from you, and push forward with steady pressure. Let the blade do the work; forcing it creates uneven cuts and increases your risk of slipping.
Clear chips frequently by tapping the block or brushing them away. Accumulated debris can obscure your lines and cause you to miss spots that need carving.
Step 4: Carve Fine Details
Switch to V-shaped cutters for fine lines, letters, and detailed areas. These tools require a lighter touch than U-gouges. Carve toward your lines rather than away from them to maintain better control and accuracy.
Take your time during this phase. Rushing leads to slips, over-carving, and mistakes that are difficult (though not impossible) to fix. Forum users recommend using superglue to fill in carving mistakes, but prevention is always preferable.
Step 5: Clean and Inspect Your Block
Once carving is complete, brush away all debris and wipe the block with a slightly damp cloth. Hold your block under good light and examine it carefully. You should see clear raised areas where your design sits and clean-cut channels where you carved away material. Any fuzzy edges or incomplete cuts will show in your print.
Choosing the Right Ink for Linocut at Home
Ink selection dramatically affects your printing experience and final results. Understanding the differences helps you choose the right product for your situation.
Water-based inks are the easiest to clean up and are often marketed as kid-friendly or non-toxic. However, experienced forum users consistently warn that water-based inks are actually harder to print with at home because they dry quickly on the block, requiring fast work and consistent re-inking. They work best for very small editions or single prints.
Oil-based inks (particularly Caligo) receive the strongest recommendations from experienced home printmakers. They stay workable on the block for extended periods, roll out smoothly, and produce rich vibrant prints. The trade-off is that cleanup requires printmaking solvent or baby oil, and you need proper ventilation. However, many crafters print successfully in kitchen spaces with open windows.
Safe-wash inks represent a compromise between the two options. They clean up with soap and water like water-based inks but perform more like oil-based products during printing. They are an excellent choice for beginners who are concerned about working with solvents but want professional-quality results.
Regardless of which ink type you choose, proper consistency is key. Ink should roll out into a smooth even layer on your inking slab with no streaks or patches. If ink seems stringy or uneven, it may be too thick or too old. Most block printing inks remain usable for months when stored in airtight containers.
Printing Without a Press
One of the most appealing aspects of home linocut printing is that you do not need a printing press. Hand printing techniques produce beautiful results and give you greater control over the process.
The Baren Method
A baren is a flat disc with a handle used to burnish (rub) paper against an inked block. Japanese barens feature a bamboo disc on the underside, while Western-style barens often have a smooth plastic or metal surface. Hold the baren at a slight angle and apply firm even pressure using circular or figure-eight motions. Work from the center of the paper outward, covering the entire surface systematically.
The baren method produces consistent results once you develop your technique. Expect to spend 2-5 minutes burnishing each print, depending on block size and your pressure consistency.
The Spoon Method
If you do not have a baren, a sturdy spoon provides an effective alternative. Place a piece of paper over your inked block, then rub firmly with the rounded back of the spoon using the same circular motions you would with a baren. The technique works, though forum users note it requires more effort and can be harder on your hands. Some crafters prefer wooden spoons for the smoother burnishing surface.
Whether using a baren or spoon, consistent pressure is the secret to even ink transfer. Check your progress by gently lifting a corner of the paper to see if the image has fully transferred before burnishing the entire surface.
The Test Print
Always make a test print on scrap paper before your final run. This lets you identify any areas that need additional carving or inking adjustments. A test print might look faint, but use it to map out where you need to apply more pressure during your final burnishing.
When you are satisfied with your test results, print your final edition. Handle each print carefully as it comes off the block, setting it aside to dry flat. Oil-based inks typically need 24-48 hours to fully cure, while water-based inks may dry faster.
Best Paper for Linocut Prints
Paper selection significantly impacts your final print quality. The right paper holds ink well, withstands burnishing, and presents your image beautifully.
Japanese washi papers are widely considered the gold standard for linocut printing. They are strong despite their thin appearance, absorb ink evenly, and produce crisp clean prints with excellent detail. Japanese papers like Sekishu and Unryu are favorites among serious printmakers but represent a significant investment for beginners.
Rice papers (often labeled as Chinese or Japanese rice paper) offer many of the same benefits at a lower price point. They work exceptionally well for linocut and are frequently recommended in forum discussions as the best balance of quality and affordability.
Cartridge paper is a heavy drawing paper that works well for practice prints and larger editions where cost is a concern. Look for papers in the 80lb to 100lb weight range for best results. Lighter papers tear easily during burnishing, while very heavy papers may not transfer ink evenly.
Printmaking papers from companies like Legion, Fabriano, and Arches are specifically designed for printmaking techniques. These papers produce professional results but come with professional-level prices. They are worth exploring if you plan to create editions or sell your prints.
Regardless of which paper you choose, dampening it slightly before printing can improve ink transfer and reduce paper tearing. Some printmakers spray their paper lightly with water or place it between damp towels for a few minutes before printing. Experiment to find what works best with your specific supplies and environment.
Troubleshooting Common Problems
Every beginner encounters challenges with their first linocuts. Knowing how to identify and fix common problems will save you frustration and help you improve faster.
Uneven ink coverage shows up as patchy areas in your print where ink appears too light or missing entirely. This usually stems from inconsistent inking technique. Practice rolling ink in multiple directions on your slab until you achieve a completely even layer. Apply the same technique when rolling ink onto your block, checking that all raised surfaces are covered uniformly.
Paper tearing during burnishing happens when the paper is too dry, too thin, or when you are applying too much localized pressure. Try dampening your paper slightly before printing, switch to a heavier paper stock, or reduce your pressure and increase the number of burnishing passes instead.
Design rubbing off during carving occurs when your transfer lines are too light to see clearly or when you are carving in multiple sessions and lose track of your original design. Redraw faded lines with pencil, and consider photographing your block after each session so you have a reference for where you left off.
Crumbling linoleum creates rough ragged edges instead of clean carved lines. This typically happens with older grey lino that has dried out or with lower-quality materials. There is no fix for this issue; replace your block with fresher material. Softcut and Speedy Carve are less prone to crumbling than traditional grey lino.
Faint or incomplete prints result from insufficient pressure during burnishing, ink that has dried on the block, or paper that is too thick for effective transfer. Apply more pressure with your baren or spoon, work faster to keep ink wet, or try thinner paper for better results.
Tips for Linocut Beginners
Experienced crafters who have been carving linocuts for years share these insights that took them time to discover on their own.
Invest in better carving tools than you think you need. Cheap tools are frustrating to use, require constant sharpening, and produce inferior results. A solid set of Flexcut tools will serve you well for your first year of printing, and you can upgrade to Pfeil tools as your skills develop and you know you will stick with the craft.
Good lighting transforms your carving accuracy. Position a bright adjustable lamp directly over your workspace and angle it to highlight the grooves you are creating. Shadows in carved areas should contrast clearly with raised surfaces so you can easily spot missed spots.
Start with simple designs featuring bold shapes rather than intricate details. Complex designs look impressive but require advanced carving skills that take years to develop. Completing a few simpler projects builds your confidence and technique before you attempt challenging subjects.
Print more copies than you think you need. Multiple prints let you experiment with different paper types, ink colors, and burnishing pressure without committing to a single result. Some prints may become gifts, while others serve as references for future projects.
Join online communities like Reddit’s r/printmaking and r/Linocuts to see how other crafters solve problems and share their work. The collective knowledge in these communities accelerates your learning and provides inspiration when you feel stuck.
Keep your carved blocks as references even after printing your edition. You can re-ink and print additional copies later, and you have a physical record of your progress as a printmaker.
FAQs
What supplies do I need to start linocut printing at home?
You need linoleum blocks, carving tools (V-gouge and U-gouge), block printing ink, a braylor (ink roller), printmaking paper, a pencil, transfer paper, and a baren or spoon for burnishing. A basic starter set costs under $50.
How do you make a linocut print step by step?
First, draw and transfer your design onto the linoleum block. Carve away the areas you do not want to print using V-cutters for details and U-gouges for larger areas. Ink your block by rolling out ink evenly on a slab, then roll it onto the raised surface. Place paper over the block and burnish with a baren or spoon. Lift the paper to reveal your print.
Can you do linocut printing without a press?
Yes, you can print linocuts completely by hand using a baren or spoon to burnish paper against an inked block. This technique works well and is how most home printmakers create their work. It requires no expensive equipment.
What is the best ink for linocut printing at home?
Oil-based inks like Caligo are recommended by experienced printmakers for home use because they stay workable longer and produce richer colors. Safe-wash inks are a good alternative that cleans up with soap but performs like oil-based inks. Water-based inks are easier to clean but dry quickly and can be harder to master.
How do you transfer a design to linoleum for carving?
Draw your design on paper and flip it horizontally (reverse it) before transferring. Place transfer paper or carbon paper between your drawing and the linoleum block with the graphite side facing down. Trace over all lines firmly with a pencil to transfer the design. Alternatively, draw directly onto the linoleum using a soft pencil.
Start Your Linocut Journey Today
Linocut printing offers a uniquely satisfying way to create hand-printed artwork from the comfort of your home. The technique rewards patience and practice, with each print you make building your skills and confidence. Starting costs are minimal, the supplies are widely available, and the creative possibilities are virtually endless.
You do not need artistic training or natural talent to create beautiful linocut prints. The process is learnable by anyone willing to invest a few hours of creative time. Your first prints will not look like they belong in a gallery, but they will be genuine linocuts that you carved and printed yourself. That hands-on satisfaction only grows as your technique improves.
Set up a small workspace, gather your supplies, and commit to completing at least one print this week. Start with a simple design, expect to make mistakes, and treat each one as a learning opportunity. Before you know it, you will have a stack of hand-printed creations and the foundation for a lifelong printmaking practice.