
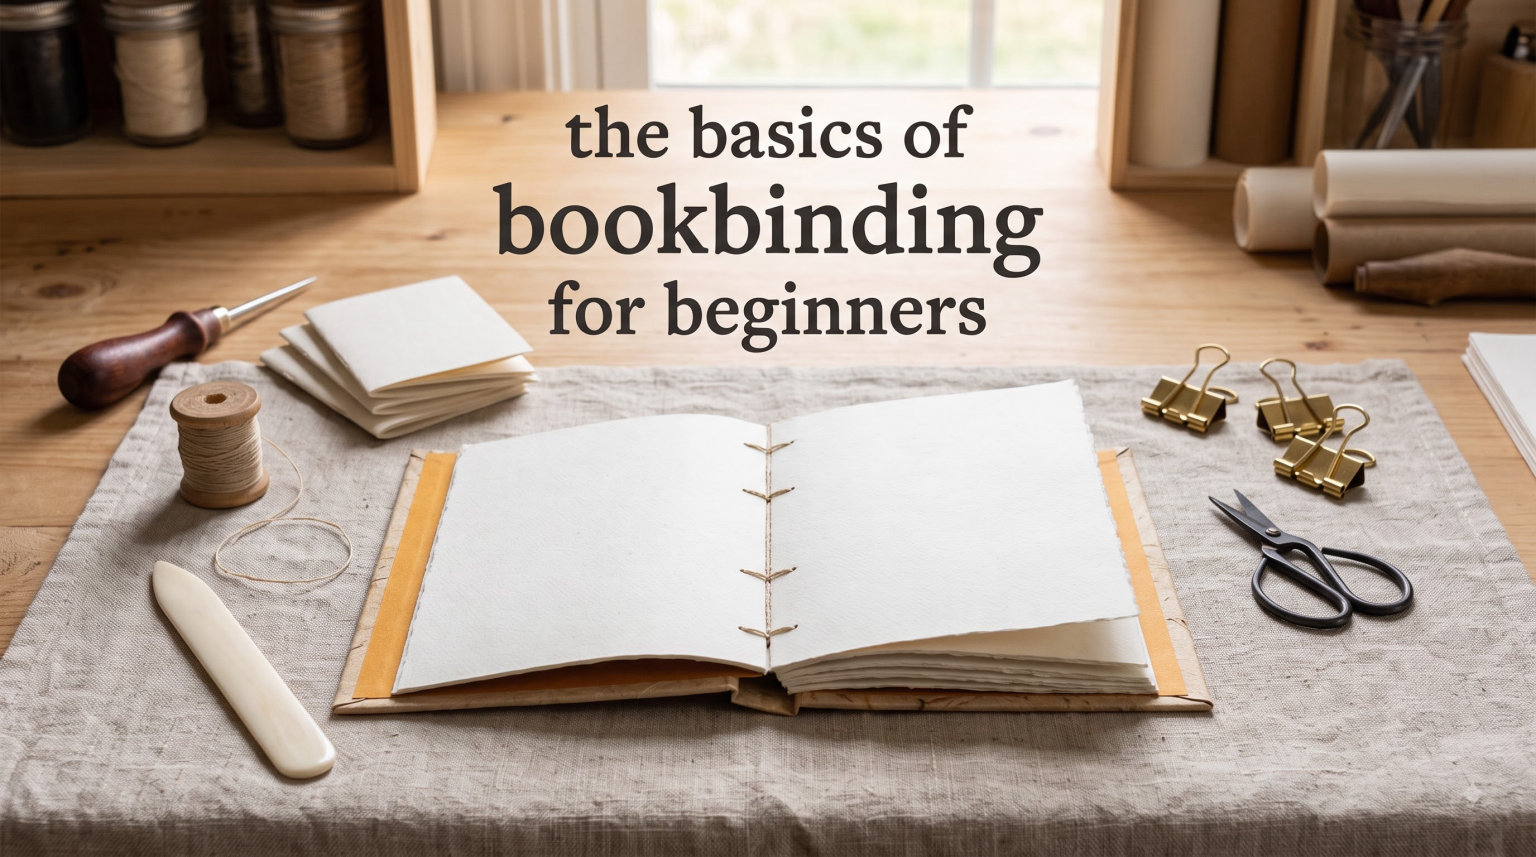
If you have ever held a handmade journal and thought about making one yourself, you are in the right place. Bookbinding for beginners is far more approachable than most people realize. You do not need formal training, expensive equipment, or years of practice to create your first hand-bound book. In fact, members of online bookbinding communities consistently share stories of starting with nothing more than paper, thread, and a needle. I put together this guide to walk you through everything you need to know: the tools, the materials, the methods, and a complete first project you can finish in a single afternoon.
The beauty of DIY bookbinding lies in how customizable it is. You choose the paper, the cover design, the binding style, and the size. Whether you want a pocket-sized sketchbook, a personalized gift for a friend, or a leather-bound journal that looks like it came from a medieval scriptorium, the fundamentals stay the same. This guide focuses on the basics so you can build confidence without feeling overwhelmed.
By the end of this article, you will understand the core bookbinding techniques, know exactly which tools and materials to get, and have step-by-step instructions for completing your very first project. Let us get started.
Table of Contents
What Is Bookbinding?
Bookbinding is the craft of assembling individual pages of paper into a single, durable volume using thread, glue, or other fastening methods. At its core, the process involves folding paper into groups called signatures, securing those signatures together along one edge to form a text block, and then attaching a protective cover. People have practiced variations of this craft for thousands of years, evolving from clay tablets and scrolls to the codex-style books we recognize today.
The history of bookbinding stretches back to ancient civilizations. Coptic Christians in Egypt developed one of the earliest sewn binding methods around the 2nd century, and their technique is still taught to beginners today. Throughout the Middle Ages, monks hand-copied and bound religious texts, often adding ornate leather covers with gold tooling. The invention of the printing press in the 15th century transformed bookbinding from an exclusively monastic practice into a widespread trade.
Modern bookbinding serves both practical and artistic purposes. Artists create hand-bound sketchbooks and journals that reflect their personal style. Writers print and bind small editions of their own work. Crafters make personalized photo albums, guest books, and planners. The rise of online communities and video tutorials has made beginner bookbinding more accessible than ever. Far from being a dying craft, bookbinding has experienced a genuine revival among makers, artists, and hobbyists around the world.
You might wonder whether bookbinding is something you can pick up casually on a weekend. The answer is a definite yes. The simplest binding methods require only a few sheets of paper, some thread, and about 30 minutes of your time. From there, you can gradually work your way up to more complex techniques at your own pace.
Essential Tools for Bookbinding
One of the most common concerns I see in beginner forums is worry about needing a long list of specialized tools. The truth is, you can start with surprisingly few items. Many experienced bookbinders recommend buying tools gradually as you discover which techniques you enjoy most. Here is what you actually need to get started.
The Must-Have Tools
Bone folder: This is a smooth, flat tool used to crease paper cleanly along a fold line. A real bone folder works best, but the back of a spoon or a credit card can serve as a stand-in when you are just testing the waters. The key advantage of a proper bone folder is that it will not scratch or mark your paper the way improvised tools sometimes can.
Awl: An awl is a pointed tool used to punch small holes through paper for sewing. You can find inexpensive ones at craft stores or online. A pushpin or a thick needle works as a temporary substitute for thin pamphlets, but an awl gives you more control and cleaner holes when you start binding thicker books.
Needle: Bookbinding needles typically have rounded tips and large eyes to accommodate thicker thread. That said, any sewing needle with an eye large enough for your thread will work for your first few projects. Tapestry needles size 18 or 20 are a popular and affordable choice among beginners.
Ruler: A metal ruler at least 12 inches long helps you measure paper and mark hole positions accurately. Metal is preferable to plastic because it will not get nicked by your cutting tool.
Utility knife or craft knife: You need something sharp to trim paper and cover materials. A standard craft knife with replaceable blades works well. Some bookbinders prefer a tear bar for separating paper along its natural grain, but a knife is more versatile for beginners.
Nice-to-Have Tools
Once you have completed a few projects and decide you want to keep going, consider adding these tools to your kit:
C-clamp or book press: Helps hold your text block tightly while the glue dries. You can stack heavy books on top as a free alternative.
Cutting mat: Protects your work surface and extends the life of your blade. A self-healing cutting mat is a worthwhile investment if you plan to make books regularly.
Pencil and eraser: For marking fold lines and hole positions. A mechanical pencil with a fine tip gives you the most precision.
Waste paper or scrap paper: Always useful for protecting your work surface from glue and for practicing folds before you use your good paper.
Budget-Friendly Tool Alternatives
If cost is a concern, know that many bookbinding beginners start with items already sitting in their junk drawer. The Reddit bookbinding community frequently shares how they began with household items before committing to proper tools. A butter knife can substitute for a bone folder in a pinch. A pushpin works for punching holes in thin booklets. Regular sewing thread can stand in for linen thread on practice projects. The important thing is to start creating and upgrade your tools as your interest and skills grow.
Basic Materials You Will Need
Tools help you do the work, but materials are what your book is actually made of. Choosing the right paper, thread, glue, and cover material makes a noticeable difference in how your finished book looks and holds up over time.
Paper Selection
The paper you choose depends on what your book will be used for. Standard printer paper (20 lb or 75 gsm) works fine for practice projects and small booklets. For journals and sketchbooks, look for heavier paper in the 70 to 120 gsm range. Watercolor paper, kraft paper, and text-weight decorative papers all make excellent choices depending on your project.
One concept worth understanding early is grain direction. Paper has fibers that run in a particular direction, and folding along the grain produces cleaner, more durable creases. You can test grain direction by gently bending the paper in both directions. The direction that offers less resistance is the grain direction. For bookbinding, you generally want the grain of your pages to run parallel to the spine.
Thread
Waxed linen thread is the gold standard for sewn bindings. The wax coating helps the thread grip itself, keeps knots secure, and glides through paper without tearing. Linen thread is strong, durable, and comes in a range of colors. If waxed linen thread is not available, you can wax plain linen thread yourself by running it over a block of beeswax a few times.
For practice projects, regular cotton sewing thread or embroidery floss can work. Be aware that cotton thread is weaker than linen and may break under tension with heavier books. Dental floss is another surprisingly effective substitute that beginners have used successfully.
Glue
PVA glue (polyvinyl acetate) is the adhesive most bookbinders reach for. It dries clear, remains flexible, and creates a strong bond between paper and cover materials. PVA is sometimes sold as bookbinding glue, white craft glue, or woodworking glue. You can find it at craft stores and online retailers.
A common question beginners ask is whether Elmer’s school glue works for bookbinding. The short answer is that it can work for simple, non-permanent projects, but it is not ideal. School glue is thinner than PVA, takes longer to dry, and can make pages wrinkle if applied too heavily. If you want a book that lasts, invest in proper PVA glue. It costs about the same as school glue and performs significantly better for this purpose.
Apply glue with a small brush or a piece of stiff cardboard. A little goes a long way. Too much glue causes warping, extends drying time, and makes a mess. You can always add more, but removing excess glue from paper is difficult.
Cover Materials
Your cover protects the pages and gives your book its personality. For beginners, chip board, heavy cardstock, and even repurposed cereal boxes work well as cover bases. You can wrap these rigid bases in decorative paper, fabric, canvas, or even leather scraps for a more polished look.
If you want to keep things simple for your first project, a single sheet of heavy cardstock folded around your pages makes a perfectly serviceable softcover. You can always move on to hardcovers with chip board and decorative wrapping once you feel comfortable with the basic sewing techniques.
Beginner-Friendly Bookbinding Methods Compared
There are dozens of bookbinding techniques practiced around the world, but a handful of them are especially well-suited for beginners. Each method has its own strengths, visual style, and level of difficulty. Here is a comparison of the four I recommend for anyone just starting out.
1. Pamphlet Binding
Pamphlet binding is the simplest method available and the one I recommend for your very first project. It involves folding a small stack of pages in half and sewing through the center fold with a single length of thread. The entire process takes about 15 to 30 minutes once you understand the steps.
Pros: Extremely fast, requires minimal tools, great for small booklets and zines, easy to learn in a single sitting.
Cons: Limited to relatively thin books, not as durable as multi-signature bindings, basic appearance.
2. Japanese Stab Binding
Japanese stab binding creates beautiful, decorative patterns on the spine using visible stitching. Instead of sewing through folded signatures, you stack loose pages and sew through holes punched along one edge. Traditional patterns include the four-hole binding (yotsumetoji), the noble binding (kikkotoji), and the tortoise shell pattern.
Pros: Visually striking, works with loose sheets of paper, no folding required, forgiving of minor alignment errors.
Cons: Books do not lay completely flat when open, paper can tear at the holes if not punched cleanly, uses more thread than other methods.
3. French Link Stitch
The French link stitch is a multi-signature binding where you sew groups of folded pages together using a pattern that creates visible loops across the spine. It produces an elegant, traditional look and teaches you the fundamental skill of sewing multiple signatures, which applies to many advanced techniques.
Pros: Attractive visible stitching, lays relatively flat, introduces multi-signature sewing, good for medium-thickness books.
Cons: Slightly more complex than pamphlet binding, requires consistent hole spacing, takes practice to keep tension even.
4. Coptic Binding
Coptic binding uses a chain stitch to connect signatures and attach the cover simultaneously. The resulting book opens completely flat, making it a favorite for journals and sketchbooks. This method traces its roots back to early Christian communities in Egypt and remains one of the most popular techniques among modern bookbinders.
Pros: Opens 360 degrees, no glue required for the binding itself, creates a beautiful chain-stitched spine, excellent for journals.
Cons: More complex than the other three methods, requires careful attention to stitch tension, cover must be prepared before sewing.
If you want my recommendation for where to start: begin with pamphlet binding to learn the basic mechanics of folding, punching, and sewing. Then try Japanese stab binding to practice decorative stitching. From there, you will have the foundation to move into French link and Coptic binding with confidence.
The Basics of Bookbinding for Beginners: Step-by-Step First Project
Now it is time to put theory into practice. This walkthrough guides you through a complete pamphlet stitch binding, which is the easiest way to bind a book for beginners. You will end up with a small, handmade booklet you can use as a journal, a sketchbook, or a gift.
What You Will Need
5 sheets of paper (standard printer paper or any paper of your choice)
1 sheet of heavier paper or cardstock for the cover
Waxed linen thread or cotton embroidery floss (about 2 feet)
1 needle with an eye large enough for your thread
An awl or pushpin
A ruler
A bone folder or the back of a spoon
A pencil
Step 1: Fold Your Pages
Take each sheet of paper and fold it in half individually. Run your bone folder (or spoon) firmly along the crease to create a sharp, flat fold. Folding each sheet separately, rather than folding the entire stack at once, produces cleaner creases and prevents the pages from buckling.
Once all five sheets are folded, nest them inside each other to form a single signature. In bookbinding terms, a signature is a group of folded pages that are sewn together as one unit. Your signature now has 10 leaves or 20 pages when you count front and back.
Step 2: Prepare the Cover
Take your cardstock sheet and fold it in half the same way you folded the pages. This will serve as your softcover. Place your folded signature inside the cover to make sure it fits snugly. The cover should be slightly larger than the pages, extending about a quarter inch on all sides except the fold.
If your cover paper is the same size as your page paper, you may need to trim the pages down slightly so they sit inside the cover with a small margin. Use your ruler and craft knife for clean, straight cuts.
Step 3: Mark the Sewing Holes
Open your signature flat so the center fold faces up. Using your ruler and pencil, mark three evenly spaced points along the fold line. For a standard letter-size booklet, place one mark at the exact center of the fold, and the other two marks about one inch from the top and bottom edges.
These marks are where you will punch holes and sew through. Three holes are enough for a pamphlet stitch. You can use five holes for larger booklets, but three keeps things simple for your first attempt.
Step 4: Punch the Holes
With your signature still open flat, use your awl or pushpin to punch through each pencil mark. Press straight down through all layers of the signature and the cover at the same time. This ensures that the holes align perfectly when you start sewing.
If you are using a pushpin, rotate it slightly as you push through to widen the hole. The hole should be large enough for your needle to pass through without forcing it. Forcing the needle can tear the paper or shift the alignment of your pages.
Step 5: Thread Your Needle
Cut about 2 feet of thread. Thread your needle and tie a knot at the other end of the thread. The knot should be large enough that it will not pull through the hole you punched. If your knot slips through, tie a second knot on top of the first one.
Some bookbinders prefer to use a loop of thread without a knot, starting and ending by tying the thread to itself. Either approach works for pamphlet binding. Using a knot is simpler for your first project.
Step 6: Sew the Pamphlet Stitch
Here is the sewing pattern for a three-hole pamphlet stitch:
First pass: Starting from the inside of the signature at the center hole, push the needle outward through the middle hole. Pull the thread all the way through until the knot rests against the inside of the fold.
Second pass: From the outside, push the needle back inward through the top hole. Pull the thread snug but do not overtighten, as too much tension can tear the paper.
Third pass: From the inside again, push the needle outward through the bottom hole. Pull through with even tension.
Final pass: From the outside, push the needle back inward through the center hole. Your thread should now have created a figure-eight pattern along the spine. You should see two parallel lines of thread running along the outside of the spine between the top and bottom holes.
Tie off the thread by looping it around one of the spine threads and pulling it tight. Repeat to create a secure knot. Trim the excess thread, leaving about a quarter inch tail. Your first pamphlet binding is now complete.
Step 7: Finish and Admire Your Work
Open your booklet and check that all the pages turn freely. The spine should feel secure but flexible. If any pages feel loose, you can tighten the binding by gently pulling the knot tighter or adding a drop of PVA glue to the spine thread for extra hold.
Take a moment to appreciate what you just made. You transformed loose sheets of paper into a functional, hand-bound booklet using skills that humans have refined over centuries. That first finished book is always special, no matter how simple the technique.
Troubleshooting Common Beginner Mistakes
Mistakes are part of learning any craft, and bookbinding is no exception. Here are the most common issues beginners run into and how to fix or prevent them.
Torn or Wrinkled Paper
Paper tears most often when holes are too small or when you pull the thread too hard. Always make your holes slightly larger than your needle. If paper wrinkles after gluing, you used too much adhesive. Use a thin, even coat of glue and press the glued pages under heavy books while they dry to keep everything flat.
Uneven Holes and Misaligned Pages
Crooked holes cause the binding to pull at an angle, which makes the book open unevenly. The fix is simple: measure carefully before punching. Use your ruler to ensure the marks along the fold are perfectly straight and evenly spaced. Punch through all layers at once rather than one sheet at a time to keep holes aligned.
Loose or Sagging Binding
If your book feels loose or the pages shift around, the thread tension was too low during sewing. Each time you pass the needle through a hole, pull the thread taut before making the next pass. You want consistent, firm tension throughout the sewing process. Not so tight that you tear the paper, but not so loose that the pages wobble.
Glue Problems
Using too much glue is the single most common adhesive mistake. Excess glue seeps between pages, sticks pages together unintentionally, and warps the paper. Always apply a thin coat. You can always add a second thin layer if the first is not enough. If glue gets somewhere it should not be, wipe it away immediately with a damp cloth before it dries.
Cover Alignment Issues
Crooked covers usually happen when the cover is not aligned with the text block before gluing. Take your time positioning the cover. Measure twice, glue once. If you are making a hardcover, dry-fit all the pieces together before applying any adhesive. This lets you catch alignment problems early when they are still easy to correct.
Tips for Getting Better at Bookbinding
Like any hands-on skill, bookbinding gets easier and more satisfying the more you practice. Here are the strategies that helped me and countless other beginners improve quickly.
Practice With Scrap Paper First
Before you cut into your nice paper or expensive cover material, do a test run with scrap paper or printer paper you do not care about. Practicing the fold, punch, and sew sequence on disposable material removes the pressure of ruining something valuable. Once you feel comfortable with the process, switch to your chosen materials with confidence.
Watch Video Tutorials
Reading about bookbinding is helpful, but watching someone do it makes a huge difference. YouTube is full of excellent bookbinding tutorials ranging from absolute beginner to advanced. Search for specific techniques like “pamphlet stitch tutorial” or “coptic binding for beginners” and follow along at your own speed. Pause, rewind, and rewatch as many times as you need. The bookbinding community on YouTube is generous with detailed, patient instruction.
Join Online Communities
The Reddit community at r/bookbinding is one of the most welcoming craft groups I have encountered. Beginners post their first projects and receive encouragement and constructive feedback. Experienced bookbinders share tips, troubleshoot problems, and recommend resources. Other great communities exist on Instagram and dedicated craft forums. Connecting with other bookbinders keeps you motivated and exposes you to new ideas and techniques.
Master One Method Before Moving On
It is tempting to jump straight into complex bindings after finishing your first pamphlet. Resist that urge. Take time to make several pamphlet bindings until the process feels natural. Then move to Japanese stab binding and do a few of those. Building a solid foundation with simple techniques makes learning advanced methods much smoother. Every complex binding is built from the same fundamental skills you learn with these beginner methods.
Save Money on Supplies
Bookbinding does not have to be expensive. Many beginners start with materials they already have at home. Printer paper, cereal boxes, sewing thread, and school glue can carry you through your first several practice projects. When you are ready to invest in better materials, buy in small quantities from craft stores rather than ordering large bulk lots online. This lets you try different types of paper and thread without committing to a big purchase.
FAQs
Is bookbinding a dying craft?
No. Bookbinding has experienced a genuine revival in recent years thanks to online communities, video tutorials, and the maker movement. Artists, hobbyists, and crafters around the world practice hand bookbinding as both a creative outlet and a practical skill. Social media platforms and forums like r/bookbinding have thousands of active members sharing their work and helping newcomers get started.
How many hours does bookbinding take?
A simple pamphlet binding takes 15 to 30 minutes. A multi-signature binding with a hardcover typically takes 2 to 4 hours, often spread across two sessions to allow glue to dry. Complex bindings with decorative elements, leather covers, or hand-sewn endbands can take 8 to 20 hours or more. The time depends entirely on the complexity of the project and your level of experience.
Does Elmer’s glue work for bookbinding?
Elmer’s school glue can work for simple, non-permanent practice projects, but it is not recommended for bookbinding you want to last. School glue is thinner than PVA bookbinding adhesive, takes longer to dry, and can cause paper to wrinkle. PVA glue performs significantly better, costs about the same, and is widely available at craft and hardware stores.
What is the easiest way to bind a book?
The easiest way to bind a book is the pamphlet stitch. Fold a stack of pages in half, punch three holes along the fold, and sew through the holes in a figure-eight pattern. It requires only paper, a needle, thread, and an awl or pushpin. Most beginners complete their first pamphlet binding in under 30 minutes.
Can a beginner casually get into book binding?
Absolutely. Bookbinding is one of the most accessible crafts for casual hobbyists. You can start with household items like printer paper, a sewing needle, and embroidery floss. The simplest binding methods take less than 30 minutes to learn. Many experienced bookbinders started as complete beginners who just wanted to make a single handmade journal. No formal training is required.
What tools should a beginner get for bookbinding?
Start with five basics: a bone folder for clean creases, an awl or pushpin for punching holes, a needle with a large eye, a metal ruler, and a craft knife. Add waxed linen thread and PVA glue for adhesive-based projects. You can find all of these at craft stores for a modest total cost. Many of these items have household substitutes if you want to try before buying.
Conclusion
Bookbinding for beginners does not have to be intimidating or expensive. You now have a complete understanding of the essential tools, the materials that matter, and four beginner-friendly binding methods to explore. You also have detailed, step-by-step instructions for completing your first pamphlet stitch project this afternoon. The most important step is simply starting. Grab some paper, fold it, punch a few holes, and sew. Your first handmade book is waiting to be created. Once you finish that first project, you will understand why so many people around the world have fallen in love with this craft.
1 thought on “The Basics of Bookbinding for Beginners (October 2026) Complete Guide”