
Mixing skin tones that look alive and natural is one of the biggest challenges painters face. I spent my first year of portrait painting creating figures that looked either sunburned, sickly, or like plastic dolls. The problem was not my brushwork or my drawing. It was my color mixing.
After studying with professional portrait artists and testing every method I could find, I discovered a simple framework that works. This guide will show you how to mix skin tones in oil and acrylic that look realistic and full of life. You will learn the base formula that works for every skin type, how to adjust for warmth and coolness, and how to avoid the muddy and chalky colors that ruin so many portraits.
Whether you work in oils, acrylics, or both, these principles apply. The pigments are the same. Only the working time and techniques differ.
Table of Contents
Why Mixing Skin Tones Is Difficult
Skin is deceptively complex. At first glance, it looks like one color. Look closer at any portrait subject and you will see skin contains every color family. There are reds in the cheeks and ears. Yellows appear in the forehead and highlights. Blues and purples live in the shadows around the eyes and under the jaw. Greens sometimes appear near the temples.
The difficulty comes from two factors working together. First, skin tone changes dramatically based on light source. A face under warm afternoon sun looks completely different from the same face under cool fluorescent light. Second, every person has unique undertones. Some skin leans pink. Other skin leans golden or olive.
Most beginners try to mix one “flesh color” and apply it everywhere. This approach always fails. Realistic skin requires a family of related colors that shift between warm and cool, light and dark.
How to Mix Skin Tones: The Foundation Method
The key to mixing realistic skin tones is starting with the right base formula. I teach my students this simple rhyme: “Red, yellow, brown, and white – that is how you mix skin tones right.” These four colors create the foundation for every skin tone you will ever paint.
Here is the exact process I use to mix a versatile base flesh tone.
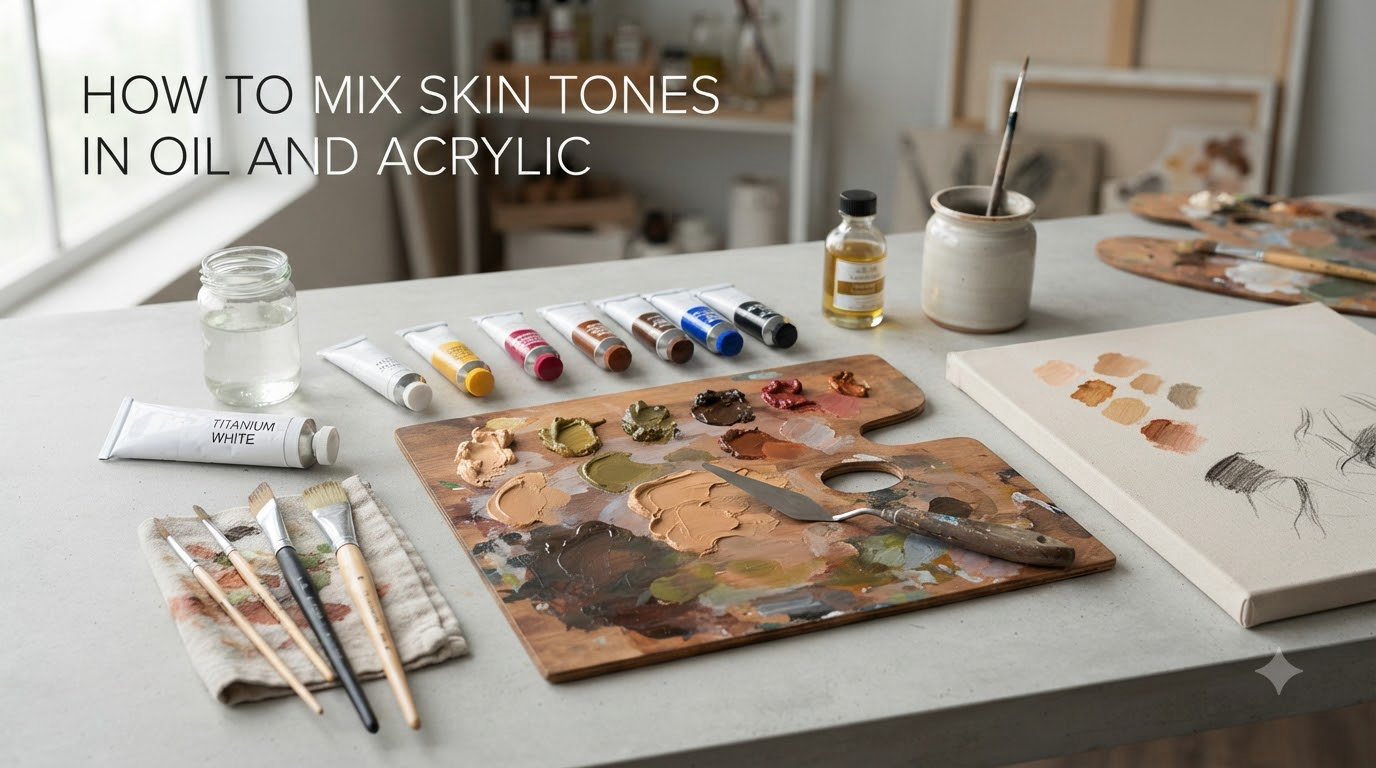
Step 1: Gather Your Essential Palette
You need four primary colors plus a few “nudge colors” for fine adjustments.
Core Colors:
- Cadmium Red Medium (or any warm red) – provides the blood tones
- Yellow Ochre – provides the earth tones without being too bright
- Burnt Umber – provides the neutral depth
- Titanium White – provides the highlights and lightens the mix
Nudge Colors for Adjustments:
- Cadmium Yellow Light – for warming up tones
- Alizarin Crimson – for cooling down reds and adding transparency
- Phthalo Blue – for cooling and shadow mixing
- Raw Umber – for cooler darks
You can mix skin tones with fewer colors, but this palette gives you maximum control. The investment pays off in every portrait you paint.
Step 2: Create Your Base Mixture
Start by squeezing equal amounts of cadmium red, yellow ochre, and burnt umber onto your palette. Add a larger amount of titanium white – roughly equal to the other three colors combined. Mix these four colors together thoroughly.
The result should be a medium peach or tan color. This is your starting point. From here, you will adjust for your specific subject.
Pro tip: Mix a large batch of your base tone. Paint a swatch on scrap canvas and let it dry. This becomes your reference as you create lighter and darker variations.
Step 3: Adjust for Individual Skin Types
Once you have your base tone, analyze your subject. Is their skin lighter or darker than your base? Warmer or cooler? Adjust accordingly.
For lighter skin: Add more titanium white to your base. Be careful not to add too much, or you will create that chalky, washed-out look.
For darker skin: Add more burnt umber and less white. Some dark skin tones benefit from adding a touch of raw umber for coolness.
For warm undertones: Add more yellow ochre or a touch of cadmium yellow.
For cool undertones: Add a tiny amount of phthalo blue or alizarin crimson.
Controlling Color Temperature
Temperature control separates amateur skin tones from professional ones. Warmth and coolness are relative. A color that looks warm next to one color might look cool next to another. The key is understanding your base and knowing which direction to push it.
I think of color temperature like a clock face on the color wheel. Yellow is at 12 o’clock. Red is at 4 o’clock. Blue is at 8 o’clock. To warm a color, move clockwise toward yellow and red. To cool a color, move counter-clockwise toward blue and purple.
When to Warm Your Mix
Add warmth to skin tones that appear in direct sunlight, near warm light sources like candles or incandescent bulbs, or on areas with lots of blood flow like cheeks, ears, nose, and fingertips. Warmth also helps recede areas come forward visually.
To warm a skin tone, add small amounts of cadmium yellow or yellow ochre. For a more subtle warmth, try cadmium red. Add these nudge colors in tiny increments. It is easy to overshoot and end up with orange skin.
When to Cool Your Mix
Add coolness to skin tones in shadow, under cool light like overcast skies or fluorescent tubes, or on areas where blood flow is reduced like the underside of the jaw or the hollows of the eyes. Cool tones help push areas back in space.
To cool a skin tone, add the tiniest amount of phthalo blue. I mean tiny. A speck on the end of your brush can cool a large pile of paint. You can also use alizarin crimson, which cools while maintaining transparency.
Avoid using black to cool skin tones. It kills the life in your color. If you need to darken and cool simultaneously, mix phthalo blue with burnt umber. This creates a rich, natural dark that keeps skin looking alive.
Controlling Value: Light and Shadow
Value refers to how light or dark a color is. Skin has a huge value range from bright highlights on the forehead and nose to deep shadows in the eye sockets and under the chin. Getting this range right is essential for three-dimensional form.
The biggest mistake I see is artists reaching for black paint to create shadows. Do not do this. Straight black mixed into skin tones creates a muddy, dirty look that reads as gray rather than shadow. The same applies to premixed dark browns that contain black.
Creating Natural Shadow Colors
Instead of black, mix your own dark using phthalo blue and burnt umber. This combination creates a deep, rich dark that harmonizes with skin tones. Add this dark to your base skin tone in small amounts to create shadow colors.
Another approach is to add the complement of your local skin color. For warm skin tones, add a tiny amount of blue or green to the shadow areas. This optical mixing creates depth without muddiness.
Using White with Restraint
Just as black causes problems in shadows, overusing white causes problems in highlights. Too much titanium white makes skin look chalky and opaque. The color loses its warmth and vibrancy.
When lightening skin tones, add white gradually. Stop before you think you have added enough. You can always add more, but you cannot take it out. Consider using flake white or mixing white instead of titanium white for highlights. These whites are less opaque and maintain more color character.
Create a value scale for your subject. Mix five versions of your base skin tone: two lighter versions for highlights, your base tone, and two darker versions for shadows. Having these premixed keeps your values consistent throughout the painting.
Oil vs Acrylic: Key Differences for Skin Tones
The principles of color mixing apply equally to oil and acrylic. The pigments are identical. What changes is how you work with the paint.
Oil Painting Skin Tone Tips
Oil paint stays wet for hours or days, depending on your medium. This extended open time lets you blend colors directly on the canvas. You can place a warm highlight next to a cool shadow and softly blend them together while both are wet.
Work fat over lean when building skin tones in oils. Start with thin, lean layers for your underpainting. Add medium-rich paint for subsequent layers. This prevents cracking and ensures proper adhesion.
Glazing works beautifully in oils for skin. After your underlying layers are dry, apply thin transparent glazes of color to shift temperature. A glaze of alizarin crimson warms the cheeks. A glaze of phthalo blue cools the shadows under the jaw.
Oil colors do not shift as they dry. What you see on your palette is what you get on the canvas, assuming you account for the gloss of wet paint versus the matte of dry paint.
Acrylic Painting Skin Tone Tips
Acrylic paint dries within minutes. This rapid drying time means you must work quickly for wet-into-wet blending. Many acrylic painters use a stay-wet palette or mist their work with water to extend working time.
The biggest challenge with acrylic skin tones is color shift. Acrylic paint dries darker than it appears when wet. Mix your colors slightly lighter than you think you need them. As the water evaporates, the color will settle to the correct value.
Glazing in acrylic requires patience. Each layer must be completely dry before adding the next. Use acrylic glazing medium to create transparent layers. Build skin tones gradually with multiple thin glazes rather than trying to get the perfect color in one layer.
Many acrylic portrait painters work in an indirect method. Block in large shapes first with simple color. Once dry, add details and refine temperatures with subsequent layers. This approach plays to acrylic’s strengths.
For alla prima (wet-into-wet) acrylic painting, keep a spray bottle handy. Mist your palette and canvas to keep paint workable. Work in small sections that you can complete before the paint skins over.
Fixing Muddy and Chalky Skin Tones
Even experienced painters occasionally create muddy or chalky skin tones. Understanding why these problems occur helps you prevent and fix them.
What Causes Muddy Colors
Muddy skin tones happen when you mix complementary colors together in equal amounts. Red and green, blue and orange, yellow and purple – these pairs neutralize each other into brownish grays. In skin tone mixing, this usually happens when you add too much blue to warm skin, or too much orange to cool skin.
Another cause is over-mixing on the canvas. When you scrub colors together aggressively, they blend into a neutral gray-brown. This destroys the clean color relationships that make skin look alive.
Fix: Start fresh with a new base mix. Use less of the offending nudge color. Keep warm and cool areas separate on your palette until the final application. Place colors side by side on the canvas and let optical mixing do the work.
What Causes Chalky Colors
Chalky skin tones come from too much white. Titanium white is very strong and opaque. It overpowers the warm pigments in your skin mix. The result looks like sunscreen or porcelain rather than living flesh.
Chalkiness also happens when you add white to darken colors instead of using proper dark pigments. This creates a washed-out, pastel version of your color with no depth.
Fix: Add white sparingly. Consider using zinc white or mixing white instead of titanium white for lighter passages. These whites are less overpowering. For darkening, use burnt umber or your blue-brown mix, never black.
How to Rescue a Bad Mix
Sometimes a skin tone mix goes wrong despite your best efforts. When this happens, do not keep adding more colors hoping to fix it. This usually makes things worse.
Scrape off the offending paint and start fresh. Mix a new base tone. It takes less time to remix than to struggle with bad color. Keep your palette clean. Wipe off muddy or chalky residues before they contaminate fresh mixes.
Practical Skin Tone Recipes
Here are three starting recipes to get you going. Adjust these based on your specific subject and lighting conditions.
Light Skin Base Recipe
- 1 part cadmium red
- 1 part yellow ochre
- 1/2 part burnt umber
- 3 parts titanium white
For warmth, add cadmium yellow. For coolness, add raw umber or a speck of phthalo blue.
Medium Skin Base Recipe
- 1 part cadmium red
- 1 part yellow ochre
- 1 part burnt umber
- 1 part titanium white
This creates a versatile peach-tan that works for many subjects. Adjust the brown up or down for darker or lighter variations.
Dark Skin Base Recipe
- 1 part cadmium red
- 1 part yellow ochre
- 2 parts burnt umber
- 1/2 part titanium white
For very dark skin, eliminate white entirely from the base and add it only for the lightest highlights. Consider using raw umber for cooler undertones.
Frequently Asked Questions
How to mix skin tones with oil?
Start with equal parts cadmium red, yellow ochre, and burnt umber. Add titanium white equal to the combined amount of the other three colors. Mix thoroughly to create your base flesh tone. Oil paint’s slow drying time lets you blend colors directly on the canvas. Work fat over lean when layering. Use glazes of alizarin crimson for warmth and phthalo blue for coolness in shadows.
How to mix skin tone colors in acrylic?
Mix your base using cadmium red, yellow ochre, burnt umber, and titanium white in equal parts for the first three with extra white. Remember that acrylic dries darker than it appears wet, so mix slightly lighter than your target color. Work quickly or use a stay-wet palette. Let each layer dry completely before glazing. Use acrylic glazing medium for transparent temperature adjustments.
What colors to use to mix skin tones?
You need four core colors: cadmium red (warm red), yellow ochre (earth yellow), burnt umber (dark brown), and titanium white. These create your base flesh tone. For adjustments, keep nudge colors handy: cadmium yellow (warming), alizarin crimson (cooling), phthalo blue (shadows and cooling), and raw umber (cool darks).
What are common mistakes when mixing skin tones?
The three most common mistakes are: adding black to shadows (creates mud), adding too much white to lights (creates chalkiness), and mixing complements in equal amounts (neutralizes color). Other errors include using one flesh color everywhere instead of a family of tones, and failing to account for how acrylic darkens as it dries.
Conclusion
Learning how to mix skin tones in oil and acrylic takes practice, but the framework is simple. Start with red, yellow, brown, and white. Adjust for temperature using your nudge colors. Control value by mixing your own darks and using white with restraint.
Paint is forgiving. Bad mixes can be scraped off or painted over. Each portrait teaches you something new about color. The key is to keep painting, keep observing, and trust the process.
Grab your paints and try the base formula right now. Mix a small pile of flesh tone, then create three lighter and three darker variations. You are on your way to painting skin that breathes.