
If you have ever looked at your pencil drawing and felt like something was missing, the answer is almost always shading. Learning how to shade with a pencil for beginners is the single skill that transforms flat, lifeless sketches into drawings that look three-dimensional and real. I remember my own early attempts at shading. They were patchy, too dark in some spots, and completely missing in others. That frustration is universal among new artists.
The good news is that pencil shading is not some mysterious talent you either have or do not have. It is a learnable skill built on a handful of techniques, a basic understanding of how light works, and consistent practice. You do not need expensive supplies or years of training to start seeing real improvement.
In this guide, I will walk you through everything you need to know about pencil shading as a beginner. We will cover pencil grades, essential shading techniques, how to find your light source, a step-by-step shading process, common mistakes to avoid, and practice exercises that actually build your skills. By the end, you will have a clear roadmap for shading that you can apply to any drawing.
Table of Contents
What Is Pencil Shading and Why Does It Matter?
Pencil shading is the process of using graphite pencil strokes to create different values of light and dark on paper. These values simulate how light falls on an object, creating the illusion of form, depth, and volume in a flat drawing. Without shading, a circle stays a circle. With shading, that same circle becomes a sphere.
Shading matters because it is what makes a drawing look real. When you look at any object around you right now, you will notice that it is not one flat color. The side facing the light is brighter, the side facing away is darker, and there are subtle gradients in between. Your brain uses these tonal differences to understand the three-dimensional shape of everything you see. Pencil shading recreates those tonal differences on paper.
Many beginners jump straight into drawing complex subjects without understanding value, and that is exactly why their drawings look flat. Shading is not an optional finishing touch. It is the foundation of realistic drawing. Once you understand how to control light and dark with your pencil, every subject you draw will look dramatically better.
Understanding Pencil Grades for Shading
Not all pencils are created equal when it comes to shading. Pencils are rated on a scale from hard (H) to soft (B), and this grade determines how much graphite the pencil deposits on paper. Understanding this scale is one of the first things that helped me improve my shading results.
The H side of the scale produces lighter, harder marks. An H pencil leaves a fine, pale line that is great for initial sketches and very light shading. A 2H is even harder and lighter. These pencils are useful for underdrawings, but they are not your go-to for rich, dark shading.
The B side is where the magic happens for shading. A standard HB pencil sits right in the middle and is fine for general sketching. But when you move to 2B, 4B, 6B, and 8B pencils, the graphite gets softer and darker. A 2B is excellent for mid-tone shading. A 4B or 6B gives you rich darks without having to press hard. An 8B can produce deep, velvety blacks that are impossible to achieve with an HB.
For beginners, I recommend starting with just three or four pencils: an HB for sketching and light shading, a 2B for mid-tones, a 4B for darker values, and optionally a 6B for your deepest shadows. You do not need a full 12-pencil set to begin shading effectively. Three to four tones of dark is sufficient when you are starting out.
Pencil sharpness also plays a big role. A sharply pointed pencil gives you precise lines and works well for hatching and detail work. A dulled or rounded pencil tip covers more area and produces softer, broader marks that are ideal for smooth shading over large areas.
How to Shade with a Pencil for Beginners: Essential Techniques
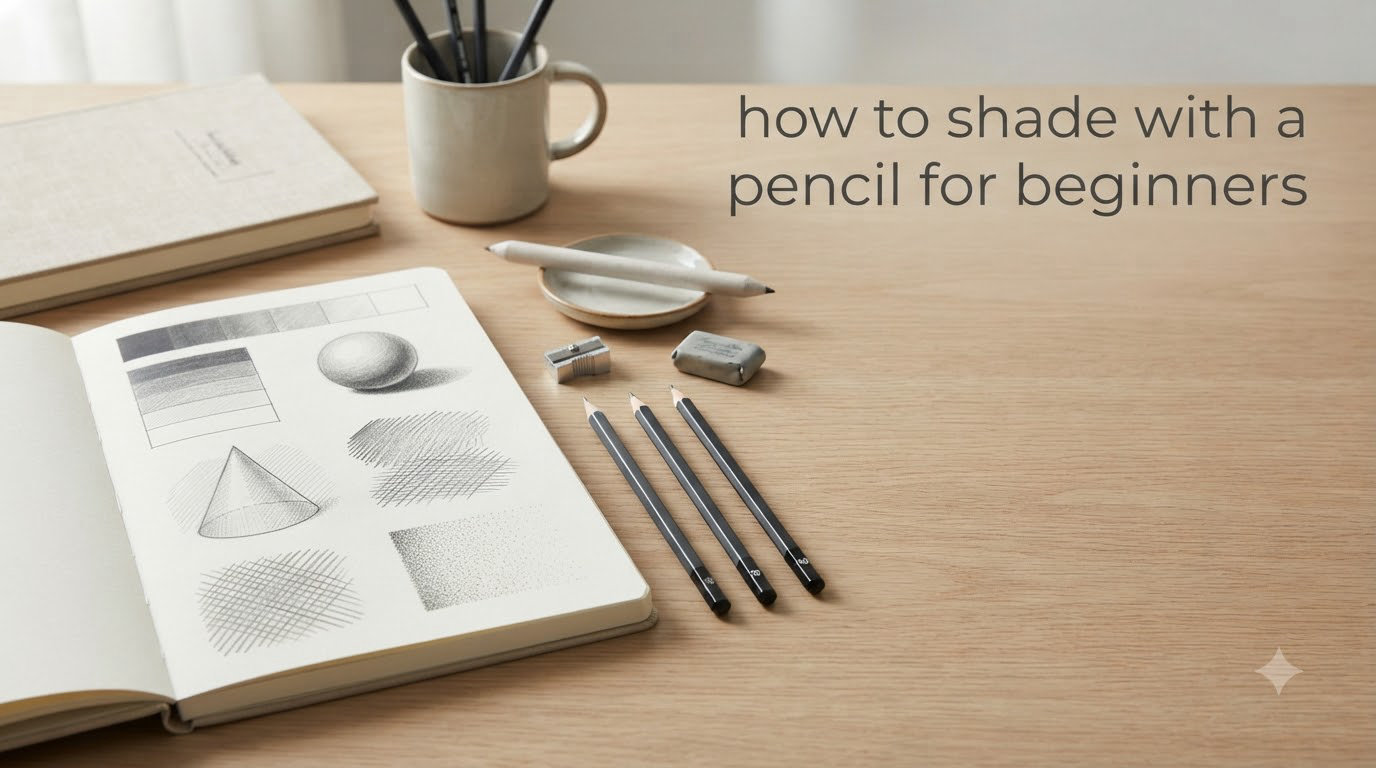
There are six core pencil shading techniques that every beginner should learn. Each one creates a different texture and visual effect, so knowing when to use each technique gives you enormous control over how your drawings look. Let me break them all down.
Hatching
Hatching is the most fundamental shading technique. You draw a series of parallel lines spaced close together to create a shaded area. The closer the lines, the darker the value appears. The angle and direction of your lines can follow the contour of the object you are shading, which helps reinforce its three-dimensional form.
Hatching works well for quick sketches and for areas where you want visible line texture. It is also the fastest shading technique, making it ideal when you want to establish value relationships quickly before committing to detailed rendering.
Cross-Hatching
Cross-hatching builds on hatching by adding a second set of lines that cross over the first set at an angle. This layered approach lets you build up darker values without needing softer pencils. More layers of crossed lines mean darker areas. Fewer layers mean lighter areas.
This technique gives you precise control over value transitions. It is especially popular in pen and ink drawing, but it works beautifully with graphite pencils too. Cross-hatching creates a distinctive textured look that many artists prefer over smooth, blended shading.
Stippling
Stippling uses tiny dots instead of lines to build up value. You create dark areas by placing dots close together and lighter areas by spacing them farther apart. This technique requires patience, but it produces a unique granular texture that looks distinctly different from line-based methods.
Stippling is excellent for adding texture to rough surfaces like stone, bark, or fabric. I would not recommend it for large smooth areas because it takes a very long time, but as a supplementary technique for adding detail, it is incredibly useful.
Blending
Blending is the technique most beginners think of when they hear pencil shading. After laying down graphite on paper, you use a tool or your finger to smooth out the pencil marks, creating soft, seamless gradients. Blending stumps, tortillions, tissue paper, and even cotton swabs all work for this.
Blending produces smooth, realistic-looking shading that is great for skin tones, smooth objects, and atmospheric effects. The key to good blending is starting with enough graphite on the paper. If you try to blend an area that is too lightly shaded, you will just smudge the paper grain without achieving a smooth result.
Contour Shading
Contour shading follows the three-dimensional surface of the object you are drawing. Instead of parallel lines going in one direction, your pencil strokes curve and wrap around the form. This technique naturally describes the volume of an object because the lines themselves communicate its shape.
Contour shading is one of the most effective techniques for making objects look truly three-dimensional. When you shade a sphere using curved strokes that follow its surface, your brain instantly reads it as round. This technique pairs beautifully with blending for a polished, realistic result.
Scumbling and Circling
Scumbling involves drawing small, overlapping circular or scribbly marks to build up value gradually. The overlapping marks create an even tone that does not have the directional quality of hatching. Circling is similar but uses more organized, overlapping circular motions.
Both techniques are excellent for creating smooth, even shading without obvious line direction. Many experienced artists use circling as their primary shading method because it produces consistent tones that blend easily. For beginners, it is a forgiving technique because small mistakes get hidden by the overlapping marks.
Finding and Using Your Light Source
Every shading decision you make depends on one thing: where the light is coming from. The light source determines where your highlights go, where shadows fall, and how dark those shadows should be. If you get the light source wrong, your shading will look confusing no matter how good your technique is.
To identify the light source in a reference photo, look at where the brightest highlight sits on the object. The light is coming from that direction. The side of the object facing away from the light will be your shadow side. If you are drawing from imagination, pick a single light source direction before you start shading and stick with it.
Every shaded object has five key value zones. The highlight is the brightest spot where light hits most directly. Halftones are the mid-value areas that wrap around the form. The core shadow is the darkest part of the shadow on the object itself. Reflected light is a subtle lighter area on the shadow side caused by light bouncing off nearby surfaces. The cast shadow is the dark shape the object projects onto the surface below it.
Understanding these five zones changed my shading dramatically. Before I learned this, I was just guessing at where to put darks and lights. After, I had a clear framework for analyzing any subject. Practice by placing a simple object like an egg or an apple under a single desk lamp and observing how the five zones appear on it.
Step-by-Step Shading Process for Beginners
Here is the exact shading process I use and teach. Follow these seven steps every time you shade a drawing, and you will build a reliable workflow that produces consistent results.
Step 1: Choose Your Reference and Identify the Light Source
Pick a simple reference photo or a real object. Study it and determine exactly where the light is coming from. Mark that direction lightly on your paper if it helps you stay oriented.
Step 2: Map Out the Value Areas
Before touching your shading pencil, lightly outline where the highlights, mid-tones, core shadows, reflected light, and cast shadows will go. This planning step prevents the common mistake of shading randomly and hoping it works out.
Step 3: Start with a Light Base Layer
Using an HB or 2B pencil with very light pressure, lay down a base tone over all the areas that will have any shading at all. Skip only the brightest highlights. This base layer gives you something to build on and makes subsequent layers blend more smoothly.
Step 4: Build Up Darks Gradually
Switch to progressively softer pencils (2B, then 4B) and add darker values in layers. Never try to go dark in one pass. Multiple light layers produce smoother, more controllable results than pressing hard with a single dark pencil. This is probably the most important tip in this entire guide.
Step 5: Blend for Smooth Transitions
Use a blending stump or tortillion to smooth out the transitions between your value areas. Blend in the direction of the form. For a sphere, blend along the curve. For a flat surface, blend in straight, even strokes. Wipe your blending tool on scrap paper frequently to avoid transferring too much graphite.
Step 6: Add Highlights with Your Eraser
A kneaded eraser is perfect for lifting graphite and restoring bright highlights. Press it gently onto the paper and lift it straight up rather than rubbing. For sharper highlights, a click eraser or the edge of a vinyl eraser works well. This step brings life to your drawing.
Step 7: Refine Edges and Details
Go back over your drawing and sharpen edges where needed. Some edges should be crisp and sharp, like the edge of a cast shadow closest to the object. Others should be soft and blurred, like the transition between mid-tones and core shadow. Edge control is what separates competent shading from amateur shading.
Pencil Grip and Pressure Control
How you hold your pencil has a bigger impact on your shading than most beginners realize. There are two main grips you should know, and each one serves a different purpose.
The overhand grip means holding the pencil further back along the barrel, with the pencil resting against your index finger and the side of the graphite touching the paper. This grip covers more area with each stroke, produces softer marks, and gives you excellent control over pressure. It is the ideal grip for broad shading.
The writing grip is the standard tripod grip you use for handwriting. It gives you precision and control for small areas and fine details, but it tends to produce more pressure and harder marks. Use it for detail work, line work, and tight spaces.
Pressure control is the skill that separates smooth shading from patchy messes. Practice by drawing a long rectangle and filling it with a gradient that goes from the lightest possible mark on one end to the darkest you can make on the other. Start with almost zero pressure and gradually increase. This exercise trains your hand to feel the difference between light and firm pressure.
One thing that helped me was learning to shade with my arm rather than my wrist. Small wrist movements create uneven, wobbly strokes. Moving from the shoulder and elbow produces smoother, more confident lines. This also helps prevent hand fatigue during longer shading sessions.
Blending Tools and When to Use Them
Blending tools are not strictly necessary for pencil shading, but they make a huge difference when you want smooth, polished results. Here are the most common blending tools and when to use each one.
Blending Stumps: These are tightly rolled paper sticks that come in various sizes. They are my go-to blending tool for most shading work. Large stumps cover broad areas, while the pointed tip is great for precise blending in small areas. They produce very smooth, even blends and keep your fingers off the drawing.
Tortillions: Similar to blending stumps but looser and more pointed. They are great for detailed blending in tight spaces. Because they are less dense than stumps, they pick up graphite more aggressively, which is useful for lifting and softening edges.
Your Fingers: The most accessible blending tool you have. Your fingers produce very smooth blends, but they also transfer natural oils to the paper, which can cause smudging problems later. If you use your fingers, wash and dry them first, and avoid touching areas you want to keep clean.
Tissue Paper and Cotton Swabs: These are good for blending large, flat areas. A folded tissue can smooth out a background gradient quickly. Cotton swabs work well for medium-sized areas. Both are cheap and disposable, which makes them practical for practice sessions.
When NOT to Blend: Not every drawing needs blended shading. Hatching and cross-hatching look best when left crisp and unblended. If you want a more expressive, textural quality in your work, skip the blending tools and let the pencil marks show. Blending everything flat can make drawings look airbrushed and lifeless.
Common Shading Mistakes Beginners Make (and How to Fix Them)
I made every single one of these mistakes when I started shading, and I see them constantly in beginner artwork. Recognizing these errors is the first step to fixing them.
Going Too Dark Too Fast: This is the number one beginner mistake. You press hard with a soft pencil immediately, and suddenly you have a dark splotch you cannot erase. The fix is simple: always start light and build up in layers. You can always make something darker, but making it lighter is much harder.
Patchy, Streaky Shading: If your shading looks uneven with visible light and dark patches, the cause is usually inconsistent pressure or uneven pencil strokes. Slow down, use a consistent technique like circling, and apply multiple even layers rather than trying to cover everything in one pass.
Visible Pencil Marks Where They Should Not Be: Unwanted directional lines showing through smooth areas usually means you are pressing too hard or using the wrong pencil grip. Switch to the overhand grip, use the side of the pencil tip, and apply lighter pressure.
Accidental Smudging: Resting your hand on already-shaded areas smears graphite across your drawing. Place a clean sheet of scrap paper under your drawing hand to protect finished areas. Work from top to bottom or left to right so you are not reaching over completed work.
Ignoring the Light Source: Shading without a clear light source produces confusing, unrealistic results. Always decide where your light is coming from before you start shading. Use a single consistent light source until you are comfortable enough to handle multiple light sources.
Using Only One Pencil Grade: Trying to do all your shading with a single HB pencil means either your darks are not dark enough or your lights are not light enough. Use two or three different grades so you can achieve a full range of values without resorting to extreme pressure.
Spending Too Long on One Area: Beginners tend to overwork a single spot trying to get it perfect while the rest of the drawing is untouched. Work across the entire drawing, establishing values everywhere before refining details. This keeps your values consistent and prevents one area from becoming overworked.
Practice Exercises to Improve Your Shading
Shading is a physical skill that improves with deliberate practice. These exercises target specific aspects of shading and build your skills progressively from basic to more advanced.
The Value Scale Exercise: Draw a row of nine equal squares. Fill the first square with the darkest value you can create and leave the last square white as paper. Gradually fill in the remaining squares so each one is progressively lighter. This exercise teaches you to see and reproduce specific values, and it warms up your hand for pressure control.
Shading Basic Forms: Draw a circle, a square, and a cylinder. Shade each one with a consistent light source coming from the upper left. Focus on getting the five value zones correct on each form. Start with the sphere since it is the most forgiving, then move to the cube, then the cylinder. This exercise trains you to understand how light wraps around different shapes.
The Smooth Gradient: Draw a long rectangle and fill it with the smoothest gradient you can create, going from pure white on one end to near-black on the other. Use any technique you like, but the goal is no visible bands, patches, or transitions. This exercise is frustrating at first, but it dramatically improves your blending and pressure control.
Technique Comparison: Draw four identical simple shapes. Shade one with hatching, one with cross-hatching, one with stippling, and one with blending. Compare the results side by side. This exercise helps you understand what each technique looks like in practice and which ones you prefer for different effects.
Progressive Complexity: Start with a plain white egg under a single light. When you can shade that convincingly, move to a group of two or three eggs. Then try an apple, a cup, a folded cloth. Each subject introduces new challenges like texture, overlapping shadows, and reflected color. This progression builds real drawing skill rather than just mechanical technique.
The most important thing about practice is consistency. Fifteen minutes of daily shading practice beats a single three-hour session once a week. Your hand and eye learn through repetition, and regular short sessions build muscle memory faster than occasional long ones.
FAQs
What are the four rules of shading?
The four rules of shading are: (1) Always establish your light source before you start shading. (2) Build values gradually in layers rather than going dark immediately. (3) Preserve your brightest highlights by not shading them at all. (4) Create smooth transitions between light and dark areas rather than abrupt changes. Following these four rules will immediately improve your shading results, even as a complete beginner.
What are the 5 techniques of shading?
The five main pencil shading techniques are hatching (parallel lines), cross-hatching (overlapping lines), stippling (dots), blending (smoothing with tools), and contour shading (lines following the form). Each technique creates a different texture and visual effect. Beginners should try all five and practice each one to understand their strengths before choosing favorites.
What are the four ways to shade with pencil realistically?
The four approaches to realistic pencil shading are: (1) Smooth blending using stumps or tortillions for seamless gradients. (2) Layered hatching and cross-hatching for controlled value building. (3) Circulating or scumbling for even, non-directional tones. (4) A combined approach that uses blending for smooth areas and directional strokes for texture. Most professional artists use a combination of these methods depending on the subject and desired result.
How to start shading for beginners?
To start shading as a beginner, first gather two or three pencils (an HB and a 2B or 4B), a kneaded eraser, and regular drawing paper. Practice the value scale exercise to learn pressure control. Then shade a simple sphere with a single light source, focusing on the five value zones: highlight, halftone, core shadow, reflected light, and cast shadow. Start with light pressure, build up darks in layers, and use a blending stump for smooth transitions. Practice 15 minutes daily for the fastest improvement.
Wrapping Up: Your Shading Journey Starts Now
Learning how to shade with a pencil for beginners comes down to understanding a few core ideas: how pencil grades affect your values, how to use the six essential shading techniques, how to read a light source, and how to build shadows gradually in layers. None of these concepts are complicated on their own. The challenge is putting them all together, and that just takes practice.
Start simple. Pick up an HB and a 4B pencil, grab a blending stump, and shade a sphere under a single light. Then do it again the next day. Then try an egg, a cube, a cup. Each drawing teaches your hand something new about pressure, about value, about seeing light and shadow in the world around you.
Real practice beats fancy tools every time. You do not need the best pencils or the most expensive paper to learn how to shade with a pencil for beginners. You just need a willingness to make mistakes, analyze what went wrong, and try again. That process is how every artist who ever lived developed their skills, and it will work for you too.