
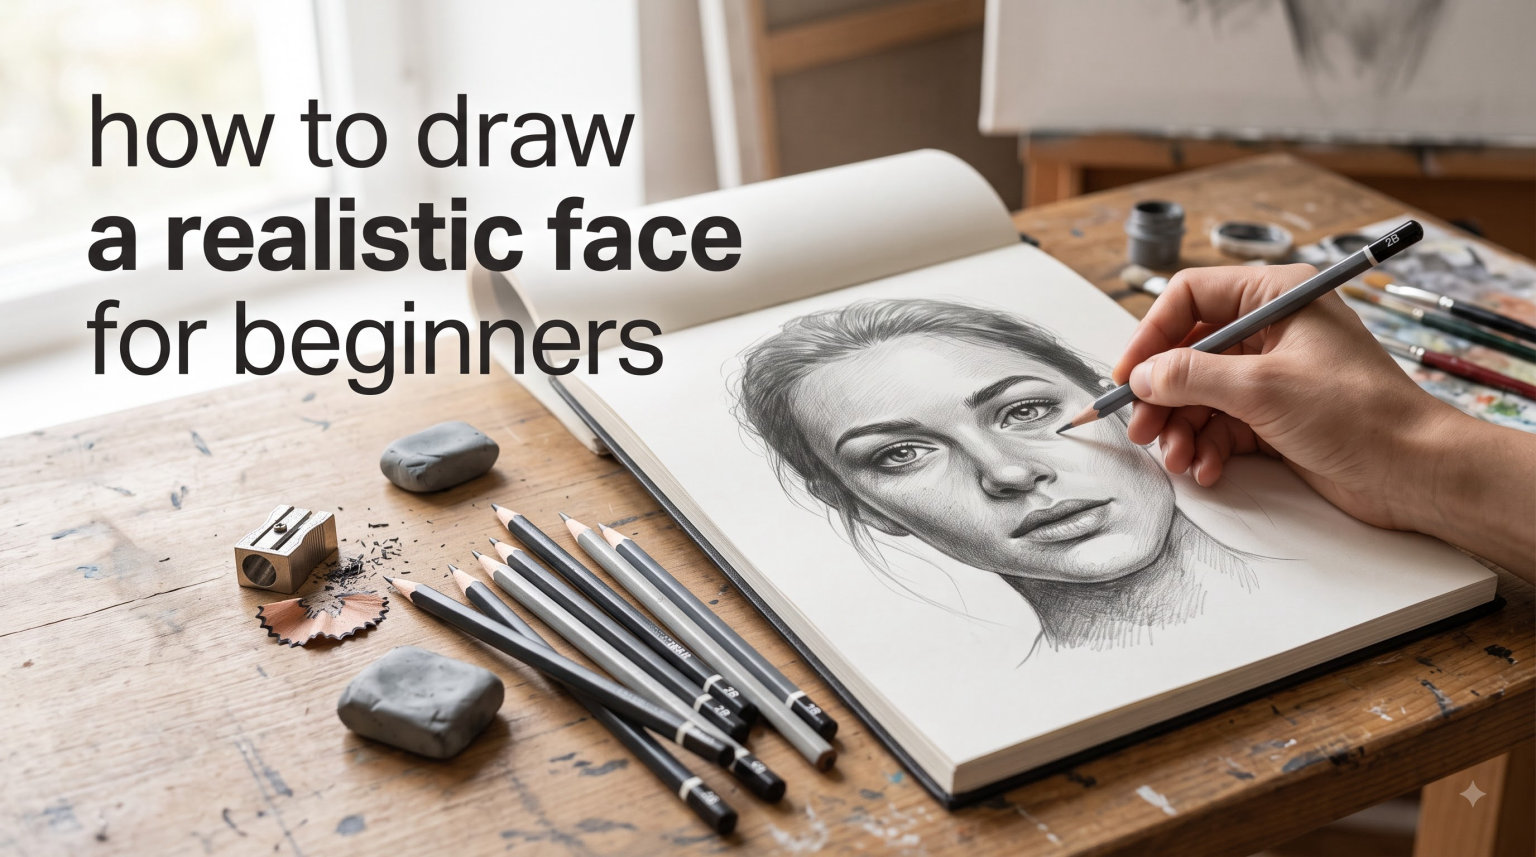
Drawing a realistic face can feel like one of the most challenging artistic goals, especially when you are just starting out. The human face contains intricate details, subtle shadows, and complex structures that can overwhelm even the most enthusiastic beginners. However, with the right guidance, proper techniques, and consistent practice, anyone can learn to create compelling, realistic face drawings. This comprehensive guide will walk you through every step of the process, from understanding essential materials to mastering advanced shading techniques, ensuring you build a solid foundation for your portrait drawing journey.
Table of Contents
Understanding Face Drawing Materials and Tools
Before you begin drawing realistic faces, having the right materials is essential. The quality of your tools can significantly impact your learning experience and the final outcome of your artwork. While professional artists can work with expensive supplies, beginners can achieve excellent results with carefully selected materials that balance quality and affordability.
Essential Drawing Supplies
The foundation of realistic face drawing begins with selecting quality graphite pencils. You will need a range of pencil grades to create different values and textures. An HB pencil serves as an excellent starting point for light sketches and outlines. The 2H pencil produces crisp, light lines perfect for initial construction guidelines. For darker values and defined shadows, a 4B or 6B pencil provides the depth you need for realistic shading. A 4H pencil can help you achieve extremely light tones during the blending process.
Your paper selection matters considerably for pencil work. Drawing paper with a weight of 90gsm to 120gsm works well for practice exercises and initial studies. For final pieces, consider using heavier paper (150gsm+) that can withstand multiple layers of erasing and blending without deteriorating. Many artists prefer smooth Bristol paper for detailed facial features, while slightly textured paper can add interesting qualities to shading.
Pencil Grades Explained
Understanding pencil grades is crucial for achieving realistic results in your face drawings. The pencil grading system follows a logical pattern where H pencils become harder and lighter as the number increases, while B pencils become softer and darker.
| Pencil Grade | Hardness | Best Use | Effect on Paper |
|---|---|---|---|
| 4H – 6H | Very Hard | Precise guidelines, light details | Very light, subtle marks |
| 2H – H | Hard | Construction lines, light shading | Light gray marks |
| HB | Medium | General sketching, outlines | Medium gray marks |
| 2B – 4B | Soft | Shading, shadows, depth | Dark gray to dark marks |
| 6B – 9B | Very Soft | Deep shadows, rich blacks | Very dark, easily blendable |
When drawing realistic faces, you will typically use the full range of pencil grades. Harder pencils (H to 2H) excel at creating the initial framework and light details like catch lights in eyes. Medium pencils (HB, 2B) work well for general shading and defining features. Softer pencils (4B to 6B) create the deep shadows that add dimension and realism to your portraits.
Blending and Erasing Tools
Blending stumps, also called tortillons, are essential for creating smooth, realistic shading in face drawings. These cylindrical paper tools allow you to soften pencil strokes and create gradual transitions between tones. Blending stumps come in various sizes, with smaller ones ideal for detailed areas like eyes and lips, while larger ones work better for cheek and forehead shading.
Kneaded erasers offer unique versatility that standard erasers cannot match. Unlike vinyl erasers that completely remove graphite, kneaded erasers lift graphite while preserving paper texture. This makes them perfect for creating highlights on the nose bridge, cheekbones, and forehead. You can also shape kneaded erasers into fine points for precision work in small areas like the corners of eyes or lips.
Vinyl or plastic erasers serve important purposes despite their limitations. They excel at completely removing graphite when you need to correct construction lines or create sharp highlights. Many artists keep both types on hand and use them strategically throughout their drawing process.
The Foundation: Head Shape Construction
The single most important skill in drawing realistic faces is mastering head construction. Without a properly constructed foundation, even the most skilled shading cannot rescue a portrait that lacks accurate proportions. The Loomis method, developed by artist and author Andrew Loomis, provides a systematic approach to building the head that has proven effective for countless artists over many decades.
The Loomis Method Explained
The Loomis method is a drawing technique that simplifies the complex three-dimensional structure of the human head into manageable geometric forms. This method allows you to establish accurate proportions before adding details, giving you a reliable framework that ensures all features align correctly. The technique works regardless of the view angle, making it versatile for front views, profile views, and three-quarter views.
Andrew Loomis introduced this method in his influential book “Figure Drawing for All It’s Worth,” and it has since become a cornerstone of portrait drawing education worldwide. The fundamental principle involves visualizing the head as a collection of simple shapes that relate to each other in predictable ways. By mastering this method, you develop an intuitive understanding of facial structure that transfers to drawing faces from any angle or perspective.
Building the Egg Shape
The journey to drawing realistic faces begins with the basic egg shape, sometimes called the ball-and-blade construction. This shape represents the cranium (the upper, rounded portion of the skull) and the jaw area (the lower, more squared portion). When learning to draw faces step by step, always start with this foundational form.
To create the egg shape, draw a vertical line to establish the center of the face. This line will help you maintain symmetry throughout your drawing. The overall shape should be wider at the top and slightly narrower at the jaw, though the exact proportions vary between individuals and between male and female faces. The top of the head should be slightly rounded, while the bottom transitions into the chin area with a more angular quality.
When practicing this construction, try drawing the egg shape from multiple angles. Front view construction involves a symmetrical egg shape with the vertical center line visible. Three-quarter view construction requires foreshortening one side while maintaining the overall proportions. Profile view construction emphasizes the different planes of the face, particularly the forehead, nose, and chin projection.
Adding Construction Lines
With your egg shape established, the next step involves adding the crucial construction lines that dictate feature placement. These lines transform your simple shape into a face blueprint with precise positions for eyes, nose, mouth, and ears.
The horizontal center line crosses the head at approximately eye level, roughly halfway between the top of the head and the chin. This line serves as the primary reference for eye placement. The vertical center line remains your symmetry guide. Eyes should be positioned so the space between them equals one eye width, and each eye sits at an equal distance from the vertical center line.
The nose line drops from the area between the eyebrows, roughly halfway between the eye line and the chin. The angle of this line varies depending on the face angle you are drawing. For the front view, it drops vertically. For the three-quarter view, it foreshortens according to perspective. For the profile view, it represents the bridge of the nose projecting forward.
The mouth line positions itself approximately one-third of the distance between the nose line and the chin. This line curves gently, with the corners of the mouth typically aligning with the inner edge of the iris when looking straight ahead. Understanding these proportions helps ensure your facial features sit in anatomically correct positions.
Mastering Facial Proportions
Accurate facial proportions separate realistic portrait drawings from amateur attempts. Even if you have the technical skill to render individual features beautifully, incorrect proportions will make the final result appear wrong to viewers. Understanding and applying proven proportional guidelines ensures your faces look natural and believable.
The 4-8-8 Method
The 4-8-8 method offers a simple but effective system for establishing facial proportions. This technique divides the face into sections that help you place features correctly and maintain accuracy throughout your drawing process.
According to this method, the human face can be divided using specific measurements. The top section, representing the hair and forehead area, occupies approximately four units of height. The middle section, containing the eyes and upper nose, occupies approximately eight units. The lower section, containing the nose tip to chin, also occupies approximately eight units. These measurements apply to adult faces viewed from the front.
This proportional system extends to feature placement as well. The eyes position at the midpoint of the head (not the face). The nose tip falls at approximately the halfway point between the eye line and the chin. The mouth aligns with the area between the nose and chin in a specific relationship. While individual variations exist, these guidelines provide reliable starting points for realistic face construction.
Horizontal and Vertical Guidelines
Beyond the basic proportional divisions, specific horizontal lines help you place features with precision. These lines intersect the face at predetermined positions, creating a grid that guides feature placement.
The eye line spans the width of the head at the halfway point vertically. When drawing eyes, position the tops of the eyebrows slightly above this line and the bottoms of the ears align with it in profile view. The eyes themselves sit on this line, with their tops and bottoms equidistant above and below it for an average almond shape.
The nose baseline does not represent the bottom of the nose but rather the position where the nose meets the face plane. This line helps you position the nose correctly in three-dimensional space. The actual bottom of the nose falls slightly below this line and projects forward from the face plane.
Vertical measurements focus on the width relationships between facial features. The face narrows at the temples and widens at the cheekbones. The width of the face at cheekbone level typically equals approximately one and a half times the width of one eye multiplied by five (two eyes plus three spaces between and beside them). The nose width usually matches the distance between the inner corners of the eyes.
Male vs Female Proportions
Understanding how proportions differ between male and female faces allows you to create more accurate and believable portraits. These differences extend beyond surface appearance to the underlying bone structure that defines each sex’s characteristic appearance.
| Feature Area | Male Characteristics | Female Characteristics |
|---|---|---|
| Forehead | Lower, slightly angled, more prominent brow ridge | Higher, smoother, less prominent brow ridge |
| Eye Area | Eyes set deeper, more recessed shadow | Eyes sit closer to surface, larger appearing |
| Cheekbones | Less prominent, more lateral placement | Higher, more defined, prominent highlight |
| Jaw | Strong, angular, wide at base | Slender, softer, narrower at base |
| Chin | Wider, more squared, projects forward | Narrower, more pointed, softer curve |
| Neck | More mass, visible Adam’s apple | Slender, smoother transition to shoulders |
When drawing realistic faces for beginners, focusing first on one gender before attempting both helps you master the fundamental proportions without confusion. Many artists start with female faces because the softer features and simpler bone structure provide a slightly more forgiving learning curve. However, some find male faces easier to approach initially because the more defined structural lines offer clearer guides.
Drawing Eyes: The Window to Realism
The eyes remain the most expressive elements of any portrait, and their complexity makes them both challenging and rewarding to draw. Mastering eye drawing transforms your portraits from generic representations into compelling, lifelike depictions that capture the subject’s character and emotion.
Eye Shape and Structure
Understanding eye anatomy provides the foundation for realistic rendering. The eye consists of multiple interrelated structures, each requiring careful observation and accurate rendering for convincing results.
The eye socket forms a depression in the skull that houses the eyeball and surrounding tissues. This socket creates the characteristic shadow that frames the top of the eye and contributes significantly to the eye’s three-dimensional appearance. The surrounding bone structure determines the eye’s overall shape and the shadows that define its edges.
The almond shape defines the visible portion of the eye. This shape varies between individuals, with some eyes appearing more round and others more elongated. The outer corners of the eyes typically angle slightly upward for most faces, creating the characteristic almond appearance. The upper eyelid covers the top portion of the iris, while the lower eyelid follows a gentler curve that barely touches the iris edge.
When drawing eyes, begin by establishing the overall almond shape with light construction lines. Position the iris and pupil within this shape, ensuring they sit equidistant from all edges of the opening. The iris contains fine radial details that catch light in specific patterns, and observing these details closely adds tremendous realism to your drawings.
Drawing the Iris and Pupil
The iris presents one of the greatest challenges in realistic eye drawing due to its intricate pattern of colors and textures. This colored portion of the eye contains radiating fibers, varying color zones, and complex shadows that must be rendered carefully for convincing results.
Begin with the pupil, which appears as a perfect circle at the center of the iris. The pupil should be completely black in most lighting conditions, providing a stark contrast against the surrounding iris colors. When light reflects directly off the pupil, it creates a bright highlight that adds life and sparkle to the eye.
The iris surrounds the pupil with a circular form that contains numerous fine details. Rather than attempting to draw every individual fiber, focus on creating the overall color pattern and value variations within the iris. Darker rings and shadows near the outer edge contrast with lighter zones near the pupil. Small radial lines radiate from the pupil toward the outer edge, growing darker as they approach the iris border.
The catch lights or reflections that appear on the eye surface significantly impact the impression of life and moisture. These highlights typically appear as small, bright shapes on the cornea overlying the iris and pupil. Position catch lights in the upper portion of the iris for natural-looking light sources. Some artists add a secondary, smaller catch light in the opposite corner to increase the threedimensional illusion.
Adding Eyelashes and Eyebrows
Eyelashes and eyebrows frame the eyes and contribute substantially to facial expression. These elements require careful observation because their characteristics vary enormously between individuals and convey different emotional states.
For eyelashes, focus on the upper lashes since they receive more light and create stronger shadows than lower lashes. Individual lashes follow the curve of the upper eyelid, growing from the eyelid edge and curving outward and upward. The lashes at the outer corners tend to be longest and most prominent. Rather than drawing each lash individually, suggest their presence through the shadow they cast on the eyelid surface.
The eyebrows follow the brow ridge and frame the upper portion of the eye socket. The inner portion (near the nose) typically grows in an upward direction, while the outer portion angles more horizontally or slightly downward. The density and direction of eyebrow hair vary significantly between individuals and should match your subject’s characteristics for realistic results.
Drawing the Nose: Structure and Shading
Many beginners consider the nose the most challenging facial feature to draw realistically. Unlike eyes or lips, the nose lacks obvious defining lines and instead relies heavily on subtle value changes to convey its three-dimensional form. Understanding how light interacts with the nose’s simple geometric shapes makes this challenge much more manageable.
Nose Basic Shapes
Breaking the nose down into basic geometric forms reveals its underlying structure and simplifies the drawing process. The nose consists of three primary components that can be visualized as simple shapes.
The nose bridge forms the upper portion of the nose, connecting the brow area to the nose tip. This ridge rises from the face and creates a distinct shadow on one side while catching light on the other. The width of the bridge varies considerably between individuals, with male noses typically featuring wider bridges than female ones.
The nose tip represents the most prominent feature of the nose and consists of a rounded form projecting forward from the face. This area contains the most complex shadow patterns due to its curved surface and the transitions between lit and unlit areas. The tip connects to the bridge above and the nostrils below.
The nostrils and surrounding alar base create the lower portion of the nose structure. The nostrils appear as dark openings flanked by rounded forms that connect to the cheek. Understanding that the nostrils are cavities with depth, not flat marks, helps you render them convincingly.
Creating Depth with Shading
Nose shading relies on understanding how light interacts with curved surfaces. The nose creates predictable shadow patterns based on its form and the direction of the light source.
The bridge shadow falls across the upper portion of the nose, creating a dark value that separates the nose from the forehead. This shadow extends down one side of the bridge, with its edge following the contour of the bone structure. The shadow’s edge should be softer on the shadow side of the nose and harder where it meets the lit surface.
The nose tip shadow appears below the tip of the nose, creating a characteristic triangular shape. This shadow shows the projection of the nose tip forward from the face plane. The edges of this shadow curve around the nostrils, suggesting their rounded forms. Below this shadow, a subtle highlight often appears on the upper lip due to reflected light.
Side shadows cast across the alar area (the fleshy sides of the nose) help define the nose width and separate it from the cheek areas. These shadows connect with the bridge shadow above and the tip shadow below, creating a complete description of the nose form through value relationships alone.
Nose from Different Angles
The nose appearance changes dramatically depending on the viewing angle, making angle-specific study essential for realistic portrait drawing.
In the front view, the nose occupies the center of the face with symmetrical features on both sides of the bridge. Both nostrils should be visible, along with the full width of the nose tip. The shadow patterns remain relatively symmetrical, with light typically coming from one side to create directional shading.
In the three-quarter view, one side of the nose faces the viewer more directly while the other side foreshortens. The visible nostril appears larger than in the front view, while the opposite nostril compresses into a smaller shape due to perspective. The bridge shadow shifts toward the farther side of the nose.
In the profile view, the nose projects forward from the face with only one side visible. The bridge creates a strong diagonal line from forehead to tip, with dramatic shadow patterns across the entire nose form. The visible nostril appears at the tip’s lower edge, while the opposite side of the nose completely disappears from view.
Drawing Lips and Mouth
The mouth area combines complex form with subtle surface details that contribute significantly to facial expression and character. Learning to draw lips convincingly requires understanding both the underlying structure and the surface variations that make lips appear natural and alive.
Lip Shapes and Proportions
The lips consist of the upper lip and lower lip, each with distinct characteristics that vary between individuals. These proportions affect how the mouth appears and conveys expression.
The upper lip typically features a cupid’s bow shape with two peaks at the center and a curved center line called the philtrum. This distinctive shape varies in prominence between individuals, with some mouths showing very pronounced peaks while others display almost no definition in this area. The sides of the upper lip transition into a flatter section before reaching the mouth corners.
The lower lip usually appears fuller and more rounded than the upper lip, containing a larger volume of soft tissue. The lower lip fills the space below the upper lip, creating the mouth opening between them. A subtle shadow often separates the lower lip from the chin area, adding to the three-dimensional appearance.
When positioning the mouth on your construction lines, remember that the corners of the mouth typically align with the inner edge of the iris in a front-facing portrait. The mouth width itself equals approximately the distance between the pupils, though this varies with individual facial structure. The mouth sits slightly above the halfway point between the nose and chin.
Contour Lines and Definition
The edges where lips meet the surrounding facial skin require careful handling to appear realistic. These transitions rarely appear as sharp lines but rather as subtle value changes and surface direction shifts.
The lip edge describes where the pink lip tissue meets the surrounding skin. This edge should never appear as a continuous dark line, as this creates an unnatural cartoon appearance. Instead, the transition happens through subtle value changes as the lip surface curves away from view. The lip edge contains fine vertical wrinkles that add texture and age to the lips.
The mouth opening appears as a darker value between the lips, showing the inside of the mouth rather than a simple line. This dark area provides the opening through which teeth might be visible in more detailed drawings. The edges of this opening curve at the corners, creating the characteristic smile lines that appear with facial expression.
Individual variation in lip texture includes vertical creases, asymmetric shapes, and different levels of moisture that affect how light reflects from the surface. Observing these details from your reference photos helps you capture the specific characteristics of your subject rather than generic lip shapes.
Shading for Softness
Lips possess soft, rounded forms that require smooth shading transitions to appear convincing. The curved surfaces catch and reflect light in predictable ways that you can learn to replicate.
The upper lip highlight appears along the peaks of the cupid’s bow, where the curved surface catches light. This highlight tends to be narrow and elongated, following the lip edge contour. Below this highlight, the lip surface transitions through a range of values as it curves away toward the mouth opening.
The lower lip highlight appears near the lower edge of the lip, where the most forward-facing portion of the lip catches light. This highlight tends to be broader and more diffuse than the upper lip highlight, reflecting the lower lip’s fuller, more rounded shape. The transition between highlight and mid-tones should be very smooth to suggest the soft, pliable nature of lip tissue.
Shadows within the mouth area include the corner shadows at the sides of the mouth and the subtle shadow below the lower lip where it meets the chin. These shadows provide depth and ground the lips to the face, preventing them from appearing as flat shapes floating on the surface.
Ears, Hair, and Finishing Touches
While eyes, nose, and mouth receive the most attention in face drawing, the ears and hair contribute essential context that completes the portrait. Neglecting these elements results in incomplete-feeling artwork, even if the primary features render beautifully.
Ear Placement and Shape
The ears position themselves along the vertical center line at approximately the height of the eyebrows to the nose line. This placement varies slightly depending on the individual’s head shape and age, but the general zone remains consistent. The ears tilt slightly backward, with the outer edge falling slightly behind the front plane of the face.
The ear shape consists of the outer rim (helix), inner rim (antihelix), earlobe, and the opening (concha) leading to the ear canal. These components create an irregular oval shape with various folds and indentations. The complexity of ear anatomy makes ears challenging to draw, but a systematic approach helps.
When drawing ears, start with the overall oval shape and the basic structure before adding details. The inner features should relate to the outer shape, following its contours. Shadows within the ear tend to be complex due to the overlapping curves and indentations that characterize ear structure. The earlobe, being soft and rounded, creates a characteristic shadow where it meets the jaw area.
Basic Hair Drawing Techniques
Hair presents unique challenges because it involves thousands of individual strands that must suggest mass and movement while maintaining overall shape. Attempting to draw every hair strand produces a tangled mess; successful hair drawing requires suggesting detail through strategic mark-making.
Begin hair drawing by establishing the hair mass as a simplified shape that follows the contour of the skull. This overall shape provides the foundation for more detailed work and helps ensure proper proportions between head and hair. The hair mass should acknowledge the underlying head shape while establishing the hair’s own volume and direction.
Within the hair mass, observe and render the hair flow patterns that indicate direction and movement. Groups of hairs move together in predictable patterns influenced by the head shape, face structure, and style. These patterns create light and shadow variations across the hair surface that you can suggest with directional strokes.
When rendering hair detail, use lost and found edges strategically. Some edges should appear sharp and defined where hair catches light, while other edges should soften into the surrounding values where hair recedes into shadow. This contrast creates the illusion of depth and volume without requiring you to render every individual strand.
Connecting Features Naturally
The final stage of face drawing involves ensuring all features connect naturally to create a cohesive portrait rather than a collection of individually rendered components. This integration happens through careful attention to edges, transitions, and the relationships between adjacent features.
Edges between features should vary in hardness and softness depending on the local anatomy and the direction of the light source. Sharp, defined edges work well for the edges of lips and the boundaries of eyelids, where distinct transitions exist between different tissue types. Softer, more gradual transitions work better for areas like the cheeks and forehead, where surface changes happen more gradually.
The transitions between facial features require careful observation of how each feature relates to surrounding structures. The area between the eye and eyebrow should suggest the slight ridge that separates them. The connection between nose and cheek should show the subtle elevation that defines this boundary. These interconnections ground each feature within the larger facial structure.
Shading Techniques for Realism
Shading transforms a line drawing into a convincing three-dimensional representation of a face. Without effective shading, even perfectly proportioned features appear flat and lifeless. Developing strong shading skills separates realistic face drawings from amateur attempts and represents perhaps the most significant challenge for beginners.
Understanding Light Source
All shading depends on understanding the direction and quality of the light source illuminating your subject. This light source determines where shadows fall, where highlights appear, and how values transition across the forms. Establishing a clear light source before beginning shading ensures consistent, coherent results.
A primary light source provides the main illumination for your drawing. This light typically comes from above and slightly to one side, creating the natural lighting conditions most artists use for portrait work. When this light strikes convex surfaces like the forehead, nose bridge, cheekbones, and chin, it creates highlights. When it fails to reach surfaces like the eye sockets, sides of the nose, and under the chin, it creates shadows.
Beyond primary light, understanding reflected light adds tremendous realism to your drawings. Light bounces off surrounding surfaces and illuminates areas that the primary light source cannot reach directly. The underside of the chin, the side of the nose away from light, and the area under the brow all receive some illumination from reflected light. Including these reflected light areas prevents shadows from becoming impenetrable black voids.
Building Up Tones
Effective pencil shading builds gradually from light to dark rather than attempting to apply dark values immediately. This approach, sometimes called the “building up” technique, allows you to maintain control over value relationships and achieve smooth transitions between tones.
Begin shading with an HB or 2B pencil, establishing the mid-tones across the entire form before addressing shadows and highlights. This mid-tone foundation ensures you have a cohesive base to work from and prevents the “checkerboard” effect that occurs when you apply values non-systematically. Use light, circular strokes that overlap to create even coverage without visible directional marks.
Once the mid-tones are established, add darker values in areas that receive less light. The eye sockets, sides of the nose, under the brow, under the nose, and under the chin all typically require darker values than the surrounding areas. Apply these shadows gradually, building up the darkness in layers rather than attempting to achieve full darkness in a single application.
Reserve your hardest pencils (4H to 6H) for the lightest values and the softest pencils (4B to 6B) for the deepest shadows. The highlights on the forehead, nose tip, cheekbones, and chin require the lightest possible touches, often requiring erasing or leaving the paper untouched to represent the brightest values. Deep shadows in areas like the nostrils, eye sockets, and under the jaw benefit from multiple layers of soft pencil to achieve rich, believable darkness.
Blending Methods
Blending unifies separate pencil strokes into smooth, cohesive tonal areas that suggest continuous form. While some stylistic approaches embrace visible pencil marks, realistic drawing typically requires smooth value transitions that guide the viewer’s eye across the form.
Blending stumps work effectively for large areas like the forehead, cheeks, and neck. Use the cylindrical side of the stump in light, circular motions to soften and unify pencil strokes. Rotate the stump frequently to prevent graphite buildup that can create streaks in your shading. For larger areas, you can use the larger blending stumps; for detailed work around eyes and lips, use the smaller, pointed stumps.
Tissue paper offers another blending option, particularly useful for larger areas and very soft transitions. Fold tissue into a pointed shape and use it to gently blend pencil marks. Tissue produces softer results than blending stumps and works well for the final stages of shading when you want to unify all values into a cohesive whole.
Your fingers can serve as blending tools in a pinch, though they tend to add oils from your skin to the paper and may smudge your drawing unintentionally. If using fingers for blending, keep them clean and consider this technique a last resort rather than a primary blending method.
Common Mistakes and How to Fix Them
Every beginning face artist encounters characteristic problems that can frustrate their progress. Understanding these common mistakes and their solutions helps you identify and correct issues in your own work, accelerating your improvement and building confidence.
Proportion Errors
Proportion mistakes represent perhaps the most common issue in beginner face drawings. These errors often result from working too quickly on early construction stages or failing to check relationships between features.
The eyes too close together problem occurs when beginning artists place eyes inward of proper positioning. Remember that the space between your eyes should equal one eye width. If your eyes appear too close, extend them further toward the temples and redraw your construction lines accordingly.
The forehead too tall or too short affects the overall face balance and makes the face appear unrealistic. The forehead should occupy approximately one-third of the face height. Check this proportion against your construction lines and adjust accordingly.
The nose too long or too short dramatically impacts face character and realism. Measure the nose length against the other facial proportions, ensuring the nose occupies the middle third of the face. Errors here often result from misplacing the horizontal eye line, which then throws off all feature positions below it.
Shading Issues
Shading problems frequently plague beginner face drawings and can undermine otherwise solid construction work. These issues often stem from misunderstanding value relationships or failing to establish a clear light source.
Flat shading occurs when all values occupy a narrow range, lacking the contrast that creates depth and dimension. Solution: Establish a clear primary light source and ensure your darkest shadows and brightest highlights exist at opposite ends of your value scale. Push your values to their extremes while maintaining believable transitions.
Muddy values happen when too many similar values exist in adjacent areas without clear differentiation. This creates confusion about where forms begin and end. Solution: Ensure adjacent forms have clearly different values that describe their relationship to each other. Use your darkest values in recessed areas and preserve bright highlights on projecting surfaces.
Symmetry Problems
The human eye easily detects asymmetry in faces, making symmetry issues particularly noticeable in portrait drawings. These problems often result from drawing features sequentially rather than observing their relationships.
One eye different from the other commonly occurs when artists draw each eye completely before moving to the other. Solution: Draw both eyes together, alternating between them to ensure they match. Sketch basic shapes for both eyes, then refine both equally rather than completing one entirely before starting the other.
Mouth asymmetry often appears as one side sitting higher than the other or corners being at different heights. Solution: Lightly sketch the entire mouth shape before committing to any specific area. Check the relationship between both corners and both sides of the lips before adding detailed contour lines.
Regularly step back from your drawing to view it from a distance. This allows you to see proportion and symmetry issues that become invisible when you work too close to the paper. A proportion that looked correct up close often reveals errors when viewed from across the room.
Practice Tips and Exercises
Improvement in face drawing requires consistent, focused practice over extended periods. Understanding what and how to practice makes your practice time more productive and helps you develop skills efficiently.
Daily Practice Routines
Establishing a daily drawing practice builds skills more effectively than occasional marathon sessions. Even 30 minutes of focused practice daily produces better results than sporadic multi-hour drawing marathons.
Begin each practice session with warm-up exercises that prepare your hand and eye for detailed work. Draw simple shapes, practice shading transitions, or copy small sections of professional artwork to prepare your hand for the precision face drawing requires. These warm-ups activate the motor skills and observational abilities you need.
After warm-ups, spend the majority of your practice time on construction practice, focusing on the foundational skills of head shape and proportion. Draw egg shapes and construction lines repeatedly until they become automatic. This foundational work pays dividends in all your future portrait work, so do not neglect it even when you feel eager to render detailed features.
Conclude each session by rendering one complete feature with full shading. This practice applies your construction skills to creating realistic detail and helps you develop the specific skills needed for eyes, noses, and lips. Compare your work to professional references and identify specific areas for improvement in the next session.
Reference Photo Guidelines
Working from references helps you develop observation skills and understand facial diversity. However, not all references provide equal learning value, and understanding what makes a good reference maximizes your practice effectiveness.
Select references with clear, directional lighting that creates distinct shadows and highlights. These references teach you to see value relationships and understand how light describes form. Avoid references with flat, even lighting that provides minimal shadow information, as these offer less learning opportunity.
Choose references featuring faces with character and distinct features rather than generic stock photos. Interesting references with unique bone structure, expressive features, or distinctive character provide more learning opportunities than generic “model” photos. Look for references that initially seem challenging, as working through difficulty builds skill faster than comfortable familiarity.
Use the grid method selectively when starting out, especially for checking proportions. Draw a grid over your reference and a corresponding grid on your paper to ensure accurate placement of features. However, wean yourself from this crutch as your skills develop, as depending on grids prevents you from developing intuitive proportion sense.
Progress Tracking
Tracking your progress helps you recognize improvement over time and identify areas that need additional focus. Many beginning artists fail to appreciate how much they have improved because they compare current work to idealized expectations rather than their previous attempts.
Date and organize your work so you can review previous pieces and see improvement. Keep every drawing, even ones you consider failures, as these often reveal more about areas needing attention than successful pieces. Review older work monthly to recognize the progress you have made.
Create specific improvement goals rather than general aspirations like “get better at drawing faces.” Goals like “improve eye symmetry in three-quarter view” or “develop smoother shading transitions in nose rendering” provide clear targets for your practice. When you achieve a goal, set a new one that builds on your accomplishment.
Frequently Asked Questions
How do I draw a realistic face step by step for beginners?
Start by constructing the basic head shape using the Loomis method, drawing an egg shape with horizontal and vertical center lines. Next, establish the horizontal eye line and add construction lines for nose and mouth positions. Sketch the basic shapes of features within their construction zones, then refine the outlines and add shading for realistic depth. Practice construction techniques daily until they become automatic before adding detailed rendering.
What is the 4-8-8 method of drawing faces?
The 4-8-8 method divides the face into three sections based on proportional measurements. The top section (hair and forehead) occupies four units of height. The middle section (eyes to nose tip) occupies eight units. The lower section (nose tip to chin) occupies eight units. This system helps beginners place features accurately and maintain proper proportions throughout their drawings.
What is the Loomis method for drawing faces?
The Loomis method, developed by artist Andrew Loomis, involves visualizing the head as an egg-shaped form with intersecting planes that indicate feature positions. You draw a basic egg shape for the skull and jaw, add a vertical center line and horizontal eye line, then position all features according to these construction lines. This method works for any viewing angle and provides a reliable framework for accurate proportions.
How can I make my face drawings look more realistic?
Focus on three key areas: accurate proportions through proper construction techniques, understanding light and shadow to create three-dimensional form, and careful observation of individual features rather than generic representations. Study your references closely to capture specific characteristics rather than drawing what you think a face should look like. Practice shading techniques to build smooth value transitions that describe curved surfaces.
Is the grid method or Loomis method better for beginners?
Both methods have value for different purposes. The grid method helps beginners achieve accurate proportions by providing external structure. The Loomis method builds intuitive understanding of facial structure that applies to any reference or angle. We recommend starting with Loomis construction while using grid checking as a learning aid, then gradually reducing grid dependence as your skills develop. The goal is developing natural proportion sense, not dependency on any single technique.
What pencil grades should I use for realistic face drawing?
Use a range of pencil grades from H to 6B for comprehensive value coverage. Harder pencils (2H to 4H) work well for light construction lines and erasing guidelines. Medium pencils (HB to 2B) serve general sketching and mid-tone shading. Softer pencils (4B to 6B) create deep shadows and rich blacks. Many artists find a set including 2H, HB, 2B, 4B, and 6B provides sufficient range for realistic portrait work.
How do I draw eyes that look symmetrical?
Draw both eyes simultaneously rather than completing one before starting the other. Begin with basic shapes for both eyes before adding any details. Frequently step back from your work to check symmetry from a distance, as close inspection makes symmetry errors difficult to detect. Use the center line as a reference for both eyes and ensure they sit at the same height relative to the construction lines. Measure the distance between eyes to confirm proper spacing.
Why does my shading look flat or cartoonish?
Flat shading typically results from insufficient value range and failure to establish a clear light source. Ensure you have a primary light direction and push your values to include both very dark shadows and bright highlights with smooth transitions between them. Study how light behaves on curved surfaces and use reference photos to observe real shadow patterns. Practice building up tones gradually rather than applying single-layer values everywhere.
Conclusion
Drawing realistic faces represents one of the most rewarding artistic achievements you can pursue as a beginning artist. The skills you develop through face drawing transfer to all other portrait work and build a foundation for any artistic endeavor involving human form. While the journey requires patience and consistent practice, every step brings you closer to creating compelling, lifelike portraits.
The key to success lies in mastering the fundamentals before attempting advanced rendering. Construction skills using the Loomis method provide the framework that ensures all features sit in anatomically correct positions. Proportional guidelines like the 4-8-8 method help you establish accurate relationships between features. Shading techniques bring your constructions to life by creating convincing illusions of three-dimensional form.
Remember that every professional face artist started exactly where you are now, facing the same challenges and struggling with the same difficulties. Their improvement came through dedicated practice, patient study of their subjects, and willingness to learn from mistakes. Your improvement will follow the same path if you maintain consistent practice and maintain focus on building strong foundational skills.
Begin your practice today with construction exercises and simple studies. Build your skills progressively, adding complexity as your fundamentals solidify. Before long, you will look back at your early work and marvel at how far you have come. The ability to capture human faces realistically awaits you through the practice methods and techniques outlined in this guide. Pick up your pencil and begin your journey.