
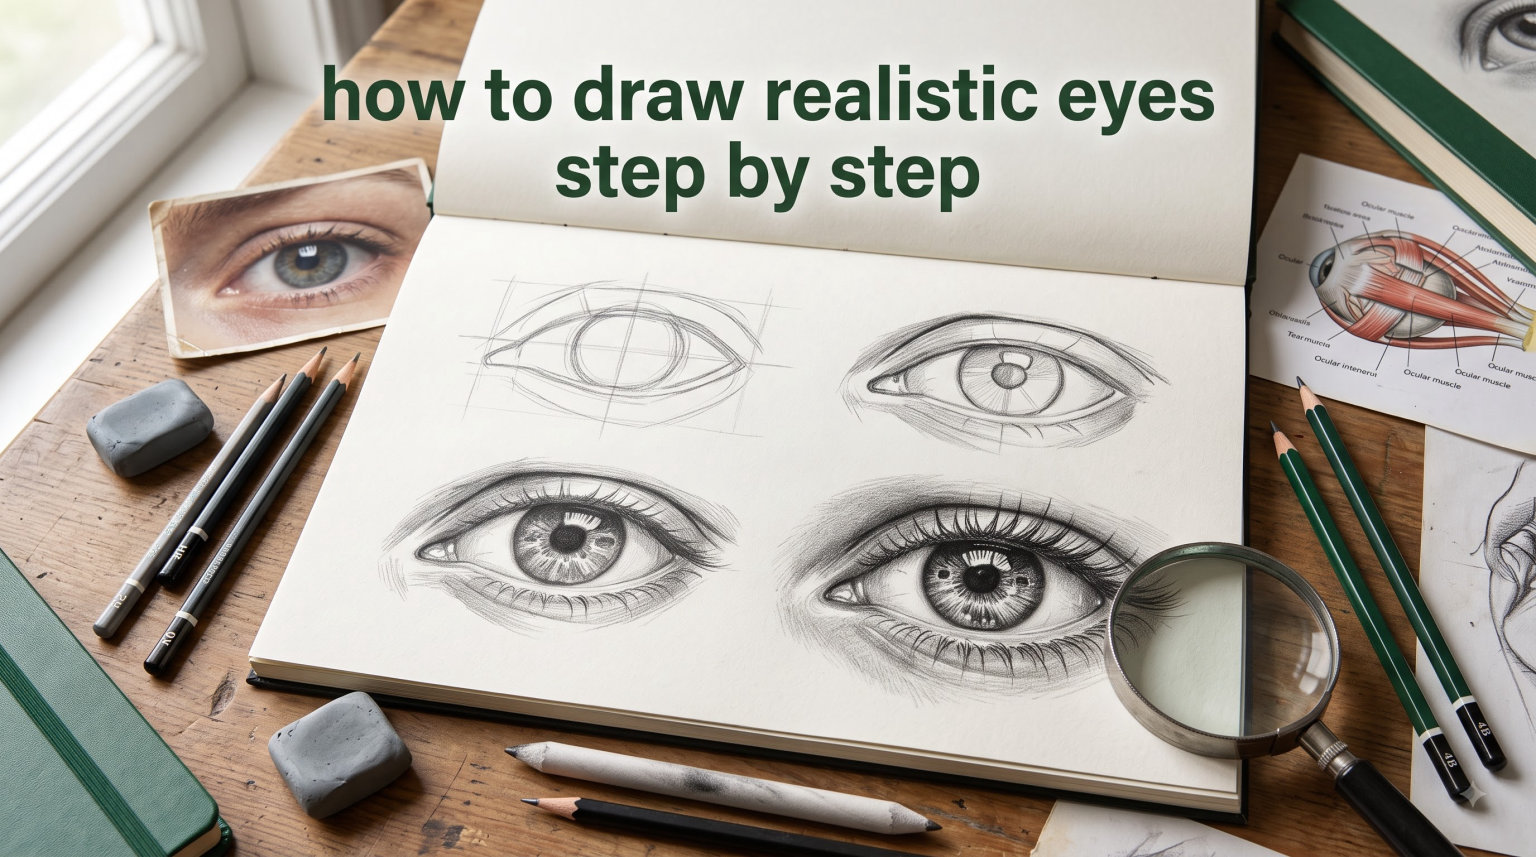
Drawing realistic eyes is one of the most challenging skills to master in portrait art. The eye is incredibly complex, capturing emotion and life in a way that can make or break a portrait. In this comprehensive guide, you will learn everything you need to know about how to draw realistic eyes, from understanding eye anatomy to mastering shading and blending techniques that bring your artwork to life.
Table of Contents
Why Drawing Realistic Eyes Is Challenging
If you have ever struggled with drawing eyes that look flat, lifeless, or simply wrong, you are not alone. The challenge with realistic eye drawing lies in several factors that trip up even experienced artists.
First, the eye is a three-dimensional spherical form, not a flat shape. Many beginners make the mistake of drawing eyes as if they were looking at a picture rather than understanding the actual structure beneath the surface. This leads to drawings that lack depth and dimension.
Second, the eye contains countless subtle value changes, from the darkest shadows in the iris to the bright highlights on the cornea. Capturing these transitions accurately requires patience and a good understanding of light and shadow.
Third, eyelashes are deceptively difficult. They need to appear natural and organic, not like a row of identical lines. The curvature, thickness variation, and directional flow of eyelashes all need careful attention.
Finally, the relationship between the eye and surrounding structures, including the eye socket, eyelids, and eyebrows, creates complex shadows and highlights that must be observed carefully from your reference.
The good news is that with proper guidance, practice, and an understanding of eye anatomy, anyone can learn to draw realistic eyes that capture the true essence of this remarkable feature.
Tools and Materials You Need
Before you begin learning how to draw realistic eyes, gathering the right materials will set you up for success. Using quality tools will make a significant difference in your results.
-
HB Pencil – Ideal for initial sketching and light guidelines
-
2B or 4B Pencil – For medium shading and outlines
-
6B or 8B Pencil – Essential for deep shadows and dark areas
-
Mechanical Pencil – Perfect for fine details and crisp lines
-
Kneaded Eraser – For creating highlights and lifting graphite
-
Blending Stumps/Torches – For smooth shading and transitions
-
Bristol Paper or Drawing Paper – Smooth surface for detailed work
-
Pencil Sharpener – Keep your tools sharp for precision
Having a range of pencil grades allows you to create the full value range necessary for realistic drawings. The softer pencils (4B-8B) are particularly important for dark shadows, while harder pencils (HB-2B) work well for building up lighter tones through layering.
Understanding Eye Anatomy
One of the most important steps in learning how to draw realistic eyes is understanding the underlying eye anatomy. Successful artists do not just draw what they see; they understand why the forms appear as they do.
The Eye Socket
The eye sits in a bony depression called the orbital cavity or eye socket. This structure, formed by parts of the frontal bone, maxilla, and zygomatic bones, creates the natural shadow that surrounds the eye. The supraorbital margin is the brow ridge above the eye, and understanding its position helps you draw the relationship between the brow and the eyelid correctly.
The Eyeball
The eyeball itself is a sphere, with approximately one-third visible outside the socket. The front surface of the eyeball, called the cornea, is transparent and creates the noticeable bulge you see over the iris. The white part of the eye is the sclera, which wraps around the entire globe.
The Eyelids
The eyelids wrap around the spherical form of the eye, creating folds that follow the curvature of the eyeball. The upper eyelid typically has more complex contours than the lower lid and creates the primary shadow across the top of the eye.
Pro Tip: Spend time studying eye anatomy before you begin drawing. Understanding that the eye is a 3D form sitting within a socket will dramatically improve your ability to create realistic drawings rather than flat representations.
Step 1: Sketch the Eye Socket and Basic Shape
1Establish the orbital structure
Begin by lightly sketching the eye socket as a faint, open circular shape. This does not need to be precise at this stage; it is just a guide to help you understand the 3D form beneath the surface.
Next, sketch the basic almond shape that defines the opening of the eye. The inner corner (tear duct area) should be slightly lower than the outer corner, creating the natural tilt of the eye. Keep your lines light and loose at this stage.
Pay attention to the space between the eyebrow and the eyelid. This gap, known as the orbital fat pad, creates important shadows that add realism to your drawing.
Step 2: Draw the Iris and Pupil
2Define the center of the eye
The iris is the colored ring that surrounds the black pupil. When drawing these elements, remember that they are not flat circles but appear on the curved surface of the eyeball.
Start by drawing the pupil as a dark circle in the center. Then, draw the iris as a slightly larger ring around it. The iris should extend slightly beyond what is visible, with the edge disappearing beneath the upper and lower eyelids.
The iris contains complex patterns of striations radiating from the pupil. Do not try to draw every single detail; instead, focus on suggesting these patterns through careful shading and leaving strategic lighter areas.
Pro Tip: The iris should be drawn slightly darker where it disappears under the eyelids. This creates depth and makes the eye appear to curve around the spherical form.
Step 3: Add Depth to the Iris
3Create realistic iris texture
Realistic iris shading requires careful attention to value and texture. The iris is not a flat colored disc but has significant depth, with fibers and patterns that create complex light and dark areas.
Begin shading the iris from the outer edge, working inward toward the pupil. Use your blending stump to create the smooth gradients that characterize natural iris appearance. Leave lighter spokes radiating from the pupil to create the effect of individual fibers.
The area where the iris meets the pupil should be the darkest part of the iris, creating a subtle ring of shadow that adds dimensionality. Build up the shading gradually, resisting the urge to go too dark too quickly.
Step 4: Shade the Sclera
4Model the white of the eye
The sclera (the white of the eye) is rarely actually white. It contains subtle veins, varying tones, and importantly, is affected by the shadows from surrounding structures.
Shade the sclera with very light pressure, using your HB or 2B pencil. The inner corner and edges near the tear duct should be slightly darker. The area under the upper eyelid often contains the most complex subtle values as the eyelid creates a shadow across the sclera.
Keep the sclera mostly light to maintain the sense that it is the illuminated part of the eye. Use subtle shading to suggest the spherical form rather than heavy outlining.
Step 5: Draw the Eyelids
5Define the eyelids and creases
The eyelids wrap around the eyeball and create some of the most important details in realistic eye drawing. The upper eyelid, in particular, casts a shadow across the top of the eye and creates the crease that defines the fold of skin above the eye.
Draw the upper eyelid as a curved line following the contour of the eyeball. The line should be thicker in the center and taper toward the corners. Add the subtle crease line above the main eyelid fold, keeping it lighter and more diffuse.
The lower eyelid should be drawn with a gentler curve, with the edge curling slightly inward toward the outer corner. The skin of the lower lid is thinner and often shows subtle shadowing from the orbicularis muscle beneath.
Common Mistake: Many beginners draw the eyelid as a simple outline without understanding its relationship to the spherical form beneath. This flattens the eye and removes the sense of 3D depth. Always remember that the eyelid is a wraparound form.
Step 6: Shading Techniques for the Eye
6Master light, shadow, and blending
Effective shading is what transforms a basic eye drawing into something realistic. The key techniques include understanding value structure, using proper blending, and building up layers gradually.
Start by identifying your light source and ensuring that all your shading is consistent with it. Darken the areas that would naturally fall into shadow, such as the upper portion of the iris, the area where the iris meets the pupil, and the region beneath the upper eyelid.
Use your blending stump to smooth out harsh pencil strokes, creating the soft transitions that characterize realistic skin and eye structures. Blending should be done lightly and progressively, building up the subtle gradients that make the eye appear three-dimensional.
Layering is essential for creating depth. Start with light applications and gradually build toward darker values. Attempting to create dark areas immediately often results in overworking the paper and losing the ability to blend smoothly.
Step 7: Drawing Realistic Eyelashes
7Create natural, organic lashes
Drawing eyelashes that look natural is one of the most challenging aspects of realistic eye drawing. The key is to understand that lashes are not identical lines but vary in length, thickness, direction, and darkness.
For the upper lashes, draw individual strokes that radiate from the eyelid edge. These strokes should be curved, not straight, with each lash thickening as it emerges from the lid and tapering to a fine point. The direction of the lashes should follow the flow of hair growth, sweeping upward and outward.
Pay attention to the layers of lashes. There are typically two or three layers: a darker, thicker set closest to the eyelid, and lighter, finer lashes that overlap and create depth.
The outer corner of the eye typically has the longest and most dramatic lashes, while lashes near the inner corner are shorter and more sparse.
Pro Tip: If your eyelashes look too uniform or artificial, you are likely making them too similar in length and spacing. Realistic lashes have visible variation. Use your kneaded eraser to lift out any that look too heavy, then add sparse individual lashes to create natural variation.
Step 8: Adding Highlights and Reflections
8Bring the eye to life with reflections
Highlights and reflections are what give the eye its sense of life and wetness. Without them, the eye appears flat and dull. However, they must be placed accurately to maintain realism.
The primary highlight appears on the cornea, the clear dome that covers the iris. This highlight should be bright and placed to suggest the light source direction. Typically, it appears slightly above and to the side of center.
Add a secondary, smaller highlight to suggest the spherical nature of the eye. This can be placed to the side or below the primary highlight, depending on your light source.
Use your kneaded eraser to create highlights by gently pressing and lifting graphite from the paper surface. This creates softer, more natural highlights than adding white media.
Step 9: Drawing the Eyebrows
9Frame the eye properly
The eyebrows are essential for framing the eye and conveying expression. They should complement the eye without overpowering it.
When drawing eyebrows, think of them as a series of hair strokes rather than a solid shape. Build them up stroke by stroke, following the natural direction of hair growth. The strokes should vary in length, direction, and darkness to create natural texture.
The inner portion of the eyebrow (near the nose) typically grows more vertically, while the outer portion sweeps upward and outward. The arch is usually located about two-thirds of the way from the inner corner.
Shade beneath the eyebrow to suggest the subtle shadow that helps ground the brow against the face structure.
Common Mistakes and How to Avoid Them
Even experienced artists encounter issues when learning how to draw realistic eyes. Understanding common mistakes will help you avoid them in your own work.
Eyelashes Looking Unnatural
If your eyelashes look like a row of matchsticks, you are likely making them too uniform. Each eyelash should be different in length, thickness, and direction. Pay particular attention to the curvature; lashes that are too straight look artificial. Use your blending stump lightly on lashes that appear too harsh.
Difficulty with Blending
Harsh lines and obvious blending strokes are signs of overworking or using incorrect techniques. Use fresh, sharp pencils and blend lightly with proper blending stumps or torches. Work in layers and resist the urge to press too hard.
Eye Shape Looking Wrong
If your eye shapes consistently look incorrect, you likely need to spend more time studying eye anatomy. Remember that the eye is a 3D spherical form, not a flat shape. Practice sketching the basic spherical structure before adding details. Refer to anatomical diagrams and study how light falls across the spherical form.
Lack of Depth in the Iris
The iris is not a flat disc but has significant depth and complexity. Many beginners make the iris too uniform, with too little contrast between light and dark areas. Build up the iris gradually, darkening the outer edge and the area around the pupil while leaving radiating spokes lighter.
Important: If something looks wrong in your drawing, step back and evaluate. Squinting at your work can help you see value relationships more clearly. Do not be afraid to erase and restart portions of your drawing; this is a normal part of the learning process.
Tips for Different Eye Shapes and Expressions
Realistic eye drawing requires understanding that no two eyes are exactly alike. The basic principles remain the same, but you will encounter significant variation in practice.
Almond-Shaped Eyes
Almond-shaped eyes have a slight upward tilt at the outer corner and are considered one of the most common eye shapes. When drawing these, focus on the elegant curve that connects the inner and outer corners.
Round Eyes
Round eyes have more visible sclera on the sides and a larger, more circular iris area. Emphasize the spherical form and pay careful attention to the shadows created by the larger curved surface.
Hooded Eyes
Hooded eyes have extra skin that partially covers the upper lid, creating a fold. Adjust your approach to show this extra tissue while maintaining the sense of the eye beneath.
Conveying Expression
Expression in eyes comes primarily from the relationship between the iris, pupil, and eyelid position. A larger visible iris suggests alert interest, while a smaller iris (partially covered by the upper lid) creates a more intense or introspective feeling.
Conclusion
Learning how to draw realistic eyes step by step is a journey that requires patience, practice, and understanding. Remember that mastery does not happen overnight. Start with the foundational elements of eye anatomy and spherical form, then progressively add shading, detail, and refinement.
The key principles to remember are understanding the 3D structure beneath the surface, using proper value structure to create depth, blending smoothly while preserving important details, and adding natural variation to elements like eyelashes and iris patterns.
As you practice, you will develop your own approach and style. Use this guide as a reference, but trust your observations from real references. Each eye you draw will teach you something new about this remarkable and expressive facial feature.
Most importantly, enjoy the process. The challenge of capturing the complexity and beauty of the human eye is what makes this aspect of portrait art so rewarding.