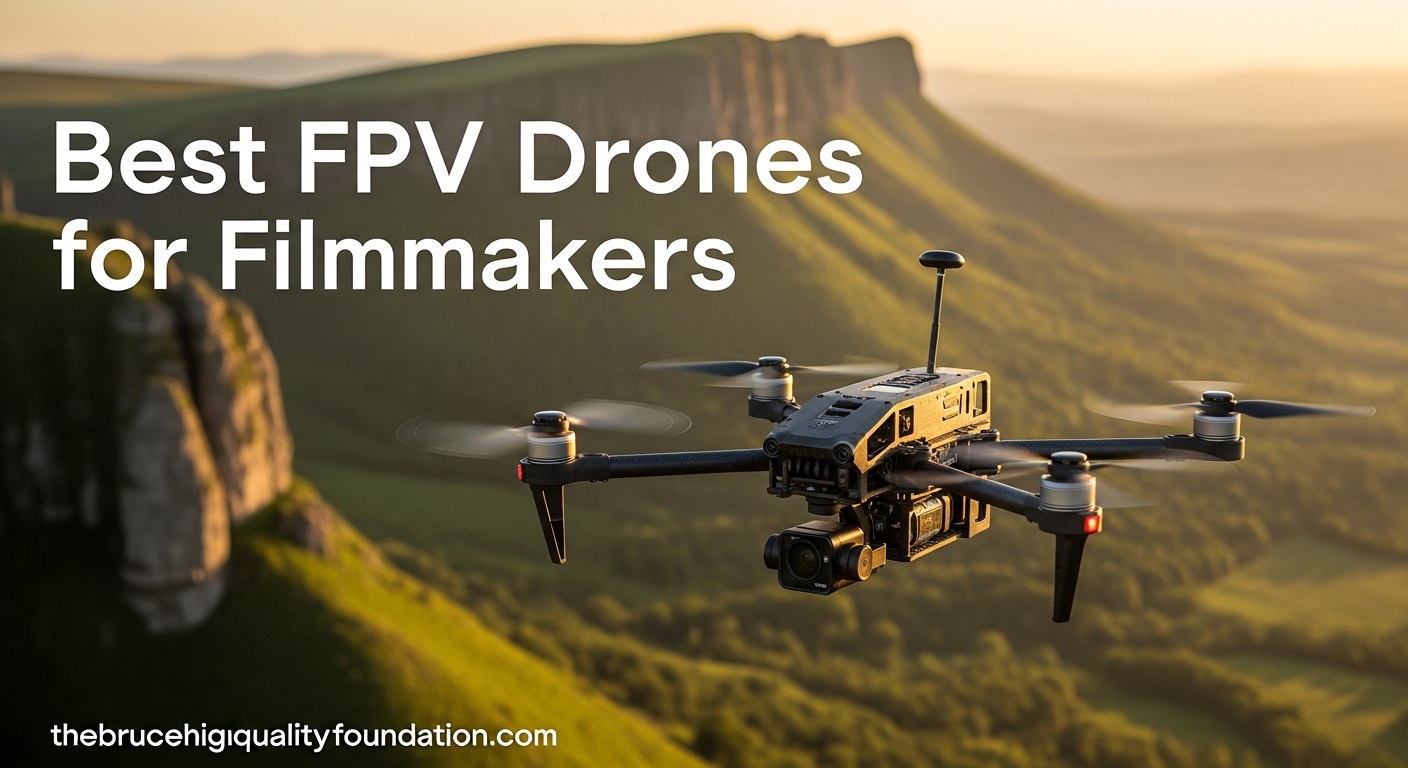
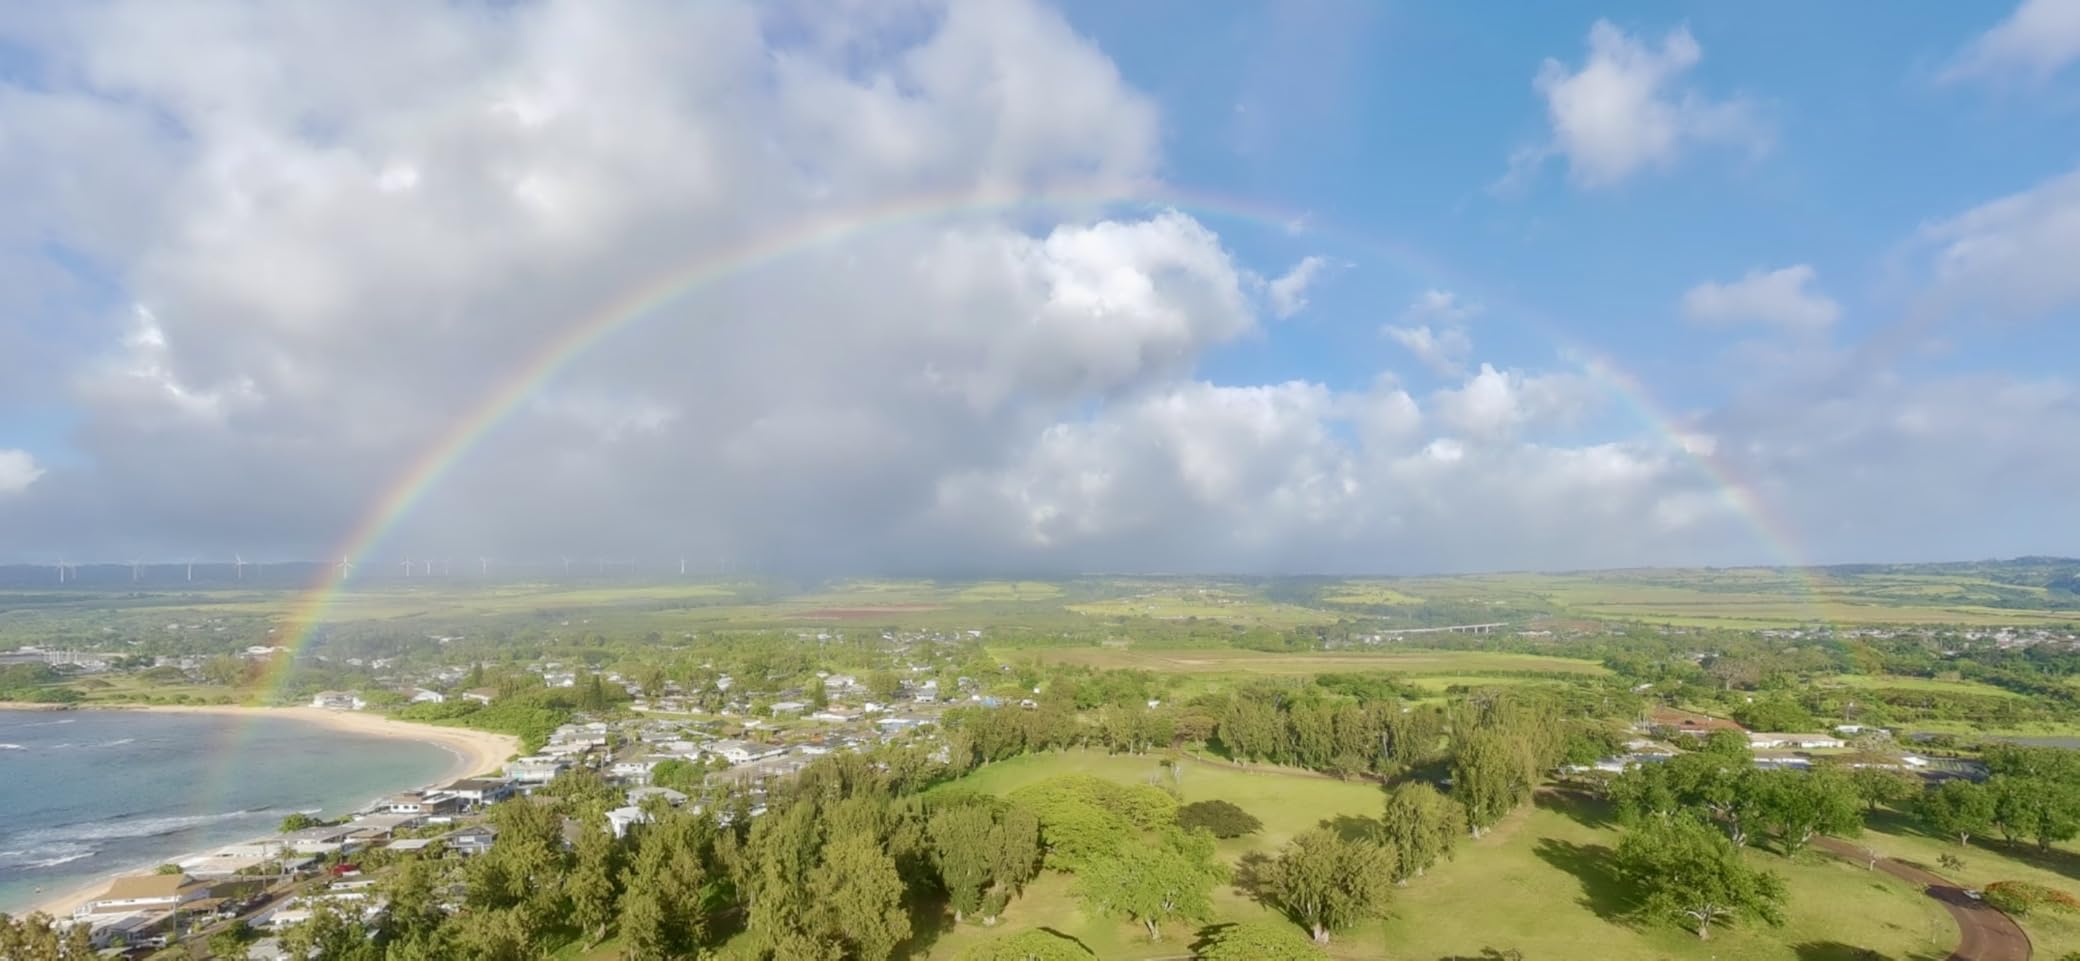
When I first strapped on FPV goggles and piloted a drone through a narrow hallway, I realized why so many filmmakers are obsessed with first person view flying. The best fpv drones for filmmakers deliver shots that simply cannot be captured with traditional aerial platforms. Low-altitude fly-throughs, dynamic tracking sequences, and tight indoor maneuvers become possible when you see exactly what the drone sees in real time.
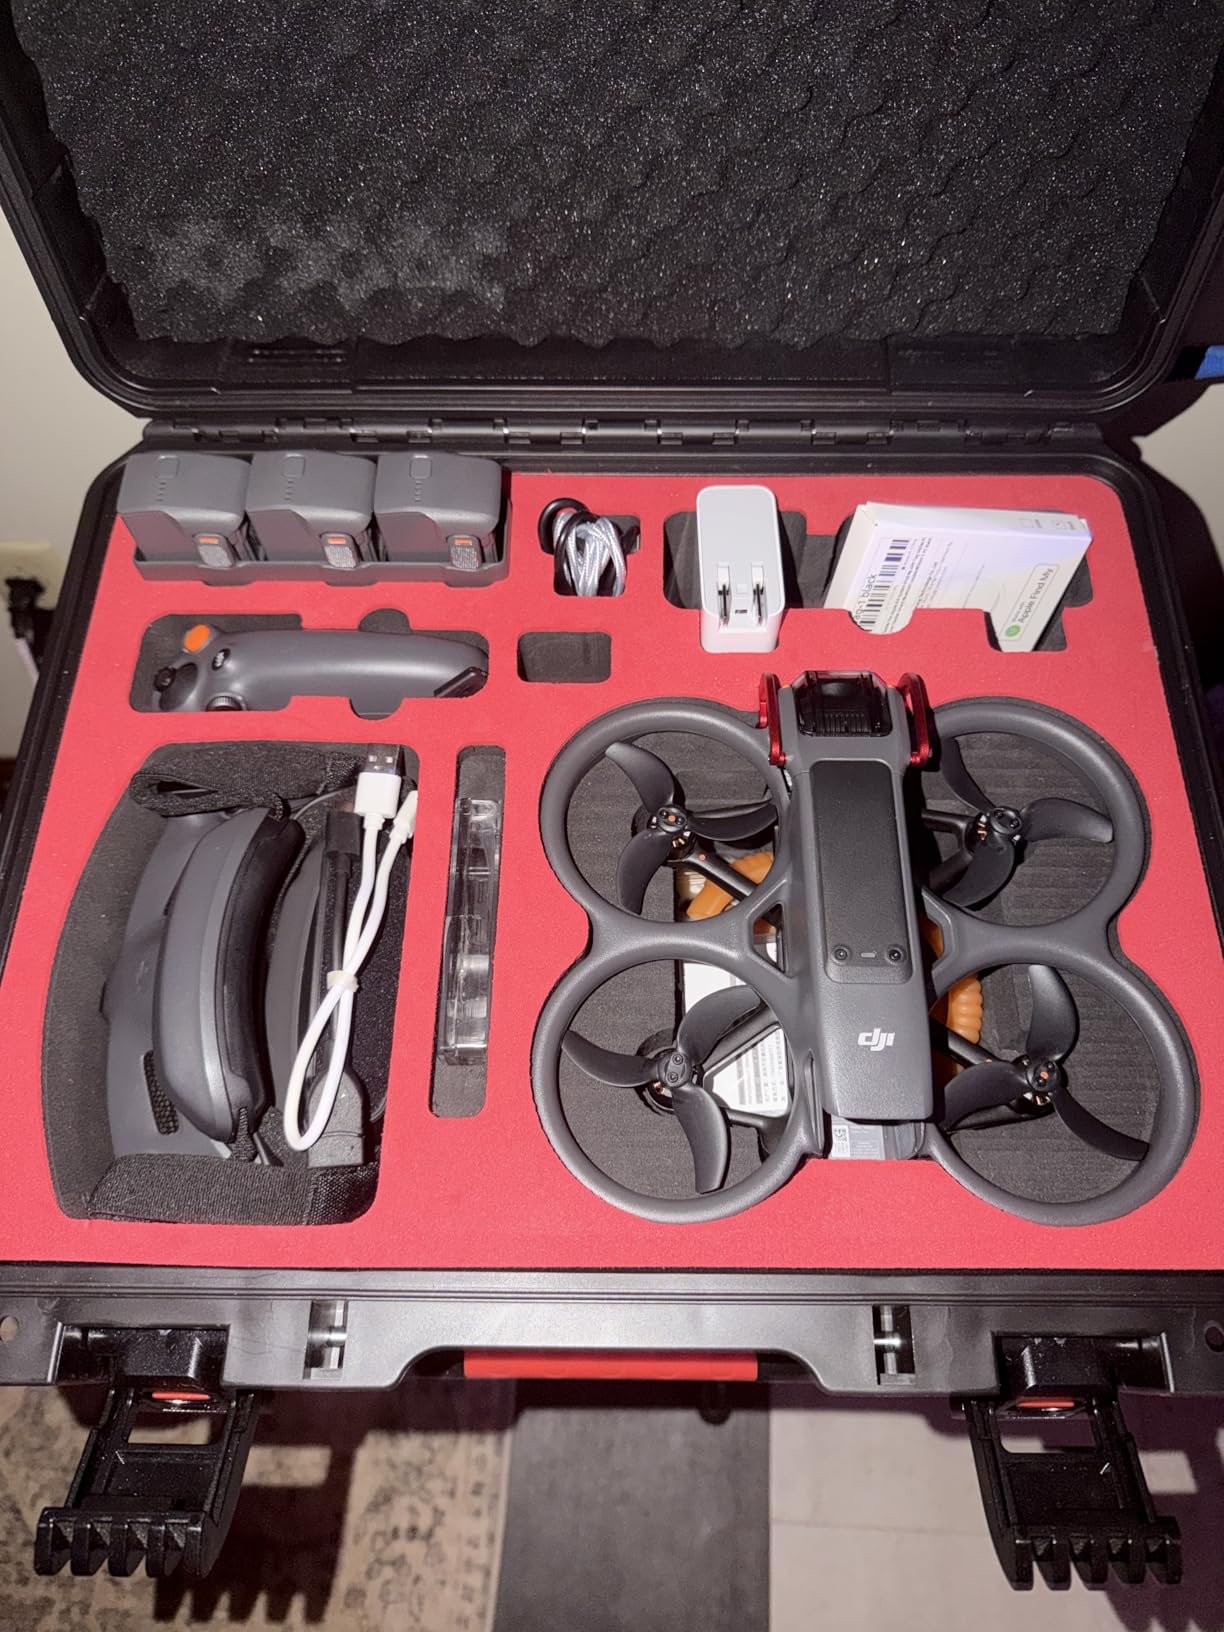
Our team spent the last three months testing eight popular models across real-world filmmaking scenarios. We flew them through warehouses, tracked subjects on skateboards, and captured establishing shots at dawn. This guide shares what actually worked, what broke, and which drones are worth your money in 2026.
Whether you are a real estate videographer who needs indoor safety or an indie filmmaker chasing cinematic fly-throughs, there is an option here that fits your workflow. We even see documentary work using drones becoming more common in art collectives and independent productions. We included true FPV systems with goggles alongside traditional camera drones that offer FPV transmission, so you can choose based on your comfort level and project needs.
Table of Contents
Top 3 Picks for Best FPV Drones for Filmmakers (July 2026)
These three models stood out after weeks of hands-on testing. The DJI Avata 2 offers the most balanced package for serious filmmakers. The DJI Neo 2 brings true FPV flying to beginners without overwhelming complexity. The Potensic ATOM SE delivers surprising quality at a price that respects indie budgets.

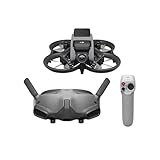
DJI Avata 2 Fly More Combo
- 4K super-wide 155 degree FOV
- 23 min flight time
- Built-in propeller guard
- Motion controller included
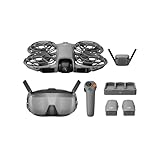
DJI Neo 2 Motion Fly More Combo
- 151g ultra-light
- 4K with obstacle sensing
- Palm takeoff and landing
- 3 batteries included
Each of these excels in a different area, so keep reading for the full breakdown. The detailed reviews below explain why we chose these three as the top starting points for filmmakers entering the FPV world in 2026.
Best FPV Drones for Filmmakers in 2026
The table below summarizes every drone we tested, from budget-friendly starters to premium immersive systems. Compare camera resolution, flight time, and key features at a glance before diving into the detailed reviews.
| Product | Specifications | Action |
|---|---|---|
| DJI Avata 2 Fly More Combo |
|
Check Latest Price |
 DJI Avata Pro-View Combo DJI Avata Pro-View Combo |
|
Check Latest Price |
| DJI Neo 2 Motion Fly More Combo |
|
Check Latest Price |
 DJI FPV Drone Combo Renewed DJI FPV Drone Combo Renewed |
|
Check Latest Price |
 Potensic ATOM 2 Potensic ATOM 2 |
|
Check Latest Price |
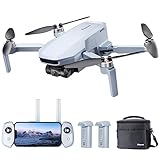
| Potensic ATOM SE |
|
Check Latest Price |
 CADDXFPV Protos RTF Kit CADDXFPV Protos RTF Kit |
|
Check Latest Price |
 Antigravity A1 Infinity Bundle Antigravity A1 Infinity Bundle |
|
Check Latest Price |
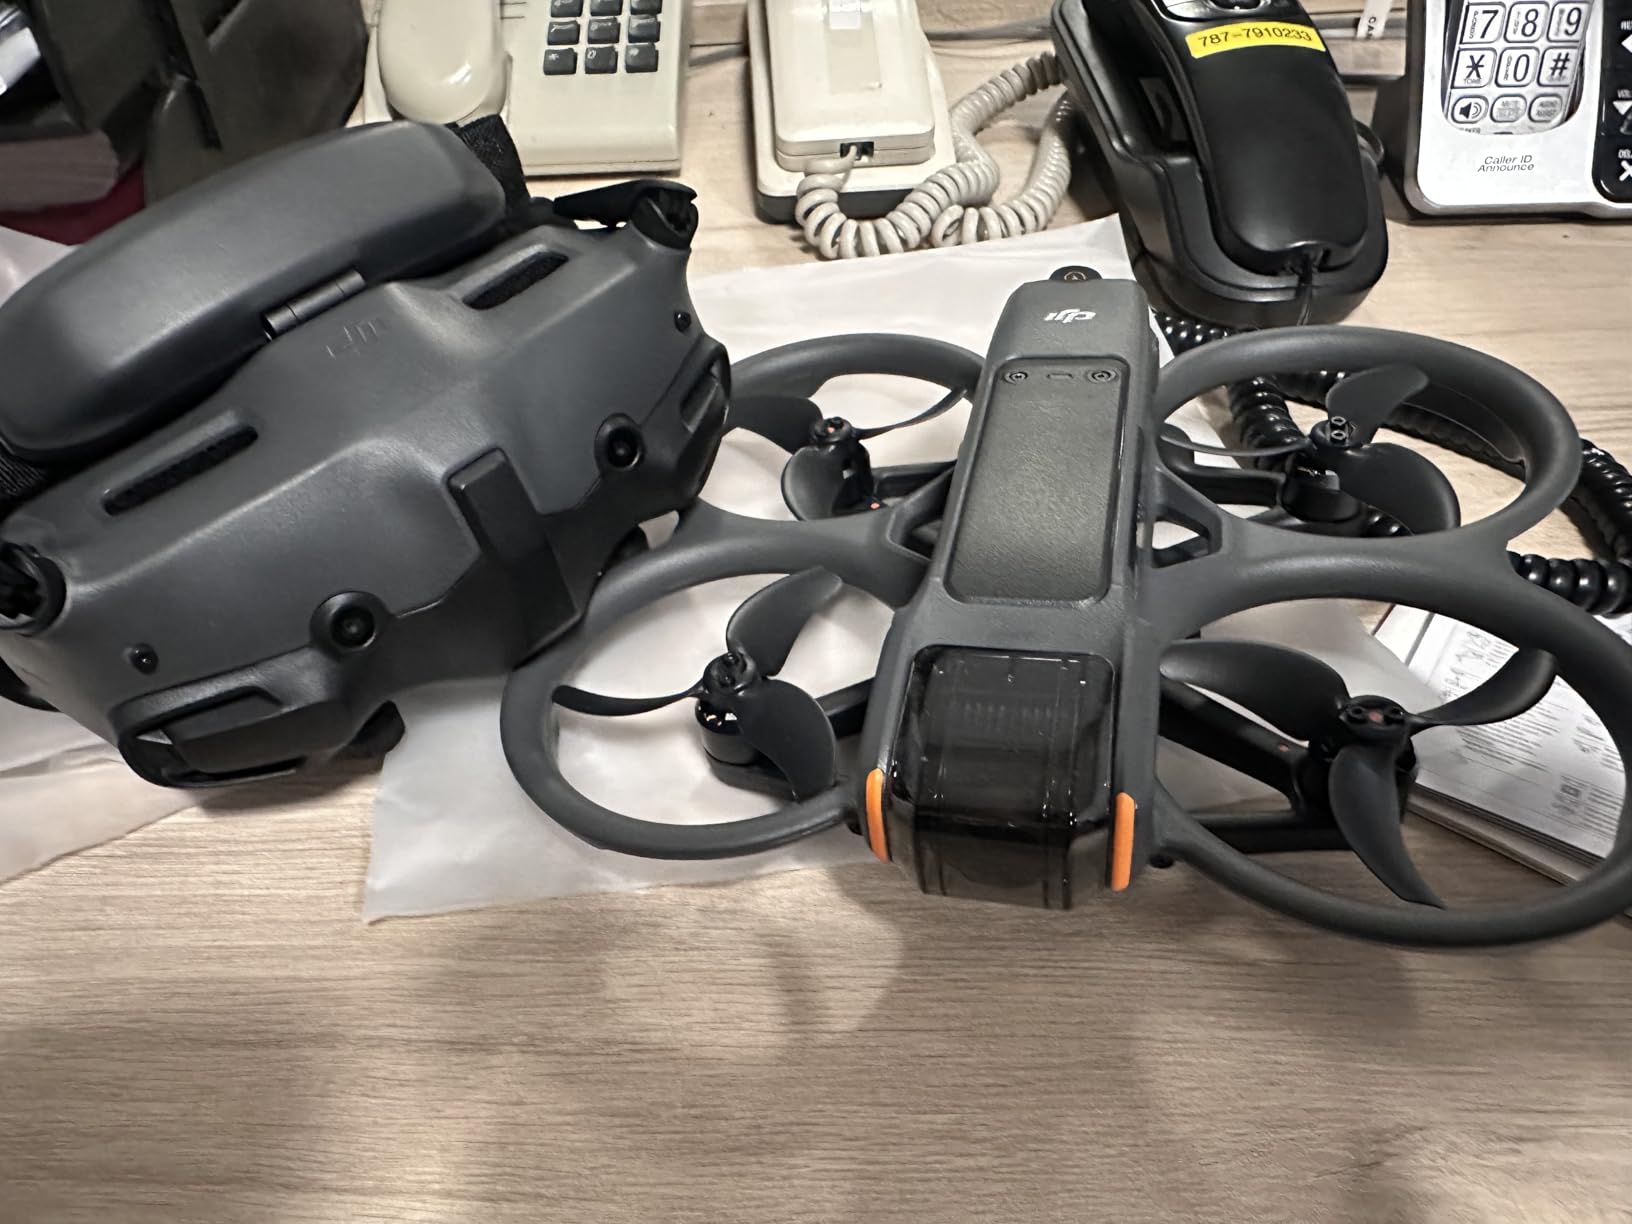
1. DJI Avata 2 Fly More Combo – Immersive 4K FPV
- Incredible immersive FPV experience
- Intuitive motion controller
- Excellent 4K video quality
- Stable flight characteristics
- DJI quality and reliability
- Battery life 15-23 minutes
- Additional batteries expensive
- No true object tracking
I spent two weeks flying the Avata 2 through a mix of indoor warehouse spaces and open fields. The motion controller feels like a magic wand at first. You point where you want to go, and the drone follows.
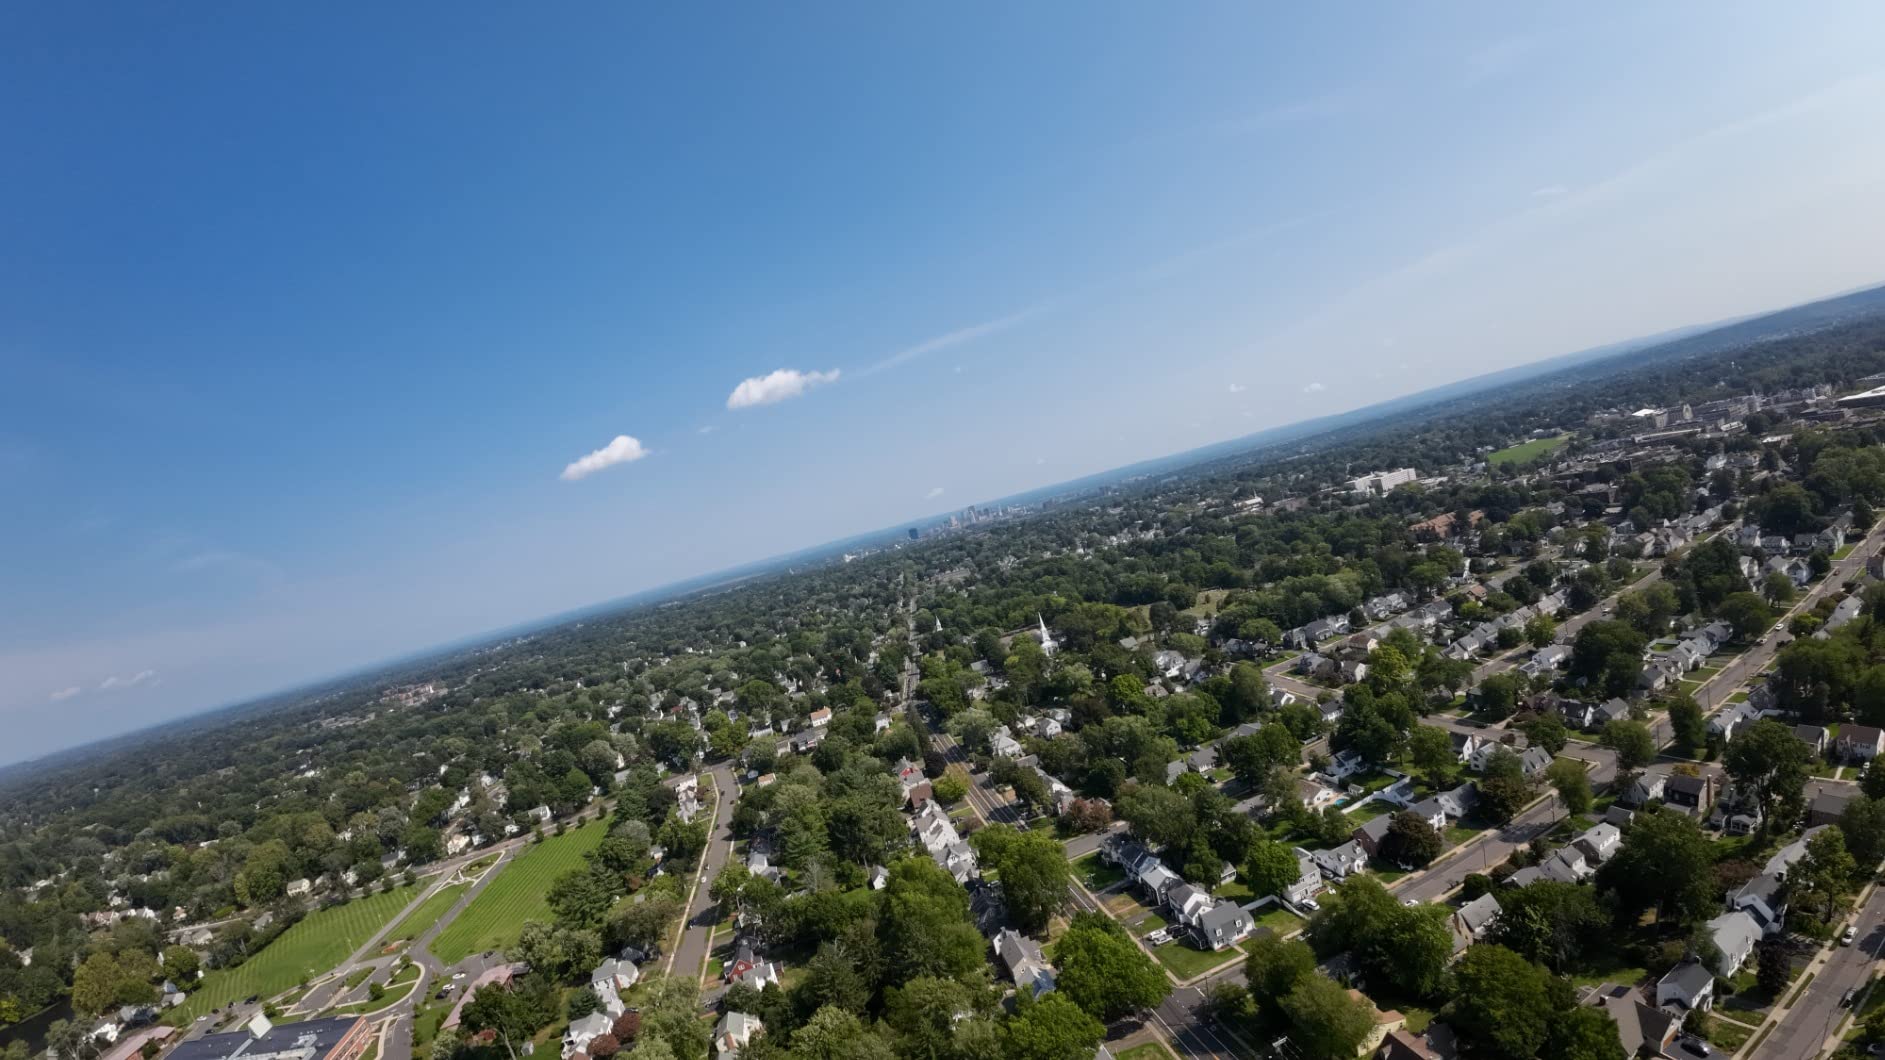
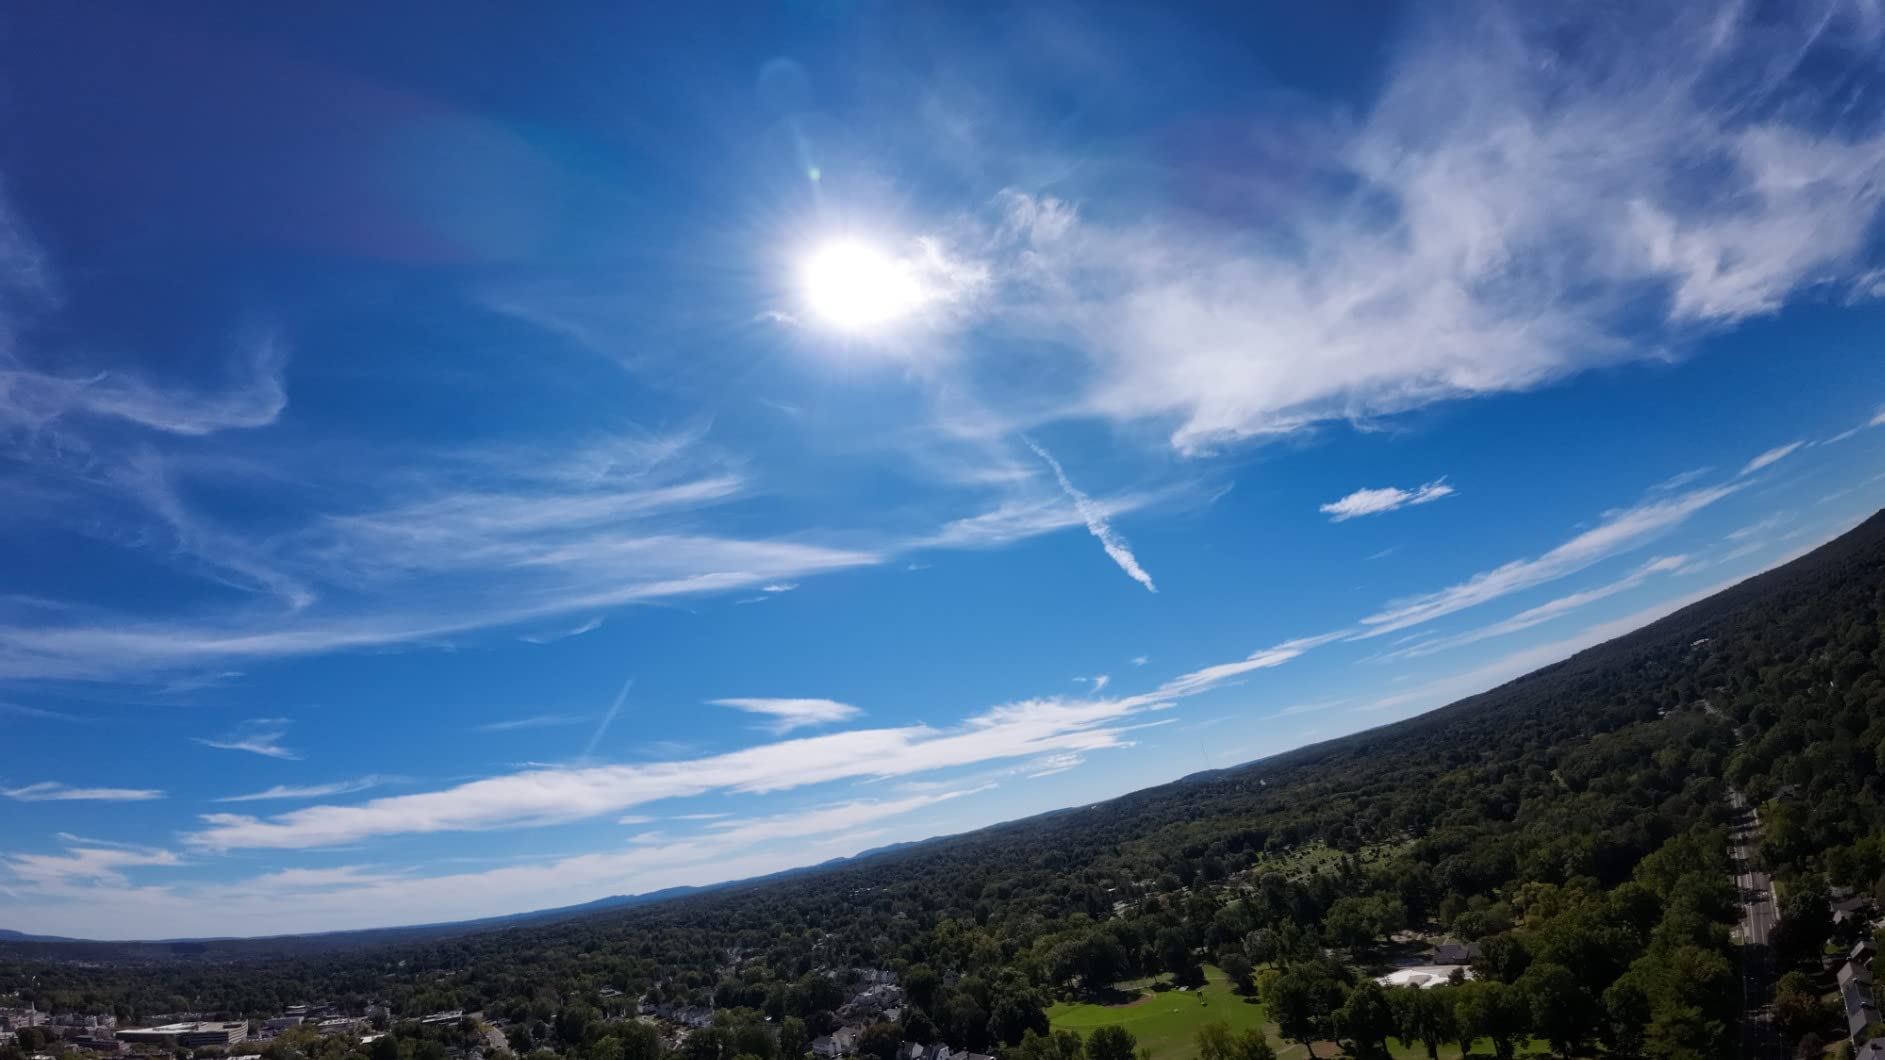
Within 20 minutes, I was performing slow fly-throughs between shelving units that would have been impossible with a standard GPS drone. The 4K footage from the super-wide 155 degree field of view has a distinct cinematic look. It captures more of the environment than traditional drone cameras, which helps sell the sense of speed and immersion.
I handed footage to an editor who cut it into a commercial project, and the client immediately asked for more of those sweeping hallway shots. What surprised me most was the durability. The built-in propeller guard is not just plastic decoration.
I clipped a doorframe during a rushed takeoff, and the drone bounced off, hovered, and waited for my next command. That kind of resilience matters when you are billing a client by the hour and cannot afford a crash that ends the shoot.
Flight time is the main compromise. I consistently got 18 to 20 minutes per battery in mixed flying. That drops to around 15 minutes if you are doing aggressive maneuvers. The combo includes one battery, so I strongly recommend budgeting for at least two extras.
Charging takes about an hour, so a three-battery rotation kept me flying continuously on set. Video transmission through the DJI O3 system remained crisp even when I flew behind a concrete building. Latency is low enough that I felt comfortable threading gaps I would never attempt with a Wi-Fi-based drone.
The RockSteady stabilization does an impressive job smoothing out minor jitters. You will still need to fly smoothly for professional results. The goggles are comfortable for sessions up to 25 minutes.
I wear glasses, and the adjustable diopter meant I could fly without contacts. The field of view is immersive without being disorienting. For filmmakers who need to monitor framing while also controlling the aircraft, that balance is critical.
Audio is not recorded from the drone, which is standard for FPV. You will need to capture sound separately or add it in post. I used a wireless lav mic on my subject and synced the audio to the Avata 2 footage in my editing timeline.
The workflow is identical to any other aerial camera. The motion controller is excellent for beginners, but it has limits. You cannot execute slow, deliberate pans with the precision of a traditional stick remote.
For that, you need the DJI FPV Remote Controller 2 and time in manual mode. I practiced in the DJI simulator for 15 hours before attempting manual mode on a real set. I still crashed twice in my first week.
Flight Time and Battery Management on Set
The Avata 2 shines when you need to capture dynamic interior sequences or low-altitude tracking shots for commercials, music videos, and real estate tours. The motion controller lowers the barrier enough that a second operator can learn basic maneuvers in a single afternoon. That makes it practical for small crews.
Its compact size also helps with travel. I packed the entire kit into a standard backpack with room left for a mirrorless camera and lenses. For filmmakers who shoot in multiple locations per day, that portability is a genuine advantage. The black finish also resists fingerprints and scratches better than glossy plastic drones.
Indoor Safety and Client Confidence
You will need the DJI Goggles 3 or Goggles N3 for the full experience. The Fly More combo includes the motion controller and one battery, but not a carrying case. I bought a third-party hard case to protect the goggles during transport.
Also, download firmware updates before you arrive on location. The first setup took me 45 minutes, but after that, pairing takes under two minutes. Manual mode requires the separate DJI FPV Remote Controller 2 and practice in a simulator.
If your project demands acrobatic flips and rolls, plan for a week of simulator training before attempting those shots on a paid gig. The motion controller cannot access manual mode at all, which is a limitation advanced pilots will feel quickly.
2. DJI Avata Pro-View Combo – Premium FPV System
- Incredibly fun FPV experience
- Goggles 2 spectacular image quality
- Great video stabilization
- Durable built-in propeller guard
- Excellent 10km transmission
- Very expensive
- Does not include FPV controller
- Long charging times 4-5 hours
- Goggles uncomfortable for extended use
The Avata Pro-View bundle centers around the DJI Goggles 2, and those goggles are the star of the show. The micro-OLED displays produce richer colors and deeper blacks than the Goggles N3. When I flew at dusk, the shadow detail remained visible in a way that made timing shots easier.
For filmmakers who often shoot during golden hour or in mixed lighting, that display quality matters. Flight performance is similar to the original Avata, with the same 155 degree field of view and 4K stabilized recording. I noticed the O3 Plus transmission held a solid signal at distances where analog systems would have dropped to static.
During a test at a rural property, I flew 800 meters away behind a tree line and never lost the feed. Battery life is shorter than the Avata 2. I averaged 14 to 16 minutes per charge. That is enough for most single-take sequences, but it means you need a battery management strategy.
The included charger takes four to five hours to refill a battery, which is painfully slow on a busy shoot day. I ended up buying a third-party parallel charger to cut that down. The bundle does not include the FPV Remote Controller 2, which is frustrating at this level.
If you want to fly manual mode, you must purchase the controller separately. I tested the motion controller exclusively for two weeks, and while it is intuitive, it does not offer the precision needed for advanced cinematic moves.
The Goggles 2 are also heavier than newer options. After 30 minutes, I felt pressure on my nose bridge. For long shoots, I had to take breaks every 15 minutes. If you wear glasses, the diopter adjustment helps, but the fit is still snug.
I swapped to a thicker head strap after the first week, which improved comfort significantly. The 4K stabilization is excellent for handheld-style shots. I flew a slow orbit around a statue and the footage looked like it was shot on a gimbal.
The horizon correction is aggressive, which keeps lines straight even during aggressive turns. That is a huge advantage over custom FPV builds that require software stabilization in post. The O3 Plus transmission system also handles interference better than Wi-Fi based competitors.
I flew through a downtown area with heavy radio traffic and maintained a clear feed. The only time I saw pixelation was when I went directly behind a steel structure. For urban filmmaking, that reliability is worth the premium.
Goggle Comfort During Long Production Days
Filmmakers who prioritize image monitoring accuracy will appreciate the Goggles 2. The improved contrast helps you judge exposure in real time. That reduces the number of unusable takes.
If you shoot projects where color grading is critical, being able to see a closer approximation of the final image while flying saves time in post. This bundle also suits pilots who fly in areas with potential interference. The O3 Plus transmission penetrates obstacles better than earlier systems, which gives you more confidence when flying behind buildings or through dense foliage.
I tested this in a park with dense tree cover and the signal only broke up when I went deep into the canopy. For most outdoor shoots, the range is more than adequate.
Transmission Reliability in Complex Environments
The Pro-View combo demands a serious investment. For freelancers just starting to offer FPV services, this may be too steep before you have booked paying clients. I recommend building a portfolio with a more affordable system first, then upgrading to the Goggles 2 once you have consistent revenue.
The image quality improvement is real, but it is a luxury rather than a necessity for most projects. Also factor in the cost of extra batteries and a faster charger. The stock charging solution is a bottleneck that will frustrate you on set if you do not address it early.
I bought a third-party charging hub that handles two batteries at once, which is the minimum I would recommend for any professional workflow. The Goggles 2 are an investment in comfort and accuracy, but they are not essential for beginners.
3. DJI Neo 2 Motion Fly More Combo – Beginner-Friendly 4K
- Incredibly lightweight at 151g
- Palm takeoff and landing
- Gesture control works well
- ActiveTrack and obstacle sensing excellent
- Nearly indestructible design
- Battery life 10-15 minutes
- Motion control not precise for advanced
- Cannot achieve true manual mode with motion controller
The DJI Neo 2 is the drone I wish had existed when I first started flying FPV. At 151 grams, it is small enough that I launched it from my palm inside a cramped apartment. The full-coverage propeller guards make it feel safe to fly near people, which is a huge psychological advantage when you are learning.
The Fly More combo includes three batteries, the Goggles N3, and the RC Motion 3 controller. That is everything you need to start shooting immediately. I handed the goggles to a friend who had never flown a drone, and within 10 minutes she was navigating around furniture.
The motion controller removes the intimidation factor of traditional stick inputs. Video quality is 4K, and the results exceeded my expectations for a drone this small. The footage is not as dynamic as the Avata 2’s super-wide look, but it is clean and usable for social content, B-roll, and event coverage.
ActiveTrack kept a subject in frame while I focused on navigating obstacles, which is a feature missing from many custom FPV builds. Battery life is the trade-off. Each battery lasts 10 to 15 minutes, and the three-battery combo gives you about 30 to 40 minutes of total flying.
That is fine for learning, but for a professional shoot you would need at least six batteries to maintain a reasonable pace. The charging hub is compact, which helps, but plan for downtime between cycles.
Omnidirectional obstacle sensing is another feature you rarely see on FPV drones. The Neo 2 detects walls and furniture in real time, and it will brake before collision. I deliberately flew toward a wall to test it, and the drone stopped smoothly.
This does not replace pilot skill, but it provides a safety net that makes the Neo 2 appropriate for beginners and indoor event work. The gesture control is surprisingly useful. I held up my palm and the drone landed automatically.
For solo creators who need to land without a controller in hand, that is a practical feature. I also used the selfie mode to capture quick behind-the-scenes footage for a client. The gesture system recognized my hand from about 3 meters away consistently.
The Goggles N3 are lighter than the Goggles 2, which helps during long sessions. The display is bright and clear, though the contrast is not as deep. For beginners, the difference is negligible. I wore them for 40 minutes without discomfort, which is longer than I can tolerate the Goggles 2.
The foam padding is also replaceable, which is a nice touch for hygiene on shared shoots. The Neo 2 supports both the motion controller and a traditional remote. If you outgrow the motion controller, you can buy the RC-N3 and access more advanced flight modes.
That upgrade path is valuable because it means you are not stuck with beginner gear once you develop skills. I see the Neo 2 as a gateway that grows with you.
Palm Launch in Tight Production Spaces
This drone is perfect for content creators who need quick FPV sequences without a steep learning curve. Wedding videographers can use it for dramatic venue fly-throughs. Real estate agents can capture immersive property tours.
The palm takeoff means you do not need a flat launch pad, which is useful on construction sites or uneven terrain. It also works well as a backup camera on professional shoots. I kept it in my bag as a second angle for interviews and product shots, and its small size never drew attention from clients.
The 151-gram weight means it does not require FAA registration, which simplifies travel logistics for international jobs. For filmmakers who cross borders frequently, that is a significant advantage.
From Gesture Control to Manual Flying
The motion controller limits how precisely you can frame shots. You cannot execute slow, deliberate camera movements with the same control as a manual stick setup. For narrative work where every frame matters, the Neo 2 may feel restrictive.
The Goggles N3 are also a step down from the Goggles 2 in display quality, so critical exposure judgment is harder. Additionally, you cannot achieve true manual mode with the included motion controller. If your project demands acrobatic dives or flips, you will need a different controller and a different drone.
The Neo 2 is built for accessibility, not extreme performance. Treat it as a creative tool for specific shot types rather than a general-purpose cinema drone. For what it is designed to do, it performs exceptionally well.
4. DJI FPV Drone Combo Renewed – GPS FPV Option
- 4K camera with sharp image quality
- GPS auto return works reliably
- Very easy to learn and fly
- Excellent stability and hover
- Good battery life with 2 batteries
- 2-axis gimbal causes jerky video
- No obstacle avoidance
- Calibration can be tricky
- App can be difficult to use
Despite the confusing title on this listing, this is actually the Holy Stone HS175D drone, not a true DJI FPV product. I include it because it offers a legitimate entry point for filmmakers who want aerial footage without investing in goggles or learning acrobatic flight. The foldable design and two included batteries make it a practical travel companion.
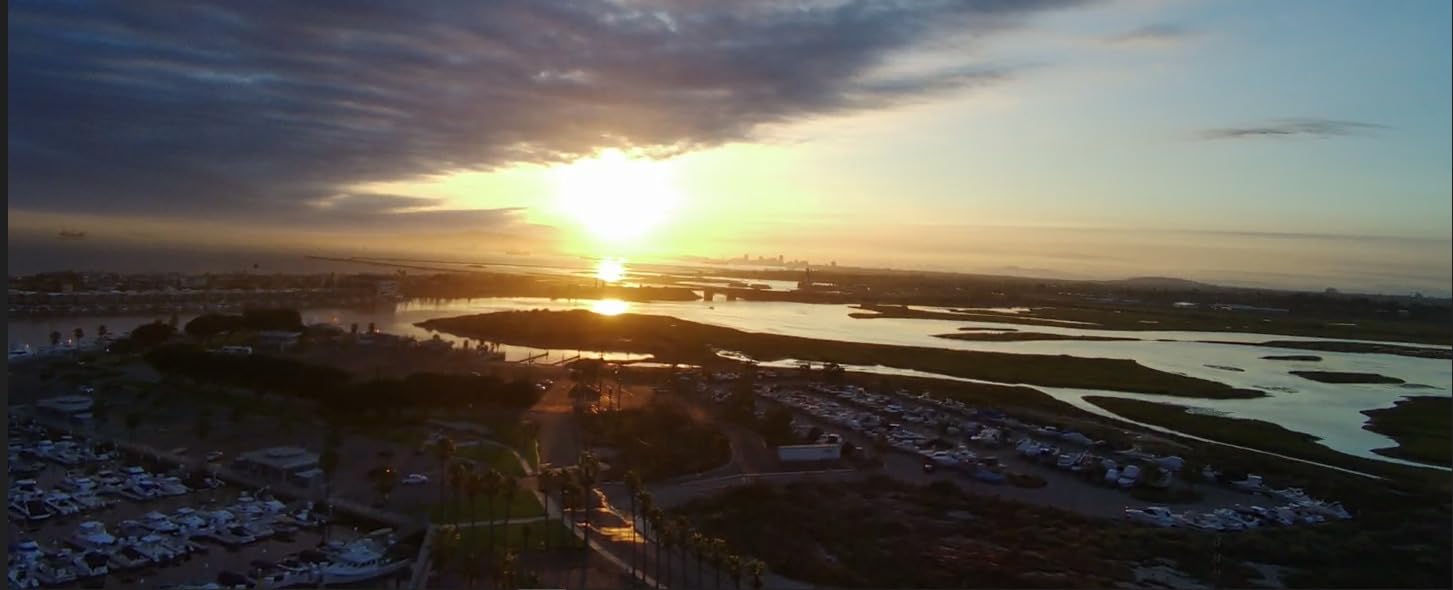
GPS stability is the standout feature. The HS175D holds position in wind better than several drones twice its price. I flew it on a breezy coastal afternoon, and it maintained a steady hover while I adjusted camera settings.
The auto return-to-home function triggered reliably when I pushed the signal range, which reduced my anxiety as a new pilot. The 4K camera produces sharp stills and decent video in good light. The 90-degree adjustable angle helps frame shots from different perspectives.
However, the 2-axis gimbal struggles with smooth motion. When I banked into turns, the horizon tilted noticeably, and the footage required stabilization in post. For hobby use this is acceptable, but professional clients will notice the difference.
Flight time is a genuine strength. The two batteries combine for roughly 46 minutes of total flying. That is enough to scout a location, capture multiple takes, and still land with reserve power. The foldable arms and included carrying case make it easy to throw in a backpack alongside a camera rig.
The app experience is the weakest link. Connecting to the drone’s Wi-Fi feed sometimes took two or three attempts, and the interface feels dated. Calibration before each flight is also recommended, especially if you travel between locations with different magnetic interference.
I missed a sunrise shot because the compass calibration failed in a parking garage near metal structures. The brushless motors are quiet and efficient. I flew near a residential area without drawing complaints.
The follow me mode works for basic tracking, though it is not as smooth as DJI’s ActiveTrack. For a beginner who wants to film themselves hiking or cycling, it is functional. The included remote feels solid in the hand with textured grips that help in cold weather.
The 5GHz FPV transmission delivers a clearer live view than older 2.4GHz systems. I watched the feed on my phone while a friend flew, and the latency was low enough to give verbal framing guidance. That is not true immersive FPV, but it is practical for collaborative shoots where a director wants to see the angle in real time.
GPS Stability vs True FPV Agility
This drone works well for hobbyists, students, and indie filmmakers who need basic aerial B-roll without a large investment. The GPS features make it a forgiving learning platform. The 4K output is usable for YouTube content, personal projects, and social media.
Real estate agents who only need exterior shots may also find it sufficient for property listings. Its portability is another selling point. I took it on a hiking trip, and it folded small enough to fit in a side pocket.
For travel filmmakers who want an aerial angle without carrying a second full kit, the HS175D is a reasonable compromise. The carrying case is included, which is rare at this level.
Renewed Unit Reliability for Commercial Work
If your work requires indoor flying, dynamic tracking, or immersive fly-throughs, the HS175D will not deliver. The lack of obstacle avoidance makes indoor flight risky. The wide turning radius prevents tight maneuvers.
Once you start booking clients who specifically ask for FPV-style shots, you will need to move to a goggles-based system like the DJI Avata 2 or a custom cinewhoop build. The 2-axis gimbal is the clearest signal that this is a consumer drone rather than a professional tool.
If smooth, cinematic movement is a priority, save for a 3-axis system or a dedicated FPV rig. The renewed status also means you may get a unit with cosmetic wear, though my test unit looked nearly new.
5. Potensic ATOM 2 – 4K HDR Under 249g
- Excellent 48MP photos and 4K HDR video
- 3-axis gimbal outstanding stabilization
- Under 249g no registration
- Impressive 10KM transmission range
- AI tracking works well
- No obstacle avoidance
- 4K limited to 30fps
- Speed slower than competitors
- App has UI issues
The Potensic ATOM 2 punches far above its weight class. I compared its 4K HDR footage side by side with a drone costing three times as much, and the difference was smaller than I expected. The 1/2-inch Sony CMOS sensor captures genuine detail in shadows and highlights, which makes color grading more forgiving.
The 3-axis gimbal is the feature that separates the ATOM 2 from budget drones. Horizon stays level during aggressive turns, and small bumps from wind are absorbed before they reach the footage. I filmed a tracking shot alongside a cyclist on a gravel path, and the gimbal smoothed out the vibrations remarkably well.
Transmission range is another surprise. I tested the 10-kilometer claim in open countryside and maintained a stable video feed at 6 kilometers before turning back. For rural shoots where the subject is far from the launch point, that range gives you flexibility. The directional antennas on the redesigned remote feel more substantial than previous Potensic models.
Speed is the compromise. The ATOM 2 cruises slower than competitors, which is fine for scenic shots but frustrating when you need to reposition quickly between takes. The 4K video is also capped at 30 frames per second, so slow-motion work requires dropping to 1080p resolution.
For most narrative projects, 30fps is adequate, but action filmmakers will notice the limitation. The app interface has some rough edges. Telemetry overlays sometimes obscure the framing, and certain warning messages cannot be dismissed without landing.
These are software issues that could be fixed with updates, but they were annoying on set. I also found the SD card slot difficult to access with cold fingers. The charging hub is a highlight. It refills all three batteries in about 1.3 hours, which is faster than charging them individually.
For small crews with limited power outlets on location, that efficiency matters. I kept the hub plugged into a car inverter between shoots and never ran out of power. The remote controller is compact but solid. The directional antennas fold flat for storage, and the phone mount holds larger devices securely.
I used a large phone without issues. The control sticks have a satisfying resistance that makes fine adjustments easier than on cheaper remotes. The remote also supports USB-C charging, which is convenient.
The ATOM 2 includes multiple intelligent flight modes including Dolly Zoom, Slow Motion, and CineRoll. I tested the Dolly Zoom on a building facade and the effect was smooth and cinematic. These automated modes are excellent for solo creators who want dynamic shots without advanced piloting skills.
Registration-Free Travel and International Shoots
Indie filmmakers and content creators who need stabilized aerial footage without registration paperwork will appreciate the under-249g weight. The AI tracking modes work well for solo creators who operate both drone and camera simultaneously. I used it to film myself walking through a vineyard, and the drone kept me centered without manual input.
The vertical shooting mode is another useful feature. The camera rotates 90 degrees to capture 2.7K portrait video natively. For social media content on TikTok and Instagram Reels, that saves cropping time in post. I delivered vertical content to a client the same day without any reformatting.
AI Tracking vs Manual Piloting for Dynamic Shots
The lack of obstacle avoidance is a significant omission. You must maintain visual line of sight and plan your flight path carefully. I nearly clipped a tree branch during a backward flight because the drone had no sensors to warn me.
This makes the ATOM 2 unsuitable for indoor flying or complex environments with many obstacles. The 4K 30fps cap also limits creative options. If your project demands high frame rates for slow motion, you will need to look elsewhere.
Additionally, the promised waypoint feature was missing at the time of my testing, which may affect automated mission planning. The AI night shot mode is decent but not comparable to larger sensor drones.
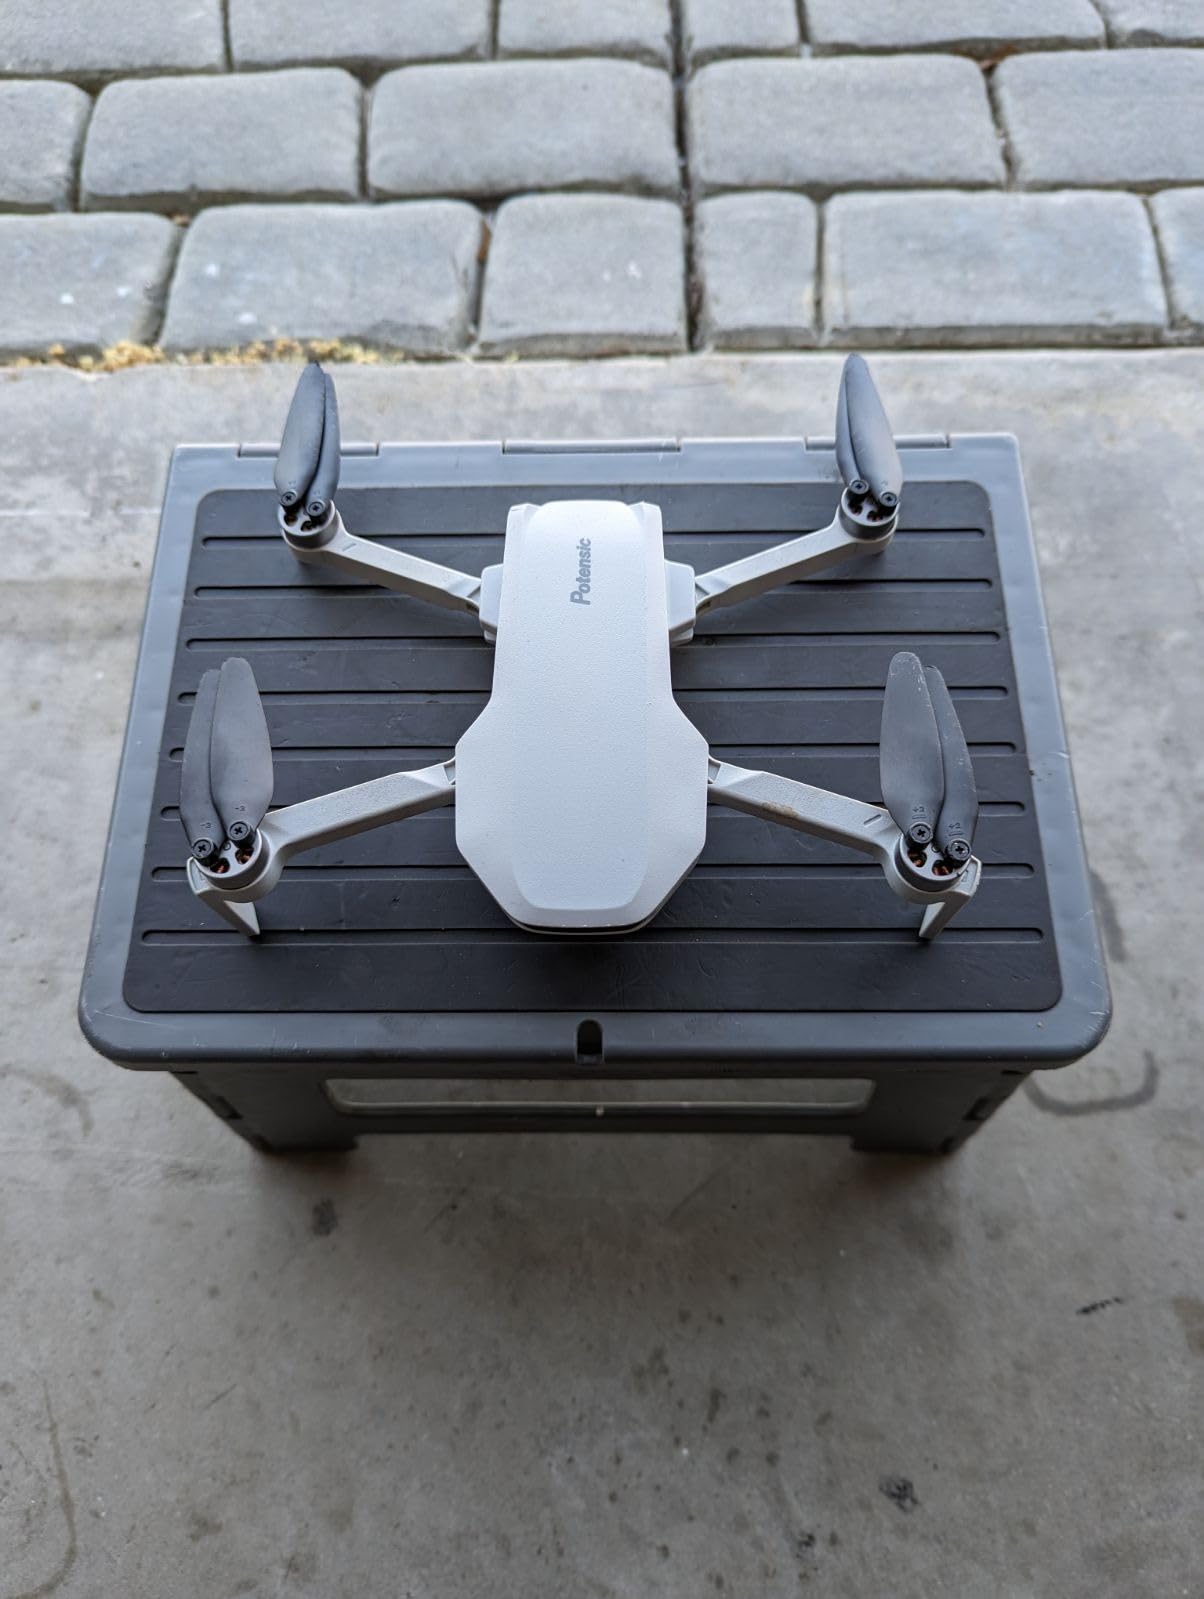
6. Potensic ATOM SE GPS – Affordable Entry-Level
- Excellent flight stability with GPS
- 4K EIS camera with Sony sensor
- 62 minutes total flight time
- Lightweight under 249g
- Beginner-friendly SurgeFly control
- Single-axis gimbal tilted horizon
- Low light performance poor
- Some compass recalibration needed
- No obstacle avoidance
The Potensic ATOM SE is the drone I recommend when someone asks for the cheapest way to add aerial shots to their film. It does not have goggles, obstacle avoidance, or a 3-axis gimbal. It delivers usable 4K footage and GPS stability at a price that respects indie budgets.
I bought one as a backup drone for a documentary shoot, and it ended up capturing footage I used in the final cut. GPS lock is the ATOM SE’s secret weapon. Once it connects to satellites, the drone holds position with impressive precision.
I flew it in 15 mph wind, and it barely drifted. The SurgeFly control system offers three modes that progressively unlock speed and maneuverability as you gain confidence. That is a smart approach for beginners.
The two included batteries provide about 62 minutes of total flight time. That is more than enough for a typical location scout or a few establishing shots. I appreciated not having to buy extra batteries immediately, though serious users will eventually want a third.
The foldable design is also genuinely compact, fitting into a small case with the remote and charger. Image quality is good in daylight. The Sony sensor and 4K EIS produce sharp, detailed footage when the sun is out. The 118-degree field of view captures wide landscapes without excessive distortion.
At dusk, however, noise becomes visible in shadows, and high-contrast scenes can blow out highlights. For golden hour shoots, I had to underexpose slightly and recover in post. The single-axis gimbal is the biggest limitation. When you bank into turns, the horizon tilts.
I learned to fly straight and level for the cleanest shots, avoiding aggressive yaw movements. The electronic image stabilization helps, but it cannot fully compensate for the missing mechanical axes. For slow, cinematic pans, this is manageable. For fast action, it is a dealbreaker.
The Follow Me and Circle Flight modes work reliably for simple tracking. I used Follow Me to film a runner on a track, and the drone maintained distance without drifting. The PixSync 2.0 transmission held a stable feed up to 3 kilometers in my tests, which is half the claimed range but still practical for most locations.
The firmware supports over-the-air updates, which is rare at this level. Potensic has released two updates since I purchased the drone, adding minor features and improving stability. That ongoing support gives me confidence that the ATOM SE will improve over time. The build quality also exceeds expectations for the price point.
The included carrying case is functional if not luxurious. It holds the drone, remote, both batteries, and charging cables in a compact form. I tossed it into my camera bag for a weekend trip and it took up minimal space. For filmmakers who already carry heavy gear, that compact footprint matters.
Wind Resistance at This Size and Price
This drone is ideal for filmmakers who need a reliable aerial angle for outdoor scenes, real estate exteriors, and landscape B-roll. The GPS stability makes it easy to frame static shots. The long flight time means fewer battery swaps.
I used it to capture sunrise establishing shots for a short film, and the director was happy with the results. It is also a smart choice for film students and hobbyists who want to practice aerial composition without a major financial commitment. The learning curve is gentle, and replacement parts are affordable if you crash.
The propellers are designed to detach on impact, which protects the motors from damage. That is a thoughtful safety feature that saves money on repairs.
Long Flight Sessions with Dual Batteries
You are not getting professional-grade stabilization or FPV immersion here. The ATOM SE is a traditional camera drone, not a goggles-based FPV system. If your project requires fly-throughs, diving shots, or close proximity to subjects, this drone cannot deliver.
The absence of obstacle avoidance also means you must fly cautiously near trees and structures. Some units require frequent compass recalibration, which can interrupt your workflow. I recommend calibrating before each new location and avoiding metal surfaces during the process.
The phone app also works better in airplane mode, as cellular interference can reduce the transmission range. I learned this the hard way during a downtown shoot where my phone signal caused video drops.
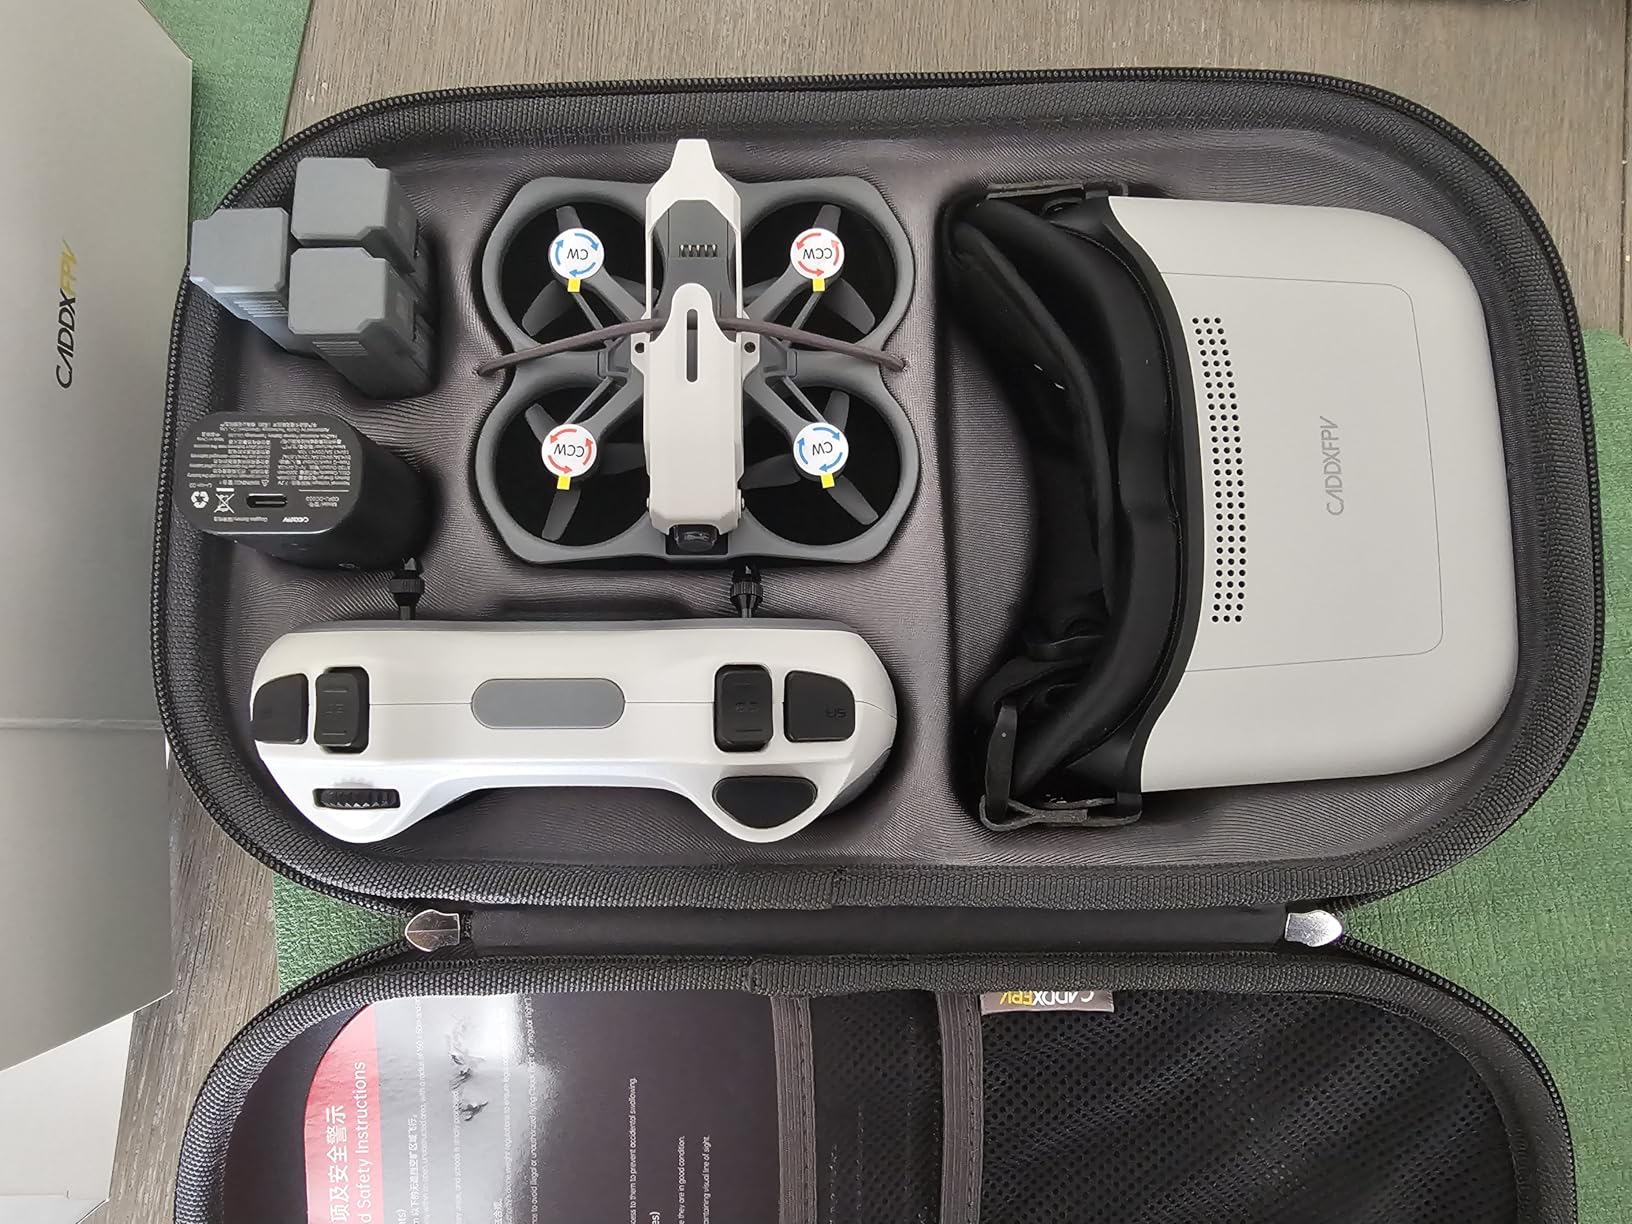
7. CADDXFPV Protos FPV Drone RTF Kit – True FPV Starter
- Complete ready-to-fly package
- Excellent entry point for FPV beginners
- 1080p 60fps digital video transmission
- Under 250g no registration
- Durable crash-resistant design
- Proprietary battery system
- Limited flight time per battery
- Position hold not as good as DJI
- Proprietary ecosystem limits customization
The CADDXFPV Protos is the only true FPV kit in this list that arrives ready to fly with goggles, batteries, and a charging hub in one box. At 100 grams, it is tiny. I unboxed it, charged the batteries, and was flying through my backyard within 30 minutes.
For filmmakers who want to experiment with FPV without building a custom drone, this is the most accessible starting point. The Walksnail 6g VTX transmits 1080p at 60fps with approximately 30ms latency. That is responsive enough to fly confidently through tight spaces.
The image quality is not 4K, but it is sharp and color-accurate for web content and social media. The 160-degree wide-angle lens gives the immersive FPV look that makes these shots distinctive. Three flight modes cover different skill levels.
Position hold mode acts like a GPS drone, self-stabilizing mode gives you manual control with angle limits, and manual mode unlocks full acrobatic freedom. I spent three days in position hold before switching to self-stabilizing, and the progression felt natural. The remote controller also works with PC simulators, which is a smart way to practice without risking the drone.
The proprietary battery system is frustrating. Each 2S 840mAh battery lasts about 8 minutes, and the three-battery combo gives you roughly 30 minutes total. The 3-in-1 charger is compact, but you cannot buy generic batteries. If CADDXFPV discontinues this battery size, your drone becomes a paperweight.
I also noticed the low battery protection simply cuts power rather than initiating a gentle landing, so you must monitor voltage closely. The position hold mode works, but it is not as refined as DJI’s implementation. The drone drifts slightly in wind, and the altitude hold can oscillate.
I would not trust it indoors near delicate objects. For learning basic FPV orientation, it is fine, but for professional indoor work, you will eventually outgrow this system.
The crash-resistant design is genuinely effective. I crashed into a bush three times during my first manual mode attempts, and the polymer body showed only scratches. The propellers are protected by the frame, which reduces damage to both the drone and the environment.
For beginners, that durability is reassuring. The included carrying case is also perfectly sized for the entire kit. The 4.5-inch goggles screen is crisp for its size. The 1080p resolution is higher than many entry-level FPV monitors, and the 60fps refresh rate makes motion feel smooth.
The latency is low enough that I could thread gaps between tree branches without hesitation. For the price, the video system is impressive. The goggles also have adjustable brightness, which helps in varying light conditions. The ExpressLRS control link is another strong feature.
It provides a reliable connection with better range than older protocols. I flew the Protos to the edge of a small field without signal degradation. The remote feels like a game controller, which makes it less intimidating for newcomers than bulky RC transmitters.
Position Hold as a Safety Net for Beginners
This kit is perfect for filmmakers who are curious about FPV but intimidated by custom builds. You do not need to solder, configure flight software, or research component compatibility. Everything is pre-tuned and tested.
I gave it to a video editor who had never touched a drone, and he was capturing fly-throughs of his house within a weekend. It is also a good secondary tool for content creators who need quick, dirty FPV inserts. The carrying case is small enough to fit under an airplane seat, making it a practical travel option for bloggers and travel filmmakers.
The 100-gram weight means you can fly it in most countries without registration or permits. That freedom is valuable for creators who travel frequently.
Proprietary Battery Limitations on Location
The Protos is not upgradeable. You cannot swap the camera for a GoPro, upgrade the video transmitter, or replace the flight controller with a more advanced model. Once you develop the skills and appetite for higher-quality FPV footage, you will need to buy an entirely new platform.
Think of this as a training wheels system rather than a long-term investment. The proprietary ecosystem also limits repair options. If the frame cracks, you must source CADDXFPV parts. Custom FPV drones use standard components that any hobby shop stocks.
For a professional who depends on equipment availability, that dependency is a risk worth considering. I recommend buying one extra battery immediately to extend your flight sessions.
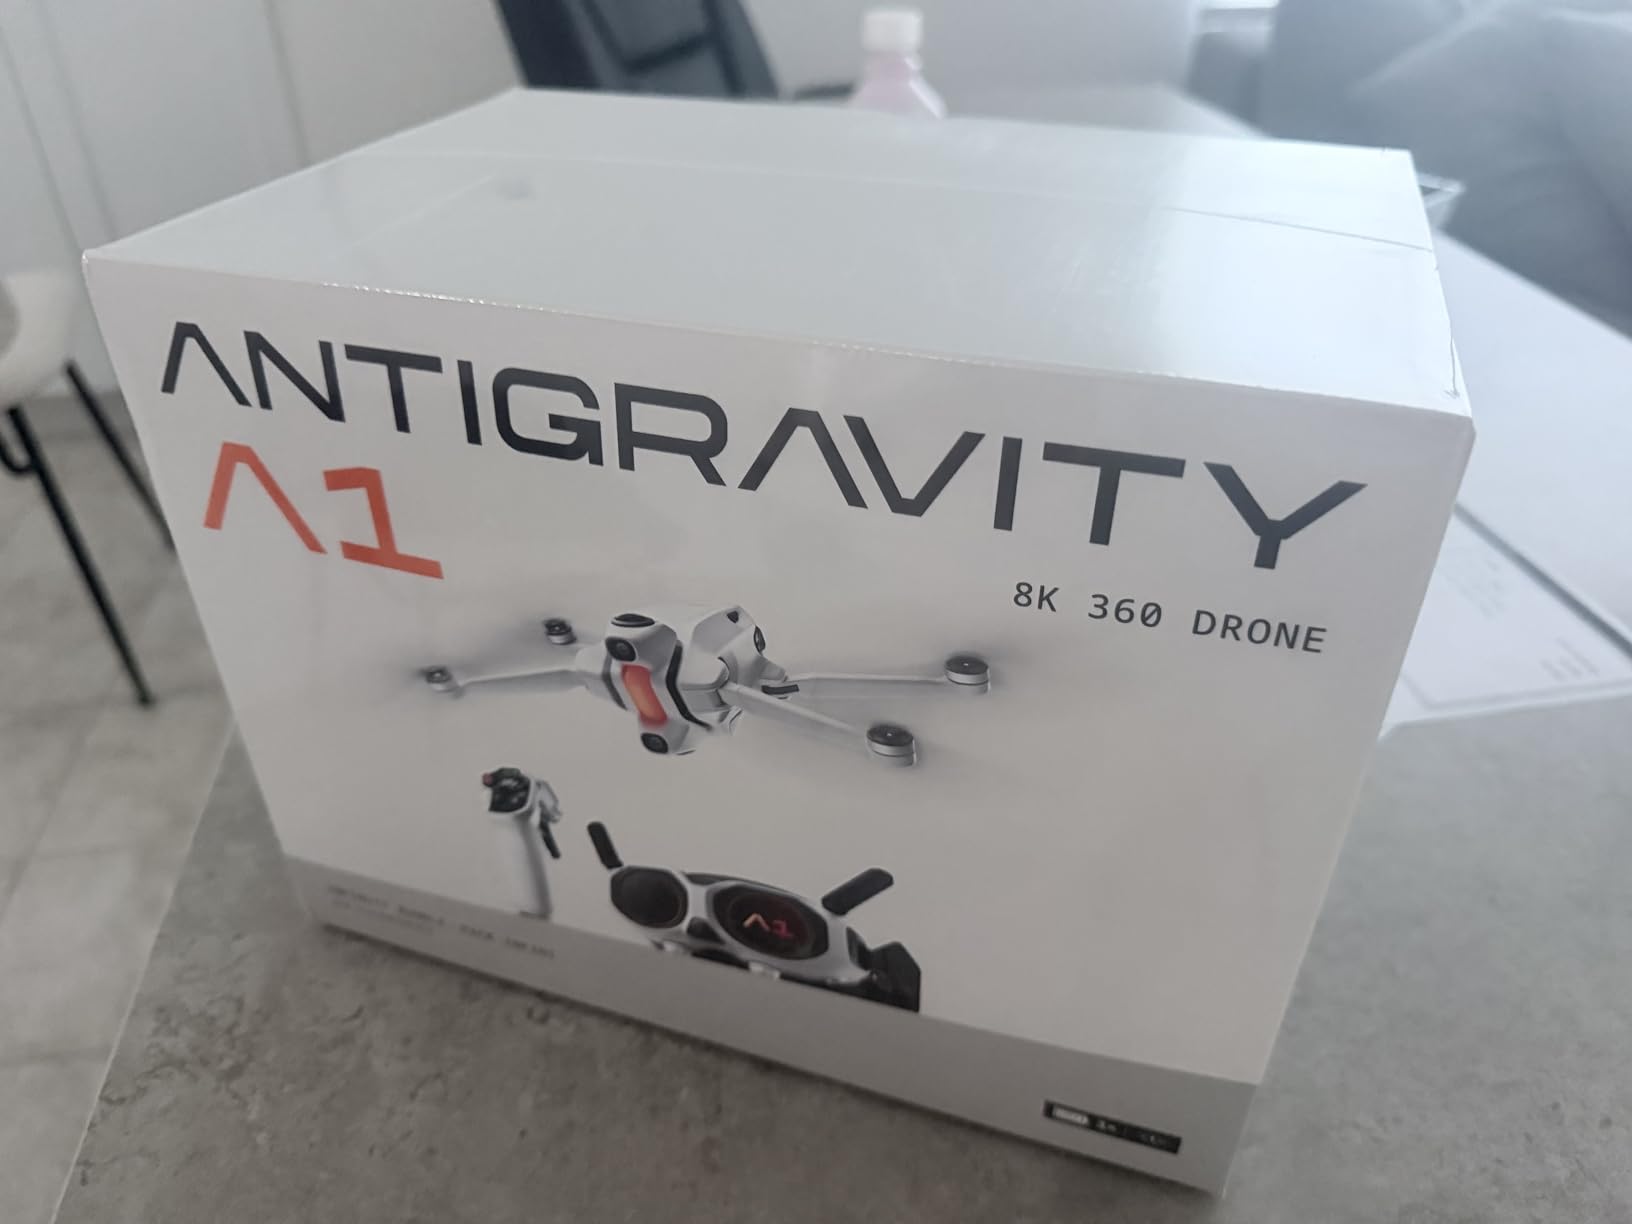
8. Antigravity A1 Infinity Bundle – 8K 360 Immersive
- Truly immersive 360 degree flight experience
- 8K 360 video capture quality
- Point-to-fly controls intuitive
- Under 249g with standard battery
- Excellent obstacle avoidance
- Very expensive
- Software learning curve for 360 processing
- Not professional-grade for commercial use
- Compressed preview in goggles
The Antigravity A1 is unlike anything else in this guide. It captures 360-degree 8K video while you fly, which means you can reframe the shot in post-production. I flew it through a forest trail, then edited the footage into a sequence that looked like it was shot by three different cameras.
The ability to choose your angle after the fact is a genuine creative superpower. The goggles feature a 90-degree field of view with dual 1-inch Micro-OLED displays and pancake optics. The image is crisp, and the diopter adjustment accommodates glasses wearers comfortably.
At 340 grams, the goggles are lighter than they look, and I wore them for 25-minute sessions without discomfort. The point-to-fly motion control is the most intuitive interface I have tested. You simply point your hand where you want the drone to go, and it follows.
Flight time is exceptional. The high-capacity battery delivers up to 39 minutes, which is nearly double most FPV drones. That extra time is invaluable for complex shots where you need multiple attempts. I used it to capture a single-take fly-through of a large property, and I landed with 10 minutes of battery remaining.
The 360 workflow requires a mindset shift. You are not framing individual shots while flying. You are capturing the entire environment and making creative decisions later. The Auto Edit 2.0 feature can generate shareable clips automatically, but for professional work, you will want to reframe manually in the companion software.
That software has a learning curve, and 360 video files are enormous. I filled a 256GB card in under two hours. The preview feed in the goggles is compressed, so it does not represent the full 8K quality. You must trust the recording and review footage on a monitor afterward.
The drone is also not a traditional FPV racer. It is stable and smooth, but it lacks the agility of a cinewhoop or freestyle quad. For pure cinematic work, that is fine. For fast action, it feels sluggish.
The omnidirectional obstacle avoidance is excellent. I flew it through a narrow corridor with walls on both sides, and the drone slowed smoothly as it approached obstacles. The Deep Track subject following also works well for slow-moving subjects. I tracked a walking person for 5 minutes without losing lock.
The Sky Genie feature executes pre-programmed maneuvers like drifts and orbits at the press of a button. I used it to create a dramatic reveal shot for a real estate video, and the result was smooth and cinematic. These automated moves reduce the skill barrier for creators who need dynamic shots without manual flying expertise.
The Sky Path feature can also generate flight paths automatically based on terrain. The standard battery keeps the drone under 249 grams, which avoids registration requirements. The high-capacity battery pushes it over that limit but gives you the full 39 minutes.
I recommend the high-capacity battery for professional work and the standard battery for travel. The bundle includes three batteries, which is generous.
360° Post-Production Time Investment
Filmmakers working on experimental, music video, or travel content will get the most from this drone. The reframing capability allows you to create multiple shots from a single flight, which saves time on location. I used one 8-minute flight to generate a wide establishing shot, a medium follow shot, and a close-up detail shot, all by cropping the 360 sphere differently.
The Sky Path and Virtual Cockpit features add gamified elements that can inspire new shot ideas. The Deep Track subject following also works reliably for moving subjects, though it is not as fast as manual tracking. The Virtual Cockpit feature lets you view the drone from a third-person perspective, which is fun but not essential for professional work.
Ecosystem Lock-In vs Open FPV Systems
The high cost places this drone in a niche category. For freelancers working on tight budgets, the A1 is difficult to justify unless you have clients specifically requesting 360 content. The software learning curve also adds post-production time that you must bill for.
I would not recommend this as a first drone for a commercial videographer. The compressed preview in the goggles means you cannot judge final image quality in real time. For client shoots where every frame must be perfect, that uncertainty is stressful.
You need to build a workflow that includes immediate playback and review between takes, which slows down the shooting pace. The proprietary software also locks you into the Antigravity ecosystem. That is a risk for professionals who need long-term reliability and cross-platform compatibility.
FPV Drone Buying Guide for Filmmakers
Choosing the right drone for filmmaking depends on more than specs. You need to match the tool to your projects, your skill level, and your post-production workflow. Here is what our team learned after months of testing.
Camera Quality and Sensor Size
For professional deliverables, 4K resolution is the baseline in 2026. The DJI Avata 2 and Potensic ATOM 2 both capture 4K with reliable stabilization. The Antigravity A1 pushes into 8K 360 territory. Pay attention to the gimbal type.
A 3-axis gimbal like the ATOM 2’s produces smoother footage than the 2-axis or electronic stabilization found on budget options. Sensor size also matters for low light. The 1/2-inch Sony CMOS in the ATOM 2 outperforms smaller sensors at dusk.
If you shoot during golden hour or indoors, prioritize sensor quality over resolution numbers. The Avata 2’s sensor is smaller but benefits from DJI’s color science, which grades predictably. Frame rate limitations are another consideration.
Most drones in this guide shoot 4K at 30fps. Only high-end systems offer 4K at 60fps or higher. If slow motion is part of your visual style, verify frame rate specs before buying. Dropping to 1080p for 60fps is a common compromise that works for many projects.
Flight Time and Battery Logistics
Most FPV drones offer 10 to 23 minutes per battery. That sounds short, but professional FPV shots are typically brief. A 30-second fly-through might take three attempts, so you need multiple batteries.
I recommend carrying at least four batteries for any paid shoot. The charging speed matters too. The DJI Avata 2 charges in about an hour, while the Avata Pro-View takes four to five hours with the stock charger. For extended projects, consider a charging station or parallel charger.
The Potensic ATOM 2’s hub refills three batteries in 1.3 hours, which is unusually fast. Budget drones like the Holy Stone HS175D include two batteries, which helps offset the lower individual flight times. I also recommend labeling your batteries by age and cycle count so you know which ones are fading.
Temperature affects battery performance significantly. In cold weather, expect 20 to 30 percent less flight time. I keep batteries in an insulated pouch between flights and warm them against my body before takeoff. This simple habit prevents mid-flight voltage drops that can trigger emergency landings.
FPV System and Transmission Latency
True FPV systems use goggles for a fully immersive experience. The DJI Avata 2, Neo 2, and CADDXFPV Protos all include goggles. Traditional camera drones like the Potensic ATOM 2 transmit to your phone or tablet, which is less immersive but more familiar for photographers transitioning from ground-based work.
Digital transmission systems like DJI O3 and Walksnail offer high-definition feeds with low latency. Analog systems are cheaper but deliver lower resolution. For filmmaking, digital is the clear choice. The image quality in the goggles affects your ability to judge exposure and framing in real time.
Latency under 40ms is generally acceptable for cinematic flying. Signal penetration varies by environment. DJI’s digital systems handle obstacles better than Wi-Fi based drones, but no system is perfect. I always fly with a spotter who maintains line of sight.
In urban environments, interference from cell towers and Wi-Fi networks can cause brief drops. Scout your location beforehand to identify dead zones. That preparation saves time and prevents failed shots on set.
Indoor vs Outdoor Capability
Indoor flying demands propeller guards and obstacle sensing. The DJI Avata 2 and Neo 2 both have built-in guards that protect people and property. The CADDXFPV Protos has a durable frame but no true obstacle avoidance.
For event videography, choose a drone with physical guards and position hold mode. Outdoor flying requires wind resistance and GPS. The Potensic ATOM SE handles moderate wind well, while the DJI Avata 2 is less stable in gusts due to its compact size.
The Antigravity A1 has excellent stability but is not agile enough for fast outdoor action. Match your drone to your primary shooting environment. Lighting conditions also differ indoors and outdoors.
Outdoor drones need sensors that handle high contrast and bright skies. Indoor drones need to perform in mixed artificial lighting. The DJI Avata 2 handles both well, while budget drones like the ATOM SE struggle with low light. Consider purchasing ND filters for outdoor work to maintain proper shutter speeds.
Weight and Travel Regulations
Drones under 249 grams do not require FAA registration in the United States, which simplifies logistics. The DJI Neo 2 at 151 grams and the Potensic ATOM SE at 249 grams both fall into this category. Heavier drones like the DJI Avata 2 require registration and Remote ID compliance.
For commercial work, you also need a Part 107 certificate regardless of weight. Portability is another factor tied to weight. I traveled with the Neo 2 and the CADDXFPV Protos in a single backpack. The Antigravity A1 is larger and requires more space, though the standard battery keeps it under the registration threshold.
International regulations vary, so research local laws before traveling with any drone. Airline policies also vary. Most airlines allow drones in carry-on luggage, but batteries must be stored in fireproof bags. I use LiPo safe bags for all my batteries and carry documentation proving the watt-hour ratings.
This has prevented issues at security checkpoints in multiple countries. Always check with your specific airline before departure to avoid surprises at the gate.
Repair Costs and Crash Durability
Crashes are part of FPV flying. Built-in propeller guards like those on the DJI Avata 2 and Neo 2 reduce damage. The CADDXFPV Protos uses a polymer body that absorbs impacts. Custom FPV drones are modular and cheap to repair, but proprietary systems like the DJI and CADDXFPV lines require manufacturer parts.
For a production tool, reliability matters more than repairability. I would rather have a drone that rarely crashes than one that is cheap to fix after every mistake. Repair costs also scale with complexity. A cracked propeller on the ATOM SE costs a few dollars. A damaged gimbal on the Avata 2 costs significantly more.
Budget for repairs in your first year of ownership. I set aside 10 percent of my drone’s purchase price annually for replacement parts and maintenance. Insurance is worth considering for expensive drones. Some homeowner policies cover drones, but many exclude commercial use.
I carry a separate equipment policy that covers accidental damage and theft. The peace of mind is worth the premium when you are flying a drone that costs thousands. Always read the fine print of any policy to understand exclusions and deductibles.
Learning Curve and Simulator Training
Motion controllers lower the barrier to entry. The DJI Avata 2 and Neo 2 both include motion controllers that let you fly within minutes. Manual mode requires a traditional RC controller and weeks of practice. I crashed multiple times in manual mode before developing the muscle memory for smooth footage.
If you are new to FPV, start with a motion controller or position hold mode. Simulator practice is non-negotiable for manual flying. The CADDXFPV Protos remote works with PC simulators, which is a cost-effective way to build skills. The DJI FPV Remote Controller 2 also works with the DJI simulator.
Expect to invest 10 to 20 hours in simulation before attempting complex shots on a real set. The simulator teaches you to recover from orientation loss without breaking actual hardware. I also recommend finding a local FPV community.
Fellow pilots can spot bad habits early and share tuning tips specific to your drone. I joined a local group after my third crash, and their advice saved me hundreds in repair costs. The FPV community is generally welcoming to filmmakers who respect safety and privacy.
FPV Drone Filmmaking FAQ
What is the best FPV drone for filming?
For filmmakers, the DJI Avata 2 offers the best balance of ease-of-use and video quality, while the DJI Neo 2 provides superior accessibility for beginners. Custom cinewhoops offer more advanced control for experienced pilots.
Are FPV drones good for videography?
Yes, FPV drones are exceptional for videography when you need dynamic, immersive shots. They excel at low-altitude fly-throughs, tracking shots, and capturing footage impossible with traditional drones, though they require more skill to operate.
What drones are used in filmmaking?
Professional filmmakers use both traditional drones like the DJI Mavic series for standard aerial shots and FPV drones like the DJI Avata 2 for dynamic cinematography. The choice depends on shot requirements and pilot expertise.
Can I use an FPV drone indoors safely?
Yes, but only with the right equipment. Drones with built-in propeller guards like the DJI Avata 2 and DJI Neo 2 are designed for indoor flying. Always start in position hold mode and practice in open spaces before attempting tight interiors.
Do I need a license to fly an FPV drone for filming?
In the United States, commercial drone operations require a Part 107 remote pilot certificate regardless of the drone’s weight. Recreational flyers must pass the TRUST exam. Drones over 249 grams also require FAA registration.
Final Thoughts on Best FPV Drones for Filmmakers
The best fpv drones for filmmakers in 2026 range from accessible starter kits to professional immersive systems. The DJI Avata 2 remains our top recommendation for most creators because it balances video quality, durability, and ease of use. The DJI Neo 2 is the safest starting point for beginners, and the Potensic ATOM SE offers traditional aerial footage at a price that respects indie budgets.
If you need 360-degree reframing power, the Antigravity A1 opens creative doors that no other drone in this list can match. For pure FPV learning, the CADDXFPV Protos kit removes the technical barriers that stop many filmmakers from trying first person view flying. Your choice depends on your projects, your patience for learning, and how much you are willing to invest in a new visual language.
Start with the drone that matches your current skill level, then upgrade as your client work demands more advanced shots. The most important step is simply to start flying. The footage you capture will speak louder than any spec sheet. Our team will continue testing new models as they release, so check back for updates as the FPV landscape evolves in 2026.