
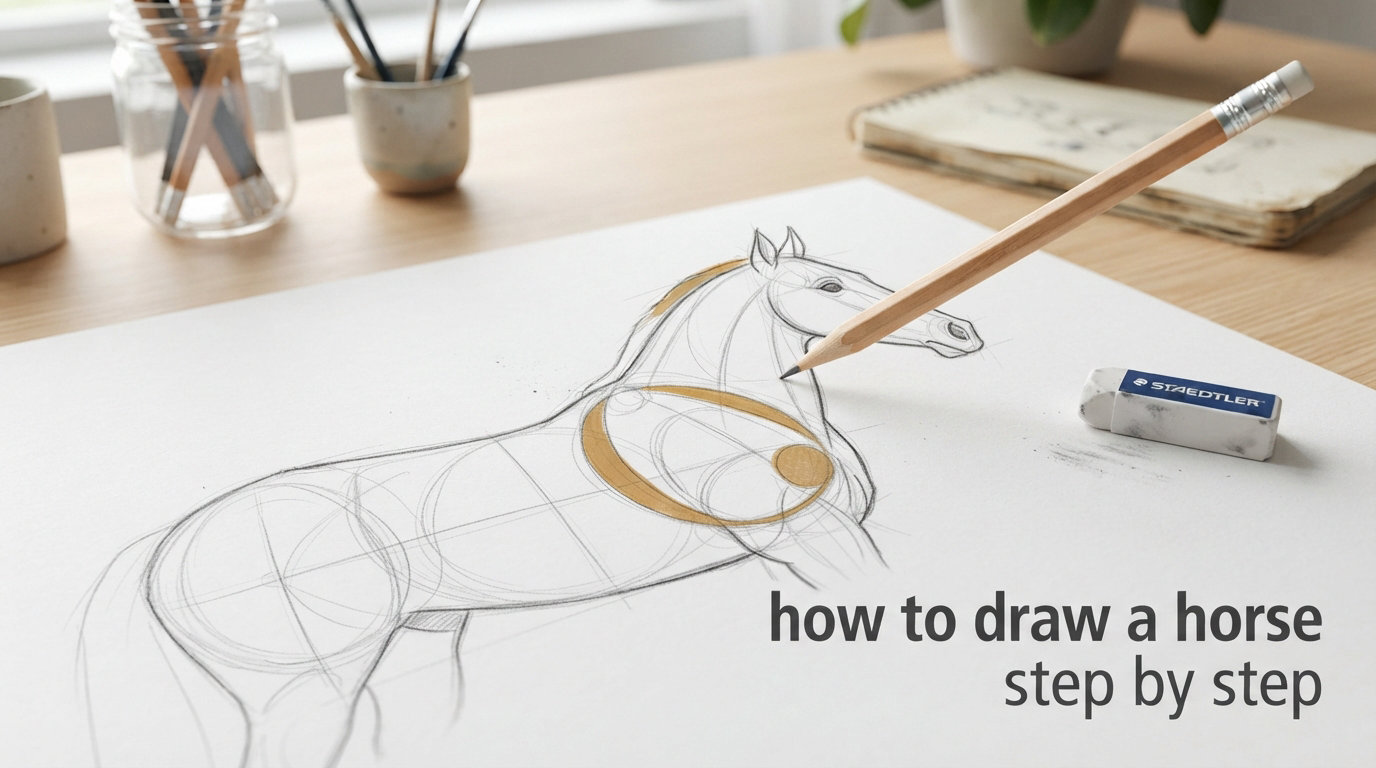
Master the art of drawing horses with this comprehensive, step-by-step tutorial for artists of all skill levels
Introduction: Why Drawing Horses Is a Valuable Skill
Few subjects have captivated artists throughout history quite like the horse. From the magnificent cave paintings at Lascaux to the dynamic sculptures of ancient Greece, from the grand portraits of the Renaissance to contemporary wildlife art, horses have held a special place in our artistic heritage. Learning how to draw a horse step by step is not just about capturing a beautiful subject; it is about developing fundamental drawing skills that will serve you in all areas of your artistic journey.
The horse presents unique challenges that make it an excellent learning subject. Its complex anatomy, expressive forms, and graceful movement require the artist to develop observation skills, patience, and technical proficiency. Yet despite these challenges, the rewards of successfully drawing a horse are immense. There is nothing quite like the satisfaction of seeing a horse come alive on your page, with its powerful muscles and gentle spirit captured in simple graphite lines.
In this guide, we will break down the process of drawing a horse into manageable, step-by-step sections. Whether you are picking up a pencil for the first time or looking to refine your existing skills, this horse drawing tutorial will provide you with clear instructions, helpful tips, and the encouragement you need to keep practicing. Remember: every accomplished horse artist began exactly where you are now. The key is patience, practice, and a willingness to learn from each mark you make.
“Every horse has a story to tell through its form. Your job as an artist is to listen with your eyes and translate that story onto paper.”
What You’ll Need
Before we begin drawing, let’s make sure you have the right tools for the job. You do not need expensive equipment to create beautiful horse drawings, but having quality materials will make the process more enjoyable and yield better results.
Essential Art Supplies
- Graphite pencils: A set ranging from 2H to 6B will give you the versatility needed for sketching and shading. The harder pencils (2H, HB) are perfect for light preliminary sketches, while softer pencils (2B, 4B, 6B) create rich, dark tones for shading and definition.
- Drawing paper: Choose a paper specifically designed for drawing, ideally with some tooth (texture) to hold graphite well. A weight of 90gsm to 120gsm works well. Drawing paper pads are inexpensive and perfect for practice.
- Eraser: A quality vinyl or kneaded eraser will allow you to make corrections without damaging your paper. Kneaded erasers are particularly useful for creating subtle highlights.
- Pencil sharpener or sandpaper block: Keeping your pencils sharp is essential for achieving fine details, especially when drawing the horse’s eye, mane, and hoof edges.
Optional But Helpful Tools
- Blending stumps or tortillons: These paper stubs help you smoothly blend graphite for soft, natural-looking shading.
- Drawing board: A simple clipboard or drawing board provides a stable surface to work on.
- Reference photos: While not a physical supply, having clear reference images of horses is invaluable. Look for photos that show the horse from multiple angles and in good lighting.
Tip: You do not need to spend a fortune on art supplies. A single HB pencil, some printer paper, and an eraser are enough to get started. As you progress, you can gradually add more supplies to your toolkit.
Understanding Horse Anatomy
One of the most important investments you can make as an artist is learning the anatomy of your subject. Understanding how horses are built will inform every mark you make and help you create drawings that feel accurate and alive. The good news is that horses share consistent underlying proportions, even though individual breeds vary in their external appearance.
The Headlength Unit: Your Measurement Tool
Professional artists often use the horse’s head length as a unit of measurement to maintain proper proportions. A horse’s body is approximately three headlengths long from the front of the chest to the back of the hindquarters. The height at the top of the shoulder (the withers) is roughly equal to the total body length. This simple ratio gives you a reliable framework to check your drawing’s overall proportions.
Key Anatomical Landmarks
Familiarize yourself with these important points on the horse’s body:
- The poll: The highest point of the head, between and slightly above the ears
- The withers: The ridge between the horse’s shoulder blades, considered the highest point of the back
- The shoulder: The slope of the shoulder blade influences the horse’s posture and movement
- The hip (point of hip): The prominent bony protrusion at the rear of the horse
- The flank: The area between the last rib and the hind leg, where the belly tucks up
- The hock: The joint in the hind leg, analogous to the human ankle
- The knee: The front leg joint, similar in function to the human wrist
- The cannon bone: The large bone between the fetlock joint and the knee or hock
How Breeds Affect Proportions
Different horse breeds have distinctly different body proportions. Thoroughbreds tend to be long-legged with refined bones, giving them an elegant, elongated appearance. Quarter horses are more compact and muscular, with a broader chest and more powerful hindquarters. Arabians have a distinctive head shape with a concave profile and high tail carriage. When drawing horses, these breed characteristics will help you capture the specific identity of your subject.
“Study the skeleton first. When you understand the framework, the surface forms make sense. Every muscle, every curve follows from the bones beneath.”
Using reference photos is one of the best ways to familiarize yourself with horse anatomy. Look for images that show the horse standing square from the side, as this view makes the underlying structure most visible. Pay attention to how the legs align, how the spine curves, and how the ribcage expands.
Step 1: Sketching Basic Shapes
Every complex drawing begins with simple shapes. This principle is the foundation of all horse drawing tutorials, and for good reason. By breaking the horse’s elaborate form into circles, ovals, and lines, you can capture the overall structure before adding any details. This approach, often called the circles and ovals method, is how professional illustrators quickly block in subjects.
Building Your Armature
Start by visualizing the horse as a series of connected shapes. The horse’s main body is an oval or egg shape, positioned horizontally. The ribcage sits at the front of this oval, while the hindquarters form a larger, more rounded shape at the back. Place these shapes loosely on your paper, using light pencil strokes that you can easily adjust.
The head connects to the body through a long, slender neck shape. Think of the neck as a slightly curved cylinder connecting the chest to the skull. The skull itself can be simplified to a long oval, with a smaller oval for the snout area.
Legs are represented as vertical lines or simple elongated rectangles in this initial stage. Do not worry about joints or hooves yet; simply establish where the legs fall relative to the body shape.
Finding Your Proportions
Use your pencil to measure proportions. Hold your pencil at arm’s length and use the tip to mark distances on the pencil with your thumbnail. This technique allows you to compare the length of the head to the height of the body, or the width of the chest to the length of the leg. These proportional checks keep your drawing accurate.
Remember: Keep your initial strokes very light. This first sketch is a guide, not the final drawing. You want to be able to erase and adjust shapes as you develop your horse drawing.
The Keyline or Wireframe
Once you have placed your basic shapes, connect them with a continuous line that traces the horse’s overall contour. This wireframe or keyline shows you the silhouette of your subject. Step back from your drawing and squint your eyes to see the shapes as a unified form. Does the overall shape read clearly? Are there any obvious proportion issues? This is the time to make corrections before investing time in details.
Step 2: Drawing the Head and Neck
The horse’s head is one of its most expressive features, and getting it right can transform your drawing. The head also tends to be the part of the horse that viewers notice first, so it deserves careful attention. This step focuses on constructing the head with accurate proportions before adding any facial details.
Constructing the Head Shape
The horse’s skull is roughly triangular in profile, with a long, relatively narrow snout. Start by drawing the top line of the face, which runs from the poll down the forehead to the bridge of the nose. This line is often slightly convex in many horses, though it can be straight or even slightly concave in Arabians.
The jawline sweeps down from the cheek area to form the lower jaw. Notice how the jaw narrows significantly before reaching the chin. The cheek area has a slight bulge, and the eye socket creates a subtle depression just behind this area.
The horse’s eye is set back from the face plane, giving the head a three-dimensional quality. The eye is large and expressive, with a gentle, watchful character. The ear sits at the highest point of the skull, and its position often indicates the horse’s mood. Ears pricked forward suggest alertness, while ears turned back may indicate irritation or attention to something behind them.
The Muzzle and Mouth
The muzzle is roughly rectangular in shape, containing the nostrils and mouth. The nostrils are large and mobile, and their shape varies between breeds. The mouth has a subtle curve, and the lips should follow the natural contour of the jaw.
When drawing the nostrils, observe how they flare at the top and taper at the bottom. They are not simple circles; they have a specific organic shape that adds character to your drawing. The area between the nostrils, called the philtrum, has a subtle vertical line.
Connecting the Neck
The neck emerges from the chest and connects smoothly to the back of the skull, just below the ear. The top edge of the neck has a pronounced curve, especially in horses with heavy musculature. The underside of the neck flows into the throat, which has a subtle bulge where it meets the jaw.
The mane grows from the top of the neck and falls naturally to one side or both sides. When sketching the mane at this stage, use simple flowing lines to indicate its general direction and bulk. We will refine the mane in later steps.
Proportion Check: A horse’s head is roughly one-third the length of its neck. The eye should be positioned at approximately one-third the distance from the poll to the nose. These ratios help ensure your horse’s head looks anatomically correct.
Step 3: Adding the Body and Legs
With the head and neck established, we now turn our attention to the body. The horse’s body houses its powerful muscles, and understanding how to represent this form will bring life to your drawing. The legs, often the most challenging part of drawing horses, require special attention to joint structure and weight bearing.
The Chest and Ribcage
The chest sits between the front legs and has a broad, rounded quality. It is one of the widest parts of the horse’s body. The ribs fan out from the spine, creating the barrel of the horse. The belly tucks upward from the chest to the flank, though this area varies in prominence depending on the horse’s age, fitness, and build.
When drawing the ribcage, pay attention to how the ribs curve around the body. They are not flat shapes; they wrap around to create a sense of volume. The area just behind the girth (where the saddle sits) often has a slight indentation as the body narrows before the flank.
The Back and Hindquarters
The back runs from the withers to the point of the hip. It should have a gentle, natural curve that follows the horse’s posture. The withers are the ridge where the shoulder blades meet, and they are an important landmark for understanding the horse’s structure.
The hindquarters are the power center of the horse, containing the large muscles of the haunches. The hip is the highest point of the hindquarters, and from here the back slopes down to the tail. The tail emerges from beneath the hindquarters and should flow naturally.
Understanding Leg Structure
The horse’s legs are marvels of engineering, built to support tremendous weight while enabling powerful movement. While the bones inside are strong, the legs appear relatively slim on the surface, which is why drawing legs is deceptively challenging. Beginners often make legs too thin or position joints incorrectly.
Each leg has several key joints. Starting from the body, the shoulder joint connects the front leg to the body. The elbow is fixed against the chest. The knee corresponds to the human wrist. Below the knee is the cannon bone, the large metacarpal (front leg) or metatarsal (hind leg) bone. The fetlock joint sits at the top of the pastern. The pastern is the sloping section just above the hoof, and the hoof itself is the final element at the bottom.
The hind leg has a similar structure but with different joint names. The stifle is analogous to the human knee, the hock is the ankle equivalent, and the rest of the leg follows the same pattern as the front leg.
Joint Alignment: When viewing a horse from the side, the front leg joints align vertically. The point of the shoulder, the knee, and the fetlock all fall on roughly the same vertical line when the leg is in a neutral position. Use this alignment to check your drawing’s accuracy.
Drawing Hooves
The hoof is often overlooked by beginners, but it is crucial for a convincing horse drawing. The hoof is roughly triangular in profile, with a rounded toe and a harder heel at the back. From the front, the hoof appears somewhat oval, with the hoof wall on the outside and the frog (a V-shaped structure) visible on the bottom.
Hooves should appear solid and grounded. They are not just flat shapes at the bottom of the legs; they have width and depth. Pay attention to how the leg enters the top of the hoof, as this junction is often drawn too abruptly.
Step 4: Refining Details
Now that we have established the basic structure of the horse, it is time to add the details that bring your drawing to life. This stage involves refining the mane, tail, and muscle definition to create a more realistic and dynamic horse drawing.
The Mane
The mane is one of the horse’s most distinctive features, and drawing it well requires observation and patience. The mane grows from the top of the neck and falls to one side or both sides, depending on the horse’s posture and any braids or ties the horse may have.
Rather than drawing each individual hair, think of the mane in terms of flowing shapes and strands. Use long, sweeping strokes to indicate the direction of hair growth. Vary your line weight slightly to create the illusion of individual strands without drawing every single hair, which would make your drawing appear stiff and overworked.
The mane is thickest at the base of the neck and tapers toward the ends. It should move and flow naturally, not sit flat against the neck like a solid block. Look for the subtle curves and waves that indicate hair overlapping and flowing together.
The Tail
The tail emerges from beneath the hindquarters and provides balance and expression to the horse’s form. Like the mane, the tail should be drawn as flowing shapes rather than individual hairs. The base of the tail is thick, and the hair fans out as it flows downward.
The tail’s movement often reflects the horse’s mood and the surrounding conditions. A relaxed horse may have a tail that hangs relatively still, while an agitated horse may have a tail that swishes energetically. Use flowing, curved lines to suggest movement and life.
Defining Muscles
Muscles give the horse its form and character. While you do not need to draw every muscle individually, understanding the major muscle groups helps you create a drawing with depth and realism.
The shoulder muscle is one of the largest and most visible, creating a smooth curve from the base of the neck to the point of the shoulder. The chest muscles sweep down and forward. The girth area (around the barrel) shows the ribcage beneath. The hindquarters have large, powerful muscles that give the horse its ability to run and jump.
When drawing muscles, use subtle, curved lines to suggest the underlying form. Shading plays a significant role in muscle definition, which we will address in the next step. For now, focus on placing the contour lines that hint at the major muscle groups.
Common Mistake: Avoid drawing hard, defined lines around every muscle. Muscles flow into each other, and hard outlines make a drawing look stiff and unnatural. Instead, use subtle transitions and implied lines to suggest muscle structure.
Refining Hooves and Details
Return to your hooves and refine their shape. Add the subtle crack lines that appear on a hoof’s surface. Indicate the different texture between the hoof wall and the sole. These small details reward the careful observer.
Add any other details specific to your horse, such as a blaze or other marking patterns. White markings on the face and legs can be suggested with lighter pencil strokes or strategic use of negative space.
Step 5: Shading and Finishing Touches
Shading is where your horse drawing truly comes to life. The way you apply tone and value transforms a flat line drawing into a three-dimensional form with depth and dimension. Good shading requires understanding light, form, and the properties of your graphite medium.
Understanding Light Source and Tonal Values
Before you begin shading, decide on a consistent light source. This is typically from above and slightly to one side, mimicking natural sunlight. Areas facing this light source will be lighter, while areas in shadow will be darker. This contrast between light and shadow defines the horse’s form.
Tonal values range from pure white (the paper itself) through various grays tones to pure black. Your shading should cover this full range to create depth. Common mistakes include using too narrow a range of values (making everything look flat) or making everything too dark (losing important details).
Building Up Graphite Layers
The most effective shading technique involves building up multiple layers of graphite rather than pressing hard with a single layer. Start with a lighter pencil (2B or 4B) and apply tone in the shadow areas, following the form of the horse. Do not worry about smooth transitions yet; focus on covering the correct areas with appropriate value.
After establishing the basic tonal structure, you can blend areas with a blending stump for smooth transitions or leave certain areas with more texture for visual interest. Textured shading works well for the mane and tail, while smooth shading suits the body and head.
Add darker values to deepen shadows and create contrast. The areas under the horse’s belly, in the creases of joints, and along the edges of forms facing away from light all need darker tones. Build these gradually, checking your work from a distance to ensure the values read correctly.
Creating Form Through Shading
The goal of shading is not merely to fill in areas with gray. It is to create the illusion of three-dimensional form on a two-dimensional surface. Every change in your shading should correspond to a change in the horse’s form. Curves and muscle contours are revealed through the transition from light to shadow.
Pay special attention to the edges of forms. Where one surface meets another, the shadow helps define the boundary. This is called terminator shading, and it is one of the most powerful tools for creating form. The terminator line (where light stops and shadow begins) should follow the contours of the horse’s body precisely.
Final Line Work and Cleanup
With your shading in place, take a fresh look at your line work. Some of your initial sketch lines may now be too prominent or may have been absorbed into your shading. Use your eraser to lighten any lines that are too dark, and consider adding a few final contour lines to define edges where the background meets the horse.
The final stage is stepping back and evaluating your drawing as a whole. Does it capture the essence of the horse you envisioned? Are the proportions accurate? Is the shading consistent and effective? Make any necessary adjustments, but also know when to stop. A drawing is never truly finished; it is abandoned at the right moment. Recognize that your first horse drawing will not be perfect, and that is exactly as it should be.
“The power of a simple pencil line lies not in its complexity, but in its truth. Capture what you see, not what you think you should see.”
Common Mistakes and How to Avoid Them
Every artist encounters challenges when learning to draw horses. Understanding these common pitfalls helps you avoid them and progress more quickly in your artistic journey.
Legs That Are Too Thin or Awkward
Beginning artists frequently draw legs that look like sticks or toothpicks. Horses have substantial boned legs with defined muscles, even in the lower legs. Study the cannon bone and pastern proportions. Remember that the joints have width and the hooves have substance. A good test: if your horse could stand on those legs in real life, are they proportionally strong enough?
Head Proportions That Are Off
The horse’s head has distinctive proportions that are easy to get wrong. Common errors include making the head too short (squashing the face), placing the eye incorrectly, or drawing the muzzle too narrow. Remember that the horse’s face is elongated, and the eye sits about one-third back from the front of the face. Use reference images to check your proportions.
Forgetting Negative Space
Negative space is the empty area around and between subjects. Many beginners focus exclusively on drawing the horse and ignore the spaces between legs, under the belly, and around the head. These negative spaces are just as important as the horse itself in creating a convincing drawing. Look at the shapes between the legs rather than only at the legs themselves.
Rushing the Initial Sketch
The initial sketch sets the foundation for everything that follows. Artists who rush through the basic shapes to get to the “fun” details often end up with drawings that are structurally unsound. Spend real time getting the proportions and layout right before adding any details. The time invested in the sketch will pay dividends in the final quality of your drawing.
Making Lines Too Dark Too Soon
Your construction lines should be light and easily erasable. Dark, heavy lines become very difficult to erase or lighten once they are in place. Keep your initial sketching light (use an HB or 2H pencil) and only switch to darker pencils (2B, 4B) once you are ready for final line work.
Practice Tips and Exercises
Improvement in drawing comes through consistent practice and thoughtful study. Here are specific exercises and approaches to help you develop your horse drawing skills.
Daily Quick Sketches
Dedicate just ten to fifteen minutes each day to quick horse sketches. These do not need to be finished drawings; they are practice for observing and recording the horse’s form rapidly. Set a timer and draw as many different horse poses as you can in that time. These quick studies train your hand and eye to work together more fluently.
Gesture Drawing Exercises
Gesture drawing focuses on capturing the essence and movement of the horse rather than detailed accuracy. Use long, fluid lines to suggest the horse’s overall pose and motion. Do not worry about details; focus on the sweep of the neck, the angle of the legs, the curve of the back. These gesture drawings build your ability to see and record proportions quickly.
Proportion Drills Using Headlengths
Practice measuring horse proportions using the headlength method described earlier. Take a reference photo of a horse and, using your pencil, measure various proportions: body length compared to height, leg lengths compared to body depth, head length compared to neck length. Then check these measurements against your own drawings. This drill trains your eye to recognize accurate proportions.
Using Reference Photos Effectively
Reference photos are invaluable for learning, but they require thoughtful use. Study your references closely before drawing. What is the overall silhouette? How do the legs align? Where are the shadow areas? Do not simply copy a photo; use it as a learning tool to understand the horse’s form from multiple angles.
Look for references that show horses in clear lighting, ideally outdoors with natural sunlight. These images make the horse’s form easier to read and understand. Avoid using blurry or low-resolution photos, as these make accurate observation difficult.
Progression Note: Your early drawings will not look the way you want them to. This is normal and expected. The artists whose work you admire spent years developing their skills through exactly this kind of practice. Stick with it, and you will see steady improvement.
Keep Drawing
You now have all the fundamental tools and knowledge to begin your journey of drawing horses. This skill will not develop overnight, but every mark you make contributes to your improvement. Be patient with yourself, celebrate small victories, and learn from each drawing you create.
The horse is one of the most rewarding subjects you can choose to draw. Its combination of power, grace, and sensitivity offers endless opportunities for artistic exploration. Whether you aim to create realistic portraits, dynamic action drawings, or expressive artistic interpretations, the principles you have learned here will serve as your foundation.
Now it is time to pick up your pencil, find a reference photo or, better yet, observe a real horse, and begin drawing. Your first horse will not be perfect. Your tenth horse will be better. Your hundredth horse will show real mastery. The only way to get there is to keep drawing.