
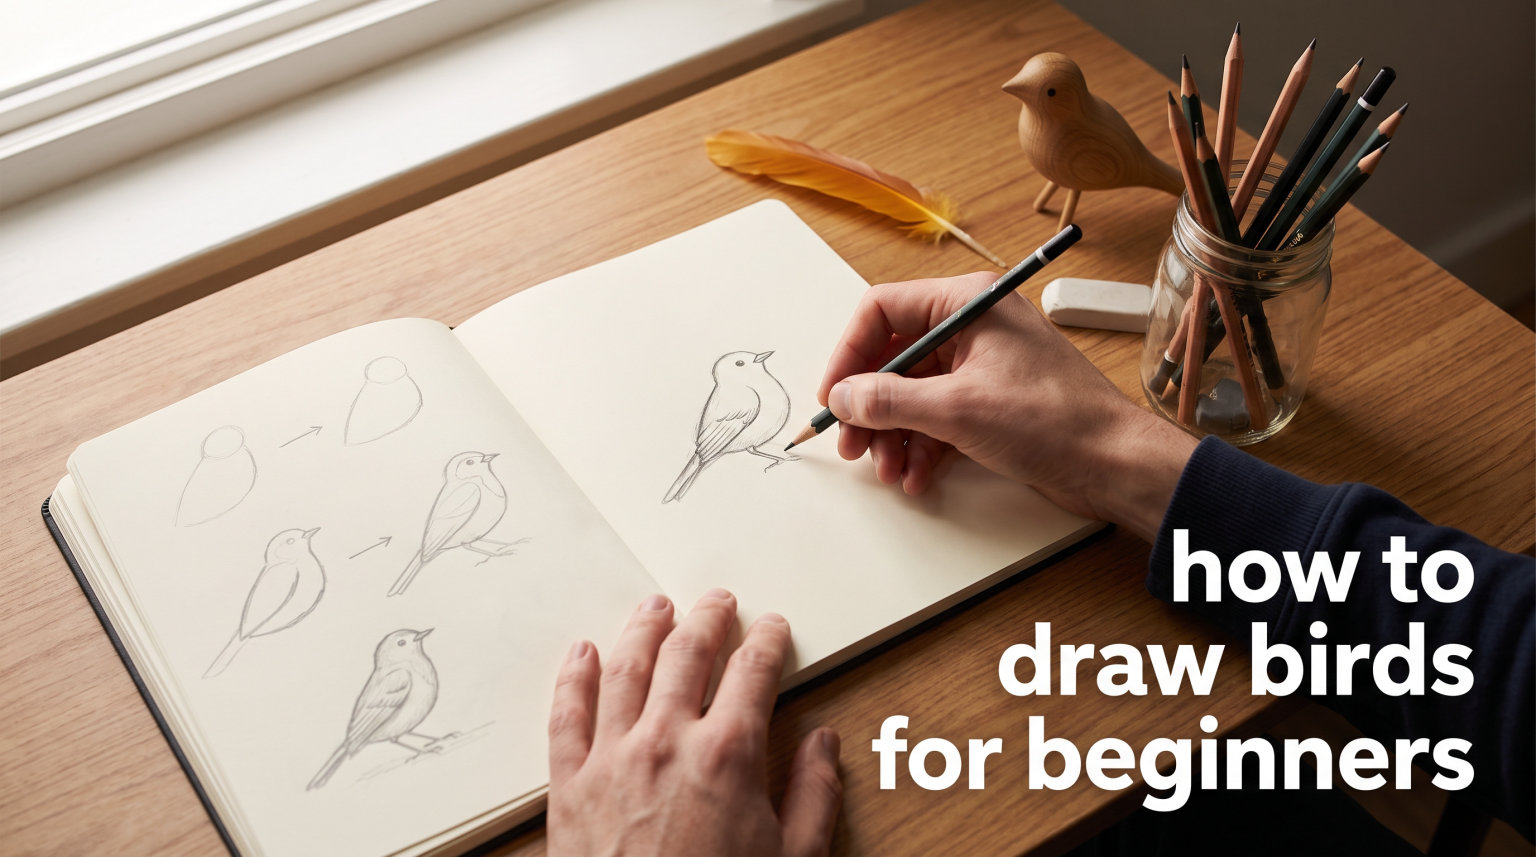
When I first tried drawing a bird, my result looked like a lopsided snowman with wings. That was humbling. But here is what I learned: drawing birds is a skill you can build, not a talent you are born with. After working through the basics covered in this guide, you will have a repeatable method that works for any bird you want to capture on paper.
Table of Contents
Why Learn to Draw Birds?
Drawing birds forces you to observe them more closely than casual watching. You start noticing details like how a sparrow holds its posture or where the wing feathers fold against the body. These observation skills transfer to everything you draw afterward.
Forum discussions confirm this repeatedly. Beginners who stick with bird sketching report that their overall drawing ability improves faster than from any other subject. The reason is simple: birds have predictable underlying structure hidden beneath complex feathers.
The mental health benefits are real too. Bird sketching provides a reason to slow down and focus. Many artists describe it as a form of moving meditation, where you forget about everything else while watching and recording.
The Basic Shapes Method
Understanding the Oval and Circle Framework
Every bird drawing starts with two shapes: an oval for the body and a circle for the head. This is not a limitation. It is the foundation that professional illustrators use to capture any bird, from a tiny chickadee to a soaring eagle.
David Sibley, one of the most respected bird artists, emphasizes this approach: “Birds are complex, and drawing is about simplifying. Begin your drawing with large shapes to establish proportions and posture.” That wisdom applies whether you are sketching a cardinal at your feeder or a hawk soaring overhead.
The key is keeping your initial shapes light. You will refine them many times before adding details. Think of the oval and circle as a framework, not a final outline.
Step-by-Step: How to Draw a Bird from Observation
Follow these steps in order. Each one builds on the previous, creating a reliable process you can use anytime.
Step 1: Watch Before You Draw
Spend 30 seconds just watching the bird. Notice how it holds its body. Is it upright like a robin, horizontal like a duck, or crouched ready to fly? This posture line determines everything else in your drawing.
Step 2: Draw the Body Oval
Lightly sketch an oval for the main body. This oval should match the bird’s actual posture, not a perfect geometric shape. For a crouched bird, make it wider and lower. For an upright bird, make it taller and narrower.
Step 3: Add the Head Circle
Position a circle above and slightly in front of the body oval. The size of this circle relative to the body tells viewers what species you are drawing. Songbirds have smaller heads relative to body, while owls have large heads.
Step 4: Connect with a Neck Line
Draw a smooth curve connecting the body oval to the head circle. This neck line should be light and fluid. Most beginners make the neck too thick. Keep this connection subtle.
Step 5: Add Guidelines for Beak, Tail, and Legs
Add light lines indicating where the beak points, where the tail extends, and where the legs attach. These guidelines help you position features correctly before committing to final lines.
Step 6: Refine and Add Feathers
Once the basic structure is correct, go back and refine your lines. Then add feather groups in broad strokes. Do not draw individual feathers yet. Start with the major feather tracts, those areas where feathers cluster naturally.
Understanding Bird Feather Groups
Feathers do not cover a bird’s body randomly. They grow in specific tracts called pterylae, with bare spaces called apteria between them. Understanding this pattern helps you draw feathers that look natural instead of like fur or fuzz.
The main feather groups to know are the primaries (wing tip feathers), secondaries (inner wing), coverts (wing surface), tail feathers, and the head plumes. Each group has a distinct shape and direction.
John Muir Laws, whose bird drawing resources are trusted by thousands, explains that birds are shape shifters. A bird’s feathers can look completely different depending on whether it is fluffed up for warmth or smoothed down for flight. Your job is to capture the current shape you observe.
Common Mistakes Beginners Make (and How to Avoid Them)
The Snowman Trap
The most common error is making the head too large and the body too small, creating a snowman shape. This happens when you focus on the cute face before establishing proper proportions. Solution: always draw the body oval first and make it larger than you think it should be.
Another version of this mistake: drawing the head circle disconnected from the body. In real birds, the head flows smoothly into the body. Your neck line should always connect them with a gentle curve.
The Stick Figure Problem
If your drawings look like stick figures, you are skipping the basic shapes step entirely. Details like legs, wings, and tails need a solid oval and circle foundation underneath.
The fix is simple but not easy: force yourself to spend more time on the basic shapes before adding any details. Forum users who overcame this problem reported that their breakthrough came when they stopped caring about final lines.
Getting Proportions Wrong
Bird proportions are tricky because different species have wildly different body shapes. A heron has a long neck and legs, while a puffin has a chunky body and tiny legs. Study your specific bird before drawing.
One proportion check that helps: the bird’s total length should be roughly three times the height when standing normally. If your drawing looks squat or elongated, check your oval and circle sizes.
Essential Materials for Bird Sketching
You do not need expensive supplies to start drawing birds. A simple sketchbook and a pencil work perfectly. Many beginners get stuck buying the “right” tools instead of actually drawing.
A mechanical pencil or a standard 2H pencil gives you light lines for initial shapes. As you refine, you can switch to a softer pencil like 2B for final lines. The key is keeping early strokes light so you can erase and adjust.
Your sketchbook choice matters more than you might think. A small pocket sketchbook encourages frequent practice because you can take it anywhere. A larger sketchbook (8×10 or bigger) gives you more room for details as you progress.
If you want to add color later, colored pencils or watercolors both work well for bird illustration. Start with monochrome and add color only when monochrome feels comfortable.
Which Bird Should I Start With?
The easiest bird to draw is a perching songbird viewed from the side. Cardinals, bluebirds, and sparrows at your feeder make ideal subjects. They stay relatively still, assume predictable postures, and have clear, visible feather patterns.
American Robins are excellent first subjects because they are common, bold, and have a classic bird shape that makes the oval and circle method obvious. The gray-brown plumage with the orange breast gives you practice with value changes without overwhelming color complexity.
Avoid starting with waterfowl, hawks, or shorebirds. These birds have complex plumage, unusual proportions, or require you to draw them in challenging poses. Build your skills with perching songbirds first.
Practice Exercises to Improve Your Bird Drawing
Daily short practice beats occasional long sessions. Try sketching one bird per day for five minutes. By the end of a month, you will have 30 drawings and noticeable improvement.
Exercise one: gestural sketches. Spend 30 seconds drawing the basic shapes of a bird without details. Focus only on capturing the posture and proportion. These quick sketches build your observation skills faster than detailed work.
Exercise two: blind contour drawing. While looking at a bird, draw its outline without looking at your paper. This trains your hand to follow what your eyes see, building hand-eye coordination.
Exercise three: Memory drawing. Look at a bird for one minute, then draw it from memory. Compare your drawing to the actual bird and note what you missed or got wrong. This exercise reveals exactly where your observation needs work.
Exercise four: Negative space practice. Instead of drawing the bird, draw the space around it. This sounds strange but it works. By understanding the empty areas around your subject, you automatically improve the shapes of the subject itself.
FAQs
How to draw birds in an easy way?
Start with the basic shapes method: draw a light oval for the body and a circle for the head. Connect them smoothly, add guidelines for the beak and tail, then refine your lines before adding feather details. Keep your early strokes light so you can erase and adjust as needed.
What are the common mistakes in bird drawings?
The three most common mistakes are: 1) Making the head too large (the snowman trap), 2) Drawing stick figures without basic structure underneath, and 3) Getting proportions wrong by not studying the specific bird first. All three are fixed by spending more time on the oval and circle foundation before adding details.
What is the easiest bird to draw for beginners?
A perching songbird viewed from the side is the easiest starting point. Cardinals, bluebirds, sparrows, and American Robins are ideal because they are common, hold still, and have clear, visible feather patterns. Avoid waterfowl, hawks, or shorebirds until you have built basic skills with songbirds first.
What materials do I need to start drawing birds?
A simple sketchbook and a pencil are all you need to begin. A mechanical pencil or 2H pencil creates light lines for basic shapes. A 2B pencil works for final lines. You do not need expensive supplies. Start drawing with what you have right now.
Conclusion
Learning how to draw birds for beginners comes down to three things: observation, basic shapes, and practice. The oval and circle method gives you a reliable starting point for any bird.
Your first drawings will not look the way you want. That is normal and expected. Every bird artist you admire went through this exact phase. The difference is they kept drawing. Start today, be patient with yourself, and watch your bird drawing skills grow steadily over time.
If you want to continue learning, explore field sketching at your local park or nature center. Drawing birds in the wild teaches you observation skills that no book can provide. You are now ready to begin your bird drawing journey.