
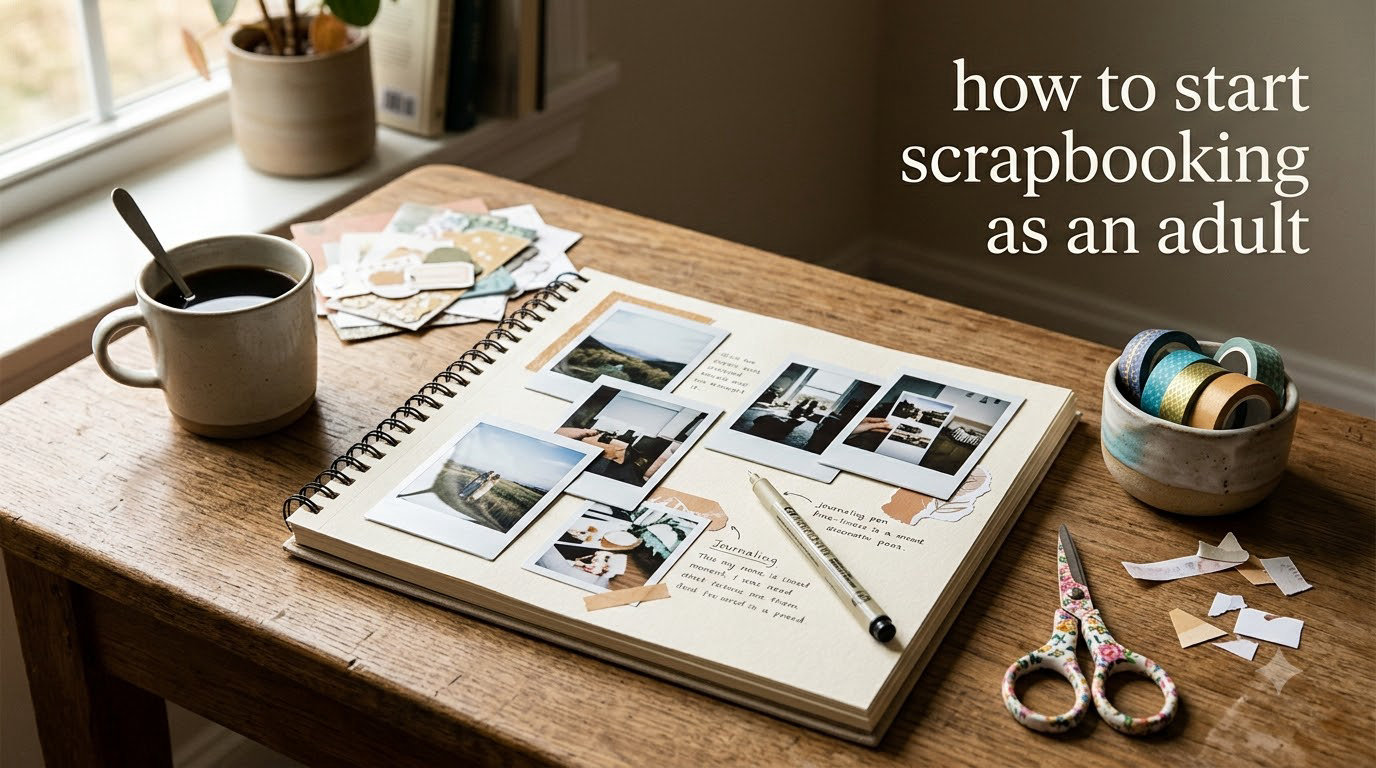
If you have been staring at a shoebox of old photos or scrolling through thousands of images on your phone wondering where to even begin, you are in the right place. I remember the exact moment I decided to figure out how to start scrapbooking as an adult. I had just spent an hour looking at vacation photos on my phone and realized I had not printed a single picture in over four years. Something about that felt wrong. My grandmother had albums filled with handwritten notes and ticket stubs from trips she took in the 1970s. I could flip through those pages and feel like I was there with her. I wanted that for my own family.
Scrapbooking is not just glue and paper. It is a way to slow down, pick up physical objects with your hands, and create something that tells a real story. Adults come to this hobby for all kinds of reasons. Some want to preserve family memories before the details fade. Others want a screen-free creative outlet that actually produces something tangible. And plenty of people, like me, just want to finally do something with those thousands of photos sitting in a cloud somewhere.
This guide covers everything you need to know about how to start scrapbooking as an adult, whether you have never made a single page or you are returning after years away. I will walk you through the supplies you actually need (and what you can skip), how to print and organize your photos, a step-by-step process for your first page, and the mistakes I wish someone had warned me about. By the end, you will have a clear path from blank album to finished page.
Table of Contents
What Is Scrapbooking and Why Start Now?
Scrapbooking is the practice of arranging photos, written memories, and decorative elements in an album to tell a story. At its core, it is memory keeping combined with creative expression. You choose photos, pair them with paper and embellishments, add journaling to capture the story behind the images, and preserve the whole thing in a bound album. That is it. Everything else is optional.
Adults are drawn to scrapbooking for reasons that go beyond just making something pretty. There is growing interest in tactile, screen-free hobbies. A 2024 survey from the Association for Creative Industries found that 62% of adult crafters cited stress relief as their primary motivation. Scrapbooking specifically offers a combination of creative expression, mindfulness, and tangible output that many adults find missing from their daily routines.
If you are wondering whether it is too late to start, the answer is absolutely not. Some of the most dedicated scrapbookers I know started in their 30s, 40s, or even 60s. The hobby has evolved significantly in recent years, with simpler approaches like pocket scrapbooking and minimalist layouts making it more accessible than ever. You do not need artistic talent. You do not need expensive tools. You just need photos you care about and a willingness to put them on a page.
For adults returning to scrapbooking after years away, the landscape has changed. Digital printing is easier. Supplies are more varied. The aesthetic trends have shifted toward cleaner, photo-focused layouts rather than the heavily embellished pages popular in the early 2000s. Think of it as returning to a familiar place that has gotten a fresh coat of paint.
What Supplies Do You Actually Need to Start Scrapbooking?
The biggest trap for beginners is buying too many supplies before making a single page. I have seen people drop hundreds of dollars at a craft store, get home, stare at the pile, and feel too overwhelmed to begin. Do not do that. You need six things to start scrapbooking. Six. Everything else can wait until you know what you actually enjoy using.
The Only 6 Things You Need to Begin
Here is your complete beginner scrapbook supplies list. Each item serves a specific purpose, and you can find budget-friendly versions of all of them.
1. A scrapbook album. This is the book that holds your finished pages. Albums come in three main sizes: 12×12 inches, 8.5×11 inches, and 6×8 inches. For most adult beginners, I recommend starting with either 8.5×11 or 12×12. The 12×12 size is the most common in the scrapbooking world, which means you will find the most paper and supplies designed to fit it. The 8.5×11 size feels less intimidating and works well if you want smaller, more focused pages. Choose a post-bound or three-ring album. Three-ring albums let you add and rearrange pages easily, which is ideal when you are just starting out.
2. Cardstock. This is thick, solid-color paper that forms the base of your pages. Buy a pack of 12×12 or 8.5×11 cardstock in neutral colors like white, cream, kraft, and black. You will use this to mat your photos and create page backgrounds. Look for cardstock that is at least 65-pound weight. Anything thinner will wrinkle when you add adhesive.
3. Patterned paper. One or two pads of patterned paper will give your pages visual interest without much effort. Pick patterns that match the photos you plan to scrapbook. For everyday photos, look for neutral patterns like polka dots, stripes, or subtle florals. For vacation or holiday photos, seasonal pads work well. You do not need more than one or two pads to start.
4. Adhesive. You need something to stick photos and paper to your pages. A tape runner is the easiest adhesive for beginners. It applies a double-sided strip of adhesive and is simple to use. Add a small pack of glue dots for attaching bulkier items like buttons or thick embellishments. Skip the liquid glue. It wrinkles paper and makes a mess.
5. A paper trimmer. A basic 12-inch paper trimmer lets you cut straight edges quickly. You can use scissors, but a trimmer saves time and gives cleaner cuts. This is the one tool where spending a little more pays off. A wobbly trimmer will frustrate you.
6. A pen for journaling. Journaling is the written part of scrapbooking, the words that tell the story behind the photos. Use an archival-quality pen with permanent, fade-resistant ink. A simple black fine-tip pen from the scrapbooking aisle works perfectly. Your handwriting, even if you think it is messy, adds a personal touch that printed text cannot replicate.
Nice-to-Have Extras (Buy Later, Not Now)
Once you have made a few pages and know you enjoy the hobby, consider adding these supplies. Notice I said after you have made pages. These are not requirements. They are extras that add variety and dimension.
Washi tape is decorative paper tape that comes in hundreds of patterns. It is easy to tear by hand and repositionable, making it very forgiving for beginners. Stickers and alphabet letter stickers (called alphas in the scrapbooking world) let you add titles and decorative elements quickly. Die cuts are pre-cut paper shapes sold in themed packs. Foam squares are small adhesive foam pieces that lift embellishments off the page, creating dimension. Ephemera includes things like ticket stubs, restaurant receipts, and brochures that you can incorporate directly into your pages.
All of these are fun. None of them are necessary for your first five pages. Start simple, learn what you enjoy, and expand your supply stash based on your actual preferences.
How to Start Scrapbooking as an Adult: Step-by-Step
This is the process I wish I had followed when I started. Instead, I printed 200 photos, bought a shopping cart full of supplies, and then sat frozen at my desk for three weeks. The step-by-step approach below is designed to get you from zero to a finished page in a single afternoon. Each step builds on the last one, and you can stop after any step and pick it back up later.
Step 1: Select and Print Your Photos
Start by picking photos from one specific event or time period. A birthday party, a weekend trip, a holiday, or even just a nice day at the park. Limit yourself to 5 to 8 photos. That is enough for one or two scrapbook pages. Do not try to sort your entire photo library. That is a project for another day.
If all your photos are on your phone, pick the ones you want, add them to a favorites album, and send them to a printing service. Most pharmacies and big-box stores offer same-day photo printing. CVS, Walgreens, and Walmart all have apps where you upload photos and pick them up in an hour. Shutterfly and Snapfish are good online options if you do not mind waiting a few days for delivery. Print in 4×6 size for standard scrapbook layouts.
For adults who have years of unprinted digital photos, the key is to not try to catch up all at once. Pick one moment. Start there. The rest of your photos are not going anywhere.
Step 2: Choose Your Album and Page Protectors
Now decide which album format you want to use. Here is a quick comparison of the three main sizes to help you choose.
The 12×12 inch album is the standard size in the scrapbooking world. It gives you the most space for photos, journaling, and embellishments on each page. Most patterned paper is designed for this size. If you have large photos or want to include lots of detail, 12×12 is the way to go.
The 8.5×11 inch album is a great middle ground. Pages feel less overwhelming to design, the albums take up less shelf space, and you can still fit 2 to 4 photos per page comfortably. This size works well for adults who prefer a cleaner, simpler look.
The 6×8 inch album is compact and approachable. Each page holds 1 to 2 photos. It is perfect for themed mini-projects like a vacation album or a month-in-review book. This size is also popular for pocket scrapbooking, which we will cover later.
For binding, three-ring albums are the most beginner-friendly because you can rearrange or remove pages at any time. Post-bound albums have screw posts that hold pages flat and look more polished on a shelf, but adding pages requires unscrewing the posts. D-ring albums are a variation of three-ring that hold pages more evenly.
Page protectors are clear plastic sleeves that slide into your album and protect your finished pages. Make sure you buy protectors that match your album size. Most albums come with a set of protectors included, and you can buy refill packs as needed.
Step 3: Pick One Story or Theme
Do not try to scrapbook your entire life at once. Pick one story. A single vacation, one birthday celebration, a favorite holiday tradition, or even a random Tuesday that made you happy. Focusing on one theme gives your first pages direction and removes the paralysis of too many choices.
If you need inspiration, here are some beginner-friendly themes: your most recent vacation, a child’s birthday, a holiday from the past year, your pet, a favorite recipe and the story behind it, a season (autumn leaves, spring flowers, summer beach days), or a relationship (date night memories, friendship adventures). The best themes are ones that evoke specific memories and emotions. If looking at the photos makes you smile, that is a good sign.
Step 4: Plan Your First Layout
Before you cut anything or apply any adhesive, plan your layout. This takes about five minutes and saves you from wasting supplies. Start by arranging your photos on a blank piece of cardstock. Move them around until you find a composition that feels balanced.
The rule of three is a simple design principle that helps here. Arrange your page elements in groups of three. Three photos, three clusters of embellishments, or three colors. Odd numbers create visual interest and feel more natural than perfectly symmetrical designs.
Another helpful approach is the visual triangle. Place your three main elements (typically your title, your main photo, and your journaling) in a triangle formation on the page. The viewer’s eye will naturally move between these three points, making the page feel cohesive.
Sketch your layout on a piece of scrap paper before committing. Draw boxes where your photos will go, note which papers go where, and mark where you want your journaling. This five-minute sketch saves you from cutting paper the wrong size or running out of room for your story.
Step 5: Assemble Your Page
Now it is time to put everything together. Follow this order for the smoothest process.
First, trim your photos if needed. Leave a white border when cutting for a clean, finished look, or cut flush to the edge for a modern feel. Next, mat your photos on cardstock. Cutting a piece of cardstock slightly larger than your photo (about 1/8 to 1/4 inch on each side) and attaching the photo on top creates a framed effect that makes photos pop. Then adhere your matted photos to your background cardstock using your tape runner. Position them according to your sketched layout.
Add patterned paper strips or blocks to fill empty spaces and add visual interest. A strip along the bottom, a block in the corner, or a band across the middle of the page are all simple options. Add embellishments sparingly. A few well-placed stickers or die cuts do more than a page crowded with decorations. Finally, write your journaling. This can be a few sentences about what was happening in the photos, how you felt, or details you want to remember. Date your page. Future you will be grateful.
Your First Scrapbook Page: A Complete Walkthrough
Let me walk you through a complete page so you can see exactly how this works in practice. No abstract advice. Just a concrete example you can follow or adapt.
For this example, I am scrapbooking a photo from a family trip to the beach. I have three photos: one wide shot of the ocean, one of my kids running toward the water, and a close-up of a sandcastle. My theme is simple: a perfect summer day.
First, I chose my color scheme. I look at my photos and pull colors from them. The ocean is blue, the sand is tan, and the sky has soft warm tones. I grab a piece of light blue cardstock for my background, a strip of tan patterned paper with a subtle wave design, and a small piece of white cardstock for my journaling block.
Next, I trim my photos to 4×6 inches. I mat the main photo (the kids running) on white cardstock, leaving a thin border, and then mat it again on blue cardstock for a double mat. The other two photos get a single mat on white. The double-matted photo becomes my focal point.
I place the focal point photo slightly left of center on my background cardstock. The ocean wide shot goes in the top-right area, and the sandcastle close-up goes in the bottom-right. This creates a visual triangle on the page. The tan patterned paper strip runs along the bottom third of the page, grounding the layout.
For embellishments, I keep it minimal. Three small shell-shaped stickers placed near the bottom-right photo. A chipboard title that says “Summer” placed above the focal point photo. That is it. Three clusters of decoration, following the rule of three.
My journaling block is a rectangle of white cardstock, about 3×4 inches, placed below the main photo. I write: “July 2025. Our first beach trip of the summer. The kids spent three hours building a sandcastle that was taller than they were. I sat in my chair and did absolutely nothing, and it was the best afternoon of the year.”
That page took about 25 minutes from start to finish. It has photos, a story, color, and personality. It is not perfect. The journaling block is slightly crooked. One of the shell stickers is a little too close to the photo. And that is completely fine. Imperfect pages tell better stories than blank ones.
If you are sitting there thinking, “But what if I mess up?”, let me tell you something I learned the hard way. Your first ten pages will not be your best work. That is normal. Every scrapbooker looks back at their early pages and cringes a little. But those pages hold your memories. Your kids will not notice that the paper is slightly crooked. They will see themselves in those photos and read your words and feel loved. That is the whole point.
Different Scrapbooking Methods for Adults
Traditional scrapbooking with paper and embellishments is just one approach. There are several other methods that might suit your style, your time constraints, or your creative preferences better. Here are the main options worth knowing about.
Pocket Page Scrapbooking
Pocket scrapbooking uses page protectors with built-in pockets (usually 3×4 or 4×6 inch slots). You slide photos and journaling cards into the pockets instead of adhering everything to a flat page. It is faster than traditional scrapbooking, more uniform in appearance, and very beginner-friendly. The Project Life system popularized this method, and you can find pocket pages and coordinating card sets at most craft stores.
This approach works especially well for busy adults who want the satisfaction of memory keeping without spending an hour on each page. You can complete a pocket page in 10 to 15 minutes. Slide in your photos, tuck in a few decorative cards, write a quick note on a journaling card, and you are done.
Mini Albums
Mini albums are small-format scrapbooks, usually 6×6 or 4×6 inches, focused on a single event or theme. A vacation mini, a birthday mini, a “month of gratitude” mini. Because they are smaller, they feel less intimidating to start and faster to finish. Completing a small project gives you a sense of accomplishment that motivates you to keep going.
Mini albums also make wonderful gifts. A grandparent would love a small album filled with photos of the grandchildren. A friend would appreciate a mini book from a shared trip. The smaller format means you use fewer supplies per page, which is easier on your budget too.
Art Journaling and Junk Journaling
Art journaling and junk journaling are freer, less structured approaches to memory keeping. Art journaling combines paint, drawing, collage, and mixed media in a bound journal. Junk journaling uses found materials like old book pages, fabric scraps, envelopes, and recycled paper to create layered, textured pages.
These methods appeal to adults who want more artistic freedom and fewer rules. There is no right way to arrange a junk journal page. You can incorporate ephemera directly, paint over photos, sew pages together, or glue in leaves from a walk. The emphasis is on creative expression rather than polished layouts.
If traditional scrapbooking feels too structured or you chafe at the idea of following layout formulas, give one of these approaches a try. They are also excellent for adults who want a craft that doubles as a creative self-care practice.
Common Scrapbooking Mistakes Beginners Make (and How to Avoid Them)
After spending time in scrapbooking communities and making plenty of these mistakes myself, here are the ones I see most often. Knowing about them in advance will save you time, money, and frustration.
Mistake 1: Buying too many supplies before starting. This is the number one beginner mistake. You walk into a craft store, see walls of beautiful paper and stickers and tools, and come home with a small fortune in supplies. Then you feel overwhelmed and never start. Buy only the six essentials I listed earlier. Make five pages. Then decide what to add.
Mistake 2: Trying to document every photo you have ever taken. Scrapbooking is about selecting the photos that matter most, not archiving every image on your phone. When you try to include everything, you end up including nothing. Curate ruthlessly. Pick the photos that tell a story or evoke a feeling.
Mistake 3: Comparing your pages to experienced scrapbookers. Social media and Pinterest are full of elaborate, professional-looking scrapbook layouts. Those pages were made by people who have been scrapbooking for years. Your first pages will be simpler. Simpler does not mean worse. Your pages tell your stories, and that is what makes them valuable.
Mistake 4: Skipping the journaling. Photos capture what something looked like. Journaling captures how it felt. Without the words, a page of beach photos is just a page of beach photos. With journaling, it becomes the story of the day your daughter rode her first wave. Write the story. Even two sentences are enough.
Mistake 5: Using the wrong adhesive or too much of it. Glue sticks and liquid glue are not your friends in scrapbooking. They wrinkle paper, leave residue, and can damage photos over time. Stick with tape runners for flat items and glue dots or foam squares for dimensional pieces. Apply adhesive to the back of your photo or paper, not directly to your background page.
Mistake 6: Not leaving white space. White space is the empty area on your page that is not covered by photos, paper, or embellishments. Beginners tend to fill every inch, which makes pages feel cluttered and overwhelming. Leave breathing room. Your photos and stories deserve space to stand on their own.
Mistake 7: Waiting for perfection before you start. Perfectionism is the enemy of finished scrapbooks. I know people who have been “planning” to start scrapbooking for years but have not made a single page because they are afraid of doing it wrong. There is no wrong. There is only done and not done. Make the page. Move on. Make the next one better.
How to Fit Scrapbooking Into a Busy Adult Schedule
This is the section I have not seen in any other beginner guide, and it is the one adults need most. You have a job, possibly kids, errands, and about twelve free minutes on a Tuesday evening. How do you actually find time to scrapbook?
The answer is not to carve out three-hour weekend sessions. The answer is to work in small, manageable chunks. Community members on scrapbooking forums consistently recommend a pace of about one page per week. At that rate, you will fill a 40-page album in less than a year. That is an entire year of memories documented.
Here is how to break the process into bite-sized sessions that fit real life.
Prep session (15 minutes): Pick 3 to 5 photos for one page. Print them or pull them from your printed stack. Set them aside with a piece of cardstock and one sheet of patterned paper.
Layout session (10 minutes): Arrange your photos on the cardstock. Move them around until you like the composition. Take a photo of the arrangement with your phone so you remember it later.
Assembly session (15 to 20 minutes): Cut paper, adhere photos, add embellishments, and write your journaling. If you prepped and planned your layout, the actual assembly goes fast.
Total time per page: about 40 to 45 minutes, spread across two or three short sessions over the week. You can prep while waiting for dinner to cook. You can plan a layout during your lunch break. You can assemble on Sunday morning with a cup of coffee.
Another strategy that works well for busy adults is batching. Print 20 to 30 photos at once. Spend one evening sorting them by event and tucking each group into a labeled envelope. Then when you have 20 minutes to scrapbook, you grab an envelope and everything is ready. No hunting for photos, no decision fatigue about which ones to use.
Keep your supplies in a portable container. A rolling cart, a tackle box, or even a large zippered pouch works. If your supplies are scattered across the house, you will spend your entire scrapbooking session gathering materials instead of making pages. A portable setup also means you can scrapbook at the kitchen table, on the couch, or wherever you have a few free minutes.
Frequently Asked Questions
What is the rule of three in scrapbooking?
The rule of three is a design principle where you arrange page elements in groups of three. Place three photos, three embellishment clusters, or use three colors on a page. Odd numbers create visual interest and feel more natural to the eye than symmetrical even-numbered arrangements.
How do you start scrapbooking for beginners?
To start scrapbooking, gather six basic supplies: an album, cardstock, patterned paper, adhesive (tape runner), a paper trimmer, and a journaling pen. Pick 3 to 5 photos from one event, arrange them on cardstock, mat them with paper, add simple embellishments, write a few sentences about the memory, and slide the finished page into a protector. Start with one page and build from there.
What are common scrapbooking mistakes?
The most common mistakes include buying too many supplies before starting, trying to use every photo instead of curating the best ones, skipping journaling, using liquid glue instead of tape runners, filling every inch of the page without leaving white space, and comparing your early pages to experienced scrapbookers. Start simple, focus on the story, and let your skills develop naturally.
Is Hobby Lobby or Michaels better for scrapbooking?
Both stores carry scrapbooking supplies, and which is better depends on your needs. Hobby Lobby tends to have a wider selection of patterned paper pads and themed collections. Michaels often has stronger sales on basic supplies like cardstock and adhesives, and their loyalty program offers regular coupons. For beginners, shop at whichever store is closer and use weekly coupons from either retailer to save on your first supply run.
What size scrapbook album is best for beginners?
The 12×12 inch album is the most versatile choice because the majority of scrapbooking supplies are designed for this size. However, the 8.5×11 inch album is less intimidating and great for adults who prefer simpler, smaller pages. If you want a quick-start option, a 6×8 inch album paired with pocket pages is the fastest way to begin because you just slide photos into pre-sized pockets.
Can I start scrapbooking without a Cricut?
Yes, absolutely. A Cricut or any electronic cutting machine is not required for scrapbooking. Most scrapbookers use pre-cut embellishments, stickers, die cuts, and paper punches instead. A basic paper trimmer and a pair of scissors handle nearly everything you need. Cutting machines are a nice upgrade later if you want to create custom titles or shapes, but they are not necessary to make beautiful pages.
Getting Started Is the Hardest Part
Every scrapbooker has one thing in common: at some point, they stopped thinking about scrapbooking and actually made a page. That first page is the hardest one. Not because it requires special skill or expensive supplies, but because starting something new feels vulnerable. What if it does not turn out well? What if I waste the paper? What if my handwriting looks bad on the journaling?
Here is what I want you to remember. That slightly crooked, imperfect first page is worth more than a hundred Pinterest-perfect layouts you never actually make. The photos matter. The story matters. The fact that you took the time to preserve a memory on paper, in your own handwriting, for someone you love to find someday, that matters.
If you want to learn how to start scrapbooking as an adult, the answer is simple. Pick three photos. Grab a piece of cardstock. Stick them down. Write the date and one sentence about what was happening. Done. You are a scrapbooker now. Everything else, the pretty paper and the design tricks and the supply collection, that all comes later. The only thing standing between you and your first finished page is about 25 minutes and the willingness to try.
Your future self, and your family, will be glad you started.