
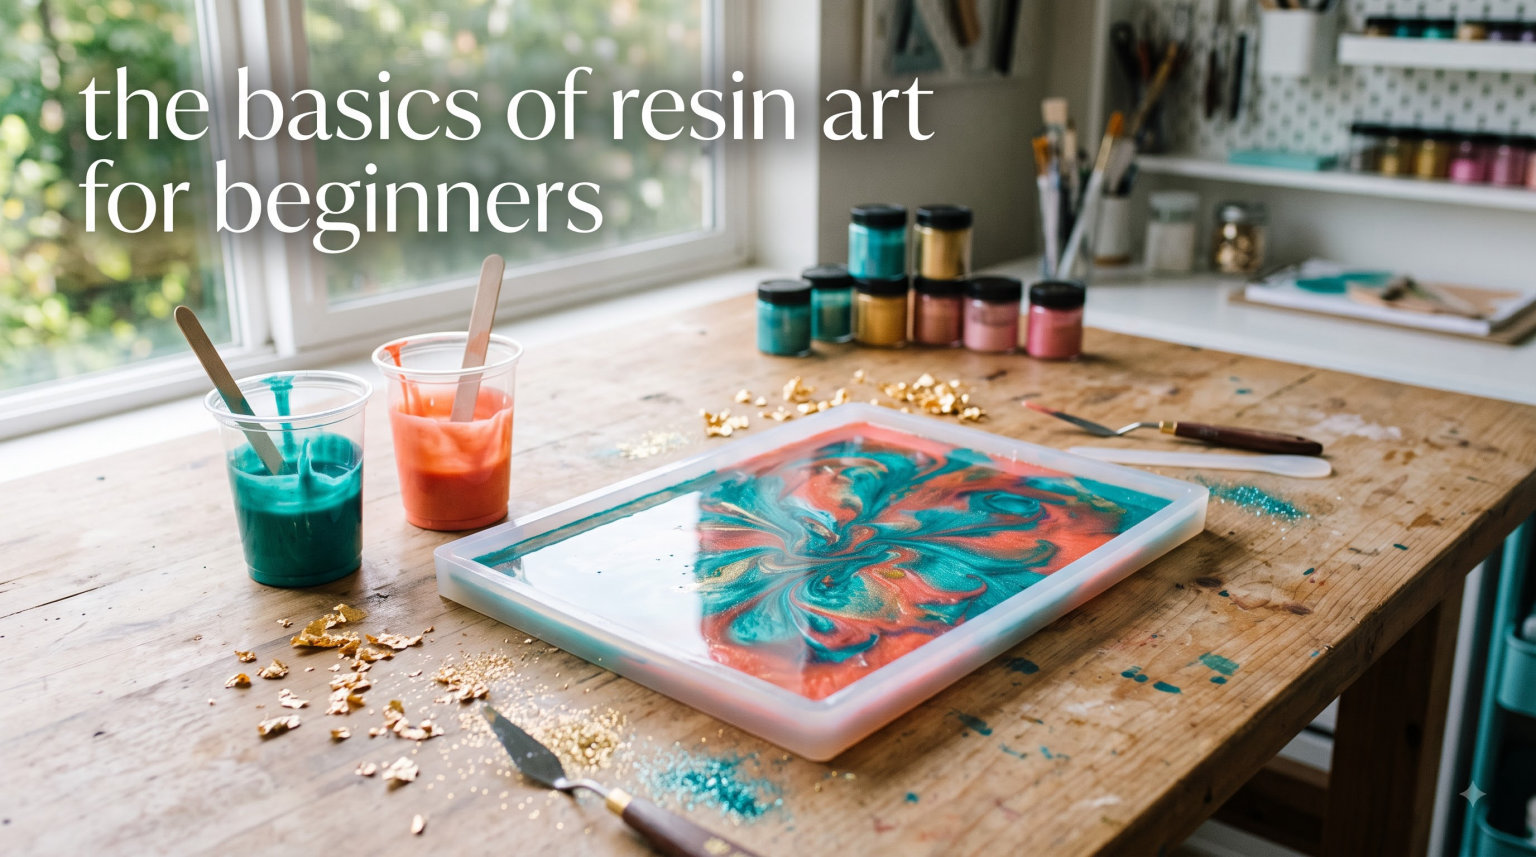
If you have been scrolling through Instagram or Pinterest and admiring those glossy, glass-like resin coasters and jewelry, you are not alone. I remember the first time I saw a resin geode painting and thought it had to be impossibly difficult to make. Turns out, resin art for beginners is far more approachable than it looks once you understand the fundamentals.
This guide covers everything you need to know to start making resin art from scratch. I will walk you through what epoxy resin actually is, how to handle it safely, which supplies matter most, and the exact step-by-step process for your first pour. By the end, you will have enough knowledge to tackle your first project with confidence.
I have spent months testing different resins, ruining a few batches along the way, and learning from every mistake. The good news is that most beginner failures come down to a handful of preventable errors, and once you know what those are, your success rate goes way up. Whether you want to make coasters for your home, pendants as gifts, or just explore a new creative hobby, the basics of resin art for beginners start right here.
Table of Contents
What Is Epoxy Resin and How Does It Work?
Epoxy resin is a clear, liquid plastic made from two separate components that, on their own, stay liquid almost indefinitely. When you combine them in the right ratio, a chemical reaction begins that transforms the mixture from a pourable liquid into a hard, glassy solid. That reaction is called curing, and understanding how it works is the single most important thing you can learn before your first project.
The two components are simple to remember. Part A is the resin itself, which is a thick, syrupy liquid. Part B is the hardener (sometimes called the catalyst or curing agent), which looks similar but has different chemical properties. When you mix Part A and Part B together, the molecules from each part begin linking together in long chains. This process is called polymerization, and it is what turns your mixed liquid into that crystal-clear, high-gloss finish resin art is known for.
Two terms you will see on every resin bottle are “working time” and “cure time.” Working time (also called pot life) is the window you have to mix, color, pour, and manipulate your resin before it starts thickening. Depending on the resin, this can range from 20 minutes to over an hour. Cure time is how long the full hardening process takes, usually 24 to 72 hours depending on the brand and thickness of your pour.
Most beginner resins are self-leveling, which means the liquid naturally spreads out to form a flat, even surface on its own. This is a huge advantage for beginners because you do not need advanced techniques to get a smooth finish. You just pour, and gravity does most of the work.
Types of Resin Explained
Walking into a craft store or searching online for resin can feel overwhelming because there are several types available. For resin art for beginners, the choice is actually pretty straightforward once you understand the main categories.
Epoxy Resin (What Most Beginners Should Use)
Epoxy resin is the most popular choice for art and crafting. It comes in a two-part system with a simple mixing ratio, usually 1:1 by volume, which means equal parts resin and hardener. This 1:1 ratio makes it extremely beginner-friendly because you just fill two cups to the same line and combine them. Epoxy resin cures to a crystal-clear, high-gloss finish and works well for coasters, jewelry, paintings, and decorative pieces.
UV Resin
UV resin is a single-part product that cures when exposed to UV light, typically from a small UV lamp. It is great for small jewelry pieces and quick fixes because it hardens in minutes instead of hours. The downside is that you can only work in thin layers, and the cost per ounce is significantly higher than epoxy. It is a nice supplement to have but not ideal as your primary resin for larger projects.
Polyester and Polyurethane Resin
These are industrial-grade resins used for deep pours, flooring, and marine applications. They cure very fast, produce strong odors, and are generally not recommended for beginners. Polyester resin in particular has a powerful smell and requires heavy-duty ventilation. Stick with epoxy resin until you have significant experience.
Which Type Should a Beginner Use?
For your first projects, choose a 1:1 epoxy resin that is specifically labeled as an art resin or craft resin. Look for one that advertises low odor, self-leveling properties, and a working time of at least 30 minutes. These formulations are designed with hobbyists in mind and are far more forgiving than industrial products.
Safety First: Essential Precautions for Beginners
If there is one section you should read carefully, this is it. Forum after forum, I see beginners asking about resin safety with genuine concern, and those concerns are valid. Epoxy resin contains chemicals that can irritate your skin, eyes, and respiratory system. The good news is that with proper precautions, you can work with resin safely. Let me be straightforward about the risks and how to manage them.
Ventilation Is Non-Negotiable
Even “low odor” resins release volatile organic compounds (VOCs) as they cure. Working in a closed room without airflow is a bad idea. The best setup is a garage with the door open, a covered outdoor area like a patio, or a room with multiple windows open and a fan pulling air out. I have seen experienced resin artists on Reddit describe serious respiratory issues from years of working without ventilation. Take this seriously from day one.
If you can only work indoors, open windows on opposite sides of the room to create cross-ventilation. Position a box fan in one window blowing outward to pull fumes away from your work area. Even a small setup like this makes a meaningful difference.
Respirator vs. Dust Mask
A standard dust mask or surgical mask does not protect against resin fumes. These masks filter particles, not chemical vapors. For proper protection, you need an organic vapor respirator with cartridges rated for VOCs. These typically cost between $25 and $40 and are worth every penny if you plan to work with resin regularly. For occasional small projects, strong ventilation may be sufficient, but a respirator is the safer choice.
Skin Protection
Epoxy resin is a skin sensitizer, which means repeated contact can cause an allergic reaction called contact dermatitis. This might not happen the first time or even the fifth time, but once you develop sensitization, it is often permanent. Always wear nitrile gloves when handling resin. Latex gloves can sometimes allow resin to seep through, so nitrile is the recommended choice. If you get resin on your skin, wash it off immediately with soap and water. Do not use solvents like acetone on your skin, as they can drive the resin deeper into your pores.
Eye Protection
Safety glasses are a smart precaution, especially when working with large quantities or when using a heat source like a torch to remove bubbles. Resin splashing into your eyes can cause serious irritation.
Workspace Safety Tips
Cover your work surface with plastic sheeting, silicone mats, or parchment paper. Resin is nearly impossible to remove from furniture and countertops once it cures. Keep paper towels within arm’s reach for quick cleanup. Make sure your workspace is level, because resin will flow to the lowest point and cure unevenly on a tilted surface. Finally, keep children and pets away from your work area while you are pouring and during the curing process.
Essential Materials and Supplies Checklist
One of the things I appreciate about resin art is that you do not need a massive collection of tools to get started. Here is a realistic breakdown of what you actually need versus what is nice to have once you are hooked.
The Must-Have Supplies
First, you need epoxy resin and hardener. Start with a small bottle kit (around 16 to 32 ounces total) so you are not committing to a large quantity before you know you enjoy the craft. You will also need measuring cups, ideally clear plastic cups with graduated measurement lines so you can see exact levels. Mixing cups should be separate from measuring cups.
Stir sticks are essential, and you want ones that are flat and wide rather than round. The flat edge helps you scrape the sides and bottom of your mixing cup thoroughly. Wooden craft sticks or silicone stir sticks both work well. You will also need nitrile gloves, a level surface to work on, and something to protect that surface with, such as a silicone mat or plastic drop cloth.
The Nice-to-Have Supplies
A heat gun or small butane torch is extremely helpful for removing bubbles, and I would argue this jumps to must-have status once you start making larger pieces. A digital kitchen scale is useful for resins that measure by weight instead of volume. Silicone molds open up a world of project possibilities, from coasters to jewelry to decorative shapes. And a level tool (even a free phone app) ensures your work surface is perfectly flat before you pour.
Colorants and Pigments
Resin starts completely clear, which is beautiful on its own, but most beginners want to add color. You have several options. Mica powder creates a shimmery, metallic look and is one of the most popular colorants. Alcohol inks produce vibrant, translucent colors and interesting effects when they spread through the resin. Liquid pigments and resin dyes offer solid, opaque colors. Acrylic paint can work in a pinch but tends to clump and affect curing, so it is not the ideal choice.
Getting Started Without Breaking the Bank
Forums are full of beginners worried about the cost of getting started. Here is the honest truth: you can begin with a basic resin kit, a set of mixing cups, stir sticks, and nitrile gloves for a relatively modest investment. Skip the fancy molds and colorants for your first pour. Pour clear resin onto a surface like a ceramic tile or a piece of MDF board just to practice the mixing and pouring process. Once you are comfortable with the basics, you can expand your collection of tools and colors gradually.
How to Make Resin Art: Step-by-Step Process
Learning resin art for beginners comes down to mastering a repeatable process. Follow these steps for your first pour, and you will avoid most of the common pitfalls that trip people up.
Step 1: Prepare Your Workspace
Before you open a single bottle, set up everything you need. Cover your work surface. Check that it is level. Open windows or set up your fan for ventilation. Put on your nitrile gloves. Lay out your resin, hardener, measuring cups, mixing cups, stir sticks, and any colorants you plan to use. Have paper towels ready. Once resin is mixed, the clock starts ticking on your working time, so you do not want to be hunting for supplies mid-pour.
Step 2: Measure the Resin and Hardener
Pour Part A (resin) into a measuring cup to your desired amount. Then pour Part B (hardener) into a separate measuring cup to the exact same level for a 1:1 ratio. Read your specific resin instructions carefully because some brands use a different ratio, such as 2:1 by volume or a weight-based measurement. Getting the ratio wrong is the number one cause of resin that stays sticky or fails to cure properly.
If your resin specifies measuring by weight, use a digital kitchen scale. Place your mixing cup on the scale, zero it out, pour Part A to the specified weight, then add Part B to reach the total combined weight listed on the instructions.
Step 3: Mix Thoroughly (At Least 3 Minutes)
Pour both parts into a single mixing cup and stir with your flat stir stick. Scrape the sides, the bottom, and the stir stick itself repeatedly. Most beginners drastically underestimate how long they need to mix. Stir for a minimum of 3 minutes, and do not rush it. Under-mixed resin will have areas that never fully cure, leaving you with soft or sticky patches.
The mixture may appear cloudy when you first start stirring. That is normal. Keep mixing until the liquid becomes consistently clear and streak-free. This is the most tedious step, but it is also the most important for a successful cure.
Step 4: Add Color (Optional)
If you want colored resin, now is the time to add your pigment. Add a small amount of mica powder, alcohol ink, or resin dye to your mixed resin and stir gently to distribute the color evenly. For swirling effects, add drops of different colors and stir only briefly so the colors stay partially separated. Less is more with colorants, as too much can interfere with curing.
Step 5: Pour Onto Your Surface or Mold
Slowly pour the resin onto your surface or into your mold. Pouring slowly helps minimize bubbles. If you are pouring onto a flat surface like a board or canvas, start in the center and let the resin spread outward. You can use your stir stick or a spreader to guide the resin to the edges if needed. For molds, fill them slowly and tap the mold gently on your work surface to encourage trapped air to rise.
Step 6: Remove Bubbles
After pouring, you will likely see small bubbles rising to the surface. Pass a heat gun or small butane torch over the surface in quick, sweeping motions. The heat causes bubbles to expand and pop. Keep the heat source moving and do not linger in one spot, as too much heat can damage your mold or scorch the resin. This step alone can transform a mediocre result into a professional-looking finish.
Step 7: Cover and Cure
Once you are happy with the pour and have removed visible bubbles, cover your piece with a box, dome, or plastic container to protect it from dust while it cures. Even a single pet hair or speck of dust landing on wet resin becomes permanently embedded. Most resins are touch-dry in 12 to 24 hours and fully cured in 48 to 72 hours. Check your specific resin instructions for exact times. Resist the temptation to move or touch your piece during this window.
How to Remove Bubbles from Resin
Bubbles are the single biggest frustration for people learning resin art for beginners, and nearly every forum post about beginner struggles mentions them. Here are the most effective techniques for getting a bubble-free finish.
Warm Your Resin Before Mixing
Cold resin is thick and holds onto air bubbles stubbornly. Before you start, place your sealed resin and hardener bottles in a bowl of warm water for 10 to 15 minutes. Warming thins the liquid, making it easier to mix and allowing bubbles to rise and escape on their own. Do not use hot water, as excessive heat can kickstart the curing reaction prematurely.
Use a Heat Gun or Torch After Pouring
This is the most reliable bubble removal method. A butane torch or heat gun held a few inches above the resin surface will pop bubbles almost instantly. Sweep the heat across the surface in steady, even passes. A kitchen torch (the kind used for creme brulee) works well for small to medium pieces. A heat gun is better for larger surfaces because it covers more area.
Pour Slowly and From a Height
When you pour resin slowly from several inches above the surface, the thin stream allows trapped air to escape before the resin pools. Think of it like pouring beer into a glass: a slow pour from higher up produces less foam. The same physics applies to resin.
Use a Toothpick for Stubborn Surface Bubbles
For individual bubbles that refuse to pop, drag a toothpick through them. The sharp point breaks the surface tension and releases the air. This is especially useful for small molds and detailed pieces where a torch might be too aggressive.
Common Beginner Mistakes (and How to Avoid Them)
When I started working with resin, I made almost every one of these mistakes. Learning resin art for beginners means learning what not to do just as much as what to do. Here are the most frequent errors and how to prevent them.
1. Getting the Mixing Ratio Wrong
This is the single most common reason resin fails. Even a small deviation from the specified ratio can result in resin that stays tacky, cures soft, or never hardens at all. Always measure carefully, and double-check whether your resin measures by volume or by weight. Eyeballing it is not good enough for resin work.
2. Not Mixing Long Enough
Three minutes of stirring feels like a long time when you are excited to pour. But insufficient mixing leaves pockets of unmixed resin and hardener that will not cure properly. Scrape the sides and bottom of your cup continuously. If you see any cloudiness or streaks, keep going until the mixture is completely uniform and clear.
3. Ignoring Temperature
Resin is sensitive to temperature. The ideal working temperature is between 70 and 80 degrees Fahrenheit (21 to 27 degrees Celsius). If your workspace is too cold, the resin will be thick and viscous, making it hard to pour and release bubbles. If it is too hot, your working time shrinks dramatically, and the resin may cure before you finish your piece. Check your room temperature before starting and adjust if needed.
4. Pouring Too Thick in One Layer
Most epoxy resins have a maximum pour depth per layer, typically around 1/8 to 1/4 inch. Pouring thicker than recommended generates excessive heat during curing (called exothermic reaction) and can cause cracking, warping, or even smoking. For deep molds, plan to pour in multiple layers, allowing each layer to partially cure before adding the next.
5. Skipping the Level Check
Resin is a liquid that flows to the lowest point. If your work surface is even slightly tilted, your resin will pool to one side, creating an uneven cure. Use a bubble level or a phone level app to check your surface before every pour. This takes 30 seconds and saves entire projects.
6. Removing Pieces from Molds Too Early
It is tempting to check your creation the next morning. But removing resin from a mold before it is fully cured can leave fingerprints, bend the piece out of shape, or cause surface imperfections that are impossible to fix. Wait the full recommended cure time, and if you are unsure, give it an extra day.
Troubleshooting: When Resin Goes Wrong
Even with perfect technique, things sometimes go sideways. Here are the most common problems beginners encounter and what to do about each one.
Sticky or Tacky Resin
If your resin is still sticky 48 hours after pouring, something went wrong with the cure. The most likely cause is an incorrect mixing ratio. Too much hardener or too much resin both prevent full curing. Under-mixing is the second most common cause. Temperature can also be a factor; resin poured in a cold room (below 65 degrees Fahrenheit) may cure slowly or incompletely.
Unfortunately, you cannot “fix” tacky resin once it has set in this state. The best approach is to pour a fresh, correctly mixed layer on top. The new layer will bond with the tacky surface and cure over it, effectively sealing the problem. Sand the tacky surface lightly first to create better adhesion.
Cloudy or Milky Resin
Cloudiness usually comes from moisture contamination. If your mixing cups, molds, or surface had any water on them, that moisture gets trapped in the resin and creates a milky appearance. Always ensure everything is completely dry before you start. High humidity in your workspace can cause the same issue. If you live in a humid climate, consider using a dehumidifier or waiting for a dry day to pour.
Soft Spots in Cured Resin
If parts of your piece are hard and other areas remain soft or rubbery, the resin was not mixed evenly. Some areas received the correct ratio while others did not. This reinforces why thorough mixing for a full three minutes is so important. There is no fix for soft spots other than starting over. Pour a new layer on top if the piece is salvageable.
Dust and Hair Embedded in the Surface
This is one of the most frustrating problems because it is so easy to prevent. Always cover your curing resin with a box, dome, or plastic container. Work in a room without fans blowing directly on your surface. If a piece of dust does land on wet resin, use a toothpick to lift it out before the resin cures. For dust that has already cured into the surface, you can sand the top layer and apply a thin clear coat of fresh resin to restore the gloss.
Temperature and Humidity Effects
Both temperature and humidity have significant impacts on your resin results. Cold temperatures slow curing and make resin thick and hard to work with. High temperatures accelerate curing and reduce your working time. High humidity introduces moisture that clouds the resin. The sweet spot is 70 to 80 degrees Fahrenheit with humidity below 50 percent. If your environment does not naturally fall in this range, a small space heater or dehumidifier can make a big difference.
5 Easy Resin Art Projects for Beginners
Ready to make something? These five projects are ideal for anyone exploring resin art for beginners because they are small, manageable, and hard to mess up if you follow the process.
1. Resin Coasters
Coasters are the classic first resin project for good reason. They are small, practical, and look impressive even with a simple clear pour or a single-color design. You can use silicone coaster molds, which are inexpensive and reusable. Try pouring a clear base layer and adding a few drops of alcohol ink on top for a petri-dish effect. Coasters also make excellent gifts, which is a nice bonus.
2. Trinket Dishes
Small trinket dishes are slightly larger than coasters and often use shallow, decorative molds. They are a great canvas for embedding small objects like dried flowers, glitter, or small shells. The pour depth is thin, so curing times are manageable and the risk of overheating is minimal. A single batch of mixed resin can usually make two or three dishes.
3. Pendant Jewelry
Resin pendants are satisfying because they turn a small amount of resin into wearable art. Small silicone pendant molds come in many shapes, and you can add dried flowers, glitter, or tiny images sealed with a clear coat before pouring. Because each pendant uses very little resin, you can make several in one session and experiment with different color combinations.
4. Petri Dish Art
Petri dish art gets its name from the circular glass dishes used as molds, but you can use any round silicone mold. The technique involves dropping alcohol inks into clear resin, where they spread and create organic, cell-like patterns. No two pieces are ever alike, which makes this project feel creative and experimental even for beginners. The results look far more advanced than the technique actually is.
5. Resin Bookmarks
Long, flat bookmark molds are inexpensive and perfect for beginners. You can layer different colors, add dried flowers or leaves, or embed metallic flakes for a striking effect. Bookmarks use minimal resin, cure quickly due to their thin profile, and are easy to gift. They are also a low-risk way to practice your mixing and bubble-removal technique before moving on to larger projects.
FAQs
What cannot be put in resin?
Avoid embedding anything with high moisture content, including fresh flowers, fresh fruit, and wet materials. The moisture prevents proper curing and causes cloudiness or bubbling. Also avoid porous items that trap air bubbles, such as unsealed wood or certain fabrics. Items that are safe to embed include dried flowers, dried leaves, glitter, small shells, beads, and paper or photos that have been sealed with a clear acrylic spray first.
What type of resin should a beginner use?
Beginners should start with a 1:1 epoxy resin kit specifically designed for art and crafting. These resins have a simple equal-parts mixing ratio, low odor, and generous working time (30 to 45 minutes). Look for products labeled as art resin, craft resin, or casting resin with self-leveling properties. Avoid industrial epoxy, polyester resin, or any product with a complicated mixing ratio for your first projects.
What is the difference between art resin and epoxy resin?
Art resin is a type of epoxy resin formulated specifically for creative projects. It typically has lower viscosity for easier pouring, reduced odor, UV resistance to prevent yellowing, and non-toxic or low-toxicity certifications. Standard epoxy resin is a broader category that includes industrial formulations with stronger odors, faster cure times, and harsher chemicals. All art resin is epoxy resin, but not all epoxy resin is suitable for art.
Is resin art difficult for beginners?
Resin art is not difficult to start, but it does require careful attention to measurements and safety. The basic process comes down to measuring two liquids, mixing them thoroughly, and pouring. Most beginners can create beautiful pieces on their first attempt if they follow instructions carefully. The learning curve comes from understanding curing behavior, mastering bubble removal, and developing an eye for color. Start with small, simple projects and you will build confidence quickly.
Is resin a cheap hobby?
Resin art has a moderate startup cost. A basic beginner kit with resin, mixing supplies, and gloves costs relatively little. Silicone molds, colorants, and tools add to the expense over time. Compared to many hobbies, the initial investment is manageable. The ongoing cost depends on how much you create and the types of projects you pursue. Buying resin in larger quantities reduces the per-project cost significantly once you know you enjoy the craft.
What are the common mistakes in resin art?
The most common mistakes include incorrect mixing ratios, insufficient mixing time (less than 3 minutes), ignoring temperature and humidity requirements, pouring layers too thick, not using a level surface, removing pieces from molds before full cure, and skipping safety precautions like gloves and ventilation. Each of these mistakes has a straightforward fix, and most are preventable once you understand the process.
How long does resin take to cure?
Most epoxy art resins are touch-dry within 12 to 24 hours and fully cured within 48 to 72 hours at room temperature (70 to 80 degrees Fahrenheit). Cure time varies by brand, pour thickness, and environmental conditions. Thicker pours take longer. Cold temperatures extend cure time significantly, sometimes adding days. Always check the specific product instructions for accurate timing, and when in doubt, give it an extra day before handling.
Getting Started with Resin Art: Final Thoughts
Resin art for beginners does not have to be intimidating. At its core, the process comes down to measuring two liquids, mixing them well, and pouring with care. The challenges around safety, bubbles, and curing are all manageable once you understand the basics. I genuinely believe that anyone willing to follow the steps carefully can create beautiful resin pieces on their very first try.
Start small with a simple project like coasters or a trinket dish. Focus on getting your mixing ratio right and stirring for the full three minutes. Protect your workspace, wear your gloves, and ventilate your area. Those fundamentals alone will carry you through your first dozen projects successfully. Everything else, from color techniques to embedding objects to advanced effects, you can learn as you go.
The most important thing is to give yourself permission to make mistakes. Every resin artist has ruined a batch, had resin stick to something it should not have, or waited impatiently for a piece that stayed tacky. Those failures teach you more than any guide can. So grab a basic kit, set up a safe workspace, and pour your first piece. The basics of resin art for beginners are exactly that: basic. The results, though, can be truly stunning.