
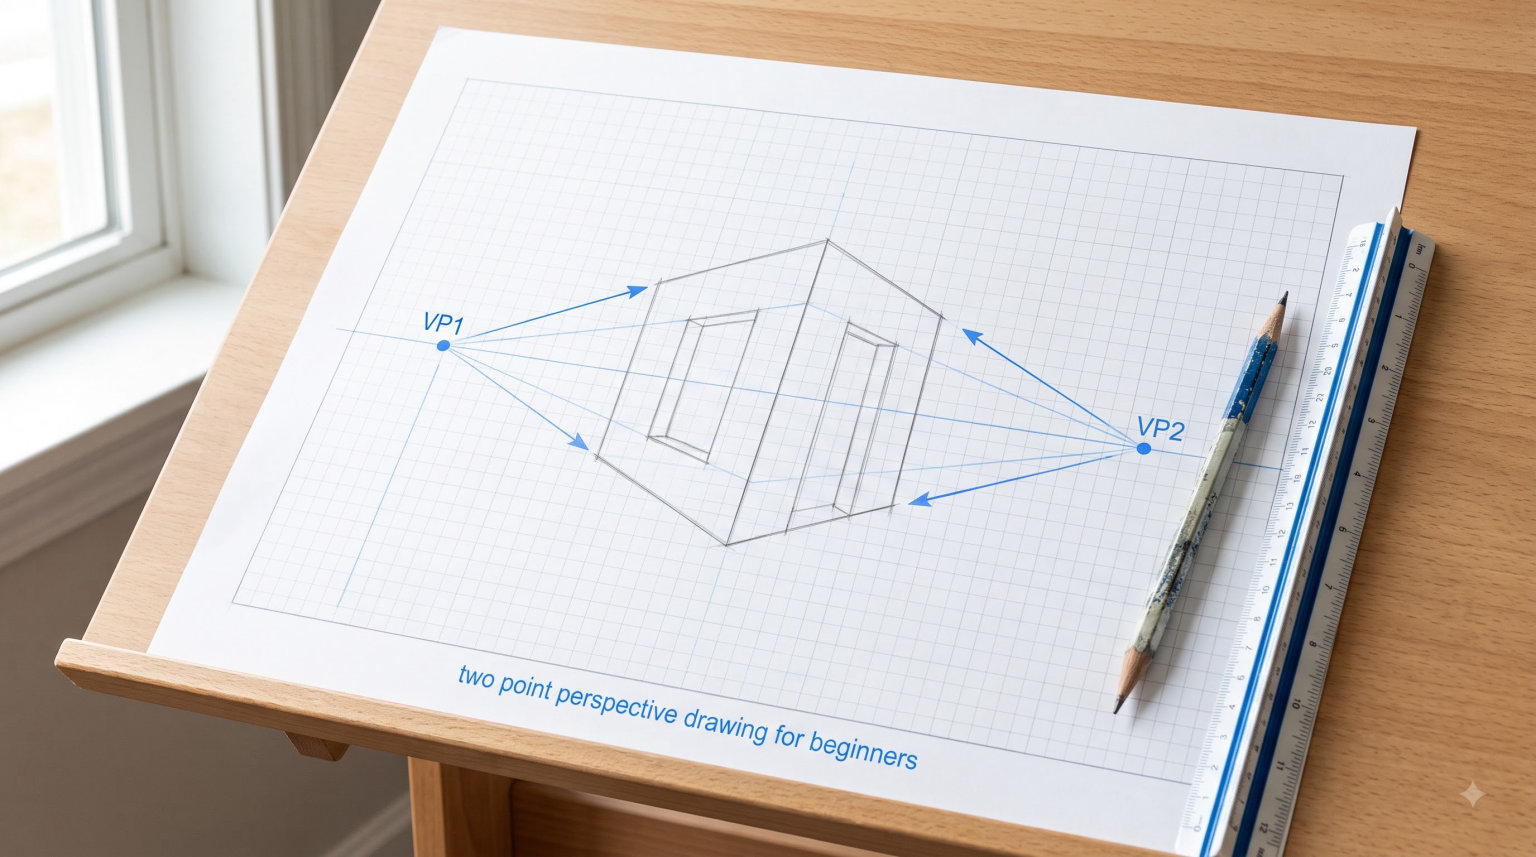
Two point perspective drawing is one of the most useful techniques you will ever learn as an artist. When I first started drawing buildings and interiors, everything looked flat and lifeless until I understood how perspective works. This guide will walk you through two point perspective drawing for beginners in plain language, with step-by-step instructions that actually make sense. By the end, you will know exactly how to create the illusion of 3D space on a flat piece of paper.
If you have ever wondered how artists make buildings look like they stretch back into the distance, the answer is perspective drawing. Specifically, two point perspective is the method that works best for anything viewed from an angle, like the corner of a building or a street receding in both directions. It is a foundational skill that opens up architectural drawing, cityscapes, room interiors, and any scene where you want to show depth.
Table of Contents
What Is Two Point Perspective?
Two point perspective is a linear perspective technique that uses two vanishing points on the horizon line to create the illusion of depth and 3D space on a 2D surface. When you draw objects at an angle, you see two sets of parallel lines that appear to converge toward two separate points on the horizon. Those two points are your vanishing points, and every horizontal line in your drawing connects to one of them.
The reason this technique works is simple. Our eyes perceive parallel lines as converging when they stretch into the distance. A road is a perfect example: the edges of the road appear to meet at a point on the horizon, even though we know they stay perfectly parallel all the way along. Two point perspective copies this natural phenomenon to make drawings feel real and three-dimensional.
Unlike one point perspective, which works best for scenes you view straight-on, two point perspective handles subjects that are rotated at an angle. Picture the corner of a house. You can see two walls, each receding toward its own vanishing point. That is exactly what two point perspective captures, and it is why this technique is essential for any artist interested in architecture or interior design.
Key Terms You Need to Know
Before you start drawing, you need to understand the basic vocabulary of perspective. These terms come up constantly in tutorials and art instruction, so learning them now will make everything else much easier.
Horizon line represents your eye level, the place where the sky meets the ground in your scene. In a landscape, that is literally where the horizon sits. In an interior, it is an imaginary line at the height of your eyes as you look into the room. Every vanishing point sits somewhere on this line.
Vanishing points are the two points on the horizon line where parallel lines appear to converge. In two point perspective, you place one vanishing point on the far left and one on the far right of your horizon line. All horizontal lines in your drawing will lean toward one of these two points.
Orthogonal lines are the diagonal lines that connect your vanishing points to the edges of objects in your drawing. The word comes from mathematics, where orthogonal means right-angled, but in perspective drawing it simply refers to those receding lines that create the sense of depth. Every orthogonal line should point directly at one of your vanishing points.
Convergence describes how lines get closer together as they move toward the vanishing point. The further away from you an object sits, the more its details compress toward the horizon. This is what creates the illusion of distance in your drawings.
Vertical lines in two point perspective always stay perfectly vertical. This is one of the most important rules to remember. While horizontal lines converge toward vanishing points, the height lines of your objects should never tilt or lean. They remain at 90 degrees to the horizon.
How to Draw a Cube in Two Point Perspective
The cube is the perfect starting point for learning two point perspective because it contains every element you need: two sets of converging horizontal lines and a set of vertical lines. Once you can draw a cube convincingly, you can draw anything box-shaped, from houses to furniture.
Here is how to draw a cube in two point perspective, step by step.
Step 1: Draw the Horizon Line
Start with a horizontal line across the middle of your page. Leave enough space on the left and right for your vanishing points. If you crowd the vanishing points too close together, your drawing will look distorted. I recommend placing them at least several inches apart on the actual line.
Step 2: Place Your Two Vanishing Points
Mark one vanishing point on the far left of your horizon line and one on the far right. Label them VP1 (left) and VP2 (right) to keep track of which is which. These two points control everything in your drawing, so take a moment to get their positions right.
Step 3: Draw the Nearest Vertical Line
This is the only truly vertical line you will draw in two point perspective, and it represents the nearest corner of your cube. Draw a vertical line somewhere in the middle of your page, a little below the horizon line. This line determines the size of your cube, so make it as tall as you want the cube to be.
Step 4: Connect the Top of the Vertical Line to Both Vanishing Points
Draw a line from the top of your vertical line to VP1 (left vanishing point). Then draw another line from the top of the same vertical line to VP2 (right vanishing point). These two lines form the top edges of your cube and show how the front face relates to the two receding side faces.
Step 5: Connect the Bottom of the Vertical Line to Both Vanishing Points
Now draw a line from the bottom of your vertical line to VP1 and another from the bottom to VP2. These complete the lower edges of your cube. You should now see a rough diamond-like shape with a vertical line down the middle.
Step 6: Mark the Width of Your Cube on the Left Side
Decide how wide you want your cube to be. From the bottom of your nearest vertical line, measure along the line going to VP1 and mark a point. This marks the front left corner of your cube. From this point, draw a vertical line upward until it meets the upper diagonal line going to VP1.
Step 7: Mark the Width of Your Cube on the Right Side
Repeat the same process on the right side. From the bottom of your nearest vertical line, measure along the line going to VP2 and mark a point. Draw a vertical line upward from this point until it meets the upper diagonal line going to VP2.
Step 8: Complete the Front Corners
You now have four vertical lines. Connect the top of the left vertical to the top of the nearest vertical line. Do the same for the right side. These lines form the top front edges of your cube, and they should appear to recede naturally toward their respective vanishing points.
Step 9: Clean Up and Define Your Cube
You now have the basic structure of your cube. Go over the final edges to make them solid. The front vertical edges should be dark and clear. The horizontal lines should connect cleanly to your vanishing points. When you erase the construction lines inside the shape, you should see a realistic 3D cube sitting below the horizon line.
Drawing Above the Horizon Line
When an object sits above your eye level, you see its bottom face more clearly while the top face becomes hidden or compressed. In two point perspective, drawing above the horizon means your object extends upward from below the horizon line, and you are looking up at it.
To draw a cube above the horizon, you follow the same steps but position your main vertical line below the horizon line. The cube rises upward, and you see the bottom surfaces of its shelves or surfaces. The top of the cube stays visible, while the bottom planes spread out toward both vanishing points.
This is how artists draw things like ceiling details, overhead bridges, or aircraft seen from below. The key is that the horizon line passes through or below your object, and you are always aware of which planes are visible from your elevated viewpoint.
Drawing Below the Horizon Line
Objects below your eye level work the opposite way. You see the top surfaces clearly, while the bottom planes become hidden or compressed. This is the scenario most people are familiar with, like looking down at a building from a hilltop or drawing a house from ground level.
Position your cube above the horizon line in your drawing, and you will naturally see its top face in full view. The vertical lines still go straight up and down, but the horizontal lines now spread out toward both vanishing points, showing the top surface of your object. This is actually the most common viewpoint for landscape and architectural drawings, so mastering it is important.
Both above and below the horizon, the mechanics stay exactly the same. Only your viewpoint changes relative to the object. This consistency is what makes two point perspective such a powerful and flexible technique once you understand the basics.
One Point vs Two Point Perspective: Which to Use?
Understanding when to use one point versus two point perspective will immediately improve your drawings. Both are linear perspective techniques, but they create very different effects and suit different subjects.
One point perspective works best for scenes viewed straight-on. Imagine standing directly in front of a doorway or looking down a long hallway. All the lines converge to a single vanishing point right in front of you. One point perspective creates a tunnel-like, symmetrical feel that works beautifully for roads, hallways, and centered compositions.
Two point perspective handles subjects seen from an angle. When you stand at the corner of a building and see two walls receding in different directions, that is two point perspective. This is the most common viewpoint for architectural illustrations, cityscapes, and any scene with objects rotated away from the viewer.
Three point perspective adds a third vanishing point above or below the horizon, creating more dramatic foreshortening. It is used for tall buildings viewed from below (looking up) or for worm’s-eye views from above. For most beginner and intermediate work, two point perspective covers everything you need.
| Feature | One Point Perspective | Two Point Perspective | Three Point Perspective |
|---|---|---|---|
| Vanishing Points | 1 | 2 | 3 |
| Best Viewpoint | Straight-on | Corner/angled | Dramatic angle |
| Common Subjects | Roads, hallways, centered scenes | Buildings, cityscapes, interiors | Skyscrapers, worm’s-eye views |
| Difficulty | Easiest | Moderate | Advanced |
Two Point Perspective in Real Drawing: A Room Example
Applying two point perspective to a room interior is one of the best exercises you can do as a beginner. It combines all the skills you have learned and shows how perspective creates believable interior spaces.
Start by drawing your horizon line through the middle of your page. Place your two vanishing points at opposite ends of the line, far enough apart that your room feels natural and not distorted. The horizon line represents your eye level as you look into the room.
Draw the back wall of your room as a vertical rectangle, positioned above the horizon line. This is your starting point. From the top two corners of this rectangle, draw lines converging to both vanishing points. These lines define the ceiling and floor of your room as they recede into the distance.
Now add the side walls. From the bottom corners of your back wall, draw lines toward both vanishing points. The lines going left connect to the left vanishing point, and the lines going right connect to the right vanishing point. This creates the basic shell of your room.
Add furniture by drawing box shapes using the same principles. A table becomes a rectangular top with four vertical legs, each following the perspective of the room. A bookshelf against the back wall stays rectangular, while a chair in the middle of the room follows the angled perspective of the floor.
The key to a convincing interior is consistency. Every horizontal surface in your room should follow the same converging lines toward your vanishing points. Every vertical edge should stay perfectly vertical. When you maintain this consistency, your room feels real and spatially accurate, even though it exists only on paper.
Common Mistakes and How to Avoid Them
After seeing hundreds of beginner drawings struggle with two point perspective, I noticed the same errors keep showing up. Here is how to fix the most common problems so you can avoid them in your own work.
Vanishing points too close together is the number one cause of distorted drawings. When your vanishing points sit near each other, the convergence becomes too extreme and everything looks warped, like a fisheye photograph. Give yourself plenty of space between the two points, ideally at opposite ends of your paper or beyond.
Vertical lines tilting happens when artists forget that vertical lines must always stay vertical in two point perspective. It is easy to accidentally tilt them as you focus on getting the horizontal lines right. Use a right angle tool or the corner of your paper to check that your vertical lines are truly at 90 degrees to the horizon.
Lines not quite meeting at vanishing points creates that wobbly, inaccurate look that makes drawings feel wrong even when the individual elements look okay. Using a ruler and drawing light construction lines that extend all the way to the vanishing point helps you catch errors early. Some artists find that labeling which vanishing point each line belongs to keeps things organized.
Forgetting that objects get smaller with distance causes elements in your drawing to appear inconsistent in scale. Objects closer to the viewer should appear larger, and distant objects should compress toward the horizon. This seems obvious when stated plainly, but it is easy to forget when you are focused on getting the perspective lines right.
The good news is that every single one of these mistakes is fixable with practice. Even professional artists deal with these issues on complex drawings. The difference is they have learned to check their work systematically, going through each vanishing point and vertical line before moving on to details.
Practice Exercises to Build Your Skills
The only way to really learn two point perspective is through consistent practice. Here are exercises that build your skills gradually, starting simple and adding complexity as you improve.
Begin with a single cube. Draw it below the horizon line, then draw another identical cube above the horizon line. This teaches you how viewpoint changes what you see. Once you can draw both confidently, try drawing a row of three cubes at different distances, making sure each one follows the same vanishing points.
Move on to stacked boxes. Draw a small box on top of a larger box, like a building with a smaller structure on its roof. This teaches you to handle multiple objects while maintaining consistent perspective. Add a smaller box in front of the large one to practice overlapping objects.
Practice drawing simple furniture. A chair, a table, and a bookshelf are all box-based forms that respond well to two point perspective. Draw each one separately before attempting to place them in a complete room interior.
Finally, draw a complete interior scene with multiple pieces of furniture, a window, and architectural details like baseboards and crown molding. This exercise combines everything you have learned and prepares you for more complex architectural illustration work.
FAQs
How to draw in 2 point perspective is easy?
Yes, two point perspective becomes easy once you understand the three core elements: a horizon line, two vanishing points on that line, and vertical lines that stay perfectly vertical. Start by drawing a simple cube using light construction lines connecting to both vanishing points. With practice, the process becomes automatic and intuitive.
What are the rules for 2 point perspective drawings?
The core rules are: place two vanishing points on opposite ends of your horizon line, keep all vertical lines perfectly vertical, and connect all horizontal edges to the appropriate vanishing point. Every receding line must point directly at one of the two vanishing points. Never let lines drift or curve.
What are common mistakes in 2 point perspective?
The four most common mistakes are placing vanishing points too close together (causing distortion), letting vertical lines tilt or lean, failing to connect lines precisely to vanishing points, and forgetting that distant objects should appear smaller. Each of these is fixable with careful construction and consistent checking.
What are the 7 laws of perspective?
The foundational perspective laws include: parallel lines converge to a vanishing point, objects appear smaller at distance, the horizon line represents eye level, vertical lines stay vertical in 2-point perspective, receding lines follow specific vanishing points, objects above the horizon show bottom faces, and objects below the horizon show top faces. These principles govern all linear perspective drawing.
Why is perspective drawing important?
Perspective drawing is essential because it creates the illusion of 3D space on a 2D surface. Without perspective, drawings appear flat and unrealistic. Understanding perspective allows artists to draw buildings, interiors, landscapes, and any scene with convincing depth and spatial accuracy.
Conclusion
Two point perspective drawing for beginners comes down to understanding three things: a horizon line at eye level, two vanishing points on that line, and vertical lines that stay vertical. Once those concepts click, everything else follows naturally. You draw a cube by connecting corners to vanishing points. You draw a room by extending walls to vanishing points. You draw furniture by applying the same principles to box-shaped forms.
The techniques in this guide give you everything you need to start creating convincing 3D drawings. Start with the cube exercise until you feel completely comfortable with the basic mechanics. Then move on to stacked boxes, furniture, and interior scenes. Each step builds on the previous one, and your confidence will grow faster than you expect.
Keep your vanishing points far apart, your vertical lines straight, and your construction lines light until you are ready to finalize. And remember, using a ruler is not cheating. Professional illustrators use every tool available to them, and accuracy tools only make your work better faster.