
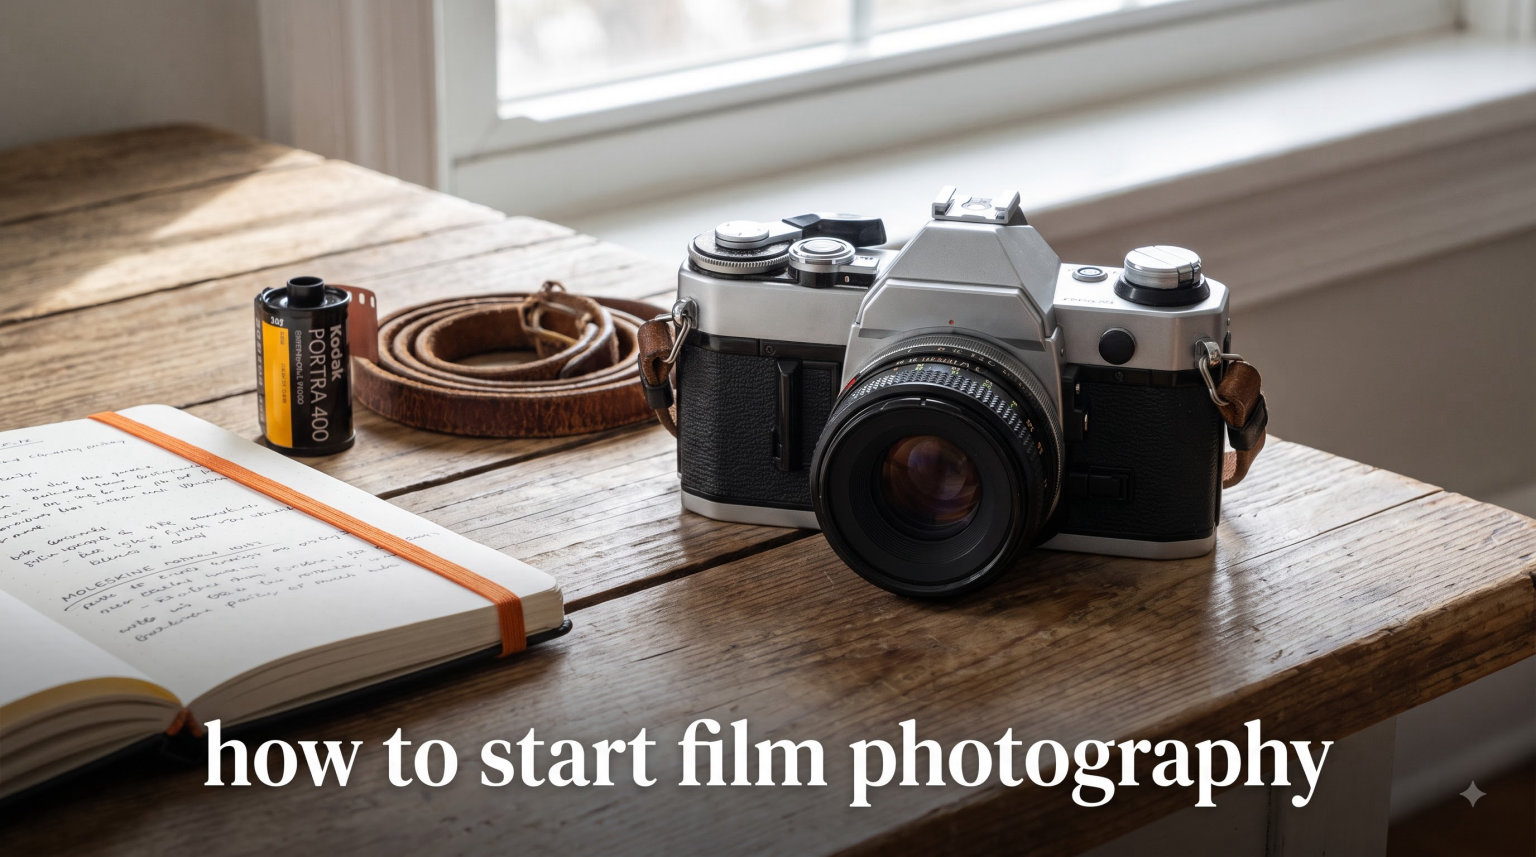
Film photography might seem like a step backward in an era of instant digital feedback, but thousands of people are rediscovering it every year. If you have been wondering how to start film photography in 2026, you are joining a growing community of shooters who value intentionality, tangible results, and the unique character that analog capture produces.
This guide walks you through everything you need to know as a complete beginner. We cover choosing your first camera, understanding film types and ISO, loading your first roll, grasping basic exposure concepts, and finding places to get your film developed. By the time you finish reading, you will have a clear roadmap for taking your first photographs on film.
One thing to understand upfront: film photography rewards patience. You cannot preview your shot, you have a limited number of exposures per roll, and you will not see your results until the film has been developed. That constraint is precisely what makes it so rewarding. Every frame becomes intentional, every click of the shutter carries weight.
Table of Contents
Why Film Photography in 2026?
The question we hear most from beginners is simple: is film photography worth it in 2026? With digital cameras delivering stunning results instantly, why would anyone choose the added cost and delay of film?
The answer lies in what film offers that digital cannot easily replicate. When you shoot film, you commit to every frame. That roll of 24 or 36 exposures forces you to slow down, observe more carefully, and make deliberate choices rather than chimping through hundreds of shots hoping one works.
Beyond the philosophical appeal, film delivers tangible archival benefits. Properly stored negatives last over a century without degradation, while digital files require ongoing migration to new formats and storage media. Your grandchildren could hold your film negatives in their hands decades from now. The same cannot be said for your smartphone photos.
Film also produces a distinctive look that many photographers find more organic than digital capture. The grain structure, the way film handles highlights and shadows, the color rendering of specific film stocks like Kodak Gold or the monochrome tones of Ilford HP5+ — these characteristics have earned film a devoted following among professionals and hobbyists alike.
The market reflects this renewed interest. Film cameras remain readily available at reasonable prices, film stocks have stabilized after supply disruptions, and developing services have expanded with mail-in options serving photographers without local labs. 2026 is an excellent time to start your analog journey.
Choosing Your First Film Camera
Your first camera shapes your entire learning experience. Choose wisely, and you will have a reliable tool that grows with your skills. Choose poorly, and you may become frustrated before you ever take a meaningful photograph.
Camera Types Explained
Three camera categories dominate the beginner film photography space: single-lens reflex (SLR) cameras, rangefinders, and point-and-shoot models. Each offers distinct advantages for newcomers.
SLRs remain the most popular choice for beginners learning photography. The design lets you see exactly what the lens sees through a mirror mechanism, with exposure information displayed in the viewfinder. This transparency makes learning exposure fundamentals much easier. When you adjust the aperture or shutter speed, you see the depth of field or motion effect change in real time through the viewfinder.
Rangefinders offer a quieter shooting experience and a brighter viewfinder image, but they require more practice to judge focus accurately. The viewfinder shows a separate frameline rather than the actual image through the lens. Many photographers love rangefinders for street photography once they have some experience, but beginners often find the focus confirmation less intuitive.
Point-and-shoot film cameras appeal to photographers who want simplicity above all else. These cameras handle exposure and focus automatically, letting you concentrate entirely on composition. Some models deliver excellent results, while others produce mediocre images with unpredictable focus. Understanding which point-and-shoot models perform well requires research that often leads beginners back to SLR territory anyway.
What to Look for in a Used Camera
The good news for beginners is that you do not need to spend much to get a capable film camera. Quality used SLRs from the 1980s and 1990s often sell for forty to eighty dollars. The key is knowing what to inspect before you buy.
Check the shutter speeds by firing the camera at various settings. All speeds should fire approximately correctly, though minor variance is acceptable on older cameras. Test the aperture mechanism by removing the lens and pressing the depth-of-field preview button while watching the aperture blades. They should open and close smoothly without binding.
Examine the viewfinder for haze or fungus, which can obscure your view and make focus assessment difficult. Look through the lens itself against a light source, checking for fungus, haze, separation, or scratches that could affect image quality. Minor dust particles inside a lens rarely impact images noticeably, but heavy contamination warrants a lower price or passing on the item.
Perhaps most importantly, check the light seals. These foam or felt strips around the film compartment and mirror box degrade over time, becoming sticky or crumbling away. They do not prevent the camera from functioning, but deteriorating light seals can cause light leaks that ruin your exposures. Many sellers replace light seals before listing cameras, but confirm this if you are buying from an individual.
Budget Expectations for Your First Camera
How much does it cost to start shooting film? The camera itself typically ranges from thirty to one hundred fifty dollars for a solid beginner model. Adding a working 50mm lens, which is the standard starter lens, may push the total slightly higher if the lens is not included.
Film runs approximately eight to twenty dollars per roll depending on the stock and format. Color negative films like Kodak Gold or Kodak Ultramax sit at the affordable end, while professional films like Kodak Portra command premium prices. Developing costs vary widely, ranging from six dollars per roll for black-and-white mail-in services to fifteen dollars or more for color processing with scanning.
Realistic first-year costs for a casual shooter might total two hundred to four hundred dollars including camera, ten rolls of film, and development. Serious shooters who shoot weekly will spend more on film and processing. The key point is that you do not need expensive gear to start. A well-maintained thirty-dollar camera and ten-dollar film stock can produce stunning results in the right hands.
Recommended Starter Cameras
Certain models have earned their reputation as excellent beginner cameras through decades of reliable service and abundant available information. Our team has tested many of these personally, and we consistently recommend starting with one of these proven platforms.
The Canon AE-1 dominates beginner recommendations for good reason. The camera offers aperture-priority automatic exposure that handles most situations competently while allowing full manual control when you want it. The viewfinder displays shutter speed and manual exposure warnings clearly. Countless tutorial videos and written guides cover every aspect of this camera, making troubleshooting easy.
The Pentax K1000 represents the opposite philosophy: pure manual operation with no automatic exposure modes. Some beginners find this refreshingly simple, while others become frustrated when learning. If you want to understand exposure fundamentals deeply from day one, the K1000 forces you to master aperture and shutter speed relationships without automation to fall back on.
Other solid options include the Nikon FE2 and FM2, which offer higher build quality and more advanced features while maintaining beginner accessibility. The Olympus OM-1 and OM-2 provide compact alternatives with excellent optics. Each of these cameras has extensive online documentation and community support, which matters significantly when you are learning.
Understanding Film: Types, Formats, and ISO
Film comes in various formats and types, each producing different characteristics. Understanding these differences helps you choose the right material for your vision and skill level.
Film Formats: 35mm vs Medium Format
Two formats dominate amateur film photography: 35mm and medium format. Beginners almost always start with 35mm because cameras and film cost less, the equipment is more compact, and finding developing services is easier.
35mm film cameras use film that measures 35mm wide, producing images that are 36mm by 24mm — essentially the same dimensions as a full-frame digital sensor. Rolls typically contain 24 or 36 exposures. The format has been the backbone of amateur and professional photography for nearly a century, meaning equipment is abundant and inexpensive.
Medium format refers to several film sizes larger than 35mm, with 120 film being the most common. Depending on the camera, medium format produces images that are 6cm wide, resulting in significantly more detail and tonality. However, medium format cameras cost considerably more, film is more expensive, and fewer exposures fit per roll. Most beginners should master 35mm before exploring medium format.
Color Negative Film (C-41 Process)
Color negative film, commonly called C-41 film after its developing process, produces the orange-based negatives from which you make prints or scans. This is the most common film type used worldwide, accounting for the vast majority of all film拍摄.
C-41 film tolerates exposure mistakes relatively well. Even if your exposure is off by a stop or two, the resulting negatives usually contain usable image information that can be corrected during scanning or printing. This forgiveness makes color negative film an excellent choice for beginners still learning exposure fundamentals.
Popular beginner-friendly color negative stocks include Kodak Gold 200, which delivers warm, saturated tones ideal for outdoor photography in daylight. Kodak Ultramax 400 offers more versatility across lighting conditions with slightly cooler color reproduction. Kodak ColorPlus provides an affordable entry point with surprisingly decent results for casual shooting.
Black and White Film
Black and white film stripping away color forces you to evaluate scenes purely in terms of light, shadow, tone, and composition. Many photographers recommend starting with black and white precisely because it simplifies the visual variables you must manage.
Black and white film developing uses different chemistry than color film, and the process is actually simpler to perform at home if you choose to explore developing your own film. Ilford HP5+ has earned its reputation as the ultimate beginner black-and-white film through decades of reliable performance and forgiving exposure latitude. You can overexpose it by several stops without serious quality loss, making it nearly impossible to ruin on your first rolls.
Other beginner-friendly black-and-white options include Ilford FP4+ for finer grain and more critical exposure requirements, and Kodak Tri-X 400 for the classic documentary look with prominent grain that many photographers love.
Understanding ISO: The Film Speed Rating
ISO measures how sensitive your film is to light. Lower numbers indicate slower film that requires more light but produces finer grain, while higher numbers indicate faster film that works in darker conditions but shows more visible grain.
Your chosen ISO determines how you set your camera. ISO 400 film is the standard recommendation for beginners because it handles various lighting conditions well without requiring extremely fast shutter speeds or wide apertures. Overcast days, indoor lighting, and shaded areas all work reasonably well with ISO 400.
ISO 200 film offers finer grain but requires more light, making it better suited for sunny outdoor shooting. ISO 800 or faster film becomes necessary for low-light situations like concerts or night photography, though the grain may be pronounced. Resist the temptation to buy ultra-fast film like ISO 3200 for general use — the grain quality often disappoints newcomers who expect digital-like sharpness.
Recommended First Film Stocks
What film should I buy for my first roll? We recommend starting with one of these proven stocks that balance quality, forgiveness, and availability.
Kodak Gold 200 offers the best combination of price and performance for color photography beginners. The warm tone reproduction flatters skin tones and outdoor scenes, the exposure latitude tolerates mistakes generously, and the film is widely available at reasonable prices. Most drugstores and camera shops carry it.
Ilford HP5+ in black and white delivers the ideal learning experience for monochrome photography. Its wide exposure latitude means you can experiment freely without worrying constantly about perfect settings. When you inevitably make mistakes on your first rolls, HP5+ negatives often reveal usable images where other films would fail completely.
How to Load Film Into Your Camera
Loading film correctly is the first technical hurdle every beginner faces. The process feels intimidating before you have done it, but it becomes second nature after a few practice attempts.
Step 1: Open the Camera Back
Locate the film advance lever on the right side of the camera top plate. Pry the latch that releases the camera back — usually a small button or lever near the hinge point — and swing the back open. You should now see the empty film compartment with the take-up spool on the right and the supply chamber on the left.
Some cameras require you to press the rewind button while opening the back. Consult your camera manual if you are unsure. The rewind button engagement releases the film cartridge from the take-up spool so the back can open freely.
Step 2: Insert the Film Cartridge
Hold your film canister with the emulsion side (the shiny side of the film leader) facing the take-up spool. Most film leaders have a straight edge with rounded corners, though some specialty stocks differ. Slide the canister into the supply chamber on the left, pressing it firmly into the slot to ensure it sits securely.
The film leader should extend across the camera interior toward the take-up spool on the right. Use your fingers to guide the leader into the take-up spool slot. The exact mechanism varies by camera model — some use a slot-and-claw system, while others require threading the leader under a tensioned strip.
Step 3: Advance the Film
Once the leader engages with the take-up spool, close the camera back firmly until the latch clicks. The back should sit flush with no gaps. Now, advance the film by rotating the film advance lever until you feel resistance, then continue advancing until the frame counter indicates frame one.
The initial advance may require more force than subsequent advances because the leader must fully seat into the take-up spool mechanism. If the advance lever feels stuck or excessively resistant, open the back and check whether the leader properly engaged. Forcing a stuck advance can damage the camera or tear the film.
Step 4: Verify Film is Advancing
How do you confirm the film is actually advancing with each shot? The rewind knob on the left side of the camera provides the answer. After taking a shot, gently rotate the rewind knob in the direction indicated by the arrow — typically counterclockwise — while holding the film advance lever stationary. You should feel slight tension as the film rewinds slightly from the take-up spool.
If you feel no tension at all, the film may not be properly engaged, and you risk shooting with no film in the camera. Some cameras have a DX sensor window or other indicator showing film presence, but the rewind knob test works universally. After each shot, confirm the rewind knob rotates smoothly with slight resistance.
Step 5: Shooting and Rewinding
After your final exposure, the film advance lever will resist and then stop advancing. Do not force it. Instead, press the rewind release button — usually on the camera bottom — and turn the rewind knob clockwise until you feel the film leader release from the take-up spool. Continue turning until the cartridge rewinds completely, indicated by the knob rotating freely with no tension.
Open the back only after complete rewinding. Removing an unrewound roll exposes the film to light, ruining all your exposures. If the film advance feels wrong at any point, stop and troubleshoot before continuing to shoot. It is better to waste one frame checking than to lose an entire roll.
Basic Exposure Concepts
Understanding exposure separates competent photographers from those who simply point and hope. Film punishes exposure errors more severely than digital because you cannot correct mistakes in post-processing. Learning to read light and set your camera correctly produces dramatically better results from your very first rolls.
The Exposure Triangle
Exposure results from the interaction of three variables: aperture, shutter speed, and ISO. These three elements form the exposure triangle, and mastering their relationship transforms your photography.
When any one variable changes, at least one other must adjust to maintain the same exposure. If you open the aperture to let in more light, you can use a faster shutter speed while keeping ISO constant. If you want a slower shutter speed for motion blur, you must close the aperture or raise the ISO to compensate. This constant balancing act defines photography at its most fundamental level.
Aperture Explained
Aperture refers to the opening in your lens that controls how much light reaches the film. It is measured in f-stops, with lower numbers indicating larger openings and higher numbers indicating smaller openings. A 50mm lens might have a maximum aperture of f/1.8 (very wide) or a minimum aperture of f/16 (very narrow).
Wider apertures let in more light but produce shallower depth of field, meaning less of your scene appears sharp. Narrower apertures admit less light but keep more of your scene in focus from front to back. Landscape photographers typically use narrow apertures for maximum sharpness throughout the scene. Portrait photographers often prefer wider apertures to separate subjects from backgrounds.
Each full f-stop either doubles or halves the light reaching the film. Moving from f/8 to f/5.6 doubles the light. Moving from f/8 to f/11 halves it. This consistent doubling and halving pattern makes calculating exposure changes systematic and predictable.
Shutter Speed Explained
Shutter speed determines how long the film is exposed to light. Faster speeds freeze motion but let in less total light. Slower speeds allow more light but can introduce motion blur if the camera or subject moves during exposure.
Standard shutter speeds follow the same doubling and halving pattern as aperture: 1/500, 1/250, 1/125, 1/60, 1/30, 1/15, 1/8, 1/4, 1/2, 1 second. Each step either doubles or halves the light exposure. Handholding a camera typically requires shutter speeds of 1/60 or faster to avoid blur from camera shake, though this varies based on lens focal length and photographer steadiness.
Motion blur is not always undesirable. Intentional slow shutter speeds can produce creative effects like light trails from cars or smooth water flowing. Understanding when to freeze motion and when to allow blur represents a creative choice that develops as your skills mature.
Using a Light Meter
Every serious film camera from the 1980s onward includes an internal light meter that measures scene brightness and suggests appropriate exposure settings. Learn to use this built-in resource rather than guessing or relying on sunny-day rules that break down in complex lighting.
Most integrated meters provide center-weighted metering, meaning they measure light primarily from the center of the frame while considering the edges. Point-and-shoot cameras use more sophisticated evaluative or matrix metering that attempts to assess the entire scene. Understanding your camera’s metering pattern helps you position your subject appropriately and recognize when the meter might be fooled by unusual lighting.
Bright scenes like snow or sandy beaches fool meters into underexposing because all that reflected light makes the camera think there is more light than actually illuminates your subject. Dark scenes like night scenes or dark clothing cause the opposite problem. Bracket your shots in difficult lighting by taking one at the meter’s suggestion and additional frames at half-stop or full-stop intervals above and below.
Metering Modes and Techniques
Beyond basic center-weighted metering, some cameras offer spot metering that measures an extremely small area of the scene, typically 1-3% of the frame. Spot metering lets you meter precisely from your subject regardless of background brightness, which is invaluable for backlit subjects or high-contrast scenes where center-weighted metering would produce incorrect exposures.
The zone system, developed by Ansel Adams and Fred Archer, provides a systematic approach to targeting specific tones in your scene. By metering from a mid-tone (typically 18% gray) and understanding how your film responds, you can place specific scene elements on specific tones of the gray scale, ensuring highlights and shadows retain detail as intended.
Modern smartphone apps provide handheld light meters that measure incident light (the light falling on your subject) rather than reflected light. Some photographers prefer incident metering for greater accuracy in unusual lighting conditions. However, the built-in meter in your camera serves most situations adequately once you learn to recognize its tendencies.
Getting Your Film Developed
You have shot your roll, rewound it carefully, and removed it from the camera. Now what? Film requires chemical processing before you can see any images. Understanding your developing options ensures your first rolls receive proper handling.
Can You Still Get Film Developed in 2026?
Yes, absolutely. Despite concerns about film photography declining, developing services remain widely available across 2026. While some independent local labs have closed, others have opened, and mail-in services have expanded significantly to serve photographers without convenient local options.
The key change in recent years is the shift toward mail-in processing. Services like Film Folk, The Darkroom, North Coast Photo, and numerous others accept film by mail and return processed scans within days. These services often produce higher-quality scans than local one-hour photo labs because they specialize in film processing and invest in professional-grade equipment.
Local Labs vs Mail-In Services
Local labs offer the advantage of personal interaction and faster turnaround. You drop off your film and often retrieve scans the same day or next day. Building a relationship with local lab technicians provides valuable guidance, especially when you encounter problems or have special requests.
Mail-in services excel in convenience and quality consistency. They typically accept all film types including less common stocks, provide multiple scan resolution options, and maintain standardized processes that reduce variability between orders. Many serious film shooters use mail-in services for most of their processing.
Finding a local lab requires some research. Search for “film developing” or “camera store” in your area, call ahead to confirm they process film (many no longer do), and ask about turnaround times and pricing. University towns often have labs serving photography students. Urban areas typically have more options than rural regions.
Understanding C-41 and Black-and-White Processing
Color negative film uses the C-41 process, a standardized chemical procedure that develops color negatives in approximately fifteen minutes at controlled temperature. The process converts the exposed silver halides into metallic silver while simultaneously forming color dyes. The orange mask in color negatives corrects color balance during printing or scanning.
Black-and-white film uses more flexible developing processes. While commercial labs typically use standard developers like D-76 or HC-110, home developers can experiment with various chemicals to achieve different grain, contrast, and tonal characteristics. Black-and-white development is simpler to learn and perform at home than color processing.
Slide film uses the E-6 process, which produces positive transparencies rather than negatives. E-6 is more demanding than C-41, with tighter temperature and timing requirements. Fewer labs offer E-6 processing, and the film itself is more expensive and less forgiving of exposure errors. Most beginners should avoid slide film until they have significant experience.
Scanning Your Negatives
Once developed, your negatives require scanning to produce digital files you can view, share, and print. Labs typically offer scan packages as part of their processing service, ranging from basic resolution web scans to high-resolution files suitable for large prints.
Self-scanning offers greater control and potentially higher quality but requires equipment investment. Dedicated film scanners like the Plustek 8200i orReflecta models produce excellent results for 35mm film. Flatbed scanners with film holders, particularly the Epson Perfection series, handle both 35mm and medium format but generally produce lower quality than dedicated film scanners.
Even if you eventually self-scan, starting with lab scans lets you see your results quickly and compare your in-camera exposure choices with the final images. This feedback accelerates learning significantly compared to waiting weeks to scan yourself.
Common Beginner Mistakes to Avoid
Every film photographer has horror stories from their early days. Learning from common mistakes saves you time, money, and frustration as you develop your skills.
Not Verifying Film Advance
The most devastating mistake is shooting an entire roll only to discover the film never advanced. The rewind knob tension check after each frame prevents this catastrophe. Make checking the rewind knob part of your shooting ritual until it becomes automatic.
New photographers sometimes assume the film advance lever advancing means the film is moving correctly. Mechanical failure, improper loading, or engagement issues can cause the lever to cycle without actually advancing film. Always verify with the rewind knob test, especially on the first roll with any new camera.
Ignoring the Light Meter
Some beginners switch to manual mode and then ignore the meter entirely, either shooting by intuition or following sunny-day rules that fail in countless real-world situations. The meter exists for a reason. Use it as a starting point, then adjust based on your understanding of the scene.
Others make the opposite mistake: following the meter without understanding what it measures. A meter reading the sky will underexpose your foreground subject. A meter reading a white wall will overexpose your scene. Learn to recognize when the meter is being fooled and adjust accordingly.
Keeping No Records
Your first rolls will contain mistakes. Without records, you cannot learn from them effectively. Keep a small notebook recording the date, film stock, camera settings, and conditions for each shot. When you receive your scans, cross-reference them with your notes to understand which settings produced which results.
Modern alternatives include phone apps designed for film photographers, which let you log exposures with metadata. However, a simple pocket notebook never runs out of battery and never crashes. Choose whatever system you will actually use consistently.
Expecting Perfection on the First Roll
Your first rolls will include failures. Exposures will be off, focus will be soft in places, and some frames may be completely unusable. This is normal and expected. Every professional film photographer earned their skills through thousands of rolls, most of which contained imperfect frames.
One useful perspective: digital shooters often take hundreds of photos and keep perhaps one in a hundred. Film photographers who shoot 24 frames might keep a dozen that they consider good, with two or three that truly stand out. That yield might seem low, but each frame received deliberate attention. The keeper rate is lower, but the process is more satisfying.
Using Expired Film Without Understanding the Tradeoffs
Expired film sometimes appears at attractive prices, and the film photography community has embraced expired stocks for their unpredictable results. However, expired film requires exposure compensation adjustments that depend on storage conditions, and the results are inconsistent. Beginners should avoid expired film until they understand how fresh film behaves.
Film stored at room temperature degrades faster than film refrigerated or frozen. A roll stored in a refrigerator for ten years may perform nearly as well as fresh film. That same roll stored in a hot garage for two years might produce foggy, low-contrast images with color shifts. Unless you know the storage history, assume expired film will underperform.
First Roll Strategy and Tips
How you approach your first roll significantly impacts your learning experience and enjoyment. Strategy matters as much as technical understanding.
Start with Fewer Exposures
Consider starting with a 24-exposure roll rather than 36. This shorter length reduces the financial and psychological pressure to achieve perfect results on every frame. Twenty-four frames give you enough variety to practice without the marathon commitment of 36 exposures.
Some photographers even recommend loading half rolls of 12 exposures for the very first sessions, using a fresh roll after the first twelve shots to review and discuss results before continuing. This approach maximizes learning but requires additional development costs per session.
Keep Detailed Notes
Record each shot number, the aperture, shutter speed, lighting conditions, and any other relevant details immediately after each exposure. Review these notes when you receive your scans. Patterns will emerge: perhaps your shutter speed suggestions consistently underexposed, or certain lighting conditions fool your meter predictably.
Digital photographs embed EXIF metadata that film lacks. Your notebook fills that gap, letting you reconstruct the circumstances of each exposure years or decades later. These records become increasingly valuable as your skills develop and you revisit early work.
Shoot Varied Subjects
Resist the temptation to photograph only subjects you think will produce impressive images. Your first roll should include outdoor daylight scenes, indoor lighting, backlit subjects, shadows, bright reflectors, moving subjects, still life arrangements, portraits, and landscapes. This variety teaches you how film responds across conditions.
Photograph people who will not judge you for imperfect results. Photograph mundane everyday scenes that you find interesting. Photograph challenging conditions that you suspect might produce failures. Each outcome teaches you something, and the failures teach the most valuable lessons.
Embrace Experimentation
Do not restrict yourself to technically perfect exposures on your first rolls. Shoot a frame at the wrong box speed intentionally. Bracket heavily in one direction to see how far you can push the film. Try double exposures by not advancing after one shot. Shoot through glass or plastic to see how flare patterns differ from digital.
Film tolerates experimentation surprisingly well, and some of the most memorable images emerge from happy accidents. Understanding the boundaries of your materials through controlled experiments builds intuition that no amount of reading can provide.
What to Do After Your First Roll
After your first roll returns, examine your scans critically but kindly. Identify your best frames and analyze what made them work. Identify your worst frames and determine what went wrong. Share your results with experienced film photographers who can offer perspective.
Do not be discouraged by a high percentage of imperfect frames. Instead, celebrate the frames that exceeded your expectations and focus your next roll on addressing the most common problems. Consider showing your work to a lab technician who may identify issues like scanning problems or camera mechanical concerns you overlooked.
Many photographers find that their third and fourth rolls show dramatic improvement as concepts that seemed abstract become concrete through repetition. Patience and consistent practice produce results that exceed what any amount of theoretical study alone can achieve.
Frequently Asked Questions
How much does it cost to start film photography?
Starting film photography typically costs $150-$400 for the first year, including a used camera ($30-$150), ten rolls of film ($10-$20 per roll), and development ($6-$15 per roll). You do not need expensive gear to begin — a $40 camera and $10 film can produce excellent results.
Is film photography harder than digital?
Film photography requires more planning and understanding because you cannot preview results or take unlimited shots. However, the constraints teach fundamental skills faster than digital shooting, where it is easy to rely on automation and chimping. Many photographers find the intentional process more rewarding despite the learning curve.
Can I use any film in any camera?
Film format must match your camera — 35mm cameras require 35mm film, medium format cameras require 120 or 220 film. Within the correct format, any film stock works in any camera. However, auto-exposure cameras may have ISO limitations, and some cameras require DX-coded film for automatic settings to function correctly.
What if my first roll comes back blank or damaged?
Blank rolls usually result from the film not advancing properly — often due to loading errors or mechanical issues with the take-up spool. Damaged frames typically indicate light leaks from failing light seals or improper camera storage. These problems teach valuable lessons about camera preparation and film handling.
How long does film last?
Unopened color negative film typically remains usable for 2-3 years past the expiration date when refrigerated. Black and white film lasts longer, often 5+ years past expiration when refrigerated. Once exposed and rewound, film should be developed within weeks for best results, though negatives remain usable for decades if stored properly away from heat and humidity.
Conclusion
Learning how to start film photography in 2026 opens a rewarding creative journey that connects you to over a century of photographic tradition while developing skills that improve every type of photography you will ever practice.
The constraints that seem frustrating at first — limited exposures, delayed gratification, no instant preview — become liberating as you embrace them. Each frame requires observation, intention, and technical competence. The satisfaction of receiving developed negatives that exceed your expectations justifies every moment of patience the process demands.
Start with an affordable SLR like the Canon AE-1 or Pentax K1000, load ISO 400 film, and shoot your first roll with deliberate attention to each exposure. Keep notes, verify film advance after every shot, and expect to learn from mistakes. Within a few rolls, you will understand why film photography continues to attract new practitioners despite all the convenience of digital alternatives.
The film photography community welcomes newcomers warmly. Local camera clubs, online forums, and social media groups offer support and guidance for beginners at every stage. Your first rolls may contain disappointments, but your best images from this journey will become treasured possessions that outlast every digital file you have ever created.