
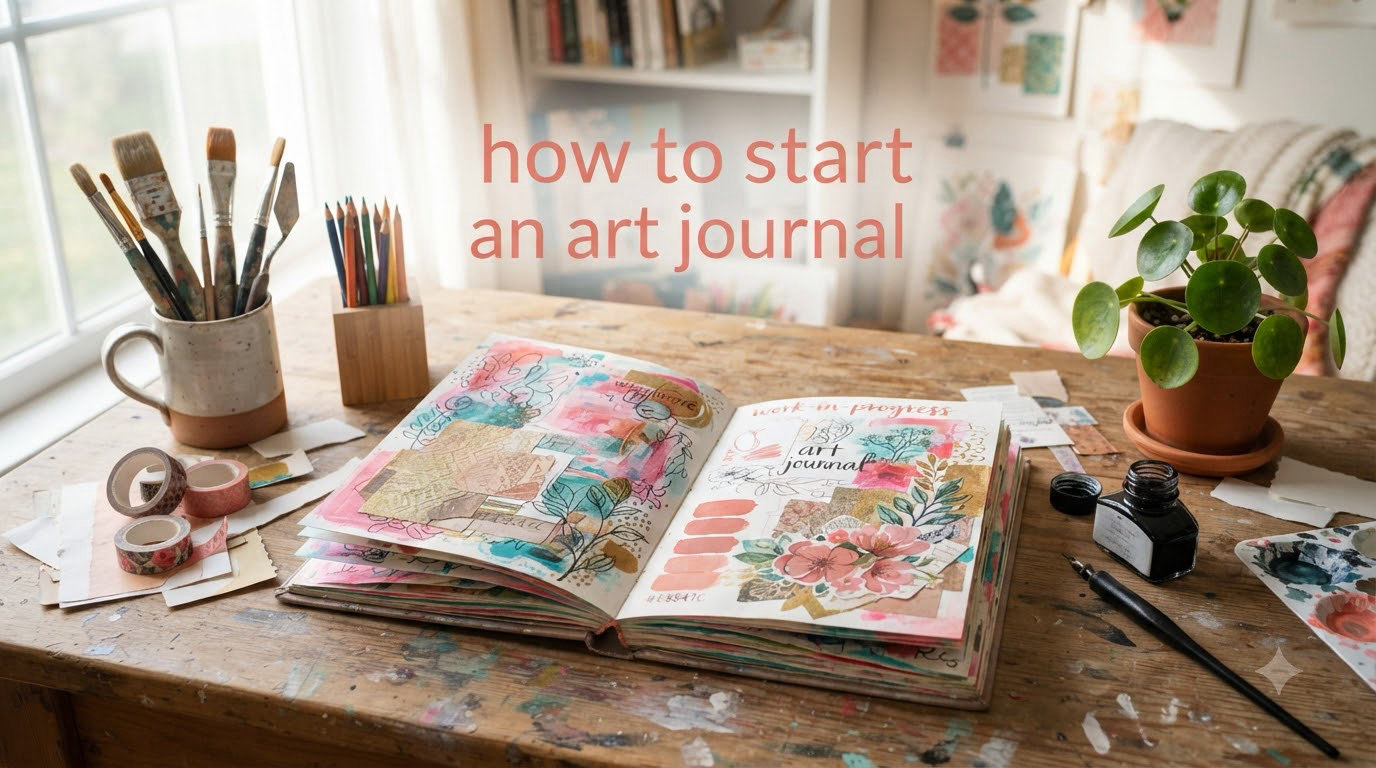
If you have been wondering how to start an art journal, you are in the right place. I have been art journaling for years, and I remember exactly how overwhelming it felt at the beginning. The blank pages staring back at me, the aisles of art supplies that all seemed necessary, and the nagging feeling that I was not “good enough” at art to even try.
Here is the truth that took me too long to learn: art journaling is not about making something pretty. It is about giving yourself permission to play, experiment, and express whatever is going on inside your head. You do not need a fine arts degree. You do not need expensive supplies. And you definitely do not need to be perfect.
In this guide, I will walk you through everything you need to know to start an art journal from scratch. We will cover the basic supplies (many of which you probably already have), a simple step-by-step process for creating your first page, background techniques that require zero skill, creative prompts to get your ideas flowing, and tips for overcoming the most common beginner roadblocks.
By the end, you will have everything you need to open a journal and just start. If you are also looking for the best art supplies for journaling or gift ideas for creative friends, we have a separate guide for that too.
Table of Contents
What Is Art Journaling?
Art journaling is an open-ended form of creative expression done in a bound journal or on loose sheets of paper. Unlike a traditional diary that relies on words alone, an art journal combines drawing, painting, collage, writing, and any other medium you want to explore on a single page. The focus is always on the creative process itself, not on producing a finished piece of art.
Think of it as a visual diary. Some pages might be colorful and layered with paint, magazine clippings, and handwritten notes. Other pages might be a single pencil sketch with a few words scribbled in the margin. There is no single “right” way to fill an art journal. That freedom is exactly what makes it so powerful.
Art journaling differs from other art forms in one important way: there is no audience. You are not creating a painting to hang on a wall or a drawing to share on social media (though you certainly can). The journal is a private space where you can be messy, vulnerable, and completely honest with yourself. Many experienced art journalers describe it as a form of meditation or self-care.
Types of Art Journals
There are several common approaches to art journaling, and you do not have to pick just one. Some people keep a single journal that becomes a mixed-media free-for-all. Others prefer themed journals. Here are a few popular types:
- Visual diary: A daily or weekly record of your life expressed through images, colors, and short text rather than long paragraphs.
- Mixed media journal: A space for experimenting with layering techniques using paint, paper, fabric, found objects, and anything else that interests you.
- Themed journal: Focused on a specific subject like nature, travel, gratitude, or dreams.
- Technique practice journal: Dedicated to trying out new art techniques without the pressure of making something “finished.”
- Emotional processing journal: Using art to work through feelings, stress, or difficult experiences.
Many art journalers I know started with one type and naturally drifted into others over time. Your journal evolves with you.
Why Start an Art Journal?
The benefits go far beyond making art. In online communities like Reddit’s r/ArtJournaling, users consistently cite stress relief as their primary reason for journaling. The tactile experience of spreading paint, tearing paper, and making marks with your hands has a calming effect that staring at a screen simply cannot replicate.
Art journaling also builds creative confidence. When you give yourself permission to make “bad” art, you develop a willingness to experiment that carries over into other areas of your life. I have seen people who swore they had zero artistic ability create incredibly personal and moving journal pages after just a few weeks of practice.
For those dealing with anxiety, grief, or simply the daily pressure of modern life, art journaling offers a healthy outlet. You do not need to talk to anyone. You do not need to explain yourself. You just put color and shape and texture onto paper and let the page hold whatever you are feeling.
What Supplies Do You Need to Start an Art Journal?
One of the biggest mistakes beginners make is buying too many supplies before they even start. I understand the temptation. Walking into an art supply store feels like being a kid in a candy shop. But here is what I have learned, and what experienced art journalers on forums consistently recommend: start with cheap supplies. Use what you already have. Add more only when you feel limited by your current tools.
You can begin an art journal with literally three things: a notebook, a pen, and something that adds color. That “something” could be a set of kids’ watercolors, a handful of markers from the dollar store, or even a cup of coffee used as paint. I am not kidding about the coffee. Some of my favorite pages started with spilled tea.
That said, if you want to invest in some basics, here is a simple starter kit that will not break the bank. You can also check out our guide to the best gifts for artists for more curated supply recommendations.
Choosing a Journal or Notebook
The type of journal you choose matters because it affects which materials you can use. Here is a quick breakdown:
- Mixed media journal: The most versatile option. Paper is thick enough (usually 90-140 lb) to handle paint, glue, and wet media without falling apart. Strathmore and Canson make affordable options.
- Watercolor journal: Best if you plan to use mostly watercolor paint. The paper has a specific texture (cold press or hot press) that handles water beautifully.
- Sketchbook: Great for dry media like pencils, pens, and markers. Thinner paper means wet media will bleed through or warp the pages.
- Hardcover vs. softcover: Hardcover journals stay flat while you work, which makes painting and collaging much easier. Softcover journals are lighter and more portable.
- Loose sheets: If you are nervous about “ruining” a bound journal (a very common fear), work on loose sheets of paper and bind them later, or keep them in a folder.
For your first journal, I recommend a mixed media journal with a hardcover. It gives you the most flexibility and removes the worry about whether your supplies are compatible with the paper.
Basic Art Supplies to Gather
Here is a practical list of supplies organized by category. Pick one or two items from each group to start. You do not need everything on this list.
Color: Acrylic paint (even craft acrylics work fine), watercolor pan set, colored pencils, markers, or highlighters.
Mark-making: Black fineliner pen (Micron 05 is a popular choice), ballpoint pen, pencil, or even a sharpie.
Adhesive: Glue stick, double-sided tape, or matte medium (which also works as a sealer).
Collage materials: Old magazines, newspaper, tissue paper, wrapping paper, printed photos, or junk mail. The ephemera category is endless and basically free.
Optional extras: Gesso (for prepping pages so paint does not soak through), washi tape, rubber stamps, stencils, fabric scraps, dried flowers, and found objects like ticket stubs or leaves.
One important tip from the forums: if you are worried about paint bleeding through your pages, apply a thin layer of gesso to both sides of the page before you start painting. It creates a barrier that prevents most bleed-through.
How to Start an Art Journal: Step-by-Step Process
Learning how to start an art journal does not have to be complicated. I am going to break it down into five clear steps. Each step builds on the last one, and by the time you finish step five, you will have completed your first art journal page. Let’s go.
Step 1: Choose Your Journal
Pick a journal that matches the supplies you want to use. If you are going to use wet media like paint or glue, get a mixed media or watercolor journal. If you mostly want to draw and write, a standard sketchbook works great. If you are unsure, go with a mixed media journal because it handles everything.
Do not overthink this step. The best journal is the one you will actually use. A five-dollar notebook from the drugstore that you open every day beats a fifty-dollar handmade journal that sits on a shelf because you are afraid to “ruin” it.
Many experienced art journalers recommend starting with an inexpensive journal for your first few pages. The lower stakes make it much easier to actually begin. You can always upgrade later when you have a better sense of your preferred style and materials.
Step 2: Gather a Few Basic Supplies
Round up a small selection of supplies. I am talking about three to five items maximum for your first page. Grab your journal, a pen, something for color (paint, markers, or even crayons), and maybe a glue stick with some magazine clippings if you want to try collage.
Set up a workspace where you can be a little messy. The kitchen table covered with newspaper works fine. You do not need a dedicated art studio. Some of my best journaling sessions have happened sitting on the living room floor with supplies spread around me like a creative nest.
The key here is to remove barriers. If your supplies are easy to reach and your workspace is ready, you are far more likely to actually sit down and create something. Keep your basic kit in a bag or box that you can pull out whenever you have a few free minutes.
Step 3: Create Your First Background
Starting with a background is one of the easiest ways to overcome the fear of a blank page. A background gives you something to react to rather than staring at an intimidating white rectangle. Here is the simplest method: squeeze a dollop of acrylic paint onto the page and spread it around with an old credit card, a piece of cardboard, or a brush.
Use one color or two. Let them blend in the middle. Do not try to make it even or pretty. Rough patches, streaks, and uneven coverage are exactly what you want because they add visual texture. Let the paint dry before moving to the next step.
If you do not have paint, try a collage background. Tear pages from an old magazine or book and glue them down with a glue stick. Overlap the pieces. Leave gaps. There is no wrong way to do this. The point is to break the blank page and create a foundation that you can build on.
Step 4: Add Layers of Images, Words, and Marks
Once your background is dry, start adding layers. This is where the journal becomes personal and interesting. Here are some ideas for what to layer on top of your background:
- Images: Cut out pictures from magazines, print photos, draw simple shapes, or stamp patterns.
- Words: Write a quote that resonates with you, a single word that describes your mood, a line from a song, or a stream-of-consciousness paragraph.
- Marks: Doodle, make dots, draw lines, stamp shapes, or splatter paint. Simple mark-making adds energy and movement to a page.
- Found objects: Glue in a ticket stub, a leaf, a piece of lace, a fortune from a cookie, or a fragment of a handwritten letter.
Work in layers. Add something, step back, and see what the page wants next. You might paint over part of what you just did. That is perfectly fine. In fact, that layered, partially hidden quality is what gives art journal pages their depth and visual interest.
Do not worry about making each element look polished. The power of an art journal page comes from the combination of elements, not from any single piece being perfect on its own.
Step 5: Let Go of Perfection and Finish the Page
This is both the hardest and the most important step. At some point, you need to stop adding things and call the page done. It will not look the way you imagined. It might look messy, or weird, or nothing like the art journal pages you have seen on Pinterest. That is not just okay, it is the point.
Art journal pages are not finished paintings. They are snapshots of a moment in time. Some of my most meaningful pages are the ones I consider the “ugliest.” They capture a real feeling, a real day, a real state of mind. A polished, perfect page often says less than a raw, imperfect one.
If you find yourself stuck in a loop of tweaking, set a timer for five minutes. When it goes off, close the journal. Move to a fresh page next time. Not every page needs to be a masterpiece. The habit of showing up matters far more than any individual result.
One of my favorite tips from the art journaling community: if a page feels like a total failure, tear it up and use the pieces as collage material for your next page. Nothing is wasted. What feels like a mistake on one page becomes an interesting texture on another.
Art Journal Background Techniques for Beginners
Backgrounds are the foundation of most art journal pages, and there are dozens of ways to create them. I want to share several techniques that work well for beginners. None of these require drawing ability or any particular artistic skill. They are all about playing with materials and seeing what happens.
Paint Wash
A paint wash is simply watered-down paint (acrylic or watercolor) brushed across the page. It creates a soft, translucent layer of color that is perfect for building on top of. Mix your paint with plenty of water in a palette or small dish, then brush it on in broad strokes. The watery consistency means you get subtle color variation that looks much more interesting than flat, opaque paint.
You can layer multiple washes in different colors, letting each one dry before adding the next. Try warm colors (reds, oranges, yellows) on one page and cool colors (blues, greens, purples) on another. The paint wash technique takes about two minutes per page and produces beautiful results every time.
Collage Background
Tear or cut pieces of paper and glue them down to create a textured, layered background. Old book pages, sheet music, maps, newspaper, tissue paper, wrapping paper, and patterned napkins all work beautifully. The key is to tear rather than cut when you want a softer, more organic look. Straight edges can look stiff in a collage.
Overlap your pieces and let some edges curl up. Cover the entire page or leave gaps of white showing through. Once the glue dries, you can paint over the collage with a thin wash of color to unify the different papers. This technique is a favorite in the art journaling community because it is essentially free. You are turning household paper waste into art.
Gelli Plate Printing
If you want to invest in one tool that opens up a world of background possibilities, get a small gelli plate. It is a soft, gelatin-like surface that you apply paint to, make marks in, and then press your journal page onto to create a print. Every print is one-of-a-kind, and the technique produces layered, textured backgrounds that look incredibly complex but take about thirty seconds to make.
Apply a thin layer of acrylic paint to the gelli plate, draw into it with a comb, fork, or any textured object, then press your paper down firmly and peel it back. You can layer multiple colors and textures by repeating the process on the same page.
Mark-Making with Found Objects
This is where art journaling gets really fun. Look around your home for objects that can make interesting marks when dipped in paint. The edge of a credit card creates sharp lines. A wine cork makes dots. Corrugated cardboard prints parallel lines. A sponge creates texture. Bubble wrap pressed into paint and then onto paper leaves a perfect dot pattern.
I have used forks, leaves, bottle caps, pieces of string, my own fingertips, and the edge of a piece of cardboard torn to make a rough brush. Every object produces a different mark, and combining several of them on one page creates a background rich with visual interest. This technique costs nothing because you already have everything you need in your kitchen junk drawer.
Brayer Rolling
A brayer is a small rubber roller used in printmaking. You can pick one up for a few dollars. To use it for backgrounds, squeeze a few dots of paint onto a non-porous surface (a piece of glass, an old baking sheet, or even a paper plate), roll the brayer through the paint to coat it evenly, and then roll it directly onto your journal page.
The result is a smooth, slightly textured layer of color. You can roll in multiple directions, use multiple colors, and layer the brayer marks to create a background that looks like an abstract painting. This technique is fast, satisfying, and produces consistently attractive results.
Creative Art Journal Prompts and First Page Ideas
Staring at a blank page is one of the most common roadblocks for new art journalers. I have been there many times. The solution is to have a stash of prompts ready so you never sit down without an idea of where to start. Here are some of my favorite art journal prompts, ranging from quick and simple to more involved.
Quick First Page Ideas
Trace your hand. Place your hand flat on the page and trace around your fingers with a pen. Then fill the inside of your hand shape with patterns, colors, or tiny doodles. This is one of the easiest first pages you can make, and it feels deeply personal because it literally features you.
Paint a single word. Pick one word that describes how you feel right now. Write it big and bold across the page. Paint the background in a color that matches the mood. You are done. Some of the most powerful journal pages are the simplest ones.
Color field page. Choose two or three colors that appeal to you and fill the entire page with them. No images, no words, just color. Let the edges blur into each other. This is meditative and requires zero skill, but it always looks beautiful.
Collage-Based Prompts
Gratitude collage. Flip through magazines and tear out images and words that represent things you are grateful for. Glue them onto the page in an overlapping collage. Add your own writing if you want, or let the images speak for themselves.
Dictionary of feelings. Write emotional words in different sizes, colors, and styles across the page. “Joy” in yellow. “Exhausted” in gray smears. “Hopeful” in light blue watercolor. Let the visual treatment of each word express its meaning.
Repurpose failed art. Take a drawing or painting that did not turn out the way you wanted. Cut or tear it into pieces. Rearrange those pieces into a new composition on your journal page. This is one of the most popular techniques in the art journaling community because it transforms frustration into something unexpected and beautiful.
Writing-Based Prompts
Paint over your words. Write a stream-of-consciousness paragraph about your day, your feelings, or whatever is on your mind. Fill the page with writing. Then paint over most of it, leaving only fragments of words visible here and there. The partially hidden text creates mystery and depth. It is also deeply therapeutic to “bury” thoughts under a layer of paint.
Record something meaningful. Pick one specific thing that happened today, something small but memorable. A conversation overheard on the bus. The way the light looked at 4 PM. A meal that tasted amazing. Capture it on the page in whatever way feels right: words, images, colors, or a combination of all three.
Write a letter you will never send. Address a letter to someone (or something: your anxiety, your younger self, the year ahead) and fill the page with it. Add visual elements around the text. This prompt is particularly powerful for emotional processing.
Beginner-Friendly Books to Try
If you want a structured way to ease into art journaling, several books provide guided prompts and exercises. “Wreck This Journal” by Keri Smith is a popular choice in art journaling forums for absolute beginners. Each page gives you a prompt like “poke holes in this page” or “take this journal in the shower.” It destroys the idea that a journal must be precious, which is exactly the mindset shift most beginners need.
“The Artist’s Way” by Julia Cameron is another classic recommendation. While not specifically about visual journaling, its “morning pages” practice of daily writing complements art journaling beautifully. Many art journalers combine morning writing with a visual practice to start their day.
Tips for Beginners: Overcoming Common Roadblocks
Every beginner hits roadblocks. The good news is that the art journaling community has been navigating these same challenges for years, and there are proven strategies for each one. Here are the most common issues I hear about and how to work through them.
Overcoming Perfectionism
Perfectionism is the number one creativity killer. If you find yourself paralyzed because a page is not turning out the way you envisioned, try this: intentionally make an ugly page on purpose. Use colors you hate. Scribble instead of drawing. Glue down random scraps without thinking about composition. Giving yourself permission to be “bad” at art journaling is often the breakthrough you need.
Another approach is the 70/30 rule. In art, the 70/30 rule suggests that 70% of a composition should be relatively calm or unified, while 30% provides contrast and visual interest. But for beginners, I flip this: let 70% of your page be messy, experimental, and free, and worry about the final 30% only if you feel like it. Lower your expectations dramatically and you will enjoy the process much more.
Dealing with Blank Page Anxiety
The blank page is intimidating because it represents infinite possibility. Too many choices can freeze you. The fix is to immediately dirty the page before you have time to overthink. Splash some water on it. Smear a handprint across the corner. Write your name in big letters and scribble it out. Once there is a mark on the page, the pressure drops dramatically because the page is already “imperfect.”
Some art journalers keep a “warm-up journal” specifically for this purpose. They spend two minutes making messy marks in the warm-up journal before moving to their main journal. By then, the creative muscles are awake and the blank page feels much less threatening.
Preventing Paint Bleed-Through
This is a practical concern that comes up constantly in forums. Paint bleeding through to the next page ruins your work on both sides. The solution is simple: apply a coat of gesso to both sides of the page before using wet media. Gesso is a white primer that seals the paper and creates a paintable surface. A single bottle costs a few dollars and lasts for months.
If you do not have gesso, try working on one side of the page only and inserting a piece of scrap cardboard behind the page while you paint to protect the pages underneath. Or simply work on loose sheets of paper and bind them into a journal later.
Building a Daily Practice
You do not need to spend hours on your art journal. Five minutes is enough. Archer and Olive, one of the popular art journaling brands, built their entire community around the idea of spending five to sixty minutes a day on a journal page. The consistency matters more than the duration.
Try linking journaling to an existing habit. Keep your journal next to your coffee maker and spend five minutes on a page while your coffee brews. Or journal for ten minutes before bed as a way to wind down. When art journaling becomes part of a routine you already follow, it is much easier to maintain.
And remember: you do not have to journal every day. Three times a week is plenty. Once a week is fine. There is no streak to maintain and no score to beat. Your journal is there for you whenever you need it.
Frequently Asked Questions About Art Journaling
What is the 70/30 rule in art?
The 70/30 rule in art is a compositional guideline suggesting that 70% of a piece should be relatively unified or calm, while the remaining 30% provides contrast, detail, and visual interest. In art journaling, you can apply this by letting most of your page be a simple background and concentrating your detailed elements in one area. Some artists flip the ratio to keep things loose and experimental.
How do I start an art journal?
To start an art journal, follow these five steps: choose a journal (mixed media is the most versatile), gather a few basic supplies like paint, pens, and glue, create a background using paint or collage, add layers of images, words, and marks, and then call the page done without worrying about perfection. The entire process can take as little as ten minutes.
Does journaling help with CPTSD?
Many people find journaling helpful as a complement to professional treatment for CPTSD. Art journaling in particular can be valuable because it allows expression without requiring words, which can be difficult when processing trauma. The tactile, sensory nature of working with art materials can also be grounding. However, art journaling is not a replacement for therapy and should be used alongside professional mental health support.
What are the 3 C’s of art?
The 3 C’s of art refer to composition, color, and contrast. Composition is how elements are arranged on the page. Color is the palette you choose and how colors interact. Contrast is the difference between light and dark, busy and calm, or textured and smooth areas. In art journaling, keeping these three principles in mind can help your pages feel more cohesive, but they are guidelines, not strict rules.
Ready to Start Your Art Journal?
Learning how to start an art journal is really about one thing: giving yourself permission to begin. You now have a clear five-step process to follow. Choose a journal, gather a few supplies, create a background, add layers, and let go of perfection. That is it. You do not need to buy everything at once. You do not need to be good at drawing. You just need to open the journal and make the first mark.
Every experienced art journaler started exactly where you are right now: staring at a blank page, wondering if they were doing it right. The secret they all discovered is that there is no “right.” There is only showing up, playing with materials, and letting the page become whatever it wants to be.
Grab whatever notebook and pen you have nearby. Put some color on a page. See what happens. Your art journal is waiting.