
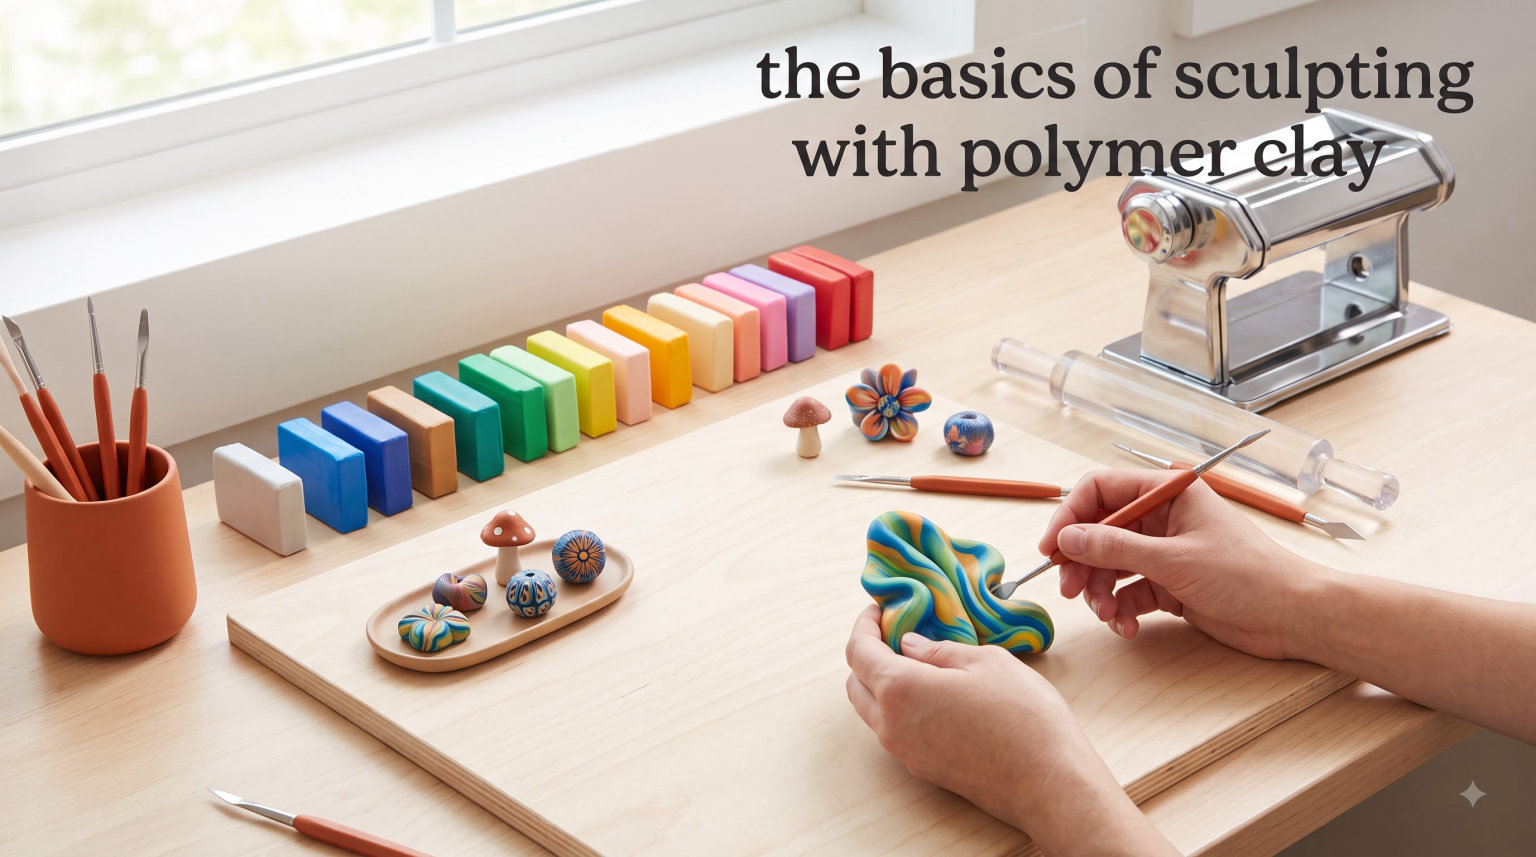
If you have ever picked up a block of polymer clay and wondered where to begin, you are in the right place. Our team has spent months testing different clays, tools, and techniques to put together this complete guide on the basics of sculpting with polymer clay. Whether you want to create small figures, jewelry, or decorative pieces, this guide walks you through every step from opening a fresh package of clay to sealing your finished sculpture.
Polymer clay sculpting is one of the most approachable art forms you can try. You do not need a kiln, a spinning wheel, or expensive equipment. A home oven, a few basic tools, and some patience are enough to get started. In this guide, we cover the six core steps that will take you from absolute beginner to completing your first real sculpture.
We will walk through choosing the right clay, conditioning it properly, building an armature, shaping your piece, baking it safely, and finishing it with professional-looking results. Along the way, we address the most common mistakes beginners make and share practical tips we learned the hard way.
Table of Contents
What Is Polymer Clay and Why Choose It
Polymer clay is a modeling material made from polyvinyl chloride (PVC) particles suspended in a liquid plasticizer. When you heat it in an ordinary home oven, the plasticizer and PVC particles fuse together, permanently hardening the clay while keeping it slightly flexible. This curing process typically happens around 265 to 275 degrees Fahrenheit, which is well within the range of any standard kitchen oven.
Unlike ceramic clay, which requires a high-temperature kiln, polymer clay cures in your kitchen. Unlike air-dry clay, which begins hardening the moment you expose it to air, polymer clay stays soft and workable indefinitely until you bake it. That means you can take your time, step away from a project for days, and come back to it without losing any progress.
This flexibility is what makes polymer clay sculpting so appealing for beginners. There is no rush. You can experiment, make mistakes, and try again without wasting material. If you do not like how something looks, you can reshape it or even recycle unbaked clay back into a ball and start fresh.
Artists use polymer clay for a wide range of projects. Figure sculpting is one of the most popular applications, but the material also works well for jewelry, beads, miniature models, decorative household objects, and even mixed-media art. The ability to hold fine detail after baking makes it a favorite among miniature painters and figurine collectors.
Essential Tools and Materials for Polymer Clay Sculpting
One of the biggest questions beginners ask is what supplies they actually need. The good news is that you can start with very few materials and expand your collection as you develop your skills. Here is what our team recommends for anyone getting started with polymer clay sculpting.
Clay
You will obviously need polymer clay. Brands like Sculpey, Fimo, Premo, and Kato Polyclay are the most widely available. For your first few projects, pick one or two blocks in neutral colors like gray, white, or flesh tone. Many sculptors prefer neutral-colored clay because it is easier to see details and the finished piece can be painted later with acrylics.
Shaping Tools
A basic set of shaping tools goes a long way. You do not need anything fancy to start. A needle tool for fine lines, a couple of ball stylus tools in different sizes for indentations and blending, and a silicone-tip brush for smoothing are the core essentials. Many beginners start with an inexpensive ball tool set designed for cake decorating or nail art, and these work perfectly fine for polymer clay.
Work Surface
Polymer clay can pick up dust, lint, and residue from whatever surface you work on. A smooth, non-porous surface like a ceramic tile, a sheet of glass, or an acrylic cutting board makes an excellent workspace. Ceramic tiles are especially useful because they can go directly into the oven, serving as both your work surface and your baking surface.
Armature Materials
For anything larger than a small charm or bead, you will want to build an armature, which is a supportive skeleton for your sculpture. Aluminum foil, craft wire (18 to 22 gauge), and masking tape are the three materials you need. The foil reduces the amount of clay required and prevents thick sections that might not cure properly. Masking tape over the foil gives the clay something to grip onto.
Baking Supplies
A home oven is all you need for baking polymer clay. However, an oven thermometer is a critical investment because most home ovens are off by 25 to 50 degrees. You will also want a ceramic tile, a baking sheet, or a piece of parchment paper to place your sculpture on while it bakes.
Finishing Supplies
After baking, you may want to sand, paint, or seal your sculpture. Wet and dry sandpaper in grits from 400 to 2000, isopropyl alcohol (91 percent or higher) for smoothing before baking, acrylic paints for adding color, and a clear varnish or sealer for protecting the finished piece round out your finishing toolkit.
Choosing the Right Polymer Clay for Your Project
Not all polymer clay is the same, and choosing the right type makes a real difference in how your sculpture turns out. The main factor to consider is firmness. Softer clays are easier to condition but harder to sculpt with because they do not hold fine details well. Firmer clays require more effort to condition but keep crisp details once shaped.
For beginners who want to sculpt figures and small sculptures, our team recommends starting with a medium-firm clay like Premo Sculpey or Super Sculpey. These clays strike a good balance between workability and detail retention. They are soft enough to condition by hand without too much effort, but firm enough to hold shape while you add details.
Sculpey III, which you will find in most craft stores, is very soft and easy to condition. It works well for simple shapes, beads, and projects that do not require fine detail. However, it can become too squishy when warmed by your hands, making it frustrating for detailed figure work. Kato Polyclay is at the opposite end of the spectrum. It is very firm, holds extraordinary detail, but can be difficult for a beginner to condition without a pasta machine.
If you plan to make jewelry or small decorative pieces, a softer clay is fine. If your goal is sculpting detailed figures or miniatures, invest in a firmer clay from the start. The clay you choose sets the ceiling for how much detail your finished piece can achieve.
Step 1: Conditioning Your Polymer Clay
Conditioning is the process of warming and working the clay until it becomes soft, pliable, and consistent throughout. This step is not optional. Unconditioned clay will have stiff spots, crack during baking, and be difficult to shape smoothly. Every experienced polymer clay artist will tell you the same thing: conditioning is the single most important preparation step.
Start by cutting your clay into small chunks, roughly a quarter inch thick. This makes it easier to warm and soften. Roll each chunk between your palms to create a short log, then fold it in half and roll it again. Repeat this process for five to ten minutes. The friction and warmth from your hands gradually soften the clay. You will feel it become progressively more supple with each pass.
If the clay is very stiff, you have a few options. Some artists sit on the clay block for ten to fifteen minutes to warm it with body heat. Others chop the clay into tiny pieces and let it sit in a warm spot near a lamp or in a zip-top bag in their pocket. A pasta machine dedicated to clay work is the fastest conditioning tool. Run thin slices through the machine on the widest setting, fold them in half, and repeat until the clay passes through smoothly without cracking at the edges.
How do you know when your clay is properly conditioned? It should roll out smoothly without cracking or splitting at the edges. When you fold it, the two halves should stick together without visible seams. If you see any cracking, lines, or stiff spots, keep conditioning. It is better to spend an extra five minutes conditioning than to rush and end up with a cracked sculpture.
Step 2: Building an Armature for Your Sculpture
An armature is the internal framework that supports your sculpture. Think of it as the skeleton. For small pieces like beads or simple charms, you can skip this step. But for anything with limbs, a pose, or larger than two inches, an armature prevents your sculpture from collapsing under its own weight.
The simplest armature for a figure starts with craft wire. Use 18 or 20 gauge wire for the main structure and 22 gauge for smaller appendages. Bend the wire into a basic stick figure that captures the pose you want. You do not need exact proportions at this stage, just the general attitude and balance of the figure.
Next, bulk out the armature with crumpled aluminum foil. Press foil around the wire frame, especially in the torso and limbs, building up the basic body shape. The foil does two important things: it reduces the amount of clay you need, which saves money, and it prevents thick sections of clay that might not cure all the way through. A good rule of thumb is to keep your clay layer to no more than a quarter inch thick over the foil.
Once the foil is shaped the way you want, wrap it in masking tape. This is a step many beginners skip, but it makes a big difference. Polymer clay does not adhere well to bare foil. The masking tape gives the clay a surface to grip, preventing it from sliding or separating during sculpting and baking. One forum member shared that this single tip transformed their sculpting experience.
For flat or relief sculptures, you may not need a wire frame at all. A simple foil pad or even a rigid cardboard base can provide enough support. Match your armature to the project at hand.
Step 3: Basic Shaping Techniques
With your clay conditioned and your armature ready, it is time to start adding clay and building forms. The approach here is to work from large shapes to small details. Start by covering your armature with a base layer of clay, then gradually refine the forms.
Begin with simple geometric shapes. Roll clay into balls, logs, and cones. These basic forms are the building blocks of every sculpture. A figure starts as a cylinder for the torso, smaller cylinders for limbs, a sphere for the head, and tapered cones for hands and feet. Press these forms onto your armature and blend the seams together.
Blending is one of the first skills you need to develop. Where two pieces of clay meet, use your fingertip or a silicone tool to smooth the joint until it disappears. Work in small circular motions, applying gentle pressure. If the clay gets too warm and sticky, set it down for a few minutes to firm up before continuing. Some artists keep a small ice pack nearby to cool their clay when it gets too soft.
Build up forms gradually. Add small amounts of clay rather than large ones. It is much easier to add clay than to remove it, especially once you have started refining shapes. Press thin pads of clay onto the surface and blend them into the existing form. This layering approach gives you more control and produces smoother results than trying to carve or remove clay.
Use your fingers for broad shaping and smoothing. Switch to tools for tighter areas and more defined edges. A ball tool pressed lightly along a seam will blend it cleanly. A silicone-tip brush dragged across a surface creates a smooth, even finish that is difficult to achieve with fingers alone.
Step 4: Adding Details and Texture
Once the basic shapes are established and the major forms are in place, you can start adding the details that bring your sculpture to life. This is where the real personality of your piece emerges, but patience is key. Adding details too early is one of the most common beginner mistakes. If you try to carve fine lines into soft, warm clay, the details will distort when you handle the piece later.
Let your sculpture rest for ten to fifteen minutes before adding fine details. This allows the clay to cool and firm up, which makes it easier to hold crisp lines. Some artists even pop their sculpture into the refrigerator for a few minutes before doing detail work.
A needle tool is your primary weapon for fine details. Use it to carve wrinkles, define facial features, add hair lines, and create surface texture. Hold the needle tool like a pencil and use light, controlled strokes. You can always deepen a line, but you cannot easily undo one.
Ball tools are ideal for creating eye sockets, rounded indentations, and blending tight corners. Choose a size that matches the scale of the detail you are working on. For very small sculptures, a pin or the tip of a toothpick can substitute for a fine ball tool in a pinch.
Texture can come from unexpected sources. A stiff brush pressed into clay creates a rough, organic surface. A piece of sandpaper rolled into a tube can add scale-like texture. The edge of a credit card makes clean, straight lines. Aluminum foil crumpled and pressed lightly against the clay surface creates an irregular, natural-looking texture that works well for stone or bark effects.
Work from large to small, refining your details in passes. Define the major features first, then go back and add the secondary details, and finish with the finest lines and surface textures. This layered approach produces better results than trying to complete one area fully before moving to the next.
Step 5: Baking and Curing Your Polymer Clay Sculpture
Baking is the step that makes everything permanent, and it is also the step where the most things go wrong. Too hot and your clay scorches and turns brown. Too cool and it remains under-cured, weak, and brittle. Getting the temperature right is absolutely critical.
The general rule for most polymer clay brands is 275 degrees Fahrenheit (135 degrees Celsius) for 15 minutes per quarter inch (6mm) of thickness. This is not a maximum time but a per-thickness guideline. A sculpture that is half an inch thick at its thickest point should bake for approximately 30 minutes. Many experienced artists bake even longer for extra strength, since you cannot really overbake polymer clay at the correct temperature.
Here is the catch: most home ovens are inaccurate. They can be off by 25 to 50 degrees in either direction, and the temperature fluctuates during cycling. An oven thermometer that sits next to your sculpture is one of the most important investments you can make. Place the thermometer on the same rack as your piece, check it frequently during the first few bakes, and adjust the dial until the thermometer reads the correct temperature.
Support your sculpture during baking. Polymer clay softens slightly as it heats up before it begins to cure. This means a standing figure might lean, an extended arm might sag, or an unsupported piece might slump. Prop up vulnerable areas with crumpled foil or quilt batting. Place your sculpture on a ceramic tile so you can move it in and out of the oven without touching the piece directly.
For complex sculptures, consider baking in stages. Build and bake the core form first, then add more clay and bake again. Polymer clay bonds to previously baked clay when pressed firmly against it and baked a second time. This staged approach lets you work on one section at a time without worrying about accidentally squishing parts you have already finished.
After baking, let your sculpture cool completely inside the oven or on the counter. Do not handle it while it is warm, as the clay is still settling into its final hardness. Once cool to the touch, the piece should be firm but slightly flexible. If it snaps or crumbles, it was likely under-cured. If it turned brown or dark, the temperature was too high.
Step 6: Smoothing, Sanding, and Finishing
The finishing process transforms a good sculpture into a great one. This stage happens in two phases: before baking and after baking.
Before baking, smoothing is your priority. Fingerprints are the most common surface issue on polymer clay sculptures. A small brush dipped in isopropyl alcohol (91 percent or higher) is your best friend here. Lightly brush the alcohol over the surface of your unbaked sculpture. The alcohol slightly dissolves the surface layer of clay, causing fingerprints and small imperfections to melt away. Use gentle strokes and do not saturate the clay. Let the alcohol evaporate completely before baking.
After baking and cooling, you can further refine the surface with wet sanding. Use wet and dry sandpaper under running water, starting with a coarser grit like 400 and working your way up to 1000 or 2000 for a polished finish. Sand in one direction rather than circular motions for the smoothest result. Rinse the piece thoroughly after sanding to remove all dust and residue.
If you plan to paint your sculpture, acrylic paints are the standard choice for polymer clay. Apply thin layers and let each one dry before adding the next. Two to three thin coats produce better results than one thick coat. Avoid oil-based paints, as they can react with the plasticizer remaining in the clay.
Finally, seal your finished piece with a clear varnish or sealer. This protects the paint, adds durability, and can change the surface finish from matte to satin to gloss depending on the product you choose. Apply the sealer in thin, even coats and let it dry fully between layers. A well-sealed polymer clay sculpture will last for years without fading or degrading.
Common Beginner Mistakes and How to Avoid Them
Over the months our team has spent working with polymer clay, we have made nearly every mistake possible. Here are the most common pitfalls and how you can avoid them in your own work.
Skipping or Rushing Conditioning
This is the number one mistake. Unconditioned clay is stiff, crumbly, and full of invisible air pockets. When you bake it, those inconsistencies cause cracking. Spend the time to condition your clay properly. If it cracks when you fold it, it is not ready yet.
Baking at the Wrong Temperature
We cannot stress this enough: get an oven thermometer. Baking at 300 degrees when you think you are at 275 will scorch your work. Baking at 250 when you think you are at 275 will leave your piece weak and crumbly. The thermometer removes all the guesswork.
Building Without an Armature
Thick masses of solid clay are prone to cracking during baking because the outside cures before the inside. An armature reduces clay thickness, saves material, and gives your sculpture structural support. Even a simple foil core makes a big difference.
Adding Details Too Early
When you are excited about a project, it is tempting to jump straight into carving faces and adding wrinkles. But handling detailed areas warms the clay and smudges your work. Build the major forms first, let the clay cool, then add details. Working in stages prevents a lot of frustration.
Mixing Incompatible Materials
Do not mix polymer clay with air-dry clay, Play-Doh, plasticine, or any other modeling material. These materials have completely different curing mechanisms and chemical compositions. Mixing them leads to poor results and wasted effort. Stick with polymer clay from start to finish.
Not Supporting Your Work During Baking
Polymer clay softens as it heats in the oven before it begins to harden. This means unsupported arms, tails, and other protruding parts can droop or collapse. Use foil props, batting, or even a support structure made of scrap clay to hold everything in position while it bakes.
Poor Storage Habits
Polymer clay picks up dust, lint, and pet hair with alarming ease. Store unused clay in zip-top bags or airtight containers. Keep it away from direct sunlight and heat sources. Properly stored clay will remain workable for years.
Beginner Project Ideas to Get You Started
Now that you understand the basics of sculpting with polymer clay, here are five beginner-friendly projects arranged from easiest to most challenging. Each one practices the core skills covered in this guide.
1. Simple Bead or Pendant
This is the easiest starting point. Roll clay into a ball, disk, or any simple shape. Add a hole with a toothpick or needle tool, and bake. This project practices conditioning, basic shaping, and baking without requiring an armature. Once cooled, you can sand and paint the bead or seal it as-is.
2. Small Bowl or Pinch Pot
Start with a ball of conditioned clay. Press your thumb into the center and pinch the walls outward, rotating as you go. Smooth the exterior with a silicone tool and your fingers. This project teaches wall control, consistent thickness, and surface smoothing.
3. Simple Animal Figure
Pick an animal with a simple body plan: a cat, a frog, or a bear. Start with basic shapes for the body, head, and limbs. Blend the pieces together, add simple facial features, and bake. This project introduces armature building, form blending, and basic detail work in an approachable way.
4. Fantasy Mushroom or Plant
A fantasy mushroom is an excellent intermediate project. The cap and stem use different shaping techniques, the surface can be textured, and the colors can be painted in interesting ways. Build a simple wire and foil armature for the stem, sculpt the cap separately, and attach them before baking.
5. Small Chibi Figure
Chibi-style figures have oversized heads, small bodies, and exaggerated features that make them forgiving for beginners. Build a foil and wire armature, cover it with clay, and sculpt the basic forms. The simplified proportions mean you can focus on expression and pose without worrying about anatomical accuracy. This project puts all six steps together in one complete sculpture.
FAQs
What supplies do I need to start sculpting with polymer clay?
To start sculpting with polymer clay, you need polymer clay (Premo Sculpey or Super Sculpey are good beginner choices), a few shaping tools (needle tool, ball tools, silicone-tip brush), a smooth work surface like a ceramic tile, aluminum foil and wire for armatures, an oven thermometer, isopropyl alcohol for smoothing, and acrylic paint with a sealer for finishing. You can start with a basic set of tools and expand as you develop your skills.
How do I condition polymer clay before sculpting?
Cut the clay into small chunks and roll each piece between your palms into a log. Fold the log in half and roll again. Repeat this process for 5 to 10 minutes until the clay is soft, pliable, and rolls out smoothly without cracking at the edges. You can also use a dedicated pasta machine to speed up the process by running thin slices through on the widest setting, folding, and repeating until smooth.
What is the correct baking time and temperature for polymer clay?
Most polymer clay brands recommend baking at 275 degrees Fahrenheit (135 degrees Celsius) for 15 minutes per quarter inch (6mm) of thickness. For a sculpture that is half an inch thick at its thickest point, bake for approximately 30 minutes. Always use an oven thermometer to verify the actual temperature, since most home ovens are off by 25 to 50 degrees.
How do I smooth fingerprints and imperfections on polymer clay?
Before baking, dip a small brush in isopropyl alcohol (91 percent or higher) and lightly brush it over the surface of your sculpture. The alcohol slightly dissolves the clay surface, causing fingerprints and small imperfections to melt away. After baking, you can use wet sanding with fine-grit sandpaper (400 to 2000 grit) under running water to further smooth the surface.
Can I use regular crafting tools for polymer clay sculpting?
Yes, many regular crafting tools work well for polymer clay. Cake decorating ball tools, nail art dotting tools, toothpicks, and wooden skewers can all serve as sculpting instruments. The main requirement is that tools have smooth surfaces without sharp or rough edges that might leave unwanted marks in the clay. Avoid tools with rust or residue from other materials.
Why is my polymer clay cracking after baking?
Cracking after baking usually happens for one of three reasons: the clay was not conditioned properly, the sculpture had thick solid areas without an armature, or the oven temperature was too high or fluctuated too much. To prevent cracking, always condition clay until it is smooth and pliable, use foil armatures to keep clay layers under a quarter inch thick, and bake with an oven thermometer to maintain a consistent temperature.
Conclusion
Learning the basics of sculpting with polymer clay comes down to six core steps: conditioning your clay, building an armature, shaping basic forms, adding details, baking at the right temperature, and finishing your piece. Each step builds on the last, and none of them require expensive equipment or specialized training.
The most important thing is to start. Pick up a block of clay, condition it until it is smooth and soft, and make something simple. Your first project does not need to be a masterpiece. Every sculptor started with lumpy beads and wobbly figures. The skills develop with each piece you complete.
Remember to condition thoroughly, use an oven thermometer every time you bake, and work from large shapes to small details. Avoid the common mistakes we covered, and you will be well on your way to creating sculptures you are proud of. Polymer clay is a patient medium. It waits for you, and with practice, you will be surprised how quickly your work improves.