
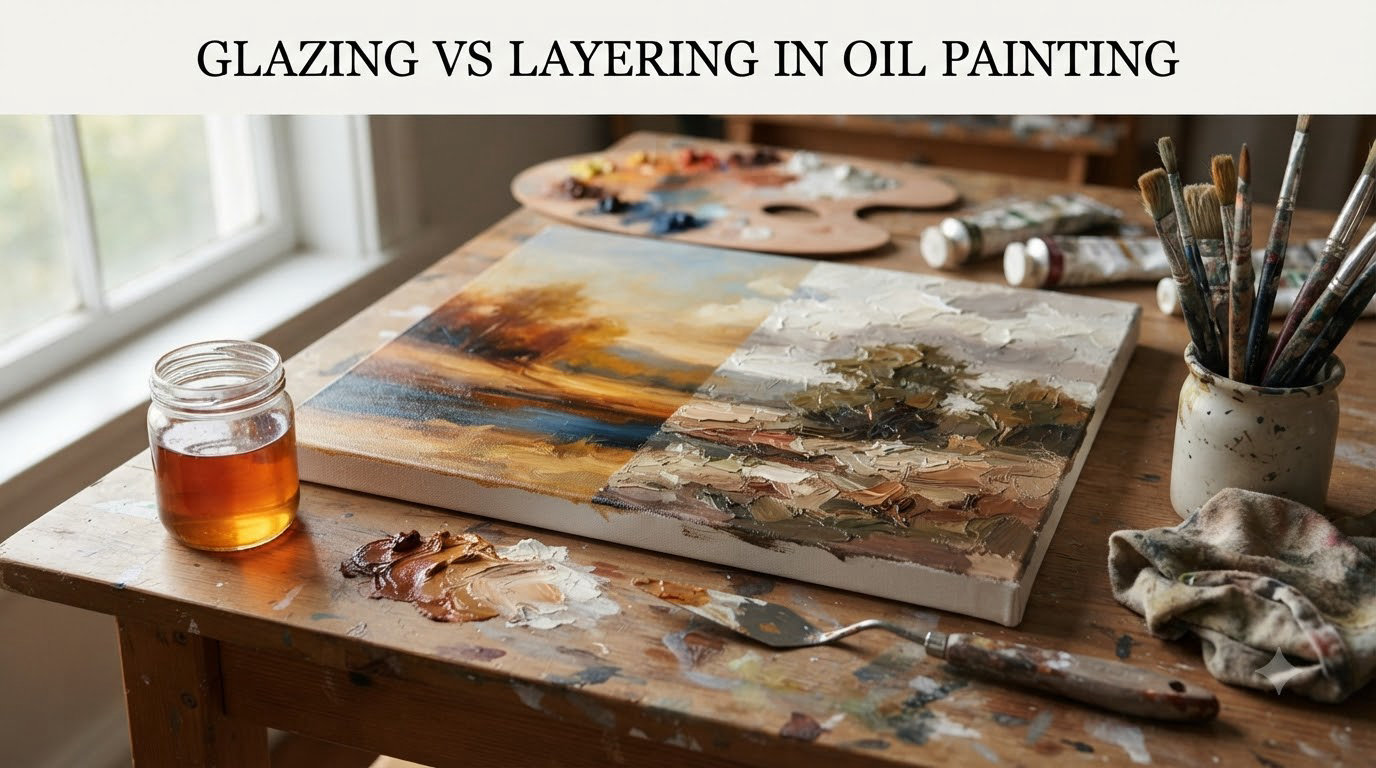
Understanding glazing vs layering in oil painting is one of those skills that separates a flat-looking canvas from one that practically glows with depth and dimension. If you have ever stood in front of a Vermeer or a Rembrandt and wondered how they achieved that inner luminosity, the answer almost always comes back to how they handled their paint layers. These two approaches, glazing and layering, form the backbone of traditional oil painting techniques that have been passed down for centuries.
But here is the thing: glazing and layering are not the same process, even though many artists use the terms interchangeably. The distinction matters because choosing the wrong technique for the wrong moment can leave you with muddy colors, cracking paint, or a surface that never quite achieves the effect you imagined.
In this guide, I am going to break down exactly what each technique involves, when to use one over the other, and how to avoid the common traps that trip up even experienced painters. Whether you are working on portraits, landscapes, or abstract pieces, getting a handle on glazing vs layering will change the way you approach your oil paintings.
Table of Contents
What Is Glazing in Oil Painting?
Glazing in oil painting is the technique of applying thin, translucent layers of oil paint over a completely dried base layer. The key word here is translucent. A glaze is not meant to cover what is underneath. Instead, it acts like a colored filter, allowing light to pass through the transparent layer, hit the opaque paint below, and bounce back through the glaze to your eye. That is what creates that characteristic luminosity and depth that glazing is known for.
To create a glaze, you thin your oil paint with a glazing medium rather than a solvent alone. Common mediums include stand oil, linseed oil, or commercial products like Galkyd or Liquin. The ratio typically falls somewhere between 10 percent pigment to 90 percent medium and 30 percent pigment to 70 percent medium, depending on how much color shift you want.
Historically, the Old Masters relied heavily on glazing. Painters like Jan van Eyck, Titian, and Vermeer built up dozens of thin glazes to achieve the rich, glowing skin tones and fabric textures that define their work. Each glaze subtly shifts the color beneath it without covering it, creating an optical mixing effect that simply cannot be replicated by mixing colors on the palette.
What Is Layering in Oil Painting?
Layering in oil painting refers to the broader process of building up a painting by applying successive layers of paint, one on top of another. Unlike glazing, layering includes both opaque and transparent applications. It encompasses everything from the initial underpainting to mid-tone blocking and final highlights. Every oil painting that dries between sessions technically uses a form of layering.
Think of layering as the structural framework of your painting. The first layer might be a monochrome underpainting in burnt umber to establish values. The second layer adds color and begins defining forms. Subsequent layers refine details, adjust values, and add finishing touches. Some of these layers may be opaque, some semi-transparent, and some may be actual glazes.
The layering technique gives you flexibility. You can correct mistakes by covering them with opaque paint, build texture with thicker applications, or gradually shift the mood of a painting by adjusting the color temperature in later layers. It is the default working method for most oil painters, whether they realize it or not.
Glazing vs Layering in Oil Painting: Key Differences
The easiest way to understand glazing vs layering in oil painting is to see them side by side. Below is a comparison that breaks down the core differences between these two approaches.
| Characteristic | Glazing | Layering |
|---|---|---|
| Opacity | Thin and translucent | Can be opaque or transparent |
| Medium ratio | High medium, low pigment | Variable ratio |
| Primary purpose | Color shifting, luminosity, depth | Building form, correcting, structuring |
| Paint consistency | Fluid, like ink or syrup | Variable: thin washes to thick impasto |
| Drying requirement | Base layer must be fully dry | Varies; some layers can be wet-on-wet |
| Effect on underlying color | Filters and modifies it optically | Covers or blends with it |
| Number of applications | Multiple thin coats (5 to 20+) | Fewer, thicker applications (3 to 8) |
| Historical use | Vermeer, van Eyck, Titian | Nearly all oil painters throughout history |
So here is the relationship in plain terms: glazing is actually a specific type of layering. All glazing is layering, but not all layering is glazing. When artists talk about “layering,” they usually mean building up opaque or semi-opaque paint. When they talk about “glazing,” they are referring to the specific practice of applying translucent color films over a dry surface.
I like to think of the difference this way. Layering is the architecture of your painting. It sets the structure, defines the forms, and establishes the overall composition. Glazing is the lighting design. It adds atmosphere, creates the illusion of light emanating from within the painting, and gives colors a richness that feels impossible to achieve any other way.
One more practical distinction. Layering generally moves faster because each layer does more heavy lifting. You can block in major color areas and refine forms in just a few passes. Glazing requires patience because each individual glaze shifts the color only slightly. You might need 10 to 15 glazes to achieve a specific effect, and each one must dry before you apply the next.
The Fat Over Lean Principle: The Golden Rule of Oil Painting
Whether you are glazing or layering, one principle governs all of oil painting: fat over lean. This is the golden rule that keeps your painting from cracking as it ages, and understanding it is essential before you pick up a brush.
“Fat over lean” means that each successive layer of paint should contain more oil than the layer beneath it. “Fat” paint has a higher proportion of oil medium, making it more flexible as it dries. “Lean” paint has less oil, sometimes thinned only with solvent, and dries to a more brittle film.
Why does this matter? Oil paint does not dry by evaporation like acrylics. It dries by oxidation, a chemical process that continues for years. A lean layer (low oil content) dries faster and becomes brittle. If you put a lean layer on top of a fat layer that is still flexible and contracting, the top layer will crack as the lower layer moves underneath it.
In practical terms, this means your underpainting should be lean (thinned with solvent like odorless mineral spirits), your middle layers should be paint straight from the tube, and your final layers, including glazes, should be the fattest (mixed with the most medium). Following this progression ensures that each layer remains slightly more flexible than the one below it, accommodating the ongoing drying process without cracking.
For glazing specifically, this principle works naturally in your favor. Since glazes are mixed with a high proportion of medium, they are inherently “fat” and should always go on top of drier, leaner layers. This is one reason why glazing is typically done in the later stages of a painting.
How to Glaze Oil Paintings: Step-by-Step
Here is a straightforward process for applying glazes to an oil painting. I have broken this into clear steps so you can follow along even if you have never tried glazing before.
Step 1: Complete your underpainting. Paint your base layer opaquely, establishing all your values (lights and darks) and forms. Let this layer dry completely. Depending on the thickness and medium used, this can take anywhere from three days to two weeks.
Step 2: Prepare your glazing medium. Mix a glazing medium by combining linseed oil (or stand oil) with a small amount of solvent. A common starting ratio is two parts medium to one part solvent. Commercial glazing mediums like Liquin or Galkyd work well too and dry faster than traditional oil-based mediums.
Step 3: Mix your glaze. Place a small amount of oil paint on your palette. Add glazing medium gradually, mixing until the paint reaches a syrupy, translucent consistency. Test the transparency by brushing a small amount on a white surface. You should see the white clearly through the glaze.
Step 4: Apply the glaze. Use a soft, wide brush to apply the glaze in even strokes across the dried base layer. Work quickly and avoid going back over areas you have already glazed, as this can lift the underlying paint. For best results, apply the glaze in one pass and let the brush sweep across the surface without hesitation.
Step 5: Let it dry completely. This is where patience becomes essential. Each glaze must dry before you apply the next one. Rushing this step is the number one cause of muddy glazes. Depending on your medium, drying time can range from overnight (with fast-drying mediums like Galkyd) to a week (with traditional stand oil mixtures).
Step 6: Evaluate and repeat. Once the glaze is dry, step back and evaluate the color shift. If you need more depth or a stronger color change, apply another glaze of the same color. If a different area needs attention, switch to a different color glaze. Build up slowly, one thin layer at a time.
The Three Rules of Glazing
If you remember nothing else about glazing, commit these three rules to memory. They will save you from the most common glazing disasters.
Rule 1: Always glaze over a dry surface. Applying a glaze over paint that is still tacky or wet will cause the layers to mix on the canvas, creating mud instead of clean, luminous color shifts. Test the surface with the back of your knuckle. If it feels cool or tacky at all, it is not ready.
Rule 2: Keep each glaze thin. A glaze should be transparent enough that you can see through it clearly. If you cannot read text through your glaze on a test surface, it is too thick. Thin glazes give you more control and build color more evenly over multiple applications.
Rule 3: Work from light to dark. Since glazes darken the layers beneath them (even transparent glazes are not perfectly transparent), plan your glazing sequence from lighter glazes to darker ones. This prevents you from overshooting your target value and having to start over.
When to Use Glazing vs Layering
Choosing between glazing and layering is not an either-or decision in most paintings. You will use both throughout your process. But knowing which technique to reach for in a given situation is what separates a confident painter from a frustrated one.
Reach for glazing when: you want to create luminous skin tones in portraits, render the translucent quality of water or sky, deepen shadows without losing the complexity of underlying colors, unify disparate colors across a painting by applying a single-color glaze over the whole surface, or create the illusion of light passing through objects like stained glass or foliage.
Reach for opaque layering when: you need to establish your initial composition and values through an underpainting, correct mistakes or cover unwanted areas, build texture and physical presence through thicker paint application, create sharp edges and defined forms, or block in large areas of consistent color.
Many experienced painters use a hybrid approach. They start with opaque layering to build the structure and forms, then switch to glazing for the final stages to add luminosity, depth, and color harmony. This combination gives you the best of both worlds: the structural control of opaque paint and the optical richness of transparent glazes.
The 70-30 Rule in Art
While researching oil painting techniques, you may have come across references to the 70-30 rule. This principle states that roughly 70 percent of your painting should consist of simpler, more unified areas, while the remaining 30 percent contains the detail, contrast, and visual complexity that draws the eye.
In the context of glazing vs layering, the 70-30 rule offers a useful framework. Think about using glazes across that broad 70 percent of your painting where you want smooth, unified color transitions and atmospheric depth. Reserve your more complex layering, with its varied opacities and textures, for the 30 percent where detail and visual interest are concentrated.
For example, in a landscape painting, the sky and distant mountains might benefit from broad, even glazes that create a sense of atmosphere and distance. The foreground elements, where you want sharp detail and visual punch, might rely more on opaque layering with thicker paint. This approach creates a natural focal point and keeps your painting from feeling flat or overly uniform.
The 70-30 rule also applies to color temperature. If 70 percent of your painting is cool-toned, glazing warm colors over select areas creates immediate visual contrast. This interplay between glazing and temperature control is something the Old Masters understood intuitively, even if they never called it a “rule.”
Common Mistakes and How to Avoid Them
Over years of painting and teaching, I have seen the same mistakes crop up repeatedly when artists start working with glazes and layers. Here are the most common ones and how to fix them.
Mistake 1: Glazes that look cloudy or milky. This usually happens when the glaze contains too much solvent relative to oil. Solvent evaporates quickly and can leave a hazy film. Solution: increase the ratio of oil medium to solvent, and make sure you are using a quality medium rather than thinning with solvent alone.
Mistake 2: Colors getting too dark with multiple glazes. Remember that even transparent glazes add a small amount of pigment with each application. After 10 or 15 glazes, the cumulative darkening can be significant. Solution: use lighter values in your underpainting than you think you need, knowing that glazes will darken the final result by 10 to 20 percent.
Mistake 3: Streaks and brush marks in the glaze. This occurs when you use a stiff brush, apply too much pressure, or go back over partially dried glaze. Solution: use a soft sable or synthetic soft-hair brush, apply with a light touch, and resist the urge to touch up while the glaze is setting.
Mistake 4: Not waiting long enough between layers. Impatience is the enemy of glazing. If you apply a new glaze before the previous one has dried, the layers mix and create muddy, dull results. Solution: wait until the surface passes the knuckle test (cool or tacky means not ready). When in doubt, wait another day.
Mistake 5: Ignoring the fat over lean rule. Putting a lean layer over a fat layer is a recipe for cracking, sometimes within months, sometimes years later. Solution: plan your painting from lean to fat, and always mix more medium into your upper layers than your lower ones.
Required Materials and Mediums
Having the right materials makes a significant difference when working with glazing and layering techniques. Here is what I recommend for each approach.
For glazing, you will need: a glazing medium (stand oil, linseed oil, Liquin, or Galkyd), soft brushes (sable or high-quality synthetic flats or filberts in sizes 4 through 12), a smooth painting surface (finely woven canvas or panel works best), a palette for mixing glazes, and odorless mineral spirits for cleanup. Transparent pigments work best for glazing. Some of the most popular include Ultramarine Blue, Alizarin Crimson, Burnt Sienna, and various transparent yellows and earth tones.
For layering, you will need: a range of brushes in different stiffness levels (hog bristle for thick paint, softer brushes for blending), a palette knife for mixing, your standard palette of oil colors, and both solvent and medium for adjusting paint consistency. Layering is more forgiving of surface texture, so you can work on rougher canvas if preferred.
One investment that pays off for both techniques is quality paint. Student-grade oils often have less pigment and more filler, which means your glazes will lack intensity and your opaque layers will lack coverage. Professional-grade paints deliver more pigment per dab, which translates to more effective glazes and fewer layers needed to achieve coverage.
If you are just starting out, I suggest beginning with a limited palette of six to eight colors, one or two mediums, and a set of decent brushes. You can always expand your supplies as you develop a feel for which techniques you gravitate toward most. And once your paintings are finished, proper care matters too. If you want to learn more about protecting and displaying your finished oil paintings, that is a topic worth exploring once your techniques are dialed in.
FAQs
What is the difference between layering and glazing?
Layering is the broad process of building up a painting with successive coats of paint, which can be opaque or transparent. Glazing is a specific type of layering that uses only thin, translucent films of color over a dried surface. Glazes modify the color beneath them optically without covering it, while general layering can involve covering, blending, or texturing. Think of glazing as a subset of layering.
What is the 70 30 rule in art?
The 70-30 rule suggests that about 70 percent of your painting should be simpler, more unified areas, while the remaining 30 percent contains detail, contrast, and visual complexity. This creates a natural focal point and prevents the painting from feeling flat or overwhelming. Applied to glazing and layering, use broad glazes for the 70 percent and more detailed opaque layering for the 30 percent where you want the eye to land.
What are the three rules of glazing?
The three rules of glazing are: (1) Always glaze over a completely dry surface to prevent colors from mixing into mud. (2) Keep each glaze thin and transparent, so light can pass through and reflect back from the layer beneath. (3) Work from light to dark, since each glaze slightly darkens what is underneath, and building up gradually prevents you from overshooting your target value.
What is the golden rule of oil painting?
The golden rule of oil painting is the fat over lean principle: each successive layer of paint should contain more oil (be fatter) than the layer beneath it. Lean layers dry faster and become brittle, while fat layers remain flexible. If a lean layer sits on top of a fat layer that is still moving during the drying process, the lean layer will crack. Following fat over lean prevents this cracking and ensures your painting lasts for decades.
Conclusion
Mastering glazing vs layering in oil painting gives you two distinct tools for dramatically different effects. Layering builds the structure and forms the foundation of your painting, while glazing adds the luminosity, depth, and color richness that make oil paintings feel alive. The fat over lean principle connects both techniques, ensuring your paint film remains stable for decades.
Start by practicing each technique separately. Create a simple still life using only opaque layering, then try another using only glazes over a monochrome underpainting. Once you understand how each approach behaves on its own, combining them becomes intuitive. The best oil paintings throughout history, from the Renaissance to today, use both techniques in harmony.