
When I first started learning to draw the human figure, everything felt like an uphill battle. My lines were stiff, my proportions were off, and I could not capture the energy of a pose no matter how hard I tried. That changed when I discovered gesture drawing. This technique transformed how I see movement and form, and it can do the same for you.
Gesture drawing is one of the most valuable skills you can develop as an artist. It trains your eye to capture the essential movement and energy of a subject in just minutes. Whether you are a beginner or have been drawing for years, mastering the basics of gesture drawing will elevate your craft.
In this guide, we will walk through everything you need to know to get started with gesture drawing. We cover the definition, benefits, techniques, and common mistakes so you can practice with confidence.
Table of Contents
What Is Gesture Drawing?
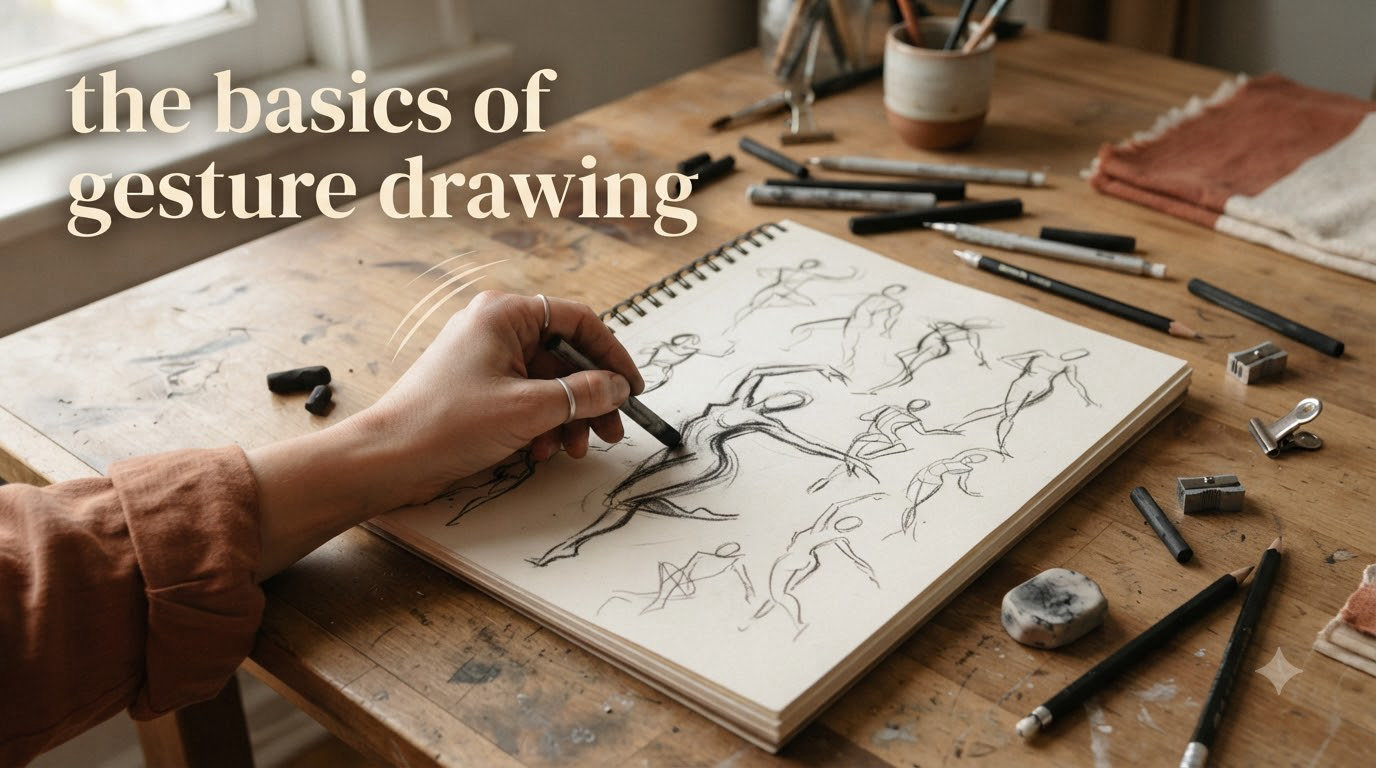
Gesture drawing is a quick, loose form of drawing that captures the action, form, and pose of a subject. Typically, you will draw a model who adopts timed poses ranging from thirty seconds to five minutes. The goal is not to create a detailed finished piece. Instead, you focus on recording the essential movement and energy of the pose.
Unlike detailed figure drawing, gesture drawing emphasizes flow and energy over accuracy. You use long, sweeping lines to capture the line of action, which runs through the body from head to toe. This line represents the overall flow and movement of the pose.
The practice originated from life drawing studios where artists needed to quickly capture the essence of a pose before the model shifted. Today, gesture drawing remains a fundamental exercise for artists studying the human form.
The Line of Action
The line of action is the backbone of gesture drawing. It is a single curved line that represents the major movement running through the body. Think of it as the energy flowing through a pose. When you strike a pose, you can feel this line running from your head, down your spine, and through your legs.
To find the line of action in a pose, look for the major curve or shift in direction of the body. In a standing pose, it often runs as an S-curve from the head to the feet. In dynamic poses, it may zigzag more dramatically. Your goal is to capture this line with one or two flowing strokes.
Contour Lines and Flow
Once you establish the line of action, you add contour lines to indicate the edges of major forms. These are not detailed outlines. They are sweeping lines that show the flow of muscles, the curve of the torso, and the angle of limbs.
Contour lines should follow the natural rhythm of the body. They work with the line of action to create a sense of movement. When done well, a gesture drawing feels alive and dynamic, even with minimal detail.
Benefits of Gesture Drawing
Many artists skip gesture drawing because it feels uncomfortable or unproductive. However, the benefits make it one of the most important exercises you can do. Here is why you should make gesture drawing a daily habit.
Develops Hand-Eye Coordination
Gesture drawing forces you to work quickly, which strengthens the connection between what you see and what your hand produces. When you have only thirty seconds to capture a pose, you cannot overthink. Your hand learns to respond instinctively to visual input. This coordination carries over into all your other drawing work.
Improves Understanding of Anatomy
By drawing many poses quickly, you start to see patterns in how the human body moves and folds. You learn how muscles connect across joints and how weight shifts during different poses. This anatomical understanding makes your finished work more convincing and dynamic.
Loosens Up Your Style
Many artists fall into the trap of drawing stiff, over-rendered pieces because they are afraid to let go. Gesture drawing teaches you to trust your instincts and embrace imperfection. The loose strokes and visible energy lines give your work a liveliness that precise drawings often lack.
Warm-Up Exercise for Daily Practice
Gesture drawing works perfectly as a warm-up before longer drawing sessions. Spend ten minutes on quick gestures and you will find your hand feels more relaxed and responsive. Many professional artists begin each session with gesture drawings for this reason.
Builds Confidence with the Figure
The human figure can feel intimidating to draw. Gesture drawing breaks this barrier by reminding you that you do not need perfection. You are capturing the pose, not the person. This shift in mindset helps you approach figure drawing with less anxiety and more freedom.
Basic Tips and Techniques
Now that you understand what gesture drawing is and why it matters, let us get into the practical techniques. These tips come from years of practice and from insights shared by artists in online communities.
Use Your Shoulder, Not Your Wrist
One of the most common mistakes beginners make is using only their wrist when drawing. This produces stiff, cramped lines. Instead, anchor your elbow and use your shoulder to create sweeping arm movements. This generates the long, flowing strokes that give gesture drawings their energy.
Think of your pencil as an extension of your arm. Let it move freely across the page. When you need to draw a long contour line, start from the shoulder and let the line flow through your entire arm.
Draw Big and Bold
Do not restrict yourself to small drawings. Use your entire page for each gesture. Big drawings force you to make confident strokes and capture the overall flow rather than getting lost in details. One experienced artist recommends doing just one gesture per page to encourage boldness.
If you are using an 11 by 17 inch sketchbook, fill the whole page with a single pose. This forces you to commit to each stroke and prevents the habit of small, timid marks.
Start with S and C Curves
Forum discussions reveal that many artists find success using primarily S and C curves to capture action. These two simple shapes can represent almost any pose when used correctly. The line of action often follows an S-curve through the spine. Contour lines frequently form C-curves around major muscle groups.
When you approach a new pose, look for these curves first. Try to capture the pose using only flowing curves before adding any straight lines or details. This trains your eye to see the essential movement rather than getting caught up in anatomy.
Work in Repeating Time Blocks
A popular timing progression for beginners involves working in repeating blocks. Start with thirty-second poses to force rapid decision-making. Then progress to two-minute poses where you can add slightly more structure. Finally, do five-minute poses to experiment with longer observation.
Many artists do this sequence twice in each practice session. Thirty seconds, thirty seconds, two minutes, two minutes, five minutes, five minutes. This progression trains you to see quickly and then build on that foundation.
Strike the Pose Yourself
One technique that sounds unusual but works remarkably well involves physically striking the pose you are drawing. Step away from your easel and adopt the pose yourself. Feel how your weight shifts and where tension builds in your body. Then return to your drawing and capture that feeling.
This method works because it creates a kinesthetic understanding of the pose. You are not just observing visually; you are experiencing the movement physically. This leads to drawings that feel more connected to the actual pose.
Record the Pose, Not the Person
Remember that you are recording the pose, not the person. This mental shift helps you focus on movement and energy rather than getting caught up in likeness or details. A great gesture drawing should feel dynamic and alive, even if it lacks facial features or precise anatomy.
When you look at a pose, ask yourself what the pose is doing rather than what the person looks like. Is it reaching, twisting, falling, standing tall? Capture that action and let the specific details of the model become secondary.
Break Things into Recognizable Shapes
Your brain looks for patterns and familiar shapes. Use this to your advantage by breaking the body into basic geometric forms. The head becomes an oval. The torso becomes a cylinder or rounded rectangle. Limbs become tubes with joints at the elbows and knees.
Do not try to draw what you know about anatomy. Instead, draw what you see as shapes fitting together. This approach speeds up your drawing because you are not fighting against your knowledge of the human form.
Mediums and Materials for Gesture Drawing
You do not need expensive materials to practice gesture drawing. The right tools depend on your preferences and the level of control you want. Here are the most common options artists use.
Graphite Pencils
Standard pencils work well for gesture drawing. A 2B or 4B pencil gives you enough darkness to see your strokes clearly while remaining easy to erase. Pencils offer control for adding subtle details if needed, though you should resist overworking your drawings.
Charcoal
Charcoal is popular for gesture drawing because it allows bold, expressive strokes. Compressed charcoal produces strong dark lines. Vine charcoal is lighter and easier to erase, making it good for building initial shapes. Charcoal also smudges easily, which can help create soft, flowing transitions between forms.
Pastel Pencils
Pastel pencils combine the control of a pencil with the boldness of pastel. They work well for gesture drawings where you want to add quick color notes. However, pastel can be messy and may not work well in sketchbooks you want to keep clean.
Sketchbook Choice
Use a sketchbook with paper that can handle your chosen medium. For graphite and charcoal, any quality drawing paper works. If you use wet media likeMarkers, choose paper specifically designed for them. Many artists prefer spiral-bound sketchbooks for the ability to fold pages flat.
Size matters more than you might expect. Larger sketchbooks encourage bigger, bolder gestures. A minimum size of 9 by 12 inches is recommended for practice work. If you can work larger, do so.
Practice Exercises for Beginners
Understanding the theory is not enough. You need structured practice to develop your gesture drawing skills. These exercises will help you build a solid foundation.
Exercise One: Thirty-Second Bursts
Find a timer and set it for thirty seconds. Look at your subject and immediately start drawing. Do not think, just respond to what you see. Your goal is to capture the line of action and the major flow of the pose in those thirty seconds.
Do five of these in a row. Then review your drawings. Which ones feel the most alive and dynamic? What do they have in common? Use this feedback to guide your next round of practice.
Exercise Two: Two-Minute Build-Up
Set your timer for two minutes. Start with a thirty-second sketch to capture the essential movement. Then use the remaining time to add slightly more structure. Do not try to render details. Instead, focus on refining the flow and proportions.
Two-minute poses let you experiment with slightly more observation while maintaining the loose, gestural quality. Use this timing to practice finding the line of action quickly.
Exercise Three: Five-Minute Exploration
Five minutes might sound like a long time after working in thirty-second increments. Use this time to explore the pose more thoroughly. Try to understand the rhythm of the body and how different parts connect.
At five minutes, you can start thinking about weight distribution and the balance of the pose. Where is the weight falling? How would this body feel if it were standing on one leg or leaning forward?
Exercise Four: The Four-Eight-Eight Method
This timing structure appears in many drawing communities. Work in four-minute, eight-minute, and eight-minute blocks. The first four minutes should be quick and loose, capturing the essential movement. The next eight minutes add structure and refinement. The final eight minutes focus on understanding the pose deeply.
This method works well for artists who want to bridge the gap between quick gesture drawing and longer studies. It trains both speed and depth of observation.
Exercise Five: Self-Posing Practice
Stand in front of a mirror and adopt a pose. Study it for a moment, then close your eyes and try to feel the line of action running through your body. Open your eyes and capture that feeling in a quick drawing. This exercise builds the connection between physical experience and visual representation.
After drawing from a mirror pose, try drawing from memory. This trains your ability to capture essential movement without relying on constant reference.
Common Mistakes to Avoid
Every artist encounters the same obstacles when learning gesture drawing. Knowing what to avoid will save you time and frustration in your practice.
Trying to Draw Too Much Detail
The most common mistake is attempting to render features or anatomy during short timed poses. When you have thirty seconds, you cannot add eyes, fingers, or clothing details. Focus on the line of action and major contours. Details will come in longer poses.
If you catch yourself adding details in a thirty-second pose, stop and ask yourself what you are trying to capture. Are you recording the pose or trying to finish a drawing? The distinction matters.
Drawing Stiff, Tense Lines
If your lines feel stiff and tense, you are likely gripping your pencil too tightly or using only your wrist. Loosen your grip and move from the shoulder. Your strokes should flow smoothly across the page.
Practice making marks without worrying about their accuracy. Speed naturally loosens your grip. When you are working quickly, you cannot afford to be precious about each mark.
Losing the Big Picture
It is easy to get lost in one part of the body and forget the rest. You start drawing a hand and suddenly your whole drawing revolves around that one element. This happens when you lose sight of the overall flow of the pose.
Keep the line of action visible in your mind. Before adding each element, check how it relates to the main flow. If you find yourself obsessed with one detail, step back and redraw the whole pose from the beginning.
Not Starting with the Line of Action
Some artists start by drawing the head or hands, which are naturally attention-grabbing. This approach leads to disconnected drawings where individual parts do not relate to the whole. Always begin with the line of action and build outward from there.
Comparing Yourself to Others
When you look at gesture drawings online, you might feel discouraged by how polished some of them appear. Remember that those artists spent years developing their skills. Your early gesture drawings will look rough, and that is fine. The goal is to capture movement, not to create museum-quality art.
Every skilled gesture artist made thousands of imperfect drawings before reaching their current level. Embrace the process and trust that each drawing builds your abilities.
Skipping the Warm-Up
If you are practicing figure drawing, do not skip gesture drawing as a warm-up. Even ten minutes of quick gestures prepares your hand and eye for more detailed work. Many artists report that their finished drawings improve significantly after a gesture drawing warm-up.
FAQs
How to gesture draw for beginners?
Start with short timed poses of 30 seconds to 2 minutes. Focus on capturing the line of action using long, flowing strokes from your shoulder. Use S and C curves to represent the major movement of the pose. Draw big and bold on your entire page. Remember that you are recording the pose, not adding details. Practice daily and do not compare your early work to others.
What is the 4 8 8 method of drawing?
The 4-8-8 method involves working in timed blocks: a 4-minute pose, an 8-minute pose, and another 8-minute pose. The first 4 minutes should capture the essential movement loosely. The next 8 minutes add structure and refinement. The final 8 minutes allow for deeper exploration of the pose. This method bridges quick gesture drawing with longer studies.
What are the 7 main techniques in drawing?
The seven main techniques include: contour drawing, cross-hatching, hatching, stippling, smudging or blending, wash technique, and gesture drawing. Each serves a different purpose in building observational skills and creating visual interest. Gesture drawing specifically focuses on capturing movement and energy quickly.
What are common gesture drawing mistakes?
Common mistakes include trying to add too much detail in short poses, drawing with stiff tense lines instead of loose strokes, losing sight of the overall pose while focusing on one element, starting with details instead of the line of action, comparing yourself to experienced artists, and skipping gesture drawing as a warm-up exercise.
Conclusion
The basics of gesture drawing form the foundation of strong figure work. This practice builds hand-eye coordination, teaches you to see movement, and loosens up your artistic style. Whether you are just starting or looking to refine your skills, gesture drawing offers something valuable at every level.
Start your practice today with thirty-second poses. Focus on finding the line of action and capturing it with bold, flowing strokes. Use your shoulder, not your wrist. Draw big and embrace the energy of each pose. Over time, you will find that your gesture drawings become more alive and your understanding of the human form deepens.
Remember that every master artist started exactly where you are now. Each imperfect gesture drawing builds your skills and develops your eye. The key is consistency. Make gesture drawing a daily practice and watch how it transforms your art.