
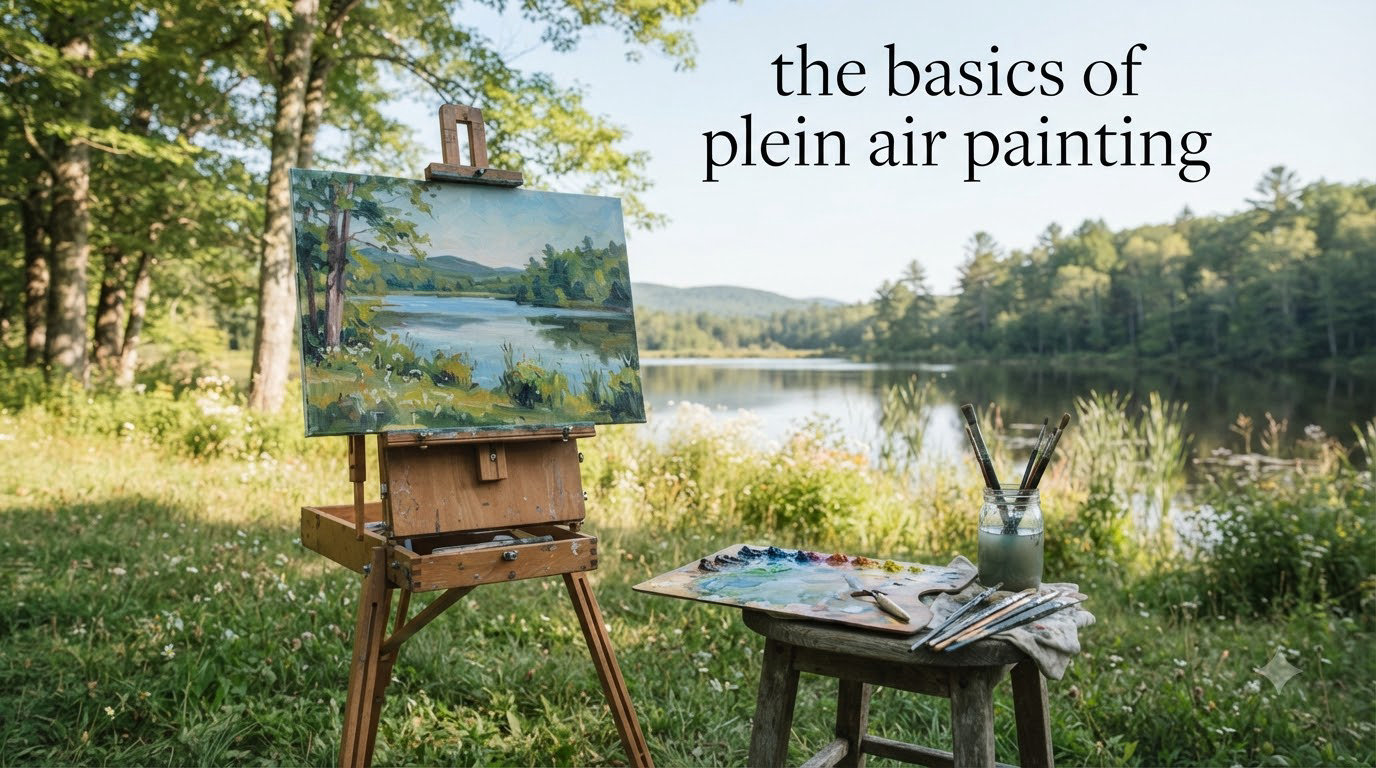
There is something deeply satisfying about setting up an easel on a hillside and painting what you see right in front of you. Plein air painting is the practice of creating art outdoors, directly from nature, capturing light, color, and atmosphere as they exist in real time. For nearly two centuries, artists have been heading outside to do exactly this, and the movement is only growing stronger in 2026.
The basics of plein air painting come down to a handful of core ideas: portable equipment, a limited palette, quick decision-making, and a willingness to embrace imperfection. Whether you have been painting in a studio for years or you are picking up a brush for the first time, working outdoors changes the way you see. This guide walks through everything you need to know to get started.
We will cover the history behind the movement, the supplies that actually matter, a step-by-step process for your first session, the key techniques experienced painters rely on, and honest advice about the challenges you will face. By the end, you will have a clear roadmap for your first outdoor painting session.
Table of Contents
What Is Plein Air Painting?
Plein air painting is the act of painting outdoors, working directly from the landscape or scene in front of you rather than from a photograph or memory. The term comes from the French expression en plein air, which translates simply to “in the open air.” It describes both a method and a philosophy — the idea that painting from direct observation produces work that is more alive, more truthful, and more connected to the moment than anything created from a secondhand reference.
When you paint outside, you observe colors, values, and atmospheric effects that no camera can fully capture. The warmth of morning light on a stone wall, the subtle violet in a distant ridge, the way shadows cool as clouds pass over — these are the moments plein air painters chase. You cannot get them from a photograph because cameras compress the dynamic range of a scene into a narrow band of values, losing the temperature shifts that make a landscape feel real.
Plein air work differs from studio painting in one fundamental way: the clock is always ticking. Light changes, weather shifts, and shadows crawl across the landscape at a pace that forces you to work decisively. That time pressure is exactly what makes it such powerful training. You learn to simplify, to commit to your brushstrokes, and to capture the essence of a scene rather than every detail.
A Brief History of Plein Air Painting
For centuries, painters created landscape studies outdoors but finished their major works inside the studio. Limited by cumbersome materials, artists carried pigments in animal bladders and mixed their own paints by hand — not exactly portable. The concept of finishing a painting entirely outdoors was impractical for most of art history.
Everything changed in 1841 when American portrait painter John G. Rand invented the collapsible tin paint tube. Suddenly, artists could carry pre-mixed oil paints into the countryside, squeeze out exactly what they needed, and paint for hours without returning to the studio. This invention was as transformative to painting as the digital camera would later be to photography. The paint tube made plein air painting accessible to anyone willing to carry a box of supplies into the field.
The Barbizon School in France was among the first to seize on this freedom. Painters like Jean-Baptiste-Camille Corot and Theodore Rousseau set up in the Forest of Fontainebleau, painting directly from nature to capture tonal relationships and atmosphere rather than idealized, academic compositions. Their work emphasized honest observation over classical perfection, and it laid the groundwork for everything that followed.
Then came the Impressionists. Claude Monet, Pierre-Auguste Renoir, and Camille Pissarro pushed plein air painting into the mainstream of art history. Monet famously set up multiple canvases at once, rotating between them as the light changed throughout the day. His haystacks and Rouen Cathedral series were direct products of working outdoors at specific times, capturing the same subject under different lighting conditions. The Impressionists proved that painting from life was not just a study method — it was a complete artistic philosophy.
The practice has only grown since. Today, plein air events and competitions draw thousands of artists worldwide. Organizations like the Plein Air Painters of America host annual gatherings, and regional festivals take place in nearly every state. Online communities share tips and organize outings, and local painting groups meet weekly in parks and natural areas. What started as a French rebellion against academic painting has become one of the most popular ways to develop as an artist in 2026.
Why Paint Outdoors? The Benefits of Plein Air
The most obvious reason to paint outdoors is that nature offers an infinite supply of subject matter. But the benefits go much deeper than having interesting things to paint. Plein air work develops skills that transfer directly to every other kind of painting you do.
Photographs flatten everything. A camera compresses the dynamic range of a scene into a narrow band of values, losing the subtle temperature shifts that make a landscape feel alive. When you stand in front of a mountain at golden hour, your eyes perceive color relationships that no sensor can record accurately. Painting from life trains your eye to see those relationships in real time.
After even a few sessions outdoors, you will notice your studio work improving because your color memory gets sharper. You learn what “warm light, cool shadows” actually looks like rather than guessing from a photo reference. You start to understand why a shadow is not just darker — it is a different temperature entirely, often cool blue or violet where the warm sunlight hits adjacent surfaces.
The time constraint is another hidden benefit. In the studio, it is easy to overwork a painting for hours, noodling details until the life drains out of it. Outdoors, you have roughly two hours before the light changes enough to make your initial observations irrelevant. That deadline teaches you to commit to brushstrokes and move on. Painters who work outdoors regularly develop a decisiveness that shows up in all their work.
There is also the simple pleasure of being outside. Many painters describe plein air sessions as a form of meditation. You become hyper-aware of your surroundings — the temperature, the wind direction, the sounds of birds or traffic. It is a fully immersive creative experience that studio work cannot replicate. Several members of the plein air community on forums describe it as therapeutic, a way to disconnect from screens and reconnect with the physical world.
Finally, painting from nature develops your compositional eye. When you stand in a landscape, you choose what to include and what to leave out. That selective vision — deciding what matters and what is noise — is one of the most valuable skills an artist can build. No photograph makes those decisions for you when you are standing in front of the real thing.
Essential Plein Air Painting Supplies
One of the biggest mistakes beginners make is bringing too much gear. Every ounce matters when you are carrying equipment to a painting spot, sometimes over rough terrain or up a hillside. The best approach is to start with the essentials and add items only as you discover you actually need them on multiple outings.
Easels and Pochade Boxes
Your easel is the centerpiece of your outdoor setup. There are three main types to consider, and each has tradeoffs between weight, stability, and capacity.
A French easel is the classic full-size outdoor easel. It holds large canvases, has built-in storage for supplies, and folds into a single unit you can carry by a handle. The downside is weight — most weigh between 10 and 15 pounds, which gets heavy on long walks. French easels work well if you plan to paint close to your car.
A pochade box is a compact wooden box that holds a palette inside the lid and a painting surface on the outside. Many attach directly to a standard camera tripod, making them lighter and faster to set up than a French easel. Pochade boxes typically handle panels up to 12×16 inches. They are the most popular choice among experienced plein air painters because they balance portability with enough workspace to paint comfortably.
A field easel is a lightweight tripod-style easel with minimal storage. It is the lightest option but requires you to carry your palette and supplies separately. This works well for painters who like to keep their palette in one hand and their brush in the other.
For most beginners, a pochade box mounted on a sturdy tripod offers the best balance of portability and functionality. You can always upgrade later once you understand your own preferences.
Paints and a Limited Palette
Resist the urge to bring every color you own. A limited palette of 5 to 7 colors forces you to mix everything you need, which actually improves your color-mixing skills faster than having 20 tubes at your disposal. It also means less weight to carry and less time spent searching for the right tube.
A solid basic palette might include: ultramarine blue, burnt sienna, cadmium yellow light, alizarin crimson, titanium white, and yellow ochre. From these six tubes, you can mix an enormous range of landscape colors. Ultramarine and burnt sienna alone give you beautiful warm and cool grays, and adding cadmium yellow light lets you mix a wide spectrum of greens.
Oils are the most popular plein air medium because they stay wet long enough to blend on location and they handle the alla prima technique well. Watercolors are a close second and have the advantage of being lighter and faster to clean up. Acrylics work too, though they dry quickly outdoors — a retarder medium can help extend working time. Pastels are another option that requires no drying time at all, making them convenient for travel.
Brushes
Bring fewer brushes than you think you need. Five or six brushes in a mix of flats and filberts will handle most plein air situations. Choose sizes ranging from a relatively large number 8 or 10 down to a number 2 for details. The larger brushes help you lay in big shapes quickly, which is the foundation of good plein air work.
Long-handled brushes help you step back from the easel while you paint, which improves your perspective on the overall composition. Some painters prefer short-handled brushes for the control they offer when working on smaller panels. Try both and see what feels natural.
Painting Surfaces
Canvas panels and gessoed hardboard panels are the standard choice for oil painters working outdoors. They are rigid, lightweight, and fit easily into a wet panel carrier. Pre-primed linen panels offer a beautiful surface but cost more. Many plein air painters cut their own panels from Masonite or birch ply and apply gesso at home to save money.
Watercolorists should use 140-pound or heavier paper, either in a block or taped to a lightweight backing board. A block keeps the paper from buckling without the need for stretching, which is a major convenience in the field. Cold-pressed paper is the most versatile choice for outdoor work.
Other Essentials
Beyond the basics, a few items make outdoor sessions much smoother. A wet panel carrier protects finished oil paintings during transport and is essential if you work in oils. A painting umbrella shades your canvas and palette so you can see accurate colors — without one, sunlight hitting your palette makes every color look brighter than it actually is. A palette — either a wooden one that fits in your pochade box or disposable paper palettes — gives you a surface for mixing.
Do not forget practical items: paper towels or rags for cleanup, a container for solvent or water, a trash bag for waste, sunscreen, a hat with a brim, drinking water, and a folding stool if you prefer to sit while painting. These comfort items matter more than you might expect when you are outside for two or three hours.
Watercolor-Specific Plein Air Gear
Watercolor painters have a lighter load overall, which makes plein air more accessible for beginners who want to start without investing in a full oil painting setup. A travel watercolor set with half pans fits in a pocket. Water brushes that hold water in the handle eliminate the need for a separate water container. A small spray bottle helps keep paints moist on dry days.
If you are looking for portable art supplies for plein air painters, travel watercolor kits make excellent starting points because they are lightweight and self-contained.
Carry a small water container with a lid. A collapsible silicone cup works well because it packs flat when empty. For paper, a 9×12 watercolor block is a good balance between painting area and portability. Tape the block to a lightweight foam core board for a stable surface that also serves as an easel. This simple setup weighs under two pounds and fits in a small shoulder bag.
The Basics of Plein Air Painting: Getting Started in 6 Steps
The transition from studio to outdoors can feel overwhelming. There are more variables — weather, light, terrain, onlookers — and less control over your environment. These six steps walk you through a typical plein air session from arrival to a finished painting, giving you a repeatable process you can follow every time.
Step 1: Choose Your Location and Set Up
Arrive early and spend 10 minutes walking around before you commit to a spot. Look for a scene with a clear focal point, interesting value contrasts, and a comfortable place to stand or sit. Pay attention to where the sun is heading — a spot that is shaded now may be in full sun in 45 minutes. Avoid setting up in direct sunlight if possible, because your canvas and palette will be too bright to judge colors accurately.
Once you pick your spot, set up your easel and arrange your supplies within arm’s reach. Everything should be accessible without stepping away from the easel. Set out your palette with your limited range of colors, position your panels where you can reach them, and make sure your solvent or water container is stable and will not tip over. Organization before you start painting saves frustration later when the clock is ticking.
Step 2: Do a Quick Thumbnail or Notan Study
Before touching paint to canvas, spend 5 minutes sketching a small thumbnail in a sketchbook. Focus on the big shapes and how they divide the picture plane. A notan study — a black-and-white thumbnail that reduces the scene to just two or three values — helps you see whether your composition has a strong underlying design. Notan comes from a Japanese word meaning “light-dark harmony,” and it is one of the most powerful composition tools available to a painter.
This step is easy to skip when the light looks perfect and you want to start painting immediately. Do not skip it. That 5-minute investment will save you from compositions that fall apart halfway through. It also helps you decide on the format of your painting — whether a horizontal, vertical, or square composition best serves the scene.
Step 3: Apply an Imprimatura or Underpainting
An imprimatura is a thin, transparent wash of color applied to the entire painting surface before you begin. It establishes a warm or cool undertone and eliminates the intimidating blank white surface. Burnt sienna thinned with solvent is a classic choice for landscapes because it provides a warm mid-tone that works well under most natural subjects. Yellow ochre is another popular option for scenes dominated by green foliage.
Let the imprimatura dry for a few minutes, or work into it wet if you prefer. Some painters sketch their composition directly into this toned ground using a darker mix of the same color. This underdrawing establishes the placement of major shapes before you commit to color.
Step 4: Block In Your Dark Values and Shadows First
This is one of the most important plein air techniques, and it is one that many beginners overlook. Start by painting the darkest darks and the major shadow shapes. When you establish the full value range early — from your darkest dark to your lightest light — every subsequent color decision becomes easier because you have a reference point on the canvas.
Work from the general to the specific. Block in large shapes first, then refine edges and add details. Many beginners make the mistake of finishing one area completely before moving to the next. This approach leads to mismatched values and a disconnected painting that feels like separate pieces rather than a unified whole.
Step 5: Work From General to Specific
Keep your initial brushwork loose and broad. Use larger brushes than you think you need. Resist the temptation to pick up a small detail brush until the entire canvas is covered with accurate values and colors. The big relationships — the major shapes, the value structure, the overall color harmony — are what make a painting succeed or fail. Details are the last thing you add, not the first.
Step back from your easel every 10 minutes. Physically stepping back 6 to 10 feet gives you a completely different perspective on your painting. Problems with value, proportion, and composition become obvious at a distance that are invisible up close. This habit alone will improve your paintings dramatically.
Step 6: Know When to Stop
Overworking is the most common plein air mistake, and it ruins more paintings than bad drawing ever did. A painting rarely improves after the point where you capture the big relationships of value, color temperature, and shape. When those elements read clearly, stop. Set the painting aside and evaluate it later with fresh eyes.
Some painters set a timer for 90 minutes or 2 hours. When it goes off, they stop regardless of where they are in the process. This constraint keeps the work fresh and prevents the fussy overworking that kills the energy of a plein air piece. Knowing when to stop is a skill that develops with practice, and a timer is a useful training tool while you build that instinct.
Key Plein Air Techniques for Beginners
Understanding a few core techniques will make your outdoor sessions far more productive. These approaches come directly from the traditions of plein air painting and have been refined by generations of working artists. You do not need to master all of them before your first session, but knowing they exist gives you something to work toward.
The Alla Prima Approach
Alla prima means “at first attempt” in Italian. It refers to completing a painting in a single session while the paint is still wet, without letting layers dry between applications. This is the dominant technique for plein air oil painting because outdoor sessions are time-limited by changing light conditions. You simply do not have time to wait for layers to dry.
With alla prima, you apply paint directly, make decisions quickly, and accept that some strokes will be bold and some will be wrong. The energy and spontaneity of this approach is what gives plein air paintings their characteristic freshness. Working wet-on-wet allows you to blend edges on the canvas and create soft transitions that would require glazing in the studio. It rewards confidence and punishes hesitation.
Working With Changing Light
Light outdoors never holds still. A shadow that took 20 minutes to paint may shift by an inch in the time it takes you to mix the next color. This is the central technical challenge of plein air painting, and experienced painters handle it in two specific ways.
First, they lock in the shadow pattern early. The first 20 minutes of a session are for capturing the major shadow shapes before they move. Once the shadows are recorded on canvas, you can fill in the lit areas at a slightly more relaxed pace because the illuminated surfaces change more slowly than the shadow edges.
Second, they commit to a specific moment. If the scene looked best at 9:15 AM, paint that 9:15 moment even if the light has changed by 10:00 AM. Do not keep updating the painting to match the current light. That leads to a confused image that captures no particular time at all. The best plein air paintings freeze a specific moment in light, not an average of two hours of changing conditions.
Simplifying Your Composition
Squint at the scene in front of you. When you squint, details disappear and you see only the major value shapes. This technique — “squint to simplify” — is one of the most valuable habits a plein air painter can develop, and nearly every professional instructor recommends it.
The landscape throws an overwhelming amount of visual information at you. Trees have individual leaves, fields have texture, clouds have complex edges, and water reflects everything around it. Your job is not to copy all of that detail. Your job is to organize the scene into a handful of clear shapes and values that communicate the essence of what you are seeing. If you cannot see the big shapes when you squint, the composition probably needs simplifying.
Eliminate elements that do not support the focal point. Move things around if it makes the design stronger. Combine multiple small shapes into one larger shape. Nature is your reference, not your dictator. The landscape gives you raw material, and your job is to design a painting from it.
Expressive Brushwork
Plein air painting rewards confidence. Bravura brushwork — bold, decisive strokes loaded with paint — gives outdoor paintings their characteristic energy and vitality. Timid, fussy brushwork reads as uncertain, while confident strokes suggest an artist who saw something real and captured it without hesitation.
Practice making each brushstroke count. Load the brush with enough paint to cover the area in one pass, place the stroke, and leave it alone. Repeatedly scrubbing over the same area destroys the freshness that makes plein air work special. If a stroke is wrong, scrape it off and try again rather than piling more paint on top of it.
Varying your brushwork adds visual interest. Use thin, transparent strokes in some areas and thick, opaque impasto in others. Let some edges stay soft and blurred while you sharpen others. This variety creates the sense of energy and movement that distinguishes a painting from a photograph.
Best Time of Day for Plein Air Painting
Timing is one of the most overlooked aspects of painting outdoors. The same location can look completely different at 7:00 AM, noon, and 5:00 PM, and some times are far easier to paint than others. Choosing the right time for your session can make the difference between a rewarding experience and a frustrating one.
Early morning (the first 2 to 3 hours after sunrise) offers long, warm shadows and soft, golden light. This is the favorite time for many plein air painters because the light is beautiful and the temperature is usually comfortable. The shadows are dramatic but not harsh, and the low angle of the sun creates strong value contrasts that are easy to see and paint.
Late afternoon (the last 2 to 3 hours before sunset) provides similar conditions. The light warms up again after cooling through midday, and shadows stretch across the landscape in long, elegant shapes. Afternoon sessions tend to have more predictable weather than mornings, and you can scout your location during the day before setting up.
Midday is the hardest time to paint outdoors. The sun is directly overhead, shadows are short and dark, and the contrast between lit and shadowed areas is extreme. Colors appear washed out, and the harsh light makes it difficult to see subtle value differences on your canvas. Many experienced plein air painters avoid this time entirely or seek out shaded subjects like the interior of a forest or the shadow side of a building.
Overcast days are surprisingly excellent for plein air. The clouds act as a giant diffuser, softening the light and reducing harsh contrasts. Colors appear richer and more saturated under overcast skies, and the even lighting means your shadow pattern stays consistent for much longer than on a sunny day. These are ideal conditions for beginners because the forgiving light gives you more time to work.
Regardless of when you paint, the key principle is this: you have roughly a 2-hour window before the light changes enough to make your reference unreliable. Plan your sessions around that window, and treat every minute of it as valuable.
Common Plein Air Challenges and How to Handle Them
Painting outdoors comes with a unique set of problems that studio painters never face. Knowing what to expect — and having strategies to deal with each issue — makes the difference between a frustrating experience and a rewarding one. Every challenge listed here is something experienced painters have dealt with and found solutions for.
Weather Unpredictability
Wind is the number one outdoor painting complaint across every forum and community. A gust can knock over an easel, send a palette flying, or blow your painting face-first into the dirt. Weight your easel by hanging your bag or a rock from the center column. Use bungee cords to secure panels to the easel. On very windy days, set up behind a natural windbreak like a wall, hedge, or your parked car. If the wind is too strong to manage, pack up and try another day — fighting the wind all session is not worth the frustration.
Rain can ruin a session — or it can create the most atmospheric painting you have ever made. Carry a large plastic bag that can cover your easel and painting in seconds. Some painters keep working in light rain with their canvas angled slightly downward so water runs off the bottom edge. If you work in watercolors, light rain can actually create interesting wet-on-wet effects that are impossible to achieve in the studio.
Temperature extremes affect your materials. In cold weather, oil paint stiffens and takes longer to dry, which can actually be an advantage for alla prima work. In extreme heat, paint becomes runny and difficult to control, and watercolors dry almost instantly on the paper. Dress in layers and plan shorter sessions when temperatures are at their worst. Always bring more water than you think you need on hot days.
Changing Light Conditions
This is the central challenge of plein air painting, and it never fully goes away. As discussed in the techniques section, the solution is to commit to a specific lighting moment and paint it quickly. Do not chase the light across the sky. Set up when conditions are right, capture what you see, and trust the process. Over time, you will develop an instinct for how quickly the light is moving and how much time you have left.
Fear of Painting in Public
This barrier stops more beginners than any technical challenge, and it is completely normal. Painting outdoors means people can see you work, and the fear of judgment is real. Members of the plein air painting community on forums like Reddit consistently report that this fear fades quickly with practice, usually after just 3 or 4 sessions.
Start by painting in your backyard or a quiet park where foot traffic is low. Bring a friend who can run interference if someone stops to chat. Wear headphones if you prefer not to engage with onlookers — even if you are not listening to anything, the visual signal discourages interruptions. Most people who stop to watch are genuinely interested and encouraging. They are not art critics; they are just curious about what you are doing.
After a few sessions, most painters report that the anxiety drops significantly. The focus shifts from worrying about who is watching to concentrating on the work itself — mixing the right green, getting the perspective right, capturing the shadow before it moves. The creative process takes over, and the self-consciousness recedes.
Overpacking and Underpacking Gear
Beginners tend to bring everything they own, then arrive at the painting spot exhausted from carrying it all. Experienced painters know exactly what they use and leave the rest at home. Start with a minimal kit: one palette, a handful of brushes, your limited palette of colors, a few panels, and basic cleanup supplies. Add items only after you discover you need them on multiple outings.
Keep a checklist. After each session, note what you used and what you did not touch. Within a few weeks, you will have a personalized packing list that keeps your kit lean and functional. Many experienced painters keep their plein air kit packed and ready to go at all times, which eliminates the barrier of gathering supplies every time they want to paint.
Easel Stability
An easel blowing over mid-session is a devastating moment that most plein air painters experience exactly once before taking prevention seriously. Choose a tripod with spiked feet or rubber tips that grip the ground. Hang weight from the center column to lower the center of gravity. Avoid extending the tripod legs to their maximum height — a lower setup is more stable. On slopes, adjust individual leg lengths to keep the easel plumb. And always set up your easel before laying out your palette and paints, so if it falls, you lose nothing but time.
Tips for Your First Plein Air Painting Session
Your first outdoor session should be about learning the process, not producing a masterpiece. Here are the practical tips that experienced plein air painters wish someone had told them at the beginning. These are the insights that come from hundreds of sessions and countless mistakes.
Practice your setup at home first. Set up your easel in the backyard or living room. Figure out where everything goes and how it all fits together. Time yourself. If it takes 20 minutes of fumbling to get ready outdoors, you will lose precious painting time and feel frustrated before you even start. A smooth setup should take under 5 minutes. Practice until it becomes automatic.
Start small. Use 5×7 or 6×8 inch panels for your first few sessions. A small surface is less intimidating, faster to cover, and easier to carry when wet. You can work larger once the process feels comfortable and you understand your own pace. Small paintings also teach you to simplify because there is no room for unnecessary detail.
Pick an easy subject. A single tree, a simple barn, or a stretch of coastline with a clear horizon line. Avoid complex scenes with too many elements fighting for attention. A simple subject painted well is always better than an ambitious scene painted badly. The goal of your first session is to complete the process from setup to finish, not to create a gallery-worthy painting.
Bring a friend. Having someone nearby — even a non-painter reading a book on a bench — takes the edge off the vulnerability of working in public. Many plein air painters say their first few group outings were the turning point in overcoming their fear of painting outdoors. The community aspect of plein air is one of its greatest strengths.
Embrace the learning curve. Your first 10 plein air paintings will probably disappoint you. That is normal, and every experienced outdoor painter went through the same phase. The improvement happens fast if you keep going. By session 15 or 20, you will see a noticeable jump in your ability to capture a scene quickly and accurately. The artists who succeed at plein air are not the ones with the most talent — they are the ones who kept showing up.
Find local painting groups. Search online for plein air groups in your area. Facebook groups, Meetup.com, and local art centers often organize weekly outings. Painting with others provides motivation, accountability, and a support network of artists who understand the specific challenges of outdoor work. It is also the fastest way to learn, because you can watch how other painters approach the same scene.
Take care of yourself. Bring water, snacks, sunscreen, and a hat. Dehydration and sunburn will end a session faster than any artistic challenge. Comfortable shoes matter more than you think when you are standing for 2 hours on uneven ground. A small foam pad to stand on can save your back during long sessions. Treat yourself well and the painting will take care of itself.
Take reference photos. Snap a few photos of your scene at the start of your session. These give you a record of the lighting conditions you were working from, which is useful if you want to finish the painting later in the studio. Just remember: the photo is a supplement, not a replacement for direct observation. The real value of plein air is in painting from life, not in creating a more polished version of a photograph.
Frequently Asked Questions
What supplies do I need for plein air painting?
You need a portable easel or pochade box, a limited palette of 5 to 7 oil or watercolor paints, 5 to 6 brushes in various sizes, painting panels or watercolor paper, a palette for mixing, solvent or water container, paper towels, and a wet panel carrier for finished work. Add sunscreen, water, and a hat for personal comfort. A pochade box on a camera tripod is the most popular beginner setup.
How do I get started with plein air painting?
Start by practicing your equipment setup at home until you can do it in under 5 minutes. Choose a simple subject like a single tree or small building. Arrive early, do a quick thumbnail sketch to plan your composition, apply a thin imprimatura wash, block in dark values and shadows first, then work from general shapes to specific details. Limit your first session to 90 minutes and use small 5×7 or 6×8 panels.
What is the best time of day to paint outdoors?
The best times are early morning (the first 2 to 3 hours after sunrise) and late afternoon (the last 2 to 3 hours before sunset). These golden hours offer warm, directional light with long, dramatic shadows. Overcast days are also excellent because the diffused light keeps colors saturated and shadows consistent for longer periods. Avoid midday when possible due to harsh overhead light and extreme contrast.
How do I overcome my fear of painting outdoors?
Start in low-traffic locations like your backyard or a quiet park where few people pass by. Bring a friend for support and company. Wear headphones if you prefer not to engage with onlookers. Join a local plein air painting group for safety in numbers and mutual encouragement. Most painters report that the anxiety drops significantly after 3 to 4 sessions as your focus shifts to the creative work itself.
What is the Alla Prima approach in plein air painting?
Alla prima is an Italian term meaning ‘at first attempt.’ It refers to completing a painting in a single session while the paint is still wet, without waiting for layers to dry between applications. This is the standard technique for plein air painting because outdoor sessions are time-limited by changing light conditions. It produces fresh, energetic work with bold brushwork and rewards confident, decisive painting.
Conclusion
The basics of plein air painting come down to preparation, observation, and practice. Pack light, work fast, and focus on capturing the big relationships of value and color rather than chasing details. Choose your time of day carefully, start with simple subjects, and do not let the fear of a bad painting keep you from setting up outdoors. Every experienced plein air painter started exactly where you are now.
Your first few sessions will teach you more about painting than weeks of studio work. The light will change faster than you expect, the wind will test your patience, and your first painting will probably not hang in a gallery. But you will have started something that artists have found rewarding for nearly 200 years — the practice of standing in front of nature and translating what you see into paint.
Find a local painting group, pack your easel, and get outside this week. The landscape is waiting, and the best way to learn the basics of plein air painting is simply to begin.