
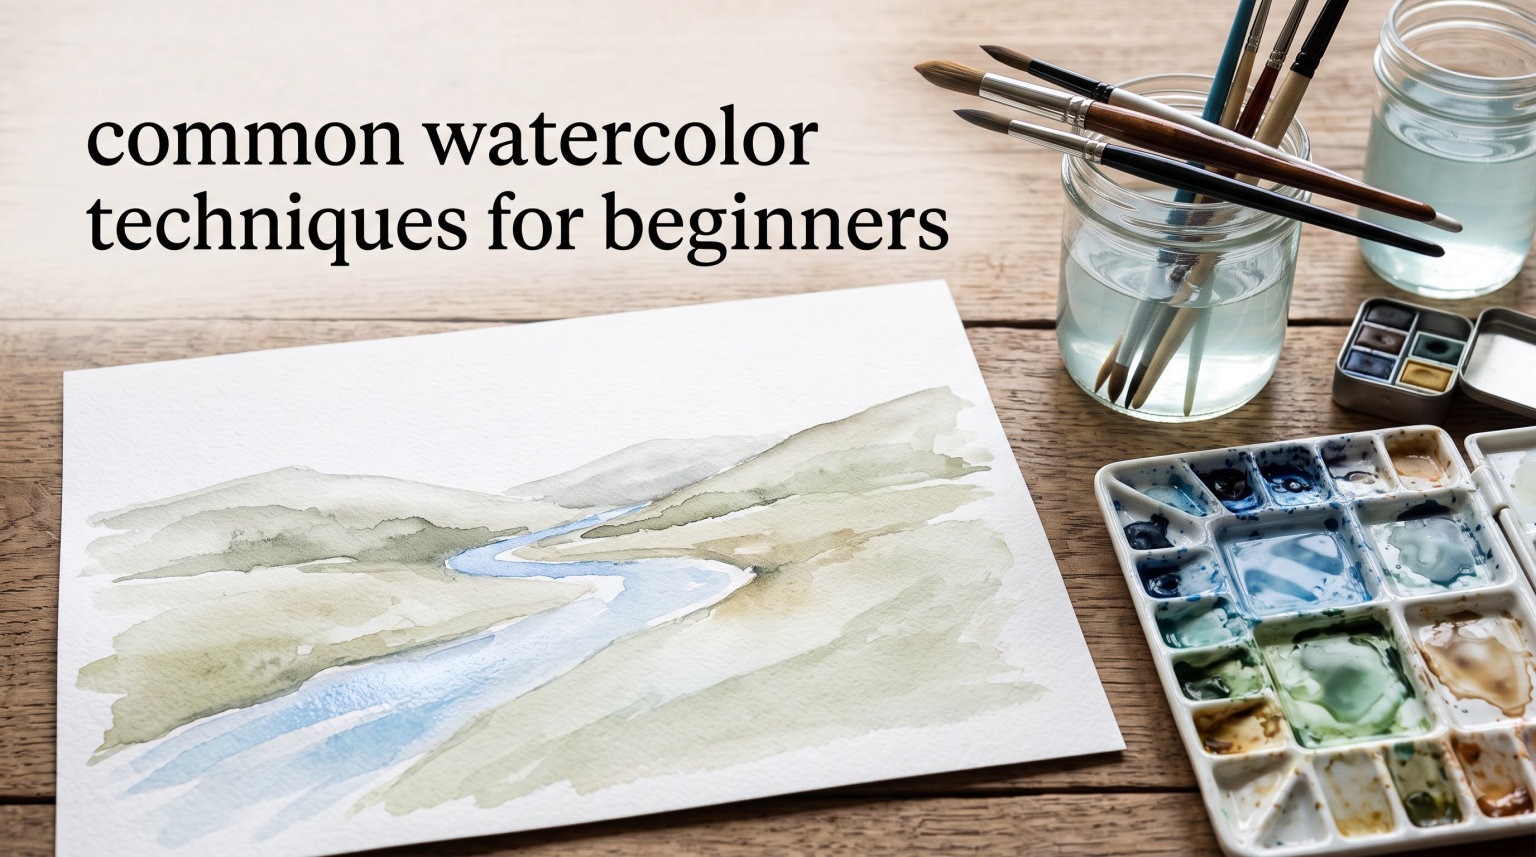
Learning common watercolor techniques for beginners opens up an entire world of creative expression that feels surprisingly approachable once you understand the basics. I have spent years experimenting with watercolor, and the biggest lesson I learned is this: watercolor rewards curiosity, not perfection. Whether you picked up a paint set yesterday or you have been dabbling for a few weeks, mastering a handful of foundational techniques will transform the way you paint.
In this guide, our team breaks down the eight most important watercolor techniques every beginner should know. We cover wet-on-wet, wet-on-dry, washes, dry brush, glazing, lifting, special effects, and masking, with step-by-step instructions for each one. You will also find a troubleshooting section, practice exercises, and answers to the questions beginners ask most often. If you are looking for supplies to get started, check out our guide to the best gifts for artists for curated recommendations.
Table of Contents
What Is Watercolor Painting?
Watercolor painting uses pigments suspended in a water-soluble binder, applied to paper with a brush. The water acts as both the vehicle and the medium, carrying pigment across the surface and creating the transparent, luminous layers that make watercolor so distinctive. Unlike acrylic or oil paint, watercolor relies on the white of the paper for its highlights rather than adding white pigment.
This transparency is what gives watercolor its signature glow. Each layer of paint lets the paper and previous layers show through, building depth and luminosity that feels almost impossible to achieve with opaque mediums. That is also what makes watercolor feel intimidating at first, because you cannot easily cover up mistakes the way you can with acrylics.
But here is the good news: once you understand how water and pigment interact on paper, that unpredictability becomes one of watercolor’s greatest strengths. The happy accidents, soft blooms, and unexpected textures are features, not flaws.
Essential Watercolor Supplies for Beginners
You do not need a massive collection of supplies to start painting with watercolor. A few well-chosen materials go a long way. Here is what our team recommends for anyone just getting started.
Watercolor paints: Choose between pan sets (solid blocks of paint you activate with water) and tube paints (squeezed onto a palette). Pan sets are portable and great for beginners. Tube paints offer more vivid color and are easier to mix in larger quantities. Student-grade paints from brands like Winsor and Newton Cotman or Sakura Koi are perfectly fine for learning the best watercolor supplies without a big investment.
Brushes: Start with three brushes: a medium round brush (size 8 or 10) for most painting, a small round brush (size 2 or 4) for details, and a flat brush (3/4 inch) for washes. Synthetic brushes hold up well and cost less than natural hair.
Paper: This is where you should not skimp. Use watercolor paper that is at least 140 lb (300 gsm) weight. Cold press paper has a slight texture that holds water well and is the most versatile choice for beginners. Hot press paper is smoother and better for fine details. Avoid regular printer paper because it will buckle and pill as soon as it gets wet.
Additional supplies: A palette with wells for mixing colors, two water containers (one for rinsing, one for clean water), masking fluid for preserving white areas, a spray bottle, paper towels, and a pencil for light sketching. That is the complete starter kit.
Setting Up Your Watercolor Workspace
A well-organized workspace makes painting more enjoyable and helps you avoid common frustrations. Here is how our team sets up for a painting session.
Prop your paper at a slight angle, about 15 to 30 degrees, using a board or an easel. This tilt lets gravity pull your washes downward in a controlled way and prevents puddles from pooling on the surface. Tape your paper down on all four sides with painter’s tape or masking tape to keep it flat and create clean borders.
Use the two-jar water system: one jar for rinsing your brush between colors, and one jar with clean water for mixing fresh paint and wetting your paper. Swap the rinse water when it gets murky. Keep your palette within arm’s reach on the same side as your dominant hand, and position your paper towel nearby for blotting your brush or lifting paint.
Good lighting matters more than most beginners realize. Natural daylight is ideal, but if you paint indoors, use a daylight-spectrum lamp so you can see accurate colors as you work.
The 8 Common Watercolor Techniques for Beginners
Here are the eight foundational watercolor techniques every beginner should learn first:
- Wet-on-Wet – Apply wet paint onto already-wet paper for soft, flowing blends
- Wet-on-Dry – Apply wet paint onto dry paper for crisp, controlled edges
- Flat Wash – Cover an area with an even layer of one color
- Graded Wash – Create a smooth transition from dark to light
- Variegated Wash – Blend two or more colors in a single wash
- Dry Brush – Use a barely-wet brush for textured, scratchy strokes
- Glazing – Layer transparent washes on top of dried paint to build depth
- Lifting and Blending – Remove or soften paint with a damp brush or tissue
Each technique below includes step-by-step instructions so you can start practicing immediately.
1. Wet-on-Wet Technique
Wet-on-wet is the technique that makes watercolor look like watercolor. You apply wet paint to paper that has already been soaked with clean water, and the pigment flows and blooms across the surface in soft, unpredictable patterns. This technique produces the dreamy, atmospheric effects that watercolor is famous for.
Step-by-step:
- Use a clean, wet brush to apply clear water evenly across the area you want to paint. The paper should glisten but not have standing puddles.
- Load your brush with plenty of pigment from your palette. Use a generous amount of paint relative to water for visible color.
- Touch the loaded brush to the wet paper. Watch the pigment spread outward in soft, feathery edges.
- Add a second color while the paper is still wet and watch the two pigments blend together naturally.
- Leave the paper flat and let it dry completely without disturbing it.
Best uses: Skies and clouds, soft backgrounds, atmospheric landscapes, water reflections, and any area where you want gentle color transitions.
Common mistakes: Using too much water turns everything into a muddy puddle. If water pools on the surface, dab it lightly with a paper towel. If the paper looks dry before you add paint, you waited too long. Wet-on-wet requires speed and confidence, so work quickly once you wet the paper.
2. Wet-on-Dry Technique
Wet-on-dry gives you the control that wet-on-wet does not. You apply wet paint directly onto dry paper, and the pigment stays exactly where you put it with crisp, defined edges. This is the technique you reach for when you want precision, sharp details, and clean shapes.
Step-by-step:
- Make sure your paper is completely dry. Any moisture on the surface will cause the paint to spread unexpectedly.
- Load your brush with paint at the consistency you want. More water creates lighter, more transparent strokes. Less water gives richer, more opaque coverage.
- Paint directly onto the dry paper with deliberate strokes. The paint will stay within the boundaries of your brush mark.
- For softer edges, lightly dampen just the edge of your stroke with a clean wet brush before the paint dries.
- Let each stroke dry completely before adding adjacent strokes if you want to keep them separate.
Best uses: Detailed work, defined shapes, outlines, lettering, botanical illustrations, and any area where you need precise control.
Wet-on-wet vs. wet-on-dry: The key difference comes down to moisture. Wet-on-wet produces soft, diffused edges because the pigment spreads through the water already on the paper. Wet-on-dry produces hard, crisp edges because dry paper absorbs the pigment immediately without letting it travel. Most watercolor paintings use both techniques together, wet-on-wet for soft backgrounds and wet-on-dry for sharp foreground details.
3. Mastering Watercolor Washes
Washes are the foundation of almost every watercolor painting. A wash is a broad area of color applied in a thin, even layer. Mastering three types of washes, flat, graded, and variegated, gives you the tools to paint skies, backgrounds, and base layers with confidence.
Flat Wash
A flat wash covers an area with a single, even tone from edge to edge. The goal is uniform color with no streaks, puddles, or variation in darkness. This is harder than it sounds because watercolor wants to do unexpected things.
How to paint a flat wash:
- Mix enough paint in your palette to cover the entire area. Running out of paint mid-wash causes streaks and uneven patches.
- Load your flat or large round brush generously with the mixed color.
- Start at the top of the area and paint a horizontal stripe all the way across. A bead of liquid should form along the bottom edge of your stroke.
- Make your next stroke immediately below, slightly overlapping the first one. Pick up the bead of liquid from the previous stroke as you go.
- Continue down the page, maintaining an even bead of liquid at the bottom of each stroke.
- At the bottom, use a dry brush to absorb the final bead of liquid so it does not backrun into your wash.
Work quickly and do not go back over areas you have already painted. The most common cause of a patchy flat wash is touching up areas that have started to dry.
Graded Wash (Gradient Wash)
A graded wash transitions smoothly from dark at the top to light at the bottom, or vice versa. This technique is essential for painting skies, sunsets, and any surface that needs a gradual shift in value.
How to paint a graded wash:
- Start with strong, saturated paint at the top of the area. Paint a horizontal stripe across.
- For the next stroke, dilute your paint slightly with more water. Pick up the bead from the previous stroke and pull it down.
- Continue adding more water to your brush with each successive stroke. The color should get progressively lighter.
- By the time you reach the bottom, your brush should be nearly clear water for the lightest value.
- Let the wash dry completely flat and undisturbed.
Variegated Wash
A variegated wash blends two or more colors within a single wash area. This creates beautiful, multi-colored transitions that look like sunset skies or reflected water surfaces.
How to paint a variegated wash:
- Start with your first color at one end of the paper, painting a horizontal stripe across.
- As you work toward the center, introduce your second color by loading your brush and blending it into the wet edge of the first color.
- The two colors will merge and blend naturally where they meet. You can tilt the paper slightly to encourage blending.
- For a third color, introduce it at the far end in the same way.
- Let everything dry flat. Do not fiddle with the transitions.
The secret to all three wash types is speed. Work quickly so each stroke blends into the previous one while both are still wet. If you hesitate and the paint begins to dry, you will see hard lines and streaks.
4. Dry Brush Technique
Dry brush is exactly what it sounds like: you use a brush with very little water and a concentrated load of pigment to create textured, scratchy strokes on dry paper. The paint catches on the raised texture of the paper and skips across the surface, leaving broken, organic marks.
How to use dry brush:
- Load your brush with pigment, then blot it firmly on a paper towel to remove most of the moisture. The brush should feel damp, not dripping.
- Hold the brush at a low angle, almost parallel to the paper, and drag the side of the bristles across the surface.
- Use quick, light strokes. Let the texture of the paper create the broken, textured effect.
Best uses: Tree bark, grass, rocks, fur texture, weathered wood, clouds, and any rough or organic surface. Dry brush adds instant visual interest and tactile quality to a painting.
Common mistake: If your brush is too wet, the paint will spread and fill in the paper texture, defeating the purpose. Press the bristles firmly against the paper towel until only a faint trace of color comes off when you brush across a scrap piece of paper.
5. Glazing (Layering Transparent Color)
Glazing means painting a thin, transparent layer of color over an area that has already dried completely. Each layer changes the appearance of the layers beneath it without covering them up, creating richness and depth that a single layer of paint cannot achieve.
How to glaze:
- Paint your first layer and let it dry completely. This is non-negotiable. If the underlayer is even slightly damp, the fresh paint will disturb it and create blotches.
- Mix a thin, watery wash of your glazing color. The more water you add, the more transparent the glaze will be.
- Apply the glaze gently with soft, even strokes. Avoid scrubbing or going over the same area repeatedly.
- Let the glaze dry before adding another layer.
The light-to-dark principle is central to watercolor, and glazing is how you execute it. Start with your lightest values and build up to darker ones through successive layers. Most watercolor paintings use three to five glazing layers. Going beyond seven or eight layers risks muddying the colors and damaging the paper surface.
6. Lifting and Blending
Lifting and blending are correction and refinement techniques that every beginner should learn early. They give you the ability to fix mistakes, create soft transitions, and add highlights after paint has been applied.
Lifting Paint
Lifting means removing paint from the paper to lighten an area or create a highlight. You can lift paint while it is still wet or after it has dried, though wet lifting is easier and more effective.
Wet lifting: Use a clean, damp brush or a paper towel to gently blot or stroke the wet paint. The pigment lifts off the paper and onto your brush or towel. Rotate to a clean section of towel between each blot.
Dry lifting: Wet the area with clean water, wait a few seconds for the pigment to reactivate, then blot with a paper towel or scrub very gently with a stiff brush. This works best on non-staining pigments.
Blending Colors
Blending in watercolor means creating a smooth transition between two colors with no hard line where they meet. The easiest method is to paint the first color, then while it is still wet, introduce the second color at the edge and let the two merge on the paper. Tilt the paper slightly if you want gravity to help the blend.
Charging
Charging is a technique where you drop concentrated pigment into an area of wet paint or wet paper. The fresh pigment pushes into the existing wash and creates dynamic, flowing patterns. To charge, load your brush with rich pigment and touch it to the wet surface. Do not stir or push, just touch and let the water do the work.
7. Fun Special Effects (Salt, Alcohol, and Splatter)
Special effects add texture and spontaneity to watercolor paintings. These techniques are fun to experiment with and produce results that are difficult, if not impossible, to achieve with a brush alone.
Salt Texture
Sprinkle table salt or sea salt onto wet watercolor wash. The salt absorbs water and pigment, creating starburst or crystal-like patterns as the paint dries. Larger salt crystals produce bigger, more dramatic textures. Apply the salt while the wash is still wet but no longer shiny, then let it dry completely before brushing the salt off.
Rubbing Alcohol Drops
Drop rubbing alcohol onto a wet wash using a brush or cotton swab. The alcohol repels the water and pushes the pigment away, creating light, circular bubbles on the surface. This works beautifully for creating underwater textures, bokeh effects, or abstract backgrounds. Apply the drops quickly before the wash dries for the most dramatic effect.
Splatter Technique
Load your brush with watery paint and tap it against your finger or another brush to splatter droplets across the paper. This creates an energetic, spontaneous texture perfect for snow, stars, sand, or abstract effects. Protect areas you do not want splattered with scrap paper or masking fluid.
8. Masking and Resist Techniques
Masking lets you preserve white areas of your paper while you paint around them. This is especially important in watercolor because you cannot paint white over dark areas the way you can with other mediums.
Masking Fluid
Masking fluid is a liquid rubber compound that you apply to the paper before painting. Once it dries, it forms a waterproof barrier that repels paint. After your painting is finished and dry, rub the masking fluid off with your finger or a rubber cement pickup to reveal clean white paper underneath.
Tips for clean masking: Use an old brush or a silicon tool to apply masking fluid because it ruins brushes. Apply it to dry paper only. Remove it as soon as your painting is dry, because masking fluid left on paper for days can become permanent. Pull slowly and gently to avoid tearing the paper surface.
Wax Crayon Resist
Draw on your paper with a white crayon before painting. The wax repels the watercolor, and your drawn lines will stay white while the paint covers everything else. This is a simple, effective technique for creating highlights, line patterns, or textured effects. It works especially well for snow scenes, flower veins, and abstract designs.
Common Watercolor Mistakes and How to Fix Them
Every watercolor beginner runs into the same set of frustrations. Understanding what causes these problems and how to fix them will save you hours of aggravation. Our team has made every one of these mistakes, so you are in good company.
Patchy, uneven washes: This almost always happens because you went back over an area that had started to dry. The fix is to work faster, mix more paint than you think you need, and resist the urge to touch up areas that are drying. If a wash dries patchy, the best fix is to glaze a thin, even layer over the top to smooth out the variation.
Blooms and backruns: Those cauliflower-shaped blotches appear when you add wet paint to an area that is partially dry. The fresh water pushes into the drying paint and creates a visible bloom. Prevention is the best cure: only add paint to areas that are fully wet or fully dry, never to areas that are in between.
Muddy colors: Muddy color happens when you mix too many pigments together or layer complementary colors on top of each other without letting them dry. Limit your palette to two or three colors per painting as a beginner, and always let layers dry completely before glazing. If you want to explore broader painting techniques, understanding color theory fundamentals helps across all mediums.
Paint drying too fast: If your paint dries before you can blend it, your paper may be too lightweight or your room may be too warm and dry. Switch to heavier paper (300 gsm), use a spray bottle to mist your palette and paper periodically, and work in smaller sections. Some painters even mist the back of their paper with water to extend working time.
Colors look faded: Watercolor always dries lighter than it looks when wet, so beginners often end up with paintings that look washed out. Use more pigment relative to water in your mixes. Build up color through two or three glazing layers rather than trying to get full intensity in one pass.
5 Beginner Practice Exercises
Practice is how techniques become instinct. These five exercises are designed to build muscle memory and confidence with the core watercolor techniques covered in this guide. Spend 15 to 20 minutes on each one.
Exercise 1: Flat Wash Swatches. Paint five flat wash rectangles on a single sheet of paper, one for each of your primary and secondary colors. Focus on even, streak-free coverage. This drill builds your brush control and teaches you how much paint and water to mix for a consistent wash.
Exercise 2: Wet-on-Wet Clouds. Wet a large area of paper with clean water. Drop in blue paint at the top and let it flow downward. While still wet, lift out cloud shapes with a damp paper towel by blotting gently. This exercise teaches you timing, moisture control, and the lifting technique simultaneously.
Exercise 3: Gradient Sphere. Paint a circle using a graded wash that transitions from dark on one side to light on the other. This creates the illusion of a three-dimensional sphere and teaches you value control, which is the single most important skill in watercolor.
Exercise 4: Dry Brush Texture Sampler. Divide a page into six sections and practice dry brush strokes using different amounts of pressure and moisture. Label each one so you can see how the texture changes. This exercise builds your understanding of how brush moisture affects mark-making.
Exercise 5: Mini Landscape. Combine three techniques in one small painting. Use a wet-on-wet wash for the sky, a graded wash for the rolling hills, and dry brush for foreground grass and tree textures. This exercise pulls everything together and shows you how the techniques work in combination.
Frequently Asked Questions
What are the basic watercolor techniques for beginners?
The basic watercolor techniques for beginners are wet-on-wet, wet-on-dry, flat wash, graded wash, variegated wash, dry brush, glazing, and lifting. These eight techniques form the foundation of watercolor painting. Wet-on-wet and wet-on-dry are the two core application methods, while washes cover large areas with even or graded color. Dry brush adds texture, glazing builds depth through transparent layers, and lifting lets you create highlights and correct mistakes. Most watercolor paintings combine several of these techniques in a single piece.
How do you do a wet on wet watercolor technique?
To do wet-on-wet watercolor, first apply clean water to your paper using a brush or spray bottle until the surface glistens without forming puddles. Then load your brush with pigment and touch it to the wet paper. The paint will spread and bloom outward in soft, feathery edges. You can add additional colors while the paper is still wet and they will blend together naturally. Work quickly because wet-on-wet only works while the paper surface is damp. Let the painting dry flat and undisturbed for the smoothest results.
What is the difference between wet on dry and wet on wet in watercolor?
The difference is the moisture state of the paper when you apply paint. Wet-on-wet means applying wet paint onto paper that has been pre-moistened with clean water, which produces soft, diffused edges as the pigment flows freely. Wet-on-dry means applying wet paint onto completely dry paper, which produces crisp, defined edges because the pigment is absorbed immediately without spreading. Wet-on-wet is best for soft backgrounds and atmospheric effects. Wet-on-dry is best for details, sharp edges, and controlled shapes. Most paintings use both techniques together.
How do you blend watercolors for beginners?
To blend watercolors, start by painting your first color on the paper. While the paint is still wet, load your brush with a second color and touch it to the edge of the first. The two colors will merge and blend on the paper surface. You can tilt the paper to help the colors flow together or use a clean damp brush to gently feather the transition. The key is timing: both colors need to be wet for a smooth blend. If the first color has started to dry, you will get a hard line instead of a gradient. Work in small sections and keep your paint juicy.
What supplies do you need for watercolor painting?
You need watercolor paints (a basic pan set with 12 to 24 colors), two or three brushes (a medium round, a small round for details, and a flat brush for washes), watercolor paper that is at least 140 lb or 300 gsm weight, a palette for mixing, two water containers, masking fluid, a spray bottle, paper towels, and a pencil for sketching. Cold press paper is the most versatile choice for beginners. Student-grade paints and synthetic brushes are perfectly fine for learning and keep your initial investment low.
Why does my watercolor look patchy?
Patchy watercolor usually happens because you went back over an area that had started to dry, creating uneven pickup of pigment. Other causes include not mixing enough paint before starting a wash, using paper that is too lightweight and buckles, or applying inconsistent pressure with your brush. To fix patchy washes, work faster so each stroke blends into the previous one while both are still wet, mix more paint than you think you need, and resist the urge to touch up drying areas. If a wash dries patchy, apply a thin glazing layer over the top to even it out.
Can you layer watercolor paint?
Yes, layering, called glazing, is one of the most important watercolor techniques. You apply thin, transparent washes on top of dried paint to build depth, adjust color, and add richness. The key rule is that each layer must be completely dry before you apply the next one. If the underlayer is even slightly damp, the fresh paint will disturb it and create blooms or backruns. Most paintings use three to five glazing layers. Going beyond seven or eight layers risks muddying the colors and roughening the paper surface.
Start Painting: Your Watercolor Adventure Begins
You now have a complete guide to the common watercolor techniques for beginners that will carry you from your first brushstroke through your first finished painting. The eight techniques we covered, wet-on-wet, wet-on-dry, flat wash, graded wash, variegated wash, dry brush, glazing, and lifting, are the building blocks that every watercolorist relies on, whether they have been painting for two weeks or two decades.
Here is what I wish someone had told me when I started: you will paint some truly awful paintings before you paint good ones, and that is not just normal, it is necessary. Each patchy wash teaches you about timing. Each muddy color teaches you about pigment. Each bloom teaches you about moisture. The forum community at Reddit’s r/Watercolor echoes this same sentiment: practice matters far more than perfection.
Start with the five practice exercises in this guide. Spend a week on each one if you can. Use student-grade supplies and cheap paper for practice so you feel free to make mistakes. When you are ready to think more critically about your finished work, our guide to art criticism techniques can help you analyze and improve your paintings.
Pick up your brush, wet the paper, and let the watercolor show you what it can do. The only wrong move is not starting.