
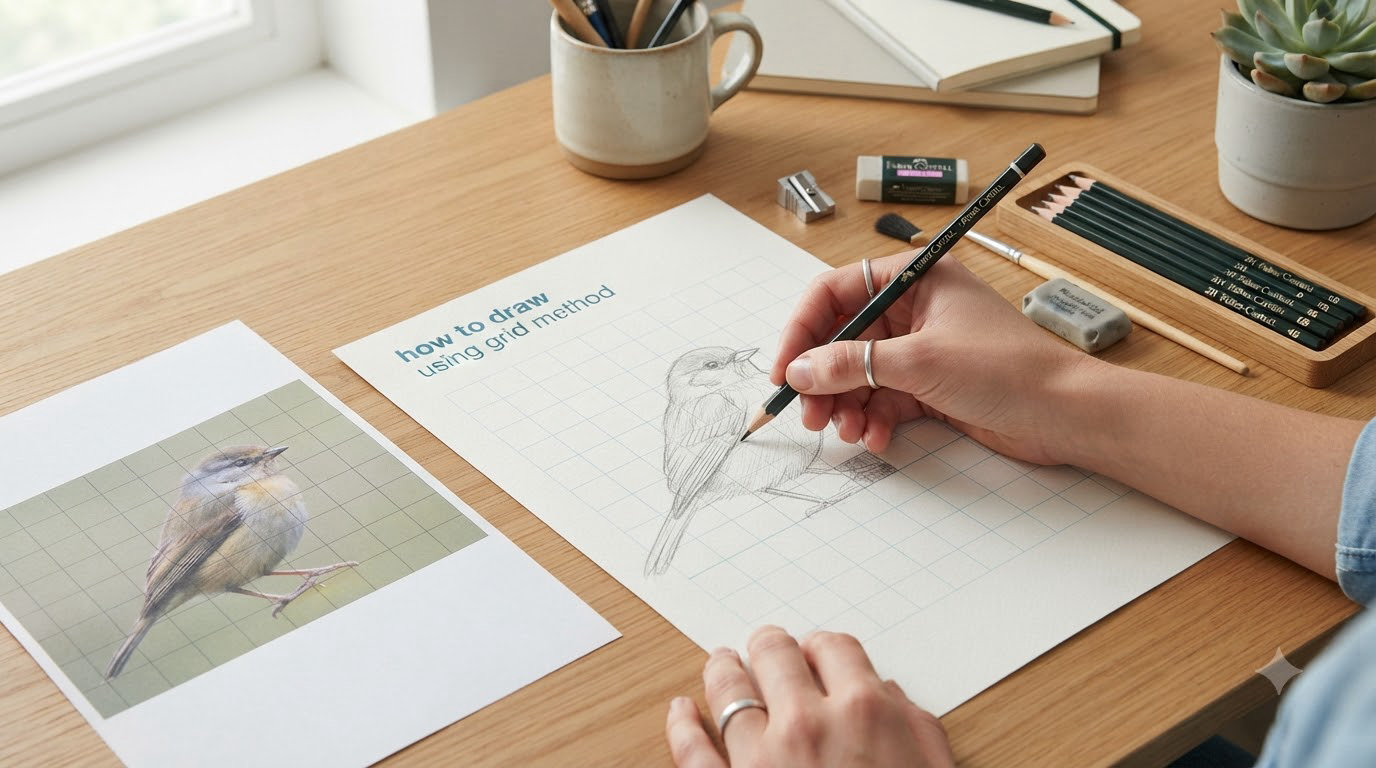
If you have ever stared at a blank page wondering how to transfer a photo onto it with accurate proportions, learning how to draw using the grid method might be the single most useful skill you pick up this year. It is a straightforward technique that breaks down even the most complex images into manageable sections, letting you focus on one small square at a time rather than the overwhelming whole.
The grid method has been around for centuries, used by Renaissance masters and modern photorealists alike. Whether you are a complete beginner trying to draw your first portrait or an experienced artist scaling up a reference for a mural, this approach gives you a reliable framework for getting proportions right every time.
In this guide, our team walks you through the entire process from start to finish. You will learn exactly what the grid method is, the tools you need, a detailed step-by-step process, and practical tips that will save you hours of frustration. By the end, you will have the confidence to tackle any reference photo and transfer it to paper or canvas with precision.
Table of Contents
What Is the Grid Method in Drawing?
The grid method is a drawing technique where you overlay a grid of evenly spaced lines on your reference photo and draw a corresponding grid of equal ratio on your drawing surface. You then transfer the image square by square, copying what you see in each section of the reference grid to the matching section on your paper. This process lets you achieve accurate proportions without relying on a projector or any digital tools.
At its core, the method works because it trains your eye to see the image as a collection of small, interlocking pieces rather than one big intimidating subject. Instead of trying to draw an entire face at once, you only need to observe and replicate what sits inside a single one-inch square. That mental shift is what makes the grid method so powerful for beginners.
The technique traces back to ancient Egyptian artists and was refined during the Renaissance. Albrecht Durer famously used a grid-like device called a “perspective machine” to study proportion. Leonardo da Vinci also explored gridded frameworks for his anatomical studies. Today, art teachers around the world introduce the grid method as a foundational skill for students learning proportion, scale, and observational drawing.
Why the Grid Method Works (and Who Should Use It)
The grid method works because it removes the hardest part of drawing: getting proportions right from the start. When you draw freehand, your brain often distorts what you see, making features too large, too small, or misaligned. A grid forces you to measure and compare, anchoring each element to a specific location on the page.
Some artists worry that using a grid is “cheating” or that it will hinder their freehand skills over time. In my experience, the opposite is true. The grid method teaches you to see relationships between shapes, angles, and negative space. After using it for a few months, you will naturally start noticing these relationships without the grid, which actually improves your freehand drawing ability.
This technique is ideal for several types of artists:
Beginners who struggle with proportion and placement
Portrait artists who need precise facial feature alignment
Photorealistic painters transferring photos to canvas
Mural artists scaling small sketches up to wall-sized works
Art students learning to observe rather than guess
Whether you are drawing faces, landscapes, still life, or abstract compositions, the proportion grid method adapts to any subject. The only requirement is a reference image and a willingness to slow down and observe carefully.
Tools and Materials You Will Need
One of the best things about the grid method is that it requires almost no specialized equipment. Chances are you already have most of these items at home. Here is what you need to get started:
A reference photo – Print a physical copy at the size you want to work from, or have it ready on a screen
A ruler or straight edge – A standard 12-inch ruler works fine; a T-square is helpful for larger surfaces
A pencil – Use a mechanical pencil or a light-grade pencil (2H or H) for drawing grid lines so they erase easily later
An eraser – A kneaded eraser is ideal because it lifts graphite without damaging the paper
Your drawing paper or canvas – Any surface you want to draw on
Artist tape (optional) – Great for creating removable grid lines on canvas instead of drawing directly on it
For those who prefer digital tools, several free apps and programs let you overlay grids on reference photos without printing anything. Programs like Photoshop, GIMP (free), and apps like “Grid Drawing Tool” or “Draw a Grid” let you customize grid size, color, and opacity directly on your device. This is a strong option if you work from a tablet or want to skip the printing step entirely.
A ruler and pencil are truly the bare minimum. I have seen artists create grids using nothing more than the edge of a piece of cardboard. The drawing grid system is flexible by design, so do not let a missing tool stop you from starting.
How to Draw Using the Grid Method: Step-by-Step Guide
This section covers the complete grid method drawing process from choosing your reference to finishing your piece. Follow each step in order, and take your time. The grid method rewards patience over speed.
Step 1: Choose and Prepare Your Reference Photo
Start by selecting a clear, high-resolution reference photo. The image should have good contrast and sharp details. If you are a beginner, pick a simple subject with strong outlines, like a flower, a piece of fruit, or a black-and-white portrait. Avoid busy, cluttered images for your first few attempts.
Print the reference photo at a size that is comfortable to work with. An 8×10 inch print is a good starting point. If you are working digitally, open the image on your device and make sure you can overlay a grid on it using your chosen app or software.
Before adding any grid lines, decide on the final size of your drawing. If your reference photo is 8×10 inches and you want to draw at the same size, you will use a 1:1 ratio. If you want to enlarge the drawing to 16×20 inches, you will use a 1:2 ratio. This ratio determines how you scale the grid on your drawing surface.
Step 2: Draw the Grid on Your Reference Photo
Using your ruler and a light pencil, draw evenly spaced horizontal and vertical lines across your reference photo. The number of lines depends on the complexity of the image and your skill level:
For beginners: Use a 3×3 or 4×4 grid (3 lines each direction or 4 lines each direction). This creates 9 or 16 squares, which is manageable and not overwhelming.
For intermediate artists: Use a 6×6 or 8×8 grid. This gives you 36 or 64 squares for more precise placement.
For detailed photorealistic work: Use a 10×10 or finer grid. More squares mean more accuracy but also more time.
Draw the lines as lightly as possible so they do not obscure the image beneath. If you are working with a printed photo and do not want to mark it, slide the photo into a clear plastic sleeve and draw the grid on the plastic with a fine-tip marker instead. You can wipe it clean later.
Make sure all lines are straight and meet at 90-degree angles. If your grid is crooked, your drawing will be distorted. Take an extra minute to double-check each line with your ruler before moving on.
Step 3: Draw the Grid on Your Drawing Surface
Now recreate the same grid on your drawing paper or canvas. If you are working at a 1:1 ratio, simply copy the exact same number of lines at the exact same spacing. If you are scaling up, multiply the spacing by your scaling factor.
For example, if your reference photo has grid lines spaced 1 inch apart and you want to double the size (1:2 ratio), space your drawing grid lines 2 inches apart. The number of squares stays the same, but each square is larger on your drawing surface.
Use a very light touch when drawing these lines. You will need to erase them later, so the lighter they are, the easier your cleanup will be. Some artists prefer to use sewing cotton or artist tape stretched across the canvas instead of drawing lines. This is especially useful for canvas surfaces where pencil lines are harder to erase. The cotton or tape can be removed cleanly once the drawing is complete.
Step 4: Number or Label Your Grid Squares
This is a small step that saves a lot of confusion. Number the columns across the top (1, 2, 3, 4…) and the rows down the side (A, B, C, D…). Do this on both your reference photo grid and your drawing grid, using the exact same numbering system.
Now each square has a unique address. Square B3 on your reference corresponds directly to square B3 on your drawing. This eliminates mistakes, especially when you step away from your work and come back to it later. I cannot count the number of times labeling has saved me from drawing the wrong section in the wrong square.
Step 5: Transfer the Image Square by Square
This is where the actual drawing happens. Starting with any square you like, observe the reference image in that specific square and draw what you see in the corresponding square on your drawing surface.
Here are some key pointers for this stage:
Start with the squares that contain the main outlines and edges of your subject. These establish the framework for everything else.
Focus on angles and shapes, not “things.” Do not think “I am drawing an eye.” Instead, think “I am drawing an angled line that curves here and ends there.” This mindset shift is the secret to accuracy.
Use the grid lines themselves as reference points. Notice where a line enters the square, where it exits, and at what angle. These entry and exit points are your anchors.
Work in sections rather than jumping around randomly. Complete a cluster of adjacent squares so you build connected outlines.
Draw lightly at this stage. You are establishing the basic shapes and proportions, not creating the final drawing. Think of this as a map that you will refine and detail later.
Some artists find it helpful to further divide complex squares into smaller quarters by adding a light diagonal or a cross through the center. This dividing squares technique gives you twice the precision without adding more full grid lines to the entire image.
Step 6: Refine Your Drawing and Erase the Grid Lines
Once you have transferred the basic outlines of your image across all squares, step back and look at the whole drawing. Check for proportional errors by comparing your drawing to the reference photo. Fix any areas that look off before moving forward.
Now begin refining your lines. Add detail, correct wobbles, and strengthen the outlines where needed. Once you are satisfied with the line work, carefully erase all the grid lines using a kneaded eraser. Work slowly and gently to avoid smudging your drawing or tearing the paper.
If you used artist tape or cotton for your grid, simply remove it from the canvas. This is one reason many artists prefer the tape method, especially on canvas, since no erasing is required at all.
With the grid gone, you are left with a clean outline drawing that you can shade, color, or paint however you like. The grid has done its job, giving you a solid foundation to build on.
Step 7: How to Scale or Enlarge a Drawing Using the Grid Method
Scaling up is one of the most practical applications of the grid method, and it is easier than you might think. The key is getting the math right when setting up your grids.
Here is a simple approach that works without complex calculations:
Measure your reference photo. Let us say it is 8 inches wide by 10 inches tall.
Decide on your final drawing size. Let us say you want 24 inches wide by 30 inches tall.
Calculate your scaling factor. Divide the drawing width by the reference width: 24 / 8 = 3. Your scaling factor is 3x.
Apply the scaling factor to your grid spacing. If your reference grid has lines every 1 inch, your drawing grid will have lines every 3 inches.
Verify the proportions match. Check that the height scales correctly too: 10 x 3 = 30 inches. It matches, so your proportions are correct.
If the proportions do not match perfectly, you may need to crop your reference photo slightly or adjust your canvas size. Drawing on a surface that does not share the same aspect ratio as your reference is one of the most common mistakes people make, and it leads to distorted images.
For mural work, this same principle applies on a much larger scale. An artist might use a 10x scaling factor, turning a 2-foot sketch into a 20-foot wall painting. The grid keeps everything proportional even at massive sizes.
Common Mistakes to Avoid When Using the Grid Method
Over the years, our team has seen artists run into the same handful of problems with the grid method. Here are the most common mistakes and how to avoid each one:
Drawing grid lines too dark. This is the number one complaint from beginners. Heavy pencil lines are difficult to erase and can show through your shading. Always use the lightest touch possible when drawing your grid, and consider using a harder pencil grade like 2H. If you are working on canvas, use artist tape or sewing cotton instead of drawing lines at all.
Mismatched proportions between reference and drawing surface. If your reference photo is 4×6 and your canvas is 16×20, the aspect ratios are different. Drawing a grid on both will not fix this mismatch, and your final image will be stretched or compressed. Always check that the ratio of width to height is the same on both surfaces before you start.
Using too many grid squares. More squares are not always better. A grid with 50 squares can feel like a tedious chore rather than a creative process. For most subjects, a 6×6 or 8×8 grid provides plenty of accuracy without draining your motivation. You can always add more divisions to specific complex squares as needed.
Grid marks left behind after shading. Forum users frequently ask how to prevent ghost grid lines from showing through shading. The best approach is to erase the grid lines completely before you begin any shading work. If traces remain, a light wash of your shading medium (graphite, charcoal, paint) over the entire surface can help blend them away.
Not stepping back to check the whole image. When you focus on individual squares, you can lose sight of how the whole drawing is coming together. Every 15 to 20 minutes, stand back from your work and compare the overall drawing to the reference photo. Catching proportional errors early saves significant rework later.
Tips and Best Practices for Better Grid Drawings
These tips come from years of personal practice and insights shared by artists in drawing communities. Each one addresses a real frustration that can derail your grid drawing experience.
Use the “fewer squares” approach for better learning. Some art instructors recommend starting with just a 3×3 grid. Nine squares force you to do more freehand observation within each section, which actually trains your eye more effectively than a dense grid. Think of the grid as training wheels. The fewer squares you use, the faster you develop the skill to draw without a grid entirely.
Try the cotton tape method for canvas work. If you are working on canvas, skip the pencil grid entirely. Stretch sewing cotton or thin artist tape across the canvas to create your grid. This leaves zero marks on the surface and removes cleanly when you are done. Forum artists consistently praise this method for keeping canvases clean.
Focus on negative space within each square. Instead of drawing the object itself, try drawing the empty space around it within each grid square. This technique, called negative space drawing, often produces more accurate results because your brain processes the abstract shapes more faithfully than familiar objects.
Divide complex squares for extra precision. When a single grid square contains a lot of detail (like an eye or a mouth in a portrait), draw a light X through that square to divide it into four triangular sections. This gives you four smaller reference areas within the square without adding grid lines across the entire image.
Use digital grid tools to save time. Free programs like GIMP and online tools like “Grid Drawing Tool” let you overlay customizable grids on your reference photo digitally. You can adjust grid color, line thickness, and number of divisions without touching a ruler. This is especially helpful if you work from a tablet or prefer not to print your references.
Know when to stop using the grid. The grid method is a learning tool, not a permanent crutch. Once you feel confident placing major features accurately, try reducing the number of grid squares. Move from an 8×8 grid to a 4×4 grid, then to a 3×3 grid, and eventually try freehand. Many artists use the grid method for initial placement of major landmarks and then switch to freehand for all the detail work. That hybrid approach gives you the accuracy of the grid while keeping your freehand skills sharp.
Practice with simple subjects first. Before attempting a photorealistic portrait, practice the grid transfer drawing technique with simple shapes, still life objects, or cartoon characters. Building confidence with easy subjects makes the jump to complex images much smoother.
Keep your reference at the same orientation as your drawing. If your reference photo is oriented vertically, your drawing surface should also be vertical. Working from a reference that is rotated 90 degrees from your drawing surface causes confusion when matching grid squares.
FAQs
Is the grid method good for drawing?
Yes, the grid method is one of the best techniques for improving drawing accuracy, especially for beginners. It helps you develop observational skills by training your eye to see shapes, angles, and proportional relationships rather than guessing. Many experienced artists use it for complex subjects like portraits and murals. Over time, the visual measuring skills you learn from grid drawing transfer directly to freehand drawing, making you a better overall artist.
How to calculate grid method drawing?
To calculate your grid for drawing, divide your reference photo width by the number of columns you want. For example, if your reference is 8 inches wide and you want 8 columns, each square is 1 inch. Then multiply that square size by your scaling factor to get the grid size on your drawing surface. If scaling up 3x, each drawing square would be 3 inches. Always verify that the height scales proportionally too. If your reference is 8×10 and your scale factor is 3x, your drawing surface should be 24×30 inches.
What famous artists use the grid method?
The grid method has been used by artists throughout history. Albrecht Durer used a perspective machine with a grid in the early 1500s. Leonardo da Vinci used gridded frameworks for anatomical studies. Ancient Egyptian artists used grid systems to maintain consistent proportions in their wall paintings. In modern times, photorealists like Chuck Close used grid systems to create massive portrait paintings from small photographs. Art instructors worldwide continue to teach grid drawing as a foundational technique.
Is there a free drawing program for grid lines?
Yes, several free options exist. GIMP is a free image editing program that lets you overlay custom grids on any photo using the grid filter or by drawing lines manually. Online tools like ‘Grid Drawing Tool’ and ‘Draw a Grid’ work directly in your browser. Apps like ‘PixelLab’ and ‘Grid Drawing Assistant’ are available free on mobile devices. For iPad users, Procreate has a built-in drawing guide feature that can create grid overlays.
What is the 70/30 rule in drawing?
The 70/30 rule in drawing suggests that a composition should be roughly 70 percent filled with content (shapes, subjects, details) and 30 percent left as empty or negative space. This balance creates visual interest without overwhelming the viewer. It applies to grid method drawings as well. When planning your grid, pay attention to which squares contain your main subject (the 70 percent) and which are mostly background (the 30 percent). Getting this balance right makes your final drawing feel more dynamic and professional.
Conclusion
Learning how to draw using the grid method gives you a reliable, repeatable process for achieving accurate proportions in any drawing. All you need is a reference photo, a ruler, a pencil, and the patience to work through one square at a time. The technique scales from simple still life sketches all the way up to wall-sized murals, making it one of the most versatile tools in any artist’s toolkit.
Start with a simple subject and a basic 3×3 grid. As your confidence grows, tackle more complex images and experiment with finer grids. Remember that the grid is a learning tool, and every drawing you complete with it strengthens your ability to observe, measure, and eventually draw freehand with greater accuracy. Grab a pencil, pick a photo, and start gridding. Your drawings will thank you.