
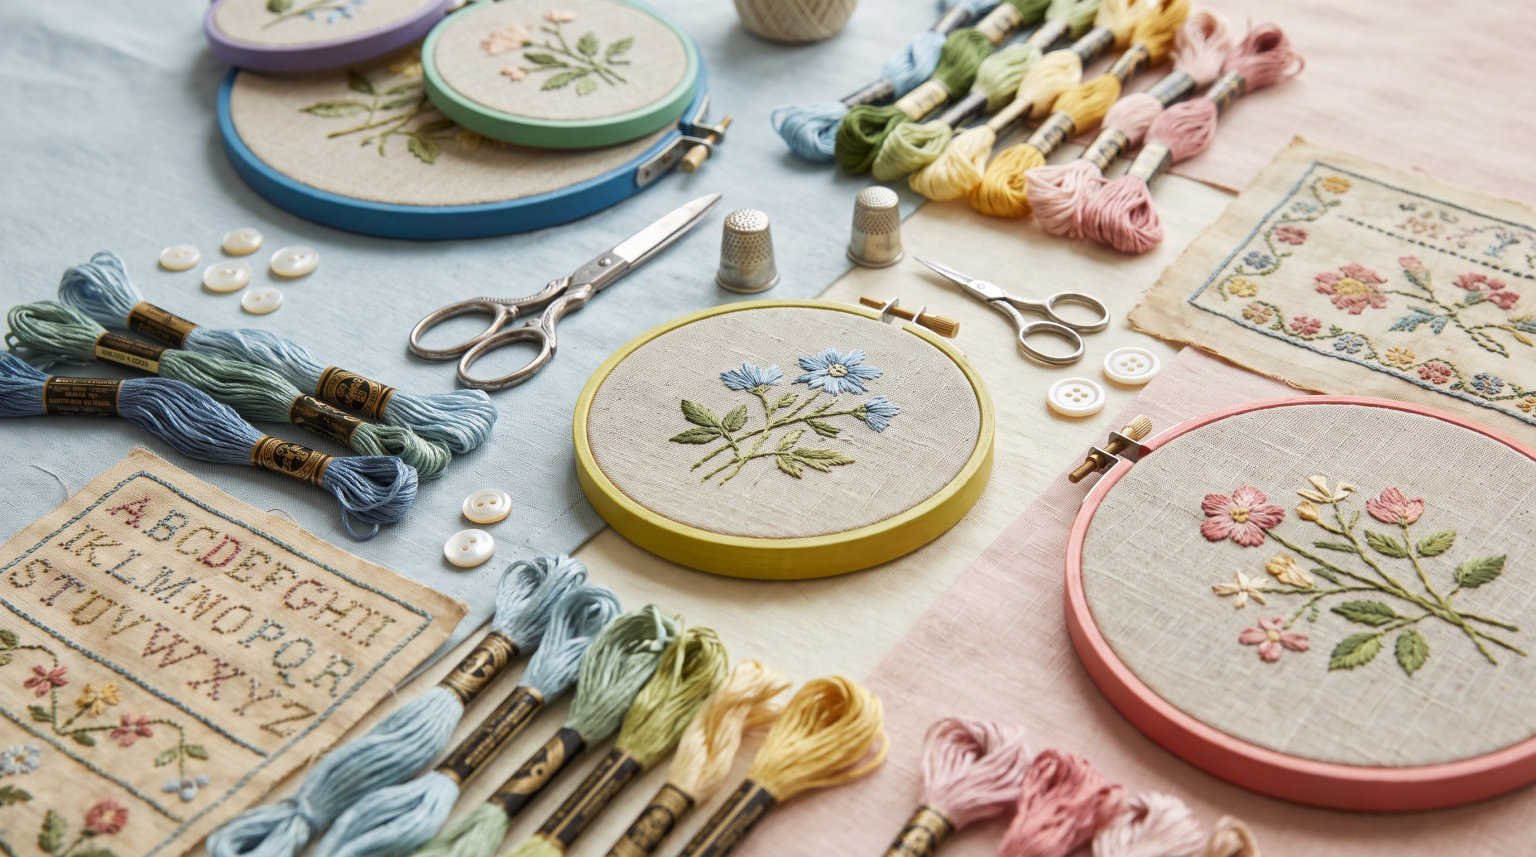
If you have ever looked at a piece of fabric covered in colorful stitched flowers, swirling lettering, or detailed portraits and thought “I wish I could do that,” you are in the right place. Embroidery is one of the most accessible and rewarding art forms you can pick up, and it does not require expensive equipment or years of training to get started. I have spent years with a needle and thread in hand, and I can tell you that understanding the basics of embroidery as an art form opens up an entire world of creative expression.
Embroidery sits at a unique intersection of craft and fine art. It has been practiced across nearly every culture on earth for thousands of years, yet it remains just as relevant today as a way to personalize clothing, create wall art, and decorate your home. Whether you are drawn to the meditative rhythm of hand stitching or the bold self-expression of contemporary textile art, embroidery has something to offer you.
In this guide, I will walk you through everything you need to know to understand embroidery as both a practical skill and an artistic discipline. We will cover what embroidery actually is, its rich history as an art form, the supplies you need, the fundamental stitches every beginner should master, and the tips that will save you from the most common beginner frustrations. By the end, you will have a clear path to start your own embroidery practice.
Table of Contents
What Is Embroidery? A Clear Definition
Embroidery is the art of decorating fabric using a needle and thread (or floss) to create decorative designs, patterns, and imagery on a textile surface. Unlike weaving or knitting, which construct fabric from scratch, embroidery adds visual and textural elements to existing fabric. It is a form of surface decoration that transforms plain cloth into something expressive and meaningful.
People sometimes confuse embroidery with other textile crafts, so let me draw a clear line. Cross-stitch is a specific type of embroidery that uses X-shaped stitches on a gridded fabric like Aida cloth. Needlepoint is worked on a stiff open canvas and typically covers the entire surface. Embroidery, in the broadest sense, encompasses all of these but also includes freeform stitching on any fabric where you can create whatever design you like.
What makes embroidery an art form rather than just a practical skill is intention. When you stitch a decorative motif onto a pillow, monogram a handkerchief, or create a detailed landscape scene entirely from thread, you are making creative choices about color, texture, composition, and technique. Those choices are the building blocks of art, and embroidery gives you a tactile, deeply satisfying medium to express them.
The History of Embroidery as an Art Form
Embroidery is not a modern invention. Archaeological evidence traces decorative stitching back to at least 30,000 BCE, with fossilized remains of hand-stitched clothing found in Russia. Ancient Egyptian tombs contained elaborately embroidered garments, and Chinese silk embroidery dates back thousands of years, eventually becoming one of the most valued art forms in the imperial court.
Across the globe, nearly every culture developed its own embroidery traditions. Indian artisans created intricate zardozi work with gold and silver threads. Japanese sashiko combined decorative stitching with functional fabric reinforcement. Mexican embroidery traditions like Otomi stitching feature vibrant animal and plant motifs. Palestinian, Nigerian, Hungarian, and Turkish embroiderers each developed unmistakable visual languages that communicated identity, status, and stories through thread.
In medieval Europe, embroidery was considered one of the highest art forms. The famous Bayeux Tapestry, which is actually an embroidered cloth rather than a woven tapestry, dates to the 11th century and depicts the Norman conquest of England in vivid detail. Professional embroidery guilds flourished, and elaborate ecclesiastical vestments and royal garments were valued alongside paintings and sculpture.
During the Arts and Crafts movement of the late 19th century, embroidery experienced a revival as artists like William Morris championed handmade textile work as a reaction against mass production. In 2026, embroidery continues to evolve as a contemporary art form. Artists like Iranian sculptor and textile artist Parastou Forouhar and countless independent makers use embroidery to explore themes of identity, memory, politics, and beauty in gallery settings and online communities alike.
Understanding this history matters because it changes how you see your own practice. When you pick up a needle and floss, you are participating in an art form that has been a vehicle for cultural expression, storytelling, and personal creativity for tens of thousands of years. That context is what elevates embroidery from a simple pastime to a genuine art form.
Essential Supplies You Need to Start Embroidering
One of the best things about embroidery is how little you need to get started. Experienced embroiderers on forums consistently confirm that you can begin with just a needle, some thread, a piece of fabric, and an embroidery hoop. Here is a breakdown of the essential supplies and what to look for as a beginner.
Embroidery Hoop
An embroidery hoop is a pair of concentric rings (usually wood or plastic) that holds your fabric taut while you stitch. Keeping the fabric tight is critical because loose fabric causes puckering and uneven stitches. A 6-inch hoop is the standard starting size. You loosen the outer ring, place your fabric over the inner ring, press the outer ring down, and tighten the screw. The fabric should feel drum-tight, like the surface of a drum when you tap it.
Embroidery Floss
Embroidery floss is a loosely twisted, slightly glossy thread made of six individual strands. You can use all six strands together for bold, thick lines, or separate it into fewer strands for finer detail. Most beginners start with 3 strands for a versatile look. Floss comes in hundreds of colors and is inexpensive, which makes it easy to build a collection over time. DMC and Anchor are the two most widely available brands.
Embroidery Needles
Embroidery needles (sometimes called crewel needles) have a sharp point and a long eye that makes threading easier. The long eye accommodates multiple strands of floss. Size 7 or 8 is a good starting point for general embroidery. Unlike sewing needles, embroidery needles are designed to glide through fabric without damaging the threads of the cloth itself.
Fabric
For beginners, plain weave cotton or linen fabric works best. Muslin and unbleached cotton are popular practice fabrics because they are affordable and have a consistent weave that makes stitching easier. Avoid stretchy fabrics like T-shirt material until you have more experience, because the fabric shifts and distorts your stitches. A tightly woven fabric with a smooth surface will give you the cleanest results.
Optional but Helpful Tools
A few additional tools make embroidery easier and more enjoyable. Small sharp scissors (embroidery snips) let you cut thread cleanly right next to your work. A water-soluble pen or pencil lets you draw or trace designs onto fabric before stitching. A needle threader saves frustration if you struggle to get floss through the eye of the needle. None of these are strictly necessary, but they are inexpensive quality-of-life upgrades that forum members consistently recommend.
The Basic Embroidery Stitches Every Beginner Should Learn
There are hundreds of embroidery stitches in existence, but you only need to learn a handful to create beautiful work. The seven stitches below form the foundation of hand embroidery. Once you are comfortable with these, you can combine them in endless ways to create any design you can imagine.
1. Running Stitch
The running stitch is the simplest embroidery stitch and the one most people already know without realizing it. You pass the needle in and out of the fabric at regular intervals, creating a dashed line. It works well for outlines, borders, and filling areas with a light, airy texture. To make it, bring your needle up through the fabric, then poke it back down a short distance ahead, and repeat. You can weave the needle in and out multiple times before pulling the thread through to speed up the process.
2. Backstitch
The backstitch creates a solid, continuous line and is the go-to stitch for outlines and lettering. It is one of the most useful stitches you will learn. Bring the needle up through the fabric a stitch length ahead of your starting point, then go back down at the starting point itself. Each new stitch starts where the previous one ended, working backward along the line. The result is a clean, unbroken line that looks like a pen stroke made of thread.
3. Split Stitch
The split stitch creates a braided or rope-like line that adds texture to outlines and works beautifully for stems and curves. Start by making a single stitch, then bring the needle back up through the center of that stitch, splitting the floss strands. Continue forward, splitting each previous stitch. The result is a slightly textured line that looks more handcrafted than a backstitch. This stitch is also excellent for filling shapes when worked in closely spaced rows.
4. Stem Stitch
The stem stitch produces a smooth, slightly twisted line that is perfect for, well, stems and vines, but also for any curved line or outline where you want a graceful, fluid look. Keep the working thread below the needle at all times. Bring the needle up along the line, then insert it at the end of the previous stitch, but exit halfway back along the stitch. Keep the thread on the same side consistently, and the line will have a smooth, rope-like appearance.
5. Satin Stitch
Satin stitch is how you create smooth, filled areas of solid color. It is essentially a series of straight stitches placed side by side, completely covering the fabric underneath. The key to a clean satin stitch is keeping your stitches even and parallel. Start by outlining the shape you want to fill (a backstitch outline helps), then stitch straight across the shape, placing each stitch right next to the previous one. This stitch takes practice, but the polished, painterly results are worth the effort.
6. French Knots
French knots are the stitch that frustrates beginners the most, but they create irresistible texture. They are used for dots, textured fills, flower centers, and decorative accents. Wrap the floss around the needle one or two times, hold the wraps taut with your thumb, and insert the needle back into the fabric right next to where it came up. Pull the thread through slowly while holding the wraps in place. The wraps form a small, tight knot on the surface. Forum embroiderers agree: the secret is keeping the thread taut as you pull the needle through, and not wrapping more than two times. Practice on scrap fabric until it clicks.
7. Chain Stitch
The chain stitch creates a linked, chain-like line that works for bold outlines, decorative borders, and filling. Bring the needle up, then reinsert it right next to the exit point and bring it back up a stitch length ahead, catching the loop of thread under the needle. Pull through to form a loop, then repeat. Each loop catches the previous one, creating a chain effect. It is one of the most visually distinctive stitches and adds a playful, graphic quality to designs.
How to Get Started With Embroidery: Tips for Beginners
Knowing the stitches is one thing. Actually sitting down and starting your first project is another. These tips come directly from experienced embroiderers who shared their hard-won advice in online communities, and they will save you from the most common beginner traps.
Start Simple and Build Confidence
The biggest mistake beginners make is choosing an ambitious project right out of the gate. Pick a small, simple design that uses only one or two stitches. A simple flower, a short word, or a basic shape lets you focus on technique without getting overwhelmed. I recommend starting with just the backstitch and running stitch for your first project. Once those feel comfortable, add satin stitch and French knots for your second.
Practice on Muslin or Scrap Fabric First
Experienced embroiderers consistently recommend muslin and plain cotton for practice. Buy a yard of inexpensive muslin, stretch it in your hoop, and stitch random lines, shapes, and patterns without worrying about making anything pretty. This low-pressure practice builds muscle memory and helps you understand how the needle, thread, and fabric interact. It also lets you experiment with different numbers of floss strands without committing to a real project.
How to Transfer a Pattern to Fabric
One of the most common questions from beginners is how to get a design onto the fabric. There are several methods that work well. You can trace a printed design using a water-soluble pen by taping the design to a window and placing the fabric over it, using the light to see through. You can use transfer paper designed for fabric, which works like carbon paper. Or you can freehand draw directly onto the fabric with a water-soluble marker. All of these marks wash away when you finish your piece.
Common Beginner Mistakes to Avoid
Thread tangling is the number one frustration for new embroiderers. To prevent it, cut your floss no longer than the distance from your fingertips to your elbow. Longer strands tangle and knot. Separate the floss into individual strands and recombine the number you need, rather than using all six at once. This practice, called “stripping” the floss, produces smoother, more even stitches.
Another common mistake is pulling your stitches too tight. If you yank the thread, it puckers the fabric and distorts your design. Stitches should sit on the surface of the fabric with gentle, even tension. If you notice fabric puckering, loosen the stitch by gently pulling the fabric around it.
Finally, avoid the perfection trap. Your first few projects will not be flawless, and that is completely normal. Forum members emphasize that patience and practice matter far more than perfection. Every experienced embroiderer started with uneven stitches and messy knots. Give yourself permission to learn and improve over time.
Caring for Your Finished Embroidery
When you finish a piece, you may want to iron it to remove hoop marks and wrinkles from handling. Always iron embroidery face down on a soft towel. The towel cushions the stitches and prevents them from getting flattened. Direct pressure on the front of the embroidery can crush the texture and damage the thread. If you plan to frame your work, stretch it over acid-free backing board and secure it with pins or stitches on the back.
Different Types and Styles of Embroidery
Once you are comfortable with the basic stitches, it helps to understand the broader landscape of embroidery styles. Each type has its own traditions, techniques, and aesthetic qualities.
Freestyle (Surface) Embroidery
Freestyle embroidery is what most people picture when they think of hand embroidery. You stitch freely onto the surface of the fabric without following a grid or counting threads. This is the most flexible and expressive style, which makes it ideal for artistic exploration. You can combine any stitches in any arrangement to create whatever design you like.
Counted-Thread Embroidery
Counted-thread embroidery involves stitching on fabric with a visible, even weave (like evenweave linen or Aida cloth) and counting the fabric threads to place each stitch precisely. Cross-stitch is the most well-known example. This style produces geometric, highly regular designs and is a great entry point if you prefer structured patterns and precision over freeform creativity.
Blackwork Embroidery
Blackwork uses a single color of thread (traditionally black on white fabric) to create intricate geometric patterns. Historically popular in Tudor England, blackwork creates stunning visual complexity from simple repeating patterns. It is an excellent style for anyone who enjoys detailed, systematic work.
Crewel Embroidery
Crewel work uses wool thread instead of cotton floss, creating thick, textural designs with a distinctly different feel from standard embroidery. Traditionally worked on linen twill, crewel often features botanical motifs like the iconic Jacobean style with flowing vines, leaves, and flowers.
Whitework and Cutwork
Whitework uses white thread on white fabric to create subtle, elegant designs that rely entirely on texture and shadow for their visual effect. Cutwork takes this further by cutting away portions of the fabric and stitching over the edges to create open, lace-like patterns. Both styles are technically demanding but produce some of the most refined embroidery in existence.
These styles are not mutually exclusive. Many contemporary embroiderers blend elements from multiple traditions to create hybrid works that are entirely their own. That freedom to mix and evolve techniques is part of what keeps embroidery vital and exciting as an art form in 2026.
FAQs
Is embroidery a cheap hobby?
Yes, embroidery is one of the most affordable art forms to start. A basic kit with a hoop, needles, a few colors of floss, and fabric costs very little. Embroidery floss runs about 40 to 70 cents per color, and a single skein lasts through multiple projects. Many beginners start with supplies they already have at home, like a sewing needle and ordinary thread. Unlike many art forms that require ongoing expensive materials, embroidery stays affordable even as your skills advance.
What are some tips for beginners in embroidery?
Start with a simple design that uses only one or two stitches. Practice on inexpensive muslin fabric before working on your final piece. Cut your floss to no longer than elbow length to prevent tangling. Strip your floss by separating the strands and recombining the number you need for smoother stitches. Keep your fabric drum-tight in the hoop. And most importantly, give yourself permission to make mistakes — every embroiderer starts with uneven stitches that improve with practice.
What are some common mistakes to avoid when doing embroidery?
The most common mistakes include using floss that is too long (causing tangles), pulling stitches too tight (causing fabric puckering), skipping the hoop (resulting in uneven tension), and using all six strands of floss when fewer would look better. Beginners also tend to choose overly complex first projects. Start small, use short lengths of floss, maintain even tension, and separate your floss strands for the best results.
What are the most common embroidery stitches for beginners?
The seven most essential beginner stitches are the running stitch, backstitch, split stitch, stem stitch, satin stitch, French knots, and chain stitch. Together, these seven stitches give you the ability to create outlines, fills, texture, and decorative elements for virtually any design. Most beginner projects use just the backstitch and running stitch to start.
Is embroidery considered an art form?
Yes, embroidery is widely recognized as a legitimate art form. It has been practiced for tens of thousands of years across virtually every culture, appears in major museum collections worldwide (including the Victoria and Albert Museum and the Metropolitan Museum of Art), and is used by contemporary artists to create gallery-quality work. The creative decisions involved in color selection, composition, technique, and design place embroidery firmly within the visual arts.
How long does it take to learn embroidery?
You can learn the basic mechanics of embroidery in a single afternoon. Most beginners feel comfortable with 2-3 fundamental stitches after just a few hours of practice. Developing consistent tension and clean stitch execution typically takes 2-4 weeks of regular practice. Mastering a full range of techniques and developing your own artistic style is an ongoing journey that can take months to years, depending on how frequently you practice.
Wrapping Up: Your Embroidery Journey Starts Now
Embroidery is a rare art form that welcomes you exactly where you are. You do not need formal training, expensive tools, or a dedicated studio space. With a hoop, some floss, a needle, and a willingness to learn, you can begin creating pieces that are uniquely yours. The basics of embroidery as an art form come down to understanding a few fundamental stitches, choosing the right supplies, and giving yourself the time and patience to develop your technique.
What makes embroidery so compelling as an art form is the way it blends tradition with personal expression. Every stitch you make connects you to thousands of years of human creativity, while the design and colors you choose are entirely your own. Start small, practice consistently, and do not worry about making every stitch perfect on your first try. Your hands will learn what your mind already knows — that creating something beautiful, one stitch at a time, is one of the most satisfying things you can do.
Pick up a needle, stretch some fabric in a hoop, and make your first stitch today. You might be surprised by how quickly it feels like second nature.