
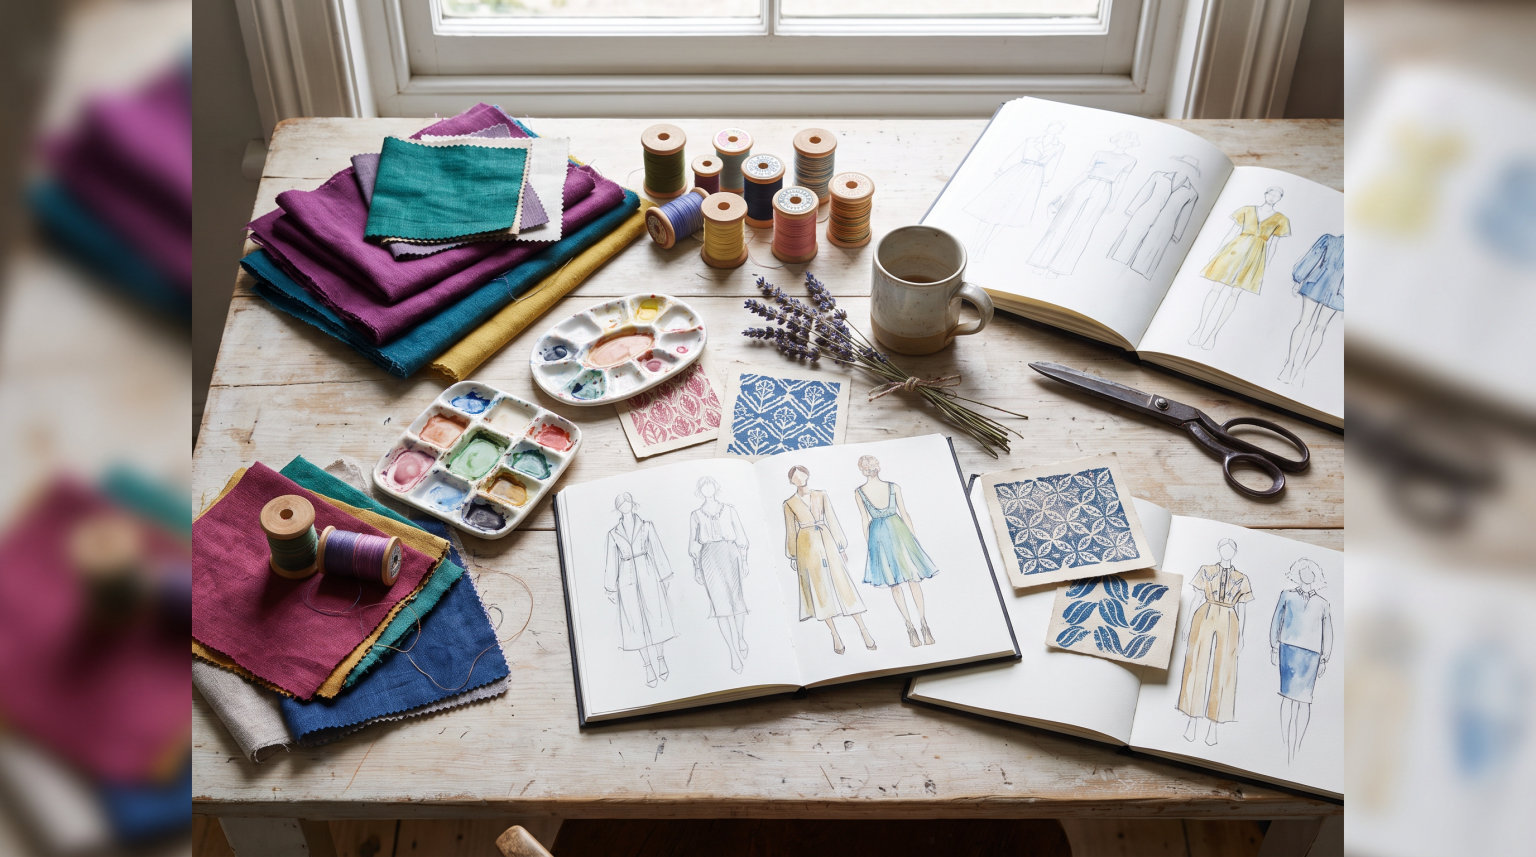
If you are an artist who has ever looked at a bolt of fabric and thought, “I want my art on that,” you are already halfway to understanding textile design basics for artists. Textile design is the practice of creating patterns, colors, and textures specifically for fabric surfaces, and it sits at the intersection of fine art, graphic design, and manufacturing. The field has grown dramatically, with digital printing and online platforms making it more accessible than ever for individual artists to break in.
This guide covers everything you need to know to get started. I will walk you through the foundational principles, the tools you actually need, the step-by-step design process, and the common mistakes that trip up beginners. Whether you want to design fabric for fashion, home decor, or your own artistic projects, this article gives you a clear starting point.
Artists bring a unique advantage to textile design because you already understand composition, color, and visual storytelling. The shift is learning how your art behaves when it repeats across a surface, gets printed on different materials, and needs to work in a commercial context. Let’s get into it.
Table of Contents
What Is Textile Design?
Textile design is the art and science of creating patterns, colors, and textures for fabrics. It encompasses every visual element you see on a piece of cloth, from the bold floral print on a summer dress to the subtle herringbone weave in a wool blazer. A textile designer considers both the aesthetic appeal of a pattern and how that pattern will perform during manufacturing, washing, and everyday use.
The field breaks down into three main categories: printed textiles (patterns applied to fabric surfaces through screen printing, digital printing, or block printing), woven textiles (patterns created through the physical interlacing of threads on a loom), and knit textiles (patterns formed by looping yarn together). Each category demands different skills, but the core design principles remain consistent across all of them.
How Textile Design Differs from Fine Art
Fine art is typically created as a one-of-a-kind piece meant to be displayed on a wall or in a gallery. Textile design, on the other hand, is built to repeat. Your artwork needs to tile seamlessly across yards of fabric, look good at different scales, and maintain visual interest when viewed up close or from across a room. This repeating requirement changes how you think about composition.
Another key difference is functionality. A painting does not need to survive a washing machine or resist fading in sunlight. Textile designs must account for the end use, whether that means choosing colorfast dyes for a beach towel or designing a pattern that hides stains on restaurant upholstery. The practical constraints actually fuel creativity in surprising ways.
A Brief History of Textile Design
Textile design is one of the oldest art forms in human history. Ancient civilizations in Egypt, India, China, and Peru were creating sophisticated fabric patterns thousands of years ago using techniques like resist dyeing, hand weaving, and embroidery. Each culture developed its own visual language through textiles, from the geometric motifs of Navajo weaving to the intricate florals of Indian block printing.
The industrial revolution changed everything. The invention of the jacquard loom in 1804 allowed complex woven patterns to be produced mechanically using punched cards, an early form of programming. Screen printing emerged in the early 1900s and made printed fabric production faster and more affordable. By the mid-20th century, designers like William Morris and Lucienne Day had elevated textile design into a recognized art form.
Today, digital printing has removed many of the traditional barriers. Artists can now design a pattern on a computer and have it printed on fabric in small quantities without expensive setup costs. This shift has opened the field to independent artists and small studios in ways that were impossible even 20 years ago. Platforms like Spoonflower and print-on-demand services have created an entirely new entry point for beginners.
Core Fundamentals of Textile Design
Every textile design rests on three foundational pillars: pattern repeats, color theory, and texture. Master these three areas and you can create compelling fabric designs regardless of the specific technique or medium you choose. Let me break each one down.
Understanding Pattern Repeats
A pattern repeat is the way a single design unit tiles across a fabric surface without visible seams or awkward gaps. This is the single most important technical concept in textile design, and it is the biggest adjustment for artists coming from fine art. Your motif, the individual design element, needs to connect seamlessly at every edge when it repeats.
There are five main types of pattern repeats:
Block repeat (also called straight repeat): The simplest form. Your motif is placed in a grid pattern, directly next to and above the previous motif. Think of wallpaper tiles. It is easy to create but can look stiff and obvious if the motif is too uniform.
Half-drop repeat: The most popular repeat type in textile design. Every other column of your motif drops down by half the height of the design. This breaks up the grid effect and creates a much more natural, flowing appearance. Most floral and organic patterns use this structure.
Brick repeat: Similar to half-drop, but the offset happens horizontally instead of vertically. Every other row shifts sideways by half the motif width. The name comes from how bricks are laid in a wall. This works well for designs with strong horizontal movement.
Mirror repeat: Your motif is flipped and reflected, creating symmetrical designs. This technique produces balanced, formal patterns and is common in traditional textile designs like paisley and damask.
Random or tossed repeat: Motifs are scattered across the surface at varying angles and spacing, without an obvious directional pattern. This is the most natural-looking repeat but the hardest to execute well because the spacing needs to feel random while still tiling seamlessly.
Color Theory for Fabric Design
Color behaves differently on fabric than it does on paper or screen. Fabric absorbs ink, threads have their own underlying color, and different materials take dye differently. A bright teal that looks stunning on your monitor might print as a muted gray-green on cotton, or shift toward blue on silk.
The core principles of color theory still apply: complementary colors create contrast, analogous colors create harmony, and warm colors tend to advance while cool colors recede. But in textile design, you also need to think about colorways, which are alternate color versions of the same pattern. A single floral design might be produced in six different color palettes to suit different seasons, markets, or customer preferences.
I recommend starting with a limited palette of three to five colors for each design. Pick one dominant color that covers about 60% of the design, a secondary color for 30%, and one or two accent colors for the remaining 10%. This ratio creates visual balance without overwhelming the eye.
Working with Texture
Texture in textile design operates on two levels. Visual texture is the illusion of physical depth created through pattern, shading, and line work. Physical texture is the actual surface quality of the fabric itself, whether smooth, nubby, matte, or glossy. Good textile designers think about both simultaneously.
When you design a pattern, consider how the printed or woven texture will interact with the physical texture of the fabric. A highly detailed, intricate pattern gets lost on a heavily textured fabric like burlap or boucle. Conversely, a simple geometric pattern can look flat and lifeless on a perfectly smooth satin. Matching pattern complexity to fabric texture is a skill that develops with experience and experimentation.
Types of Textile Design
Textile design is not a single discipline. It is an umbrella that covers several distinct approaches, each with its own techniques, tools, and traditions. Understanding the different types helps you figure out which direction excites you the most.
Printed Textile Design
Printed textile design involves applying patterns to the surface of fabric. This is the most common entry point for artists because the design process feels familiar: you create a two-dimensional pattern and it gets printed onto cloth. The main printing methods include screen printing (pushing ink through a mesh screen, one color at a time), digital printing (printing directly from a digital file, similar to an inkjet printer but for fabric), and block printing (stamping patterns by hand using carved blocks, the oldest printing method).
Each method has trade-offs. Screen printing is cost-effective for large production runs but requires separate screens for each color. Digital printing handles unlimited colors and fine detail but costs more per yard. Block printing is slow and labor-intensive but produces beautiful, artisanal results that carry the mark of the maker.
Woven Textile Design
Woven textile design creates patterns through the physical structure of the fabric itself. Instead of printing a pattern on top of the cloth, the pattern is built into the cloth during the weaving process. The designer specifies how threads interlace on the loom, and the resulting pattern emerges from that structure. Twill weaves produce diagonal lines, satin weaves create smooth surfaces, and jacquard looms can produce complex pictorial patterns.
This type of design requires understanding how looms work and how different weave structures behave. It is more technical than printed design but deeply rewarding. Many woven patterns, like houndstooth, plaid, and herringbone, are so enduring that they have become cultural icons.
Knit and Mixed-Media Textile Design
Knit textile design involves creating patterns through the interlooping of yarn. Knit fabrics are stretchy, comfortable, and widely used in activewear, casual clothing, and hosiery. Pattern in knitting can come from the stitch structure itself (cable knits, rib patterns), from printed or dyed yarns, or from combining both approaches.
Mixed-media textile design combines multiple techniques. A single fabric might feature a woven base with printed elements, embroidered accents, and applied surface treatments like batik or shibori dyeing. Artists with experimental sensibilities often gravitate toward mixed-media approaches because the creative freedom is nearly unlimited.
Essential Tools and Software for Beginners
One of the biggest questions beginners ask is what tools they need. The honest answer is that you can start with very little and build your toolkit as you go. Here is what I recommend based on where you are in your journey.
Traditional Tools You Should Know
Even if you plan to work digitally, understanding traditional tools gives you a stronger foundation. Graph paper and tracing paper are essential for working out pattern repeats by hand. A set of gouache or watercolor paints lets you experiment with colorways quickly. Brushes, pencils, and fine-tip markers are your core drawing tools.
For hands-on textile techniques, you will want a basic screen printing setup (a screen, squeegee, and fabric ink), carving tools if you want to try block printing, and an embroidery hoop and needles for stitch-based work. These physical tools help you understand how designs actually behave on fabric, which informs your digital work later.
Digital Design Software
Adobe Photoshop and Illustrator remain the industry standards for textile design. Photoshop excels at creating raster-based patterns from hand-painted artwork or photography, while Illustrator handles vector-based motifs that can scale to any size without losing quality. Many professional designers use both in their workflow.
For pattern repeat creation specifically, several specialized tools exist. The Pattern Cloud offers studio management and repeat tools. Procreate on the iPad has become a favorite for artists who prefer drawing by hand but want digital flexibility. Affinity Designer is a solid, budget-friendly alternative to Illustrator with strong pattern capabilities.
Most textile designs are saved as seamless tiles, typically in PNG or TIFF format at 150 DPI or higher. The exact file specifications depend on your printing method, but getting comfortable with creating seamless files is a non-negotiable skill.
Budget-Friendly Starter Options
You do not need expensive software to start. Procreate on an iPad costs a one-time fee and handles pattern creation beautifully. Inkscape is a free, open-source vector editor that works for basic motif design. GIMP provides free raster editing similar to Photoshop. Even Google Slides or Canva can be used to create simple repeating patterns when you are first learning the concepts.
For printing your first designs, Spoonflower offers fabric printing with no minimum order. You upload your pattern file, choose your fabric type, and order as little as a swatch. This low-risk approach lets you test your designs on actual fabric without investing in production equipment or large print runs.
The Textile Design Process: From Concept to Fabric
The path from an initial idea to a finished fabric involves a structured workflow. Here is the step-by-step process that most professional textile designers follow, adapted for artists who are just starting out.
Step 1: Gather Inspiration and Build a Mood Board
Start by collecting visual references. Look at nature, architecture, historical textiles, fashion magazines, and art from cultures around the world. Pay attention to trend forecasting resources like Pantone’s color reports and WGSN if you plan to work commercially. Compile your references into a mood board, either physical or digital, that captures the feeling, colors, and direction you want your design to take.
A strong mood board keeps you focused during the design process. Without one, it is easy to drift and lose coherence in your collection. I spend at least a full day on this stage before drawing a single motif.
Step 2: Develop Your Motifs
Motifs are the individual design elements that make up your pattern. A floral pattern might have three or four different flower motifs, plus leaf and stem elements. Draw your motifs at a larger scale than you think you need, because scaling down always works better than scaling up. Work in your preferred medium, whether that is watercolor, ink, digital painting, or vector drawing.
Aim for variety within cohesion. Your motifs should feel like they belong together but not look identical. Think of a garden: the flowers share a visual language but each one is distinct.
Step 3: Create Pattern Repeats
Arrange your motifs into a repeating tile using one of the repeat structures covered earlier. This is where the technical work happens. Your tile needs to match perfectly at every edge. Most digital tools have offset features that make half-drop and brick repeats much easier to set up. If you are working by hand, use tracing paper to check that your edges align.
Test your repeat by duplicating the tile three by three. Look for obvious lines, awkward gaps, or motifs that cluster together in unnatural ways. Adjust and re-test until the repeat looks smooth and natural.
Step 4: Develop Colorways
Once your pattern is working in one color palette, create two to four alternate colorways. Each colorway should feel distinct while maintaining the same pattern structure. A spring colorway might use soft pastels, while an autumn version of the same design could feature rich earth tones. This multiplies the commercial potential of a single design significantly.
When developing colorways, test them on screen and on paper before committing to fabric. Colors often shift between digital display and physical output, so always request a test print or swatch before approving a final version.
Step 5: Test and Refine
Print your design on fabric and evaluate it critically. Look at it from different distances. Check how it drapes, whether the colors are accurate, and if the repeat is truly seamless. Wash a test piece to see how colors hold up. Make adjustments based on what you observe, because fabric always reveals issues that a screen cannot show you.
This testing phase separates good textile design from great textile design. The willingness to iterate, refine, and sometimes start over is what produces professional-quality results. Budget time and materials for at least two rounds of testing on any important project.
Common Mistakes Beginners Make (and How to Avoid Them)
After spending time in textile design communities and forums, I see the same mistakes come up again and again. Learning from these common pitfalls will save you weeks of frustration.
Mistake 1: Making motifs too complex. Beginners tend to cram every detail into a single motif. On fabric, viewed from a few feet away, much of that detail disappears. Start simpler than you think you need to. Bold, clear shapes read better on textiles than intricate, fussy designs.
Mistake 2: Ignoring the repeat structure. Designing a beautiful single motif is not the same as designing a beautiful repeating pattern. If you only look at your design as a single tile, you will miss problems that only appear when the pattern tiles across a full yard of fabric. Always test your repeats in a three-by-three grid or larger.
Mistake 3: Choosing colors on screen only. Screen colors and printed fabric colors are two different realities. A vibrant coral on your monitor can print as a dull pink on cotton. Always test your palette on the actual fabric type you plan to use before committing to a full design.
Mistake 4: Trying to learn everything at once. Textile design spans dozens of techniques, software programs, and production methods. Pick one approach, whether that is digital surface pattern design or hand block printing, and learn it well before branching out. Depth beats breadth in the early stages.
Mistake 5: Skipping the business basics. If your goal is to sell your designs, spend time understanding licensing terms, pricing structures, and copyright. Many beginners jump into contracts or upload designs to platforms without reading the fine print. Know your rights before you share your work.
Transitioning from Fine Art to Textile Design
If you are already a practicing artist, you have a significant head start. You understand composition, you have developed your visual voice, and you know how to put in the hours of practice required to build skill. The transition to textile design is less about learning an entirely new discipline and more about adapting your existing skills to a new medium and context.
The biggest mental shift is thinking in repeats rather than single compositions. In fine art, your canvas has four edges and the viewer sees the whole piece at once. In textile design, your pattern extends infinitely in every direction. The viewer might only see a small portion of your design at any given moment, and that portion needs to be visually satisfying on its own while also working as part of the larger pattern.
Start by taking one of your existing artworks and adapting it into a repeating pattern. This exercise bridges your current skills with the new ones you are developing. Simplify forms, create separations between elements that will need to tile, and experiment with scale. You will quickly discover which aspects of your artistic style translate naturally to fabric and which need adjustment.
Consider investing in a structured course if you want to accelerate the transition. Programs like Bonnie Christine’s Surface Pattern Design course or classes on Skillshare and Domestika walk you through the complete process from a beginner’s perspective. Many artists I have spoken with found that a few weeks of focused instruction saved them months of trial and error.
Career Paths and Next Steps
Textile design offers several career paths, and understanding the options helps you set realistic goals. Each path has different requirements, income potential, and creative freedom.
Licensing: You grant a company the right to use your pattern on their products in exchange for royalties. Licensing deals vary widely. Some pay a percentage of sales, others offer flat fees per design. The advantage is passive income; the same design can generate revenue for years. The challenge is that licensing is competitive and contract terms require careful review.
Direct selling: You sell finished fabric, printed products, or digital pattern files directly to customers. Platforms like Spoonflower, Redbubble, and Society6 handle production and shipping while you upload designs and earn a margin. This path gives you more control but requires marketing effort to stand out in crowded marketplaces.
Freelance design: You create custom patterns for clients in fashion, home decor, or other industries. Freelancing offers the highest per-project income but requires strong networking, a polished portfolio, and the ability to work within client briefs and deadlines.
In-house positions: Many fashion brands, fabric manufacturers, and home decor companies employ full-time textile designers. These roles provide steady income and benefits but less creative freedom than working independently.
Building a portfolio is essential no matter which path you choose. Start by creating a collection of eight to twelve coordinated patterns that demonstrate your range and cohesion. Include colorway variations, different repeat types, and a brief explanation of your design process for each collection. A well-organized portfolio speaks louder than any resume in this field.
FAQs
What is textile design for beginners?
Textile design for beginners is the practice of creating patterns, colors, and textures specifically for fabric surfaces. It involves learning three core skills: pattern repeats (how a design tiles seamlessly across fabric), color theory adapted for textiles (understanding how color behaves on different materials), and texture (both visual and physical). Beginners typically start with surface pattern design using digital tools or traditional methods like block printing before exploring woven or knit textile design.
How do I start textile design as an artist?
Start by choosing one approach, such as digital surface pattern design, and focus there first. Gather inspiration and build a mood board, then create simple motifs in your preferred medium. Learn one repeat structure (half-drop is the most versatile) and practice tiling your motifs into seamless patterns. Test your designs by printing them on fabric through a service like Spoonflower. Most artists benefit from a structured course to accelerate the learning process.
What are the basic principles of textile design?
The basic principles of textile design center on three pillars: pattern repeats (block, half-drop, brick, mirror, and random), color theory (harmony, contrast, and colorway development), and texture (visual depth and physical surface quality). Beyond these, strong textile design requires balance in composition, appropriate scale for the intended end use, and attention to how the pattern will perform during manufacturing and everyday use.
What tools do I need for textile design?
For digital design, Adobe Photoshop and Illustrator are the industry standards, though budget-friendly alternatives like Procreate, Affinity Designer, Inkscape, and GIMP work well for beginners. For hands-on techniques, you will want graph paper, tracing paper, gouache paints, fine-tip markers, and optionally a basic screen printing or block printing setup. To test your designs on real fabric, use a print-on-demand service like Spoonflower that has no minimum orders.
How is textile design different from fine art?
Textile design differs from fine art in three key ways. First, textile designs are built to repeat infinitely across a surface rather than exist as a single composition. Second, textile designs must account for practical factors like washability, durability, and color fastness that fine art does not require. Third, textile design often involves creating multiple colorways of the same pattern and working within commercial production constraints, which adds a functional dimension beyond pure aesthetic expression.
Conclusion
Learning the basics of textile design for artists opens up an entire world of creative possibility. You now understand what textile design is, how it differs from fine art, the core principles of pattern repeats, color theory, and texture, and the tools and software available to get started. You also have a clear step-by-step process to follow from inspiration to finished fabric, along with knowledge of the common mistakes that trip up most beginners.
The artists who succeed in textile design are not necessarily the most technically skilled. They are the ones who commit to practicing pattern repeats, testing their work on actual fabric, and steadily building a body of work. Your fine art background gives you a real advantage in composition, color sense, and creative vision. The textile design world needs more artists who bring that depth of visual thinking.
Start with one technique, one repeat structure, and a small collection of motifs. Print a test swatch. Learn from what you see. Then iterate. Every professional textile designer was once exactly where you are right now, looking at a blank surface and wondering how to fill it with pattern. The only way forward is to begin.