
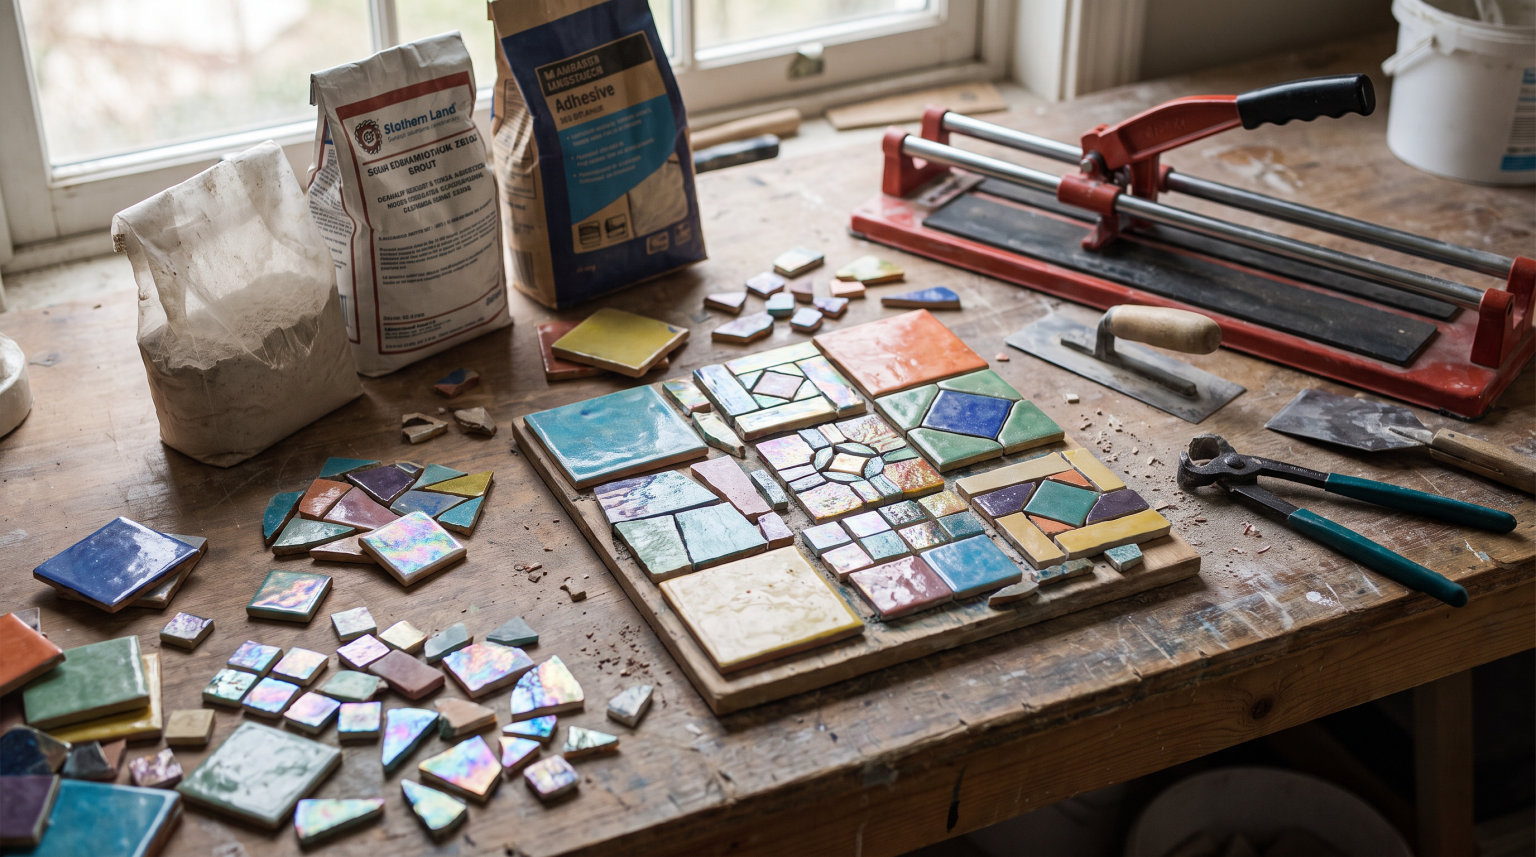
I have been making mosaic art at my kitchen table for over seven years now, and I still remember how intimidating it felt the first time I stared at a pile of broken tiles wondering where to even begin. If you are looking for a creative hobby that does not require a Fine Arts degree or a studio full of expensive gear, you are in the right place. The basics of mosaic making at home are surprisingly straightforward once you understand the core process, and I am going to walk you through everything I wish someone had told me on day one.
Mosaic art has been around for thousands of years, dating back to ancient Mesopotamia, and today it is one of the most accessible crafts you can pick up at home. Whether you want to decorate a terracotta pot for your garden or create a full wall installation, the fundamental techniques remain the same. In fact, some of the most inspiring examples of public mosaic work come from guerrilla artists who use mosaic to transform public spaces, proving that this art form is as versatile as it is enduring.
This guide covers the basics of mosaic making at home from start to finish. I will walk you through the materials you need, the two main methods, a complete step-by-step process, grouting techniques, beginner project ideas, and the common mistakes that trip up most newcomers. By the end, you will have enough knowledge to tackle your first project with confidence.
Table of Contents
What Is Mosaic Art? A Quick Overview
Mosaic art is a decorative technique where small pieces of material are arranged on a surface to create images, patterns, or abstract designs. Those small pieces are called tesserae, and they can be made from almost anything: ceramic tiles, glass, stone, seashells, broken dishes, pebbles, or even bottle caps. The tesserae are glued to a base surface using adhesive, then the gaps between them are filled with grout to lock everything in place.
The beauty of mosaic art lies in its flexibility. You can follow a precise pattern to recreate a picture, or you can work freely and let the materials guide your design. There is no single “right” way to make a mosaic, which is exactly what makes it such a welcoming craft for beginners.
Historically, mosaics were created using natural stone and were reserved for temples, palaces, and public buildings. The Romans and Byzantines elevated mosaic art to extraordinary heights, covering entire floors and ceilings with intricate scenes. Today, you can achieve stunning results at your kitchen table using materials that cost next to nothing. The basic principles have not changed in millennia: cut pieces, arrange them, glue them down, and grout the gaps.
Essential Materials and Tools for Mosaic Making
One of the biggest concerns I hear from people interested in mosaic art is whether they need to spend a lot of money to get started. The honest answer is no. While there are specialty tools that make certain tasks easier, you can complete your first few projects with a surprisingly short shopping list. Here is what you actually need.
Must-Have Tools
These are the core tools that I use on every single mosaic project, regardless of size or material.
Tile nippers – A pair of dual-wheeled glass nippers or standard ceramic nippers for cutting tiles to size. If you are working with glass tiles, dual-wheeled nippers give you much cleaner cuts.
Safety goggles – Non-negotiable. Tiles and glass send tiny shards flying when cut. Wear them every time.
Rubber gloves – Grout and adhesive are both harsh on your skin. A basic box of disposable nitrile gloves works great.
Grout float or spreader – A small rubber float for pushing grout into the gaps between tesserae. A plastic putty knife also works for small projects.
Sponge and bucket of water – For wiping away excess grout before it hardens.
Pencil and paper – For sketching your design before you start gluing.
Types of Tesserae (Tile Materials)
The material you choose for your tesserae affects both the look of your finished piece and the tools you will need. Here are the most common options for beginners.
Ceramic tiles are the most forgiving material for beginners. They are easy to cut, widely available at any hardware store, and come in hundreds of colors. Leftover floor tiles from a home renovation project work beautifully, and many tile stores will give you their broken or discontinued samples for free if you ask.
Glass tiles create a luminous, jewel-like effect that ceramic cannot match. They are a bit trickier to cut and require dual-wheeled nippers, but the results are stunning. Glass gems and glass gems from craft stores are also popular for simple projects.
Stone and pebbles are perfect for outdoor projects like garden stepping stones. They require minimal cutting and lend a natural, earthy feel. River rocks and small pebbles can often be collected for free.
Recycled and found materials are where mosaic gets really fun. Broken dishes, old china, sea glass, buttons, beads, and even LEGOs have all been used to create mosaics. Some of my favorite pieces were made entirely from items I found around the house or at thrift stores.
Adhesives: Which One to Use
Choosing the right adhesive causes more confusion for beginners than almost anything else. I keep three types on hand, and the one I reach for depends on the project.
For indoor projects on wood or MDF, a good quality craft glue or PVA adhesive works perfectly for small pieces. For larger indoor projects, I use mosaic mastic or a construction adhesive like Liquid Nails.
For outdoor projects or surfaces that will get wet, you need thinset mortar. Thinset is a cement-based adhesive that creates a permanent, waterproof bond. It is available at any hardware store in the tile section. Mix it with water to a peanut-butter consistency and apply it with a small trowel or palette knife.
For glass-on-glass projects where you want light to pass through, use a clear-drying adhesive like silicone sealant or a dedicated glass adhesive. Standard white glues dry cloudy and will block the light.
Budget-Friendly Material Sourcing
You absolutely do not need to buy a mosaic kit to get started. Some of the best materials cost nothing at all. Here are my favorite ways to source mosaic supplies on a tight budget.
Visit local tile stores and ask if they have any broken tiles, discontinued samples, or scrap pieces they are willing to part with. Most stores are happy to give them away rather than throw them out. Thrift stores are goldmines for colorful old plates and bowls that can be broken into tesserae. Garage sales often have bags of mixed buttons, beads, and sea glass for pennies.
Your own recycling bin is another great resource. Wine bottles can be cut and smoothed into beautiful glass tesserae. Broken terracotta pots, old china, and even eggshells (for tiny detail work) are all usable materials. The key is to think creatively about what you already have.
Direct vs Indirect Mosaic Method: Which Should You Use?
There are two primary methods for creating mosaics, and understanding the difference between them will help you choose the right approach for your project.
The direct method is the simplest and most intuitive. You arrange and glue each tessera directly onto your base surface, one piece at a time. You can see your design develop as you work, which makes it easy to adjust colors and spacing on the fly. This is the method I recommend for all beginners because it is forgiving and gives you full visual control over the final result.
The indirect method involves arranging your tesserae face-down on a temporary surface (like a sheet of paper or adhesive film), then casting a backing material (usually concrete or plaster) over the top. Once the backing sets, you flip the whole piece over and remove the temporary surface to reveal the mosaic face. This method produces a perfectly flat, even surface, which is why it is preferred for flooring, tabletops, and installations where the surface needs to be level.
For your first several projects, stick with the direct method. It is faster to learn, easier to correct mistakes, and produces satisfying results without any special casting equipment. You can always experiment with the indirect method once you have built confidence with the basics.
The Basics of Mosaic Making at Home: Step-by-Step Process
Here is the complete step-by-step process I follow for every mosaic project using the direct method. Each step builds on the last, so work through them in order and take your time. A small coaster-sized project typically takes me about two to three hours of active work spread over two days (to allow for curing time).
Step 1: Plan Your Design
Start by deciding what you want to create. Browse mosaic patterns online for inspiration, or create your own design from scratch. For your very first project, I suggest something simple: a geometric pattern, a heart, a star, or even just an abstract color block. Trace the outline of your base surface onto a piece of paper, then sketch your design within those boundaries. Keep in mind that small details are harder to render in mosaic than bold, simple shapes.
Step 2: Prepare Your Base Surface
Your base needs to be clean, dry, and free of dust or grease. If you are working with wood, give it a light sanding and wipe it down. Concrete bases should be brushed clean. If you are using a terracotta pot, wipe it with a damp cloth and let it dry completely. For outdoor projects, make sure the base is frost-resistant if you live in a cold climate. A quick coat of primer or sealer on porous surfaces like unsealed wood or terracotta can help the adhesive bond more effectively.
Step 3: Transfer Your Design
Once your base is prepared, transfer your sketched design onto the surface. You can do this freehand with a pencil, or use carbon paper to trace your original sketch directly onto the base. Keep the lines light and simple. You do not need to outline every single tessera, just the major shapes and color boundaries. These pencil lines will be covered by adhesive and tiles, so they will not show in the final piece.
Step 4: Cut Your Tesserae
Now it is time to break your tiles or materials into usable pieces. This is where safety goggles are essential. If you have tile nippers, hold each tile firmly and make small, controlled cuts. Work over a container or tray to catch the pieces. If you do not have nippers, you can use the hammer and cloth method: wrap your tile in an old towel or cloth, place it on a hard surface, and tap it gently with a hammer. The cloth prevents shards from flying and catches the broken pieces.
Sort your cut pieces by color and approximate size. Having everything organized before you start gluing makes the process much smoother. Aim for pieces that are roughly the same thickness so your finished surface will be even.
Step 5: Arrange and Dry-Fit Pieces
Before you break out the adhesive, lay your tesserae on the base surface to test your arrangement. This is called a dry fit, and it saves you from making permanent mistakes. Play with different layouts, swap colors, and adjust spacing until you are happy with how the design looks. Leave a small gap (about 2 to 3 millimeters) between each piece for the grout. The gap does not need to be perfectly uniform, but try to keep it relatively consistent.
Step 6: Apply Adhesive and Set Tiles
Once your dry fit looks good, start gluing pieces down. Work in small sections so the adhesive does not dry out before you place your tiles. Apply a small dab of adhesive to the back of each tessera (called back-buttering) and press it firmly onto the base. Alternatively, you can spread a thin layer of adhesive on a small area of the base and press tiles into it. I prefer back-buttering for beginners because it gives you more control over placement.
Press each piece down gently but firmly. You want full contact between the tessera and the base, but you do not want the adhesive squeezing up between the tiles and filling the grout lines. If adhesive oozes up, wipe it away with a toothpick or small tool before it dries.
Step 7: Let Adhesive Cure (24 Hours)
Patience is critical here. Leave your mosaic undisturbed for at least 24 hours to let the adhesive fully cure. Moving the piece too early can shift tiles and weaken the bond. For thinset mortar, curing may take up to 48 hours. Resist the urge to rush this step. A properly cured adhesive bond is what keeps your mosaic together for years.
Step 8: Mix and Apply Grout
Once the adhesive is fully cured, you are ready to grout. Choose a grout color that complements your tesserae. White and light gray grout works well with colorful tiles, while darker grout can make lighter tiles pop. Mix the grout according to the package directions. You want a consistency similar to thick peanut butter: spreadable but not runny.
Using your grout float or spreader, push the grout into all the gaps between your tesserae. Work diagonally across the tiles at a 45-degree angle, pressing firmly to ensure the grout fills every gap completely. Cover the entire surface, making sure there are no air bubbles or unfilled spaces. Do not worry about how messy it looks at this stage. That is normal.
Step 9: Clean Excess Grout
Wait about 15 to 20 minutes for the grout to begin setting (it will look slightly dull and less wet on the surface). Then take a damp sponge and gently wipe away the excess grout from the surface of the tiles. Rinse the sponge frequently in your bucket of water and wring it out well. You want the sponge damp, not dripping wet, because too much water will wash the grout out of the gaps.
You will not get every last bit of grout haze off in this first pass, and that is fine. Let the mosaic dry for another hour, then come back with a soft, dry cloth and buff away the remaining haze. If any stubborn spots remain, a little white vinegar on a cloth usually takes care of them.
Step 10: Seal and Protect
This step is optional for indoor pieces but strongly recommended for anything that will be displayed outdoors or in a wet area like a bathroom. Once the grout has fully cured (another 24 to 48 hours), apply a grout sealer with a small brush or applicator bottle. The sealer penetrates the grout and makes it resistant to water, stains, and mildew. Reapply sealer every year or two for outdoor pieces to keep them looking their best.
How to Grout a Mosaic Properly
Grouting is the step that seems to cause the most anxiety for beginners, so let me go deeper into the process and address the common problems people run into. A well-grouted mosaic looks polished and professional. A poorly grouted one can look messy even if the tile work is beautiful.
Choosing the Right Grout
There are two main types of grout you will encounter: sanded and unsanded. Sanded grout contains fine sand particles, which makes it stronger and more resistant to cracking. Use sanded grout for gaps wider than 3 millimeters (about 1/8 inch). Unsanded grout is smoother and works best for narrow gaps under 3 millimeters. For most beginner projects with ceramic tiles, sanded grout is the safe default choice.
Grout comes in a wide range of colors, and the color you choose has a big impact on the final look. As a general rule, choose a grout color that is slightly darker than your lightest tile. This creates subtle contrast without fighting the tile colors for attention. If you want a bold, graphic look, a dark grout with light tiles creates strong definition. White grout with colorful tiles gives a clean, fresh appearance.
Mixing Grout Correctly
The biggest grouting mistake I see is mixing the grout too thin. Runny grout weakens the bond and shrinks as it dries, leaving gaps that need to be refilled. Start with less water than you think you need and add more gradually. The ideal consistency is thick enough to hold its shape when you scoop it with your float, but thin enough to spread smoothly. Mix small batches at first until you get a feel for the right texture.
Applying Grout: Technique Matters
Work the grout into the gaps using firm, diagonal strokes with your float. Apply pressure to force the grout deep into every crevice. I usually go over the entire piece two or three times to make sure I have not missed any spots. Pay special attention to corners and edges, as these areas are easy to underfill.
When you are satisfied that all gaps are filled, use the edge of your float to scrape off the excess grout from the tile surfaces. This reduces the amount of cleanup you need to do later. Then follow the cleaning process described in Step 9 above: wait 15 to 20 minutes, wipe with a damp sponge, wait another hour, and buff with a dry cloth.
Fixing Grout Mistakes
If you notice a gap that did not fill properly after the grout has dried, you can apply a small amount of fresh grout directly to that spot. Dampen the existing grout slightly first to help the new grout bond. For grout that cracked as it dried, the same approach works: dampen the cracked area and press fresh grout into the crack, then smooth it flush with the surrounding surface.
If grout haze will not come off with a dry cloth or vinegar, wait 24 hours and use a commercial grout haze remover. These products are available at any hardware store and dissolve the stubborn residue without damaging your tiles.
Beginner-Friendly Mosaic Project Ideas
Choosing the right first project makes a huge difference in whether you enjoy the process enough to keep going. Start small and simple. You can always move on to bigger and more ambitious projects once you have a few wins under your belt.
Level 1: Coasters
Coasters are the perfect first mosaic project. They are small (about 4 inches square), require very few materials, and can be completed in a single weekend. Use a wooden or cork base, some broken ceramic tiles or glass gems, and a simple geometric pattern. Coasters also make wonderful handmade gifts, which is a nice bonus.
Level 2: Picture Frames
A plain wooden picture frame transforms into a beautiful piece of art with a mosaic border. You only need to tile the flat front surface, which keeps the project manageable. This is a great project for experimenting with color combinations and getting comfortable with the grouting process on a slightly larger scale.
Level 3: Terracotta Pots
Terra cotta pots are a natural surface for mosaic because the porous clay bonds well with adhesive. A 6-inch pot covered in mosaic tiles makes a striking centerpiece for a patio table or windowsill. Use thinset mortar for the adhesive if the pot will live outdoors, and seal the grout to protect it from moisture.
Level 4: Garden Stepping Stones
Garden stepping stones are where mosaic meets outdoor functionality. You can use a premade concrete paver as your base, or pour your own concrete into a mold. Stone and pebble tesserae work especially well for outdoor projects because they are naturally weather-resistant. This is a project that rewards patience and planning, but the results can transform a garden path into something truly special.
Level 5: Table Tops
Once you are comfortable with the basics, a small side table or bistro table top is a rewarding project. Use exterior-grade adhesive and grout if the table will live outdoors, and seal everything thoroughly. A mosaic table top becomes a functional piece of art that you will enjoy for years.
Common Beginner Mistakes to Avoid
Over the years, I have made just about every mosaic mistake there is. Here are the ones I see beginners make most often, along with how to avoid or fix them.
Using too much adhesive. When you apply too much glue, it squeezes up between the tiles and fills the space meant for grout. This creates an uneven surface and makes grouting harder. Use a small amount of adhesive per tile, and wipe away any that oozes up before it cures.
Not leaving enough space for grout. Tiles placed too close together leave no room for grout to fill, which weakens the structure and gives an unfinished look. Aim for consistent 2 to 3 millimeter gaps. If you accidentally place tiles too close, you can gently pry them apart before the adhesive sets.
Rushing the curing time. I know it is tempting to start grouting right away, but adhesive that has not fully cured will allow tiles to shift when you press grout across the surface. Wait the full 24 hours (48 for thinset). It is worth the wait.
Mixing grout too runny. Thin, watery grout sounds easier to spread, but it weakens the final result and shrinks as it dries. Mix to a thick paste consistency, and add water gradually.
Skipping the sealant on outdoor pieces. Unsealed grout absorbs water, which leads to cracking, staining, and eventually deterioration. If your mosaic will be outdoors or in a bathroom, always seal the grout after it cures. It takes 10 minutes and adds years to the life of your piece.
Choosing a too-complicated first project. I have seen beginners try to recreate the Mona Lisa in mosaic on their first attempt. It rarely goes well. Start with a simple coaster or picture frame. Build your skills and confidence before taking on complex designs.
FAQs
What materials do I need to start mosaic making at home?
You need tile nippers (or a hammer and cloth), safety goggles, rubber gloves, tesserae (ceramic tiles, glass, or recycled materials), adhesive (craft glue for indoors, thinset for outdoors), grout, a grout float or spreader, a sponge, a bucket of water, and a base surface to work on. Most of these items are available at hardware stores or can be sourced from recycled household materials.
How do I cut mosaic tiles without special tools?
You can use the hammer and cloth method: wrap your tile in an old towel or cloth, place it on a hard surface, and tap it gently with a hammer. The cloth contains the shards and keeps them from flying. Sort the resulting pieces by size and color. This method works well for ceramic and porcelain tiles. For glass tiles, nippers are strongly recommended because the hammer method produces unpredictable results with glass.
What is the difference between direct and indirect mosaic method?
The direct method involves gluing tesserae directly onto the final surface, one piece at a time. You see your design develop as you work, making it ideal for beginners. The indirect method involves arranging tesserae face-down on a temporary surface, then casting a backing material over them. Once set, you flip the piece to reveal the mosaic. The indirect method produces a perfectly flat surface, making it better for flooring and tabletops, but it requires more skill and equipment.
How do I grout a mosaic properly?
Mix grout to a thick peanut-butter consistency. Use a grout float to press grout into all gaps, working diagonally across the tiles. Scrape off excess grout with the float edge. Wait 15 to 20 minutes until grout begins to set, then wipe the tile surfaces with a damp sponge. Rinse the sponge frequently. After one hour, buff away remaining haze with a dry cloth. Use white vinegar on stubborn spots. Let the grout cure for 24 to 48 hours before sealing.
Can I make a mosaic without buying expensive supplies?
Yes, absolutely. Many mosaic artists work almost entirely with recycled and found materials. Broken dishes, leftover floor tiles, seashells, pebbles, buttons, and sea glass all work as tesserae. Tile stores often give away broken or discontinued samples for free. A hammer and cloth replaces tile nippers for ceramic materials. Basic craft glue works for small indoor projects. Grout is inexpensive and available at any hardware store. You can start your first project for under 20 dollars total.
Wrapping Up: Start Your Mosaic Journey Today
Learning the basics of mosaic making at home opens up a creative world that is both deeply satisfying and endlessly adaptable. You now have a clear understanding of the materials, the two main methods, a complete step-by-step process, and the know-how to avoid the mistakes that catch most beginners off guard.
My best advice is to start small and not worry about perfection. Your first mosaic does not need to be a masterpiece. It just needs to be finished. Pick up some broken tiles, grab a piece of wood, and give it a try. Every mosaic artist you admire started exactly where you are right now: staring at a pile of broken pieces, ready to create something beautiful from them.