
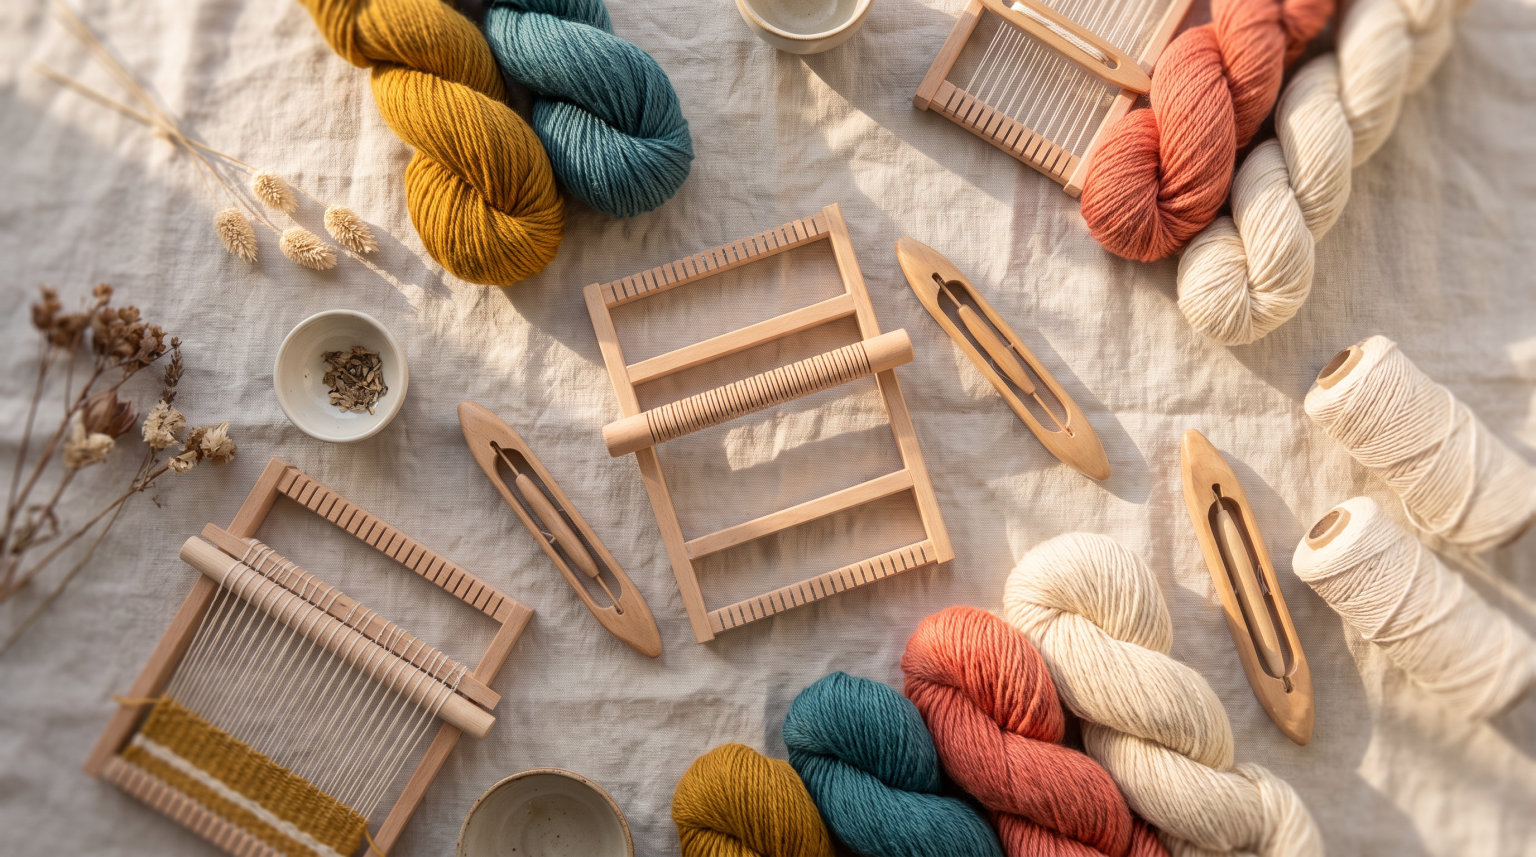
If you have ever looked at a handwoven scarf or a textured wall hanging and thought “I wish I could make that,” you are in exactly the right place. I have spent years working with yarn and looms, and I remember how confusing it all felt at the start. The good news is that the basics of weaving for beginners are far simpler than most people expect.
Weaving is one of the oldest crafts in human history. People have been interlacing threads to create fabric for thousands of years, and the fundamental process has not changed much. What has changed is the variety of tools and materials available to you today.
In this guide, I will walk you through everything you need to know to start weaving from scratch. We will cover the essential terminology, the different types of looms, the supplies you actually need (and what you can skip), and step-by-step instructions for your first projects. By the end, you will have a solid foundation to start creating your own woven pieces with confidence.
Whether you want to make decorative tapestries, functional household textiles, or just explore a relaxing new hobby, this guide will give you the clarity and direction that so many beginners tell us they struggled to find.
Table of Contents
What Is Weaving? A Complete Definition
Weaving is the process of interlacing two sets of yarn or thread at right angles to create fabric. One set of threads runs vertically under tension on a loom, and the other set passes horizontally through the vertical threads in a pattern. That is the entire concept in a single sentence.
The vertical threads are called the warp, and the horizontal threads are called the weft. Every piece of woven fabric, from a simple cotton dish towel to an intricate Persian rug, is made using this same basic structure. The warp provides the foundation and the weft builds the pattern and body of the cloth.
Weaving dates back at least 12,000 years. Archaeologists have found fragments of woven cloth in places like Turkey and Peru that predate written language. Early weavers used simple frames and plant fibers, but the core idea was identical to what we do today. Thread goes over and under other thread, repeated thousands of times, to make cloth.
What makes weaving so rewarding is the combination of structure and creativity. You follow a system, but within that system there is enormous room for personal expression. Different thread colors, different patterns, different yarn textures, and different techniques all produce completely different results.
Weaving Terminology Every Beginner Needs to Know
When I first started weaving, the vocabulary was one of the biggest hurdles. Experienced weavers toss around terms like “shed” and “pick” as if everyone knows what they mean. So let me define the essential terms right here so you never feel lost reading a pattern or watching a tutorial.
Warp
The warp is the set of threads that run lengthwise on your loom, held under tension from top to bottom (or front to back on a floor loom). Think of the warp as the backbone of your weaving. These threads stay in place the entire time you work.
Weft
The weft is the thread you weave through the warp, going horizontally from side to side. This is the thread you actively pass back and forth using a shuttle or your hands. The weft is where most of your visible pattern and color come from.
Loom
A loom is the frame or device that holds your warp threads under tension while you weave. Looms come in many sizes and styles, from small lap looms that fit on a coffee table to large floor looms that take up half a room. The type of loom determines what kinds of projects you can make.
Shed
The shed is the opening created between raised and lowered warp threads. When some warp threads lift up, they create a space for you to pass the weft through. Creating and changing the shed is how you form different weave patterns.
Shuttle
A shuttle is a tool that carries your weft yarn through the shed. Shuttles come in several shapes: stick shuttles for small frame looms, boat shuttles for floor looms, and flat shuttles for tapestry work. On small projects, you can even use your fingers or a tapestry needle instead of a shuttle.
Heddle
A heddle is a device that raises and lowers groups of warp threads to create the shed. On a frame loom, the heddle might be a simple string or rigid bar. On floor and table looms, heddles are wired or string loops hung on shafts that move up and down when you press treadles with your feet.
Beat (or Beater)
Beating is the act of pushing the weft thread snugly against the previous row of weaving. You use a tool called a beater (or a comb on simple looms) to press each row into place. The firmness of your beat determines how dense or open your fabric becomes.
Selvage
The selvage is the finished edge of your weaving on the left and right sides where the weft turns around the warp. A neat, even selvage is the mark of a careful weaver. Beginners often struggle with selvages that pull inward or flare outward, but this improves with practice.
Reed
A reed is a comb-like part of a floor or table loom that spaces the warp threads evenly and beats the weft into place. The reed has a specific number of slots (called dents) per inch, which determines how closely spaced your warp threads are.
Pick
A pick is one single pass of the weft thread through the shed. If you weave 40 rows, you have made 40 picks. Counting picks helps you track your progress and keep your pattern consistent.
Types of Looms: Which One Is Right for You?
Choosing a loom is one of the first big decisions you will make as a new weaver. The right choice depends on your budget, your available space, and the kinds of projects you want to create. Here is a breakdown of the four main types of looms that beginners encounter.
Frame Loom (Best for Absolute Beginners)
A frame loom is a simple wooden or metal frame with notches or pegs along the top and bottom edges for attaching warp threads. These looms are affordable, portable, and extremely beginner-friendly. Most people start with a frame loom before moving on to anything more complex.
Frame looms are ideal for making wall hangings, small tapestries, coasters, and placemats. They do not have mechanical parts, so you create the shed manually by lifting warp threads with a shed stick or your fingers. This hands-on approach helps you truly understand how weaving works at its core.
Pros: Low cost, easy to learn, portable, great for tapestry and decorative pieces.
Cons: Limited to smaller projects, manual shed creation can be slow, not suited for long fabric yardage.
Table Loom (Great Step Up)
A table loom sits on a table or stand and has multiple shafts (usually 4 to 8) that move the heddles up and down using levers. This mechanical advantage lets you create more complex patterns with less effort. Table looms are compact enough for apartments but capable enough for serious weaving.
With a table loom, you can weave scarves, table runners, placemats, and fabric for small sewing projects. The lever-operated shafts make pattern weaving much faster and more precise than working on a simple frame loom.
Pros: More pattern capability, manageable size, good for learning multi-shaft weaving.
Cons: More expensive than frame looms, requires some assembly and setup, takes up table space.
Floor Loom (For Serious Projects)
A floor loom is a large freestanding loom operated by foot treadles, leaving your hands free to manage the shuttle and beater. Floor looms typically have 4 to 8 shafts (sometimes more) and can weave wide, long pieces of fabric. They are the go-to choice for producing yards of cloth for garments, blankets, and large textiles.
For a beginner, a floor loom can be a big investment in both money and space. Many experienced weavers in online forums recommend taking a class on a floor loom before buying one, so you know whether you enjoy the process enough to justify the commitment.
Pros: Fast weaving speed, wide weaving width, hands-free shed changes, professional results.
Cons: Expensive, requires dedicated floor space, complex to set up and warp.
Inkle Loom (For Bands and Straps)
An inkle loom is a small, specialized loom designed for weaving narrow bands, straps, belts, and bookmarks. It has a series of pegs that hold the warp in a continuous loop. Inkle weaving is fast, fun, and a great way to practice pattern work without a big investment.
If you want quick results and love geometric patterns, an inkle loom is a fantastic and inexpensive way to start. Many weavers keep one alongside their main loom for small projects and gifts.
Pros: Very affordable, fast to set up, excellent for patterns, portable.
Cons: Limited to narrow strips, not suitable for wide fabric.
Essential Weaving Supplies and Tools
One of the most common questions I see from new weavers is “what supplies do I actually need?” It is easy to feel like you need to buy everything at once. In reality, you only need a handful of items to get started, and many of them can be improvised or purchased inexpensively.
The Essentials
Loom: Start with a frame loom if you are on a budget. You can even make one from a picture frame and some small nails. If you prefer to buy one, there are plenty of affordable wooden frame looms available online.
Yarn: For your first project, use a medium-weight cotton or wool yarn in a light color so you can see your stitches clearly. Avoid novelty yarns, fuzzy yarns, or anything too slippery until you have more experience.
Shuttle or Tapestry Needle: A stick shuttle or a large tapestry needle for passing the weft through the warp. On small frame looms, a tapestry needle works perfectly.
Scissors: Any sharp pair of craft scissors will do.
Fork or Comb: You need something to beat (press) the weft threads into place. A dining fork works surprisingly well for beginners using a frame loom. A wide-tooth comb also works.
Helpful but Optional
Warping board or pegs: For measuring long warp threads evenly. Not essential for frame loom projects where you warp directly on the loom.
Threading hook: A small hook used to pull warp threads through heddles on table and floor looms. Not needed for frame looms.
Tapestry beater: A specialized tool for beating weft on tapestry and frame looms. Nicer than a fork but not strictly necessary.
Measuring tape: Helpful for tracking the size of your weaving as it grows.
How to Choose Yarn for Weaving
Yarn selection can make or break your early weaving experience. I learned this the hard way when I tried using a slubby, variegated novelty yarn for my very first project. It was frustrating and the results were messy. Here is what I recommend instead.
Best Yarn for Beginners
Cotton yarn is the top recommendation for beginners. It is smooth, easy to handle, does not stretch much, and produces clean, even fabric. A worsted or DK weight cotton is perfect for your first few projects on a frame loom.
Wool yarn is another excellent choice, especially a smooth worsted-weight wool. Wool has a slight natural grip that helps hold your stitches in place, and it is forgiving when you make minor mistakes.
Yarn to Avoid When Starting Out
Stay away from very slippery yarns (like silk or rayon), very fuzzy yarns (like mohair), and highly textured yarns (boucle, thick-and-thin). These make it hard to see what you are doing and difficult to maintain even tension. Save them for later when your hands are more confident.
Warp vs. Weft Yarn
Your warp yarn needs to be strong and smooth because it is held under tension for the entire project. Cotton and tightly spun wool are ideal for warp. Your weft yarn can be more experimental since it just passes through the warp without bearing tension. Many weavers use a neutral cotton for the warp and save their decorative, colorful yarns for the weft.
How to Warp a Loom: Step-by-Step Guide
Warping a loom means setting up the vertical threads that form the foundation of your weaving. For beginners using a frame loom, this process is straightforward. I will walk you through it one step at a time. Take your time here because a well-warped loom makes everything that follows much easier.
Step 1: Measure Your Warp Threads
Cut warp threads that are long enough to go from one end of your loom to the other, plus extra length for finishing. A good rule is to cut each thread at least 12 inches longer than your planned weaving length. You can always trim excess, but you cannot add length once you start.
Step 2: Tie the First Thread
Take your first warp thread and tie a secure knot around the top peg or nail on one side of the loom. A double knot works well. Leave a tail of about 3 inches for finishing later.
Step 3: Thread Down and Back Up
Bring the thread straight down to the bottom of the loom and loop it around the corresponding bottom peg or nail. Then bring it back up to the top and loop around the next top peg. Continue going down and up, creating a zigzag pattern across the loom.
Step 4: Space the Threads Evenly
The spacing between your warp threads determines how tight or open your weaving will be. For most beginner projects, spacing threads about 2 to 3 per inch works well. Check that the gaps between all threads are consistent before you move on.
Step 5: Tie Off the Last Thread
When you have warped across the full width you want, tie off the final thread with a secure double knot at the top of the loom. Again, leave a 3-inch tail for finishing.
Step 6: Check and Adjust Tension
Run your fingers across all the warp threads. They should feel equally taut, like guitar strings at the same pitch. If any thread feels significantly looser or tighter than the others, adjust it now. Uneven tension at this stage causes problems throughout your entire project.
Step 7: Add a Shed Stick (Optional)
Slide a flat stick (a shed stick or ruler) between the warp threads, going over every other thread and under every other thread. This creates a permanent opening that speeds up your weaving significantly. Not required, but highly recommended.
Step 8: Begin Weaving a Spacer
Before starting your actual pattern, weave 4 to 6 rows of plain weave using scrap yarn or extra warp thread. This spacer at the bottom gives you a clean edge to work from and can be removed later. Push the spacer rows firmly against the bottom bar of the loom.
5 Basic Weaving Techniques for Beginners
Once your loom is warped and ready, it is time to start weaving. These five techniques form the foundation of nearly everything you will create. Master these and you will have the skills to tackle a wide range of projects.
1. Plain Weave (Tabby Weave)
Plain weave is the simplest and most fundamental weaving technique. You pass the weft over one warp thread and under the next, alternating across the row. On the next row, you reverse the pattern: go under where you went over, and over where you went under. This creates a neat, even checkerboard pattern.
Plain weave is sturdy, versatile, and produces a flat fabric. It is the default technique for dish towels, placemats, table runners, and the background of tapestries. Most of your early projects will use plain weave as the primary stitch, with other techniques added as accents.
When doing plain weave, focus on keeping your selvages even and maintaining consistent tension. Do not pull the weft too tight at the edges, or your weaving will narrow as it grows. Leave a slight curve of extra weft at each side before beating it into place.
2. Twill Weave
Twill weave creates a distinctive diagonal pattern in the fabric. Instead of alternating every single thread, twill moves the pattern over by one thread on each row. For example: go over two threads and under two threads, then shift the starting point by one on the next row. The result is a slanted line that runs across the weaving.
Twill is the technique behind classic blue jeans (denim is a twill weave). It produces a fabric that drapes well and is slightly more flexible than plain weave. On a frame loom, you can create simple twill patterns manually, but the technique really shines on looms with multiple shafts.
For beginners, try a basic 2/2 twill (over 2, under 2, shifting by one each row). Once you get the rhythm, it is very satisfying to watch the diagonal lines form across your weaving.
3. Satin Weave
Satin weave is characterized by long “floats” where the weft thread passes over multiple warp threads before going under one. The result is a smooth, lustrous surface with minimal visible interlacing. True satin weave requires a multi-shaft loom, but you can create a simplified version on a frame loom.
The key to satin weave is keeping the floats consistent and not too long. Floats longer than about half an inch tend to catch and snag. In traditional weaving, satin weave produces elegant, drapey fabric used for formal garments and luxury textiles.
As a beginner, try a simplified satin by passing your weft over 4 warp threads and under 1, then shifting the starting point by 2 threads on each row. The surface will have a soft sheen and a very different texture from plain weave.
4. Rya Knots
Rya knots create a fluffy, textured pile on the surface of your weaving. They are not a weave structure but rather a decorative technique layered on top of your base weaving. Rya knots are what give many wall hangings their characteristic shaggy, bohemian look.
To make a rya knot, cut several lengths of yarn (usually 3 to 5 strands per knot). Fold the bundle in half, loop it around two adjacent warp threads, and pull the cut ends through the loop to form a knot. Pull tight and slide the knot down to sit on top of the previous row of weaving.
Rya knots are incredibly satisfying to make and add wonderful texture to any project. You can trim them to any length for different effects, from short velvety pile to long dramatic tassels.
5. Interlocking Weave
Interlocking weave lets you use two different colors side by side without creating a gap between them. Each color is woven in its own section, and where the two sections meet, the weft threads loop around each other to lock the seam together.
This technique is essential for tapestry weaving, where you want to create pictures or geometric patterns in multiple colors. The interlocking join is nearly invisible when done well, creating a smooth transition from one color to the next.
To practice interlocking, warp a small section of your loom and weave one color on the left half and another color on the right half. At the center where they meet, loop the weft threads around each other before continuing back in the opposite direction. With a little practice, the join becomes second nature.
Common Beginner Weaving Mistakes (And How to Avoid Them)
I made every one of these mistakes when I started weaving. Knowing about them in advance will save you a lot of frustration and wasted yarn. Here are the most common pitfalls and how to prevent them.
Uneven tension: This is the number one beginner problem. If your warp threads are not all at the same tension, your weaving will buckle and warp. Take extra time during warping to make sure every thread feels the same when you pluck it. On a frame loom, use consistent knots.
Beating too hard: Pushing the weft too tightly against the previous row makes stiff, dense fabric and can cause the edges to draw in. Beat gently at first and increase pressure gradually until you find a consistent rhythm. Your weaving should feel firm but not rigid.
Pulling the weft too tight: When you pull the weft thread tightly at the selvage edges, the sides of your weaving pull inward, creating an hourglass shape. Instead, leave a small bubble or curve of slack in the weft before beating it into place. This gives the thread room to settle naturally.
Not planning your project: Jumping straight into weaving without deciding on size, yarn amounts, or pattern leads to running out of warp or ending up with uneven results. Even a quick sketch and rough measurements make a big difference.
Leaving too little warp for finishing: You need at least 4 to 6 inches of unwoven warp at each end to properly finish your piece. Weaving all the way to the edges leaves you with no room to tie knots, create fringe, or sew a clean hem. Always stop weaving while you still have room to finish comfortably.
Your First Weaving Projects: Easy Ideas to Build Skills
Starting with the right project builds your confidence without overwhelming you. Here are four beginner-friendly projects arranged from simplest to slightly more challenging. Each one teaches specific skills while producing something you can actually use or display.
Project 1: Woven Coasters
Coasters are the perfect first weaving project. They are small (about 4 inches square), quick to complete, and let you practice plain weave without a big commitment. You will learn how to warp a loom, weave evenly, beat consistently, and finish edges. Make a set of four in different colors for a satisfying first accomplishment.
Project 2: Simple Wall Hanging
A wall hanging on a frame loom lets you practice multiple techniques in a single project. Start with plain weave at the bottom, add a section of rya knots for texture, try interlocking for a color change, and finish with more plain weave. The varied textures make even a small piece look impressive on the wall.
Project 3: Table Mat or Placemat
Placemats are a step up in size but still very achievable. They teach you to maintain consistent width over a longer weaving, which is excellent practice for keeping your selvages even. Use cotton yarn for a durable, washable result.
Project 4: Small Scarf or Cowl
A narrow scarf woven on a frame loom is a rewarding project that produces something wearable. This project challenges you to weave a longer piece, manage yarn changes, and finish the ends neatly with fringe or hemstitching. It makes a wonderful handmade gift.
How to Finish Your Weaving: Edges, Fringe, and Twining
Finishing is the step that transforms your weaving from a work-in-progress into a completed piece. It is also the step beginners are most tempted to rush. Taking your time here makes the difference between a piece that looks homemade in a good way and one that looks unfinished.
Creating Fringe
The simplest finish for a frame loom project is fringe. Cut the warp threads off the loom, leaving enough length for the fringe you want. Tie groups of two or three warp threads together in overhand knots close to the weaving. Trim the ends to an even length. This creates a classic, casual finish that works well for wall hangings and scarves.
Twining Off the Warp
Twining is a technique where you use a separate piece of yarn to wrap around the warp ends, securing them in place without knots. It creates a clean, professional-looking edge. To twine, take a length of strong yarn and wrap it around small groups of warp threads, passing the working end between the groups to lock each wrap in place.
Hemstitching
Hemstitching is a decorative finishing stitch that secures the weft to the warp at the beginning and end of your weaving. You use a tapestry needle to stitch over and around groups of warp threads, creating a neat openwork border. It looks elegant and keeps your edges from unraveling.
Washing and Blocking
Once your piece is off the loom and finished, washing it in lukewarm water with a gentle soap helps the fibers relax and settle into their final position. Lay the piece flat on a towel, shape it to the desired dimensions, and let it dry completely. This process, called blocking, makes your weaving look polished and professional.
Tips for Getting Started With Weaving in 2026
After years of weaving and talking with hundreds of beginners in online communities, here are the tips I wish someone had given me on day one.
Start with a frame loom. Do not invest in a floor loom until you know you love weaving. A simple frame loom gives you all the fundamentals for a fraction of the cost. Many weavers in forums specifically recommend this approach.
Use free learning resources. YouTube is packed with excellent weaving tutorials for beginners. Channels like The Weaving Loom and others walk you through every technique step by step. Pair video learning with this written guide for the best results. The book “Learning to Weave” by Deborah Chandler is also widely recommended by experienced weavers.
Join a community. The r/weaving subreddit and various Facebook weaving groups are welcoming and helpful. Posting your work and asking questions accelerates your learning dramatically. Experienced weavers love helping newcomers.
Accept imperfection. Your first few projects will not be perfect, and that is completely normal. Every uneven selvage and loose row teaches you something. The weavers I admire most all started with wobbly coasters and messy fringe. The only way to improve is to keep weaving.
FAQs
What is the basic structure of weaving?
Weaving is built on two sets of threads that interlace at right angles. The warp threads run vertically under tension on a loom, and the weft threads pass horizontally over and under the warp threads in a repeating pattern. This over-and-under interlacing is the foundation of every woven fabric, from simple plain weave to complex multi-shaft patterns.
What supplies do I need to start weaving as a beginner?
You need five basic items: a frame loom, medium-weight cotton or wool yarn, a shuttle or tapestry needle, scissors, and something to beat the weft (a fork or comb works fine). You can start with a homemade frame loom made from a picture frame and nails. Everything else costs very little. Skip specialty tools until you know you enjoy the craft.
Can I teach myself to weave?
Yes, absolutely. Many weavers are entirely self-taught using free YouTube tutorials and online guides like this one. Start with a simple frame loom and plain weave, then gradually learn new techniques as you build confidence. The weaving community online is very supportive, and forums like r/weaving on Reddit are great places to ask questions and get feedback on your work.
How long does it take to learn weaving?
You can learn the basic mechanics of weaving in a single afternoon. Most beginners complete their first small project (like a coaster) within 2 to 3 hours. Developing consistent tension, even selvages, and comfort with multiple techniques typically takes a few weeks of regular practice. Becoming truly proficient with pattern weaving on a multi-shaft loom takes several months to a year.
What is the easiest weaving technique for beginners?
Plain weave (also called tabby weave) is the easiest technique for beginners. You simply pass the weft thread over one warp thread and under the next, alternating the pattern on each row. Plain weave is straightforward to learn, produces clean and sturdy fabric, and serves as the foundation for all other weaving techniques.
Can I weave without a loom?
Yes, you can weave without a traditional loom. Cardboard looms are a popular free option: cut notches into a piece of sturdy cardboard and warp it just like a frame loom. You can also weave on a stick, between two chairs, or using paper weaving techniques. While a proper loom makes the process easier and more consistent, the basic over-and-under concept works on almost any surface that can hold threads under tension.
Start Your Weaving Journey Today
Learning the basics of weaving for beginners opens up a creative practice that can grow with you for years. You started this guide with nothing but curiosity, and now you understand the terminology, the tools, the techniques, and the step-by-step process for warping a loom and weaving your first pieces.
The most important thing is to simply begin. Warp a small frame loom, grab some cotton yarn, and weave a coaster this weekend. Your first project does not need to be perfect. It just needs to exist. Every experienced weaver started exactly where you are right now.
Pick a project from the list above, gather your supplies, and give it a try. The rhythm of weaving, the repetitive over-and-under motion, is meditative and deeply satisfying. Once you feel that rhythm for yourself, you will understand why people have been weaving for 12,000 years and still love it.