
If you have ever looked at a fashion illustration and thought, “I could never draw that,” I have good news: fashion figure drawing is a learned skill, not a born talent. Every professional fashion designer started exactly where you are right now, staring at a blank page with a pencil in hand. Learning how to draw fashion figures for beginners is about following a system, not about raw artistic ability. In this guide, I will walk you through the exact process I used to go from wobbly stick figures to confident fashion sketches. We will cover the 9-head proportion system, build a figure from scratch step by step, and create your first reusable croquis template. By the end, you will have a solid foundation for sketching fashion designs of your own.
Fashion illustration has been the backbone of the design industry for over a century. Before any garment gets sewn, it starts as a sketch on paper. The fashion figure, also called a croquis, serves as the blank canvas for those ideas. The good news is that this figure follows a specific set of proportional rules that anyone can learn. You do not need a formal art degree or expensive supplies. All you need is paper, a pencil, and about 30 minutes of focused practice to get started.
Many beginners feel intimidated because fashion figures look so different from real human bodies. That is intentional. Fashion figures are elongated and stylized to show off clothing designs in the most flattering way possible. Once you understand the underlying structure, the whole process clicks into place. Our team has broken down the method into clear, repeatable steps that build on each other. Let us get started.
Table of Contents
What Is a Fashion Figure?
A fashion figure is a stylized, elongated human form used as a template for sketching clothing designs. Unlike realistic figure drawing, which follows natural human proportions of about 7.5 to 8 heads tall, a fashion figure stretches to 9 or even 10 heads tall. This elongation makes the figure appear taller, leaner, and more dramatic, which is ideal for showcasing garments.
The reason fashion figures use these stretched proportions comes down to visual impact. Designers need the figure to serve as a hanger for their ideas. Longer limbs and a narrower torso create elegant lines that make clothing look more appealing on paper. Think of it like a runway model: the proportions are idealized to present fashion in its best light.
Fashion figures have been used since the late 1800s when Charles Frederick Worth, considered the father of haute couture, began using live models and illustrations to present his designs. Today, both hand-drawn and digital fashion figures remain an essential part of the design process, from quick concept sketches to polished portfolio pieces.
One important distinction: a fashion figure is not the same as a fashion illustration. The figure is the body template underneath. The illustration includes the clothing, color, fabric details, and styling on top of that figure. Learning to draw the figure first gives you the foundation for everything that follows.
Essential Materials for Fashion Sketching
Before we dive into the drawing process, let me share the basic supplies that will set you up for success. You do not need much to get started, and the tools are inexpensive.
Basic Supplies
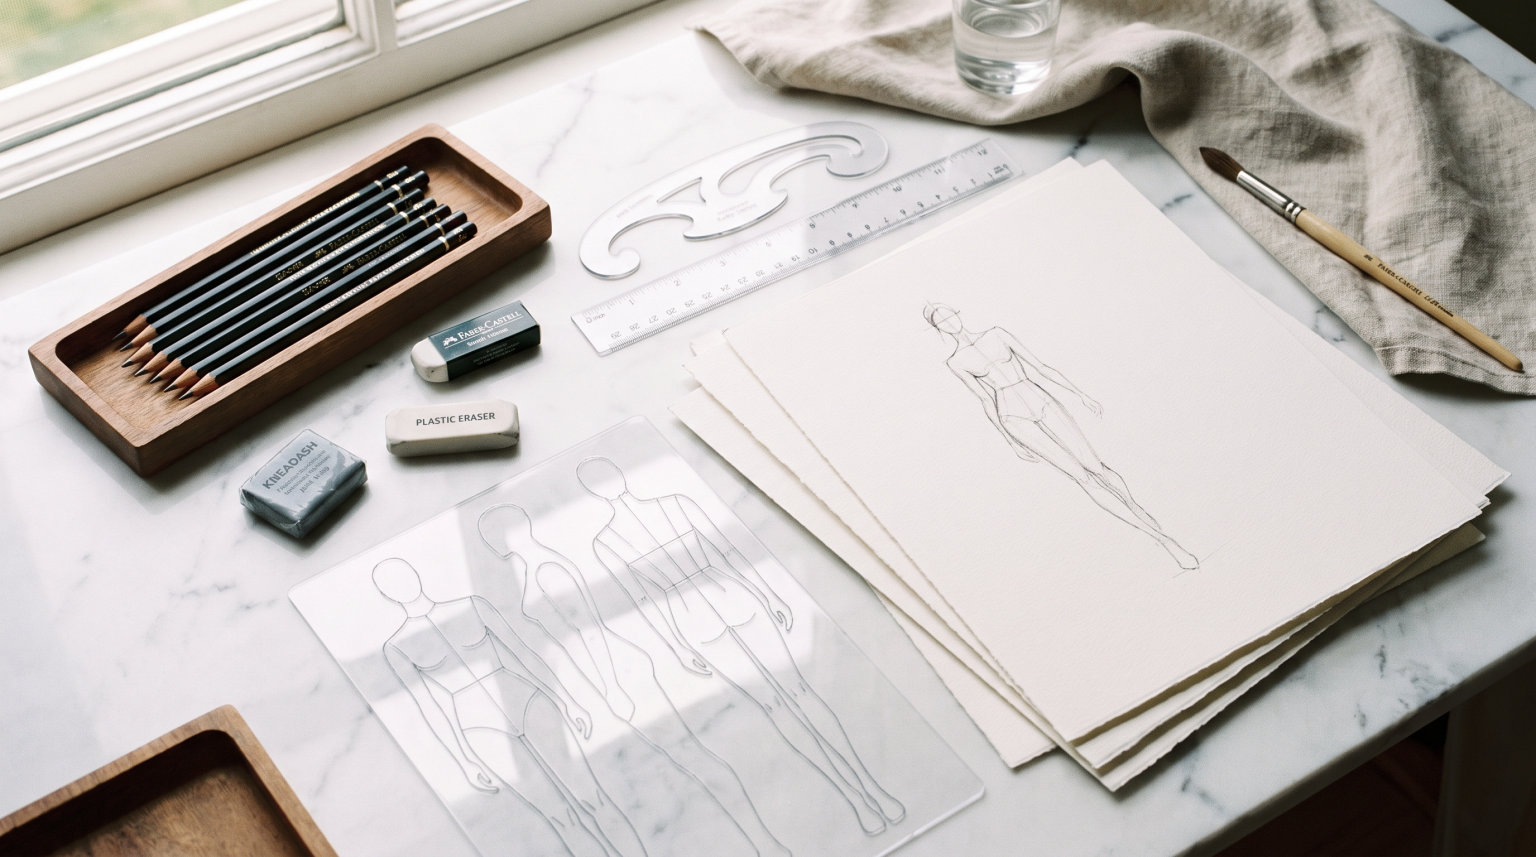
Start with a plain pencil in the HB or 2B grade. These give you a clean line that is easy to erase without smudging. A good eraser is just as important as the pencil; I recommend a soft vinyl eraser because it lifts graphite cleanly without damaging the paper. For paper, any smooth sketch paper works. Standard letter size (8.5 x 11 inches) is fine for practice, but many designers prefer 11 x 14 inches or A3 size for more room to work on proportions.
Helpful Extras
A ruler helps when you are first learning to set up your proportion grid. Tracing paper is invaluable for beginners because it lets you practice over existing figures without committing to permanent lines. A fine-tip black marker (0.3mm to 0.5mm) is useful for finalizing your outlines once you are happy with the sketch. Colored pencils or markers come later when you are ready to add color to your designs.
Optional Digital Tools
If you prefer working digitally, a tablet with a drawing app like Procreate or Adobe Fresco works great for fashion sketching. Many modern fashion designers work exclusively on iPads. The advantage of digital is that you can layer your croquis template underneath each new design and undo mistakes instantly. However, I recommend starting on paper to build muscle memory before switching to a screen.
Understanding the 9-Head Proportion System
The 9-head proportion system is the most widely used method for drawing fashion figures. It divides the entire height of the figure into 9 equal sections, with each section measuring the length of the head. This system gives the figure its characteristic elongated look while keeping the proportions balanced and consistent. Let me break down exactly what falls into each of those 9 sections.
How the 9 Heads Are Divided
Head 1 is the head itself, drawn as a slightly elongated oval. Head 2 covers the chin down to the bottom of the chest, including the neck and shoulders. Head 3 runs from the chest to the natural waistline. Head 4 extends from the waist to the crotch or hip area. Head 5 and Head 6 cover the upper portion of the legs, from the hips down to just above the knees. Head 7 and Head 8 cover the lower legs from the knees to the ankles. Head 9 is reserved for the feet.
This might sound like a lot to track, but once you draw a few figures using a grid, the spacing becomes second nature. The key is to draw light guidelines first and build the figure within them. Many beginners find it helpful to number each section on the side of their paper until they memorize the placement.
9-Head vs 10-Head Proportions
You may also hear about the 10-head proportion system. The difference is simple: the 10-head system adds one more head of height, making the figure even more elongated. The extra length usually goes to the legs, creating an ultra-dramatic look. Some high-fashion illustrators prefer 10 heads for editorial work, but for beginners, 9 heads is the better starting point. It gives you the stylized fashion look without pushing the proportions so far that the figure looks unnatural.
There is also an 8-head proportion system that stays closer to realistic anatomy. This is sometimes used in costume design or more commercial fashion illustration. But for classic fashion sketching, 9 heads is the industry standard and the one I recommend you learn first.
Setting Up Your Proportion Grid
Draw a vertical line down the center of your paper. This is your balance line, and it determines the center of gravity for your figure. Mark 9 evenly spaced sections along this line. You can do this by measuring your first head oval, then using that same measurement to mark the remaining 8 sections below it. Draw light horizontal guidelines at each mark. This grid is your roadmap for the entire figure, and you will erase it once the drawing is complete.
I cannot stress enough how helpful this grid is for beginners. On Reddit forums like r/fashiondesigner and r/learnart, experienced artists consistently recommend grid-based practice for newcomers. It removes the guesswork and lets you focus on learning the shapes of each body part without worrying about whether things are lined up correctly.
How to Draw Fashion Figures for Beginners: Step-by-Step Guide
This is the section where everything comes together. I will walk you through each step of drawing a basic standing fashion figure using the 9-head proportion system. Take it one step at a time, and do not worry about making it perfect on your first try. Every fashion figure you draw will be better than the last.
Step 1: Draw the Head
Start at the top of your proportion grid. Draw an oval shape in the first section. The oval should be slightly taller than it is wide, with a gentle taper toward the chin. Do not add facial features yet. This is just the basic shape of the head. Think of it like an egg standing on its narrow end. Keep your lines light because you will refine them later.
Step 2: Mark the Neck and Shoulders
From the bottom of the head, draw a short neck that extends about one-third of the way into Head 2. The neck should be narrower than the head. At the bottom of the neck, sketch a horizontal line for the shoulders. In fashion figures, the shoulder line is about 1.5 to 2 head widths across. The shoulders should slope gently downward from the neck, not be rigidly horizontal.
Step 3: Draw the Torso
The torso spans from the bottom of Head 2 through Head 3 and into the top of Head 4. Draw two slightly curved lines from the shoulders down to the waist. The waist is the narrowest point of the torso and falls at the bottom of Head 3. For a female fashion figure, the waist is significantly narrower than the shoulders, creating an hourglass shape. For a male fashion figure, the waist is only slightly narrower than the shoulders.
Step 4: Define the Waist and Hips
From the waist, flare the lines outward to create the hips. The hip area spans Head 4, and the hip width should be roughly equal to the shoulder width for a female figure. For a male figure, the shoulders remain wider than the hips. The transition from waist to hip should be a smooth, curved line. This curve is one of the most important elements in making your fashion figure look graceful rather than stiff.
Step 5: Add the Legs
The legs take up Heads 5 through 8, making them the longest part of the figure. Start at the outer edges of the hips and draw two long lines tapering down to the knees, which fall at the boundary between Head 6 and Head 7. Then continue the legs from the knees down to the ankles at the bottom of Head 8. Fashion figures have long, slender legs with a subtle taper. The thighs are wider at the top and narrow toward the knee, and the calves have a gentle curve before tapering to the ankle. Keep the inner legs slightly closer together at the knees than at the hips for a natural stance.
Step 6: Draw the Arms
The arms hang from the shoulder points. For a basic standing pose, draw them along the sides of the body with a slight bend at the elbow. The elbow falls at about the waistline (bottom of Head 3), and the wrist falls at the crotch line (bottom of Head 4). The hands reach to about mid-thigh. Keep the arms slender and slightly curved. Avoid making them perfectly straight, as this makes the figure look robotic.
Step 7: Add Hands and Feet
Hands are one of the trickiest parts, so keep them simple at first. A small wedge or mitten shape works fine for beginner fashion figures. You can add finger definition later as your skills improve. For the feet in Head 9, draw small, pointed shapes that suggest the direction the figure is facing. In fashion illustration, feet are often simplified to a triangular or almond shape. Do not overthink these details at this stage.
Step 8: Refine the Outline
Now go back over your figure and smooth out the lines. Erase any remaining grid marks and refine the curves so the body flows naturally from one section to the next. Check your proportions: are the shoulders in the right place? Is the waist narrow enough? Are the legs long enough? This is your chance to fix anything that looks off. Use a darker pencil or your fine-tip marker to finalize the outline once you are satisfied.
Step 9: Add Facial Features and Hair
The last step is adding detail to the head. Draw a center line down the face and a horizontal line about halfway down the oval for the eyes. Fashion figures often have small, simplified features: a few strokes for eyes, a small triangle or dash for the nose, and a curved line for the mouth. For hair, sketch the general shape around the head. Keep it simple. A sleek ponytail, loose waves, or a short crop all work well. The face and hair are stylistic choices, so experiment to find a look that fits your personal aesthetic.
Creating Your First Croquis Template
A croquis (pronounced “cro-kee”) is a quick sketch or template of a fashion figure that you reuse as a base for multiple designs. The word comes from the French word for “sketch.” In fashion design, a croquis template is one of the most powerful tools you can have because it saves you from redrawing the figure every time you want to design a new outfit.
Once you have drawn a fashion figure you are happy with using the steps above, you can turn it into a reusable template. Here is how I do it: draw your best figure on a clean sheet of paper with crisp, dark lines. Then place a fresh sheet of paper over it and trace the figure. You now have a clean croquis template you can photocopy or print multiple times. Each copy becomes the base for a new design.
Many beginners on fashion design forums recommend tracing paper as the easiest way to create and use croquis templates. You can also scan your figure and print copies, or if you work digitally, save it as a layer in your drawing app. The goal is to have a consistent base figure so you can focus your creative energy on the clothing designs rather than redrawing the body each time.
I suggest creating at least three croquis templates: one in a straight standing pose, one with a slight contrapposto (weight shifted to one leg), and one in a walking pose. These three poses cover most fashion design needs and give you variety when presenting a collection. Start with the standing pose since that is the easiest to draw, then experiment with the others as your confidence grows.
Using your croquis for fashion design is straightforward. Place your template under a fresh sheet of paper or load it as a background layer. Then sketch your clothing design on top of the figure. The existing body lines show you exactly where the garment should fall, how it drapes, and where folds and details should go. This is where the real fun begins: you are no longer drawing figures, you are designing fashion.
Common Mistakes to Avoid When Drawing Fashion Figures
After years of practice and teaching others, I see the same mistakes crop up again and again with beginners. Recognizing these pitfalls early will save you hours of frustration and help you develop good habits from the start.
Getting Proportions Wrong
The most common mistake is not sticking to the proportion grid. Beginners often draw the head too large, the legs too short, or the torso too long. These errors make the figure look awkward rather than stylized. Always start with your 9-head grid and double-check that each section is the same height before you begin drawing the body parts. If one section is off, every body part that follows will be misplaced.
Drawing Stiff, Rigid Poses
A fashion figure should convey movement and grace, even in a standing pose. Beginners tend to draw perfectly vertical lines that make the figure look like a wooden mannequin. To fix this, always include a balance line with a slight curve. Shift the weight to one leg and let the shoulders tilt slightly in the opposite direction. This contrapposto stance immediately makes the figure look more natural and dynamic.
Over-Detailing Too Early
It is tempting to start adding intricate details like facial features, finger joints, and fabric textures right away. Resist that urge. Build the basic figure first with simple shapes, then gradually add detail. If the proportions are wrong, no amount of detail will make the drawing look good. Focus on getting the structure right, and the details will fall into place later.
Ignoring the Balance Line
The balance line is the central axis of your figure, and it determines whether the figure looks like it is standing naturally or about to tip over. If the head, torso, and the weight-bearing foot are not aligned along this line, the figure will look off-balance. Always establish the balance line before you start drawing and check alignment as you go.
Drawing Clothes Before Mastering the Figure
Many beginners want to skip ahead to drawing dresses, suits, and accessories before they can draw a clean figure underneath. This leads to drawings where the clothing does not sit properly on the body because the proportions are inconsistent. Master the figure first. Once you can draw a consistent fashion figure, adding clothing becomes much easier and more satisfying.
FAQs
How do you draw a fashion figure for beginners?
Start by setting up a 9-head proportion grid on your paper. Draw the head as an oval in the first section, then work downward: neck and shoulders in section 2, torso through sections 2-3, waist and hips in section 4, legs through sections 5-8, and feet in section 9. Use light guidelines at first, then refine your outline and add details like facial features and hair last.
What is a croquis in fashion drawing?
A croquis is a quick sketch or reusable template of a fashion figure that designers use as a base for sketching clothing designs. The term comes from French and means ‘sketch.’ Having a croquis template saves time because you do not need to redraw the figure every time you want to design a new outfit. You simply trace or layer over the template.
How do you draw a 9-head fashion figure?
Divide your paper into 9 equal horizontal sections using the height of the head as your measurement unit. Head 1 is the head, Head 2 covers the neck and shoulders, Head 3 is the upper torso to the waist, Head 4 is the hips, Heads 5-6 are the upper legs, Heads 7-8 are the lower legs, and Head 9 is the feet. Draw each body part within its designated section for a properly proportioned fashion figure.
What are common mistakes in fashion sketching?
The most common mistakes include incorrect proportions (especially drawing the head too large or legs too short), stiff and rigid poses, adding too much detail before establishing correct proportions, ignoring the balance line, and trying to draw clothing before mastering the basic figure. Using a proportion grid and practicing the figure alone before adding clothes helps avoid these issues.
What supplies do I need for fashion sketching?
You only need a few basics to get started: an HB or 2B pencil, a soft vinyl eraser, smooth sketch paper (8.5 x 11 inches works for practice), and a ruler for setting up your proportion grid. Optional extras include tracing paper for creating croquis templates, a fine-tip black marker for final outlines, and colored pencils or markers for adding color to your designs.
Learning how to draw fashion figures for beginners is a skill that builds on itself with every sketch. Start with the 9-head proportion grid, follow the step-by-step process, and create a croquis template you can reuse. Avoid the common mistakes of rushing into details or skipping the proportion guidelines. With consistent practice, even 15 minutes a day, you will see noticeable improvement within the first few weeks. The fashion designers whose work you admire all started with these exact same fundamentals. Grab a pencil, set up your grid, and draw your first figure today. The only thing standing between you and your first fashion sketch is the decision to start.