Starting to teach art online can feel overwhelming at first. You might wonder if you need expensive equipment, fancy software, or even a art degree to get started. The truth is that thousands of artists have started teaching from their kitchen tables with nothing more than a smartphone and enthusiasm. This guide walks you through everything you need to know about how to teach art to beginners online, from setting up your camera to keeping your students engaged through a screen.
Table of Contents
Why Teach Art Online?
Teaching art online opens up possibilities that traditional in-person classes simply cannot match. You can reach students across the globe, work from any location, and build a sustainable income from your creative skills. Many artists who started during unexpected situations, like the sudden shift to remote learning, discovered they actually enjoyed the flexibility of teaching virtually.
The demand for online art education has grown significantly. Parents working from home need engaging activities for their children. Adults are looking for creative outlets after long workdays. Beginners everywhere are searching for accessible ways to learn drawing, painting, and other artistic techniques. By learning how to teach art to beginners online, you can fill this gap while doing what you love.
Beyond the practical benefits, teaching art online lets you share the joy that creativity brings. Creating art triggers dopamine release in the brain, which is why people feel a natural high while painting or drawing. You become the person who helps someone experience that feeling for the first time.
Essential Equipment for Teaching Art Online
You do not need a professional studio to start teaching art online. Most beginning online art teachers work with minimal equipment and upgrade over time as their student base grows. Here is what you actually need to get started.
Camera and Filming Setup
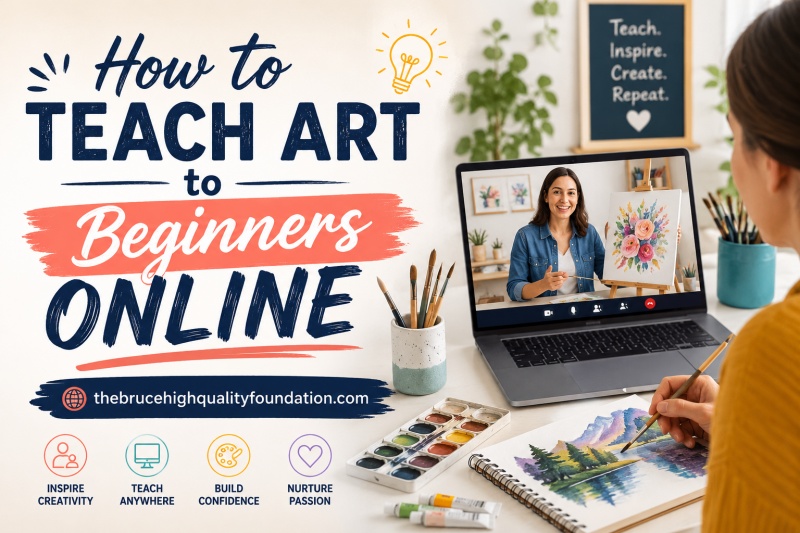
A smartphone camera or laptop webcam works perfectly fine for your first classes. The key is positioning your camera to show your hands and artwork clearly. Many teachers use a simple phone tripod mount that holds the device above their canvas or sketchbook. This overhead angle lets students see exactly what brush strokes and pencil movements look like.
Some teachers prefer using two devices: one for video conferencing with students and another positioned overhead for showing their artwork. This dual-device approach requires more setup time but creates a much cleaner learning experience for visual arts.
As you progress, you might add a dedicated HD webcam or even a document camera designed specifically for capturing artwork. These tools provide higher image quality and more control over framing and focus.
Lighting and Audio
Good lighting helps students see your artwork clearly and makes your teaching feel more professional. Natural light from a window works well, but be aware that it changes throughout the day. Position yourself so that light falls on your artwork without casting shadows across your canvas.
Audio quality actually matters more than video quality for keeping students engaged. Students need to hear your instructions clearly. A simple external microphone, even an affordable one, dramatically improves sound quality compared to built-in device microphones. This small investment prevents the frustration of repeating yourself and losing student attention.
Art Supplies for Online Classes
You need to show your supplies clearly so students understand what materials you recommend. Keep your basic setup organized and within camera view. When demonstrating, hold items up to the camera so students can see the actual size and texture.
Many online art teachers maintain a supply list that students can purchase independently. This approach lets beginners gather their own materials at their budget level while you focus on instruction rather than supplying materials for everyone.
Choosing the Right Platform to Teach Art Online
The platform you choose affects everything from how you interact with students to how you collect payment. Understanding your options helps you make the right decision for your teaching style and goals.
Zoom and Google Meet
General video conferencing platforms like Zoom and Google Meet work well for live art classes. They offer screen sharing, breakout rooms for small group work, and recording capabilities. Zoom allows up to 100 participants on most plans, making it suitable for larger group workshops.
The main advantage of these platforms is familiarity. Many students already know how to use Zoom for work or family calls, which reduces the learning curve for joining your classes. Both offer free tiers with basic features, though Zoom limits group sessions to 40 minutes on its free plan.
The downside is that these platforms are not designed specifically for education. You miss features like assignment submission, grade tracking, and built-in course management that dedicated education platforms offer.
Dedicated Art Teaching Platforms
Platforms designed for online courses, like Podia, Skillshare, or Udemy, handle everything from hosting your content to processing payments. These platforms let you create pre-recorded courses that students can access anytime, making them ideal for asynchronous learning.
The trade-off is reduced live interaction. Students watch your recorded lessons rather than participating in real-time. Some platforms are better for building a community around your teaching, while others focus more on content delivery. Research each option based on whether you prefer live teaching, pre-recorded lessons, or a combination of both.
Live vs Pre-Recorded vs Hybrid: Finding Your Format
Your teaching format affects everything from scheduling flexibility to student outcomes. Each approach has distinct advantages that suit different teaching styles and audience needs.
Synchronous (Live) Classes
Live classes let you interact with students in real time, answer questions immediately, and adjust your teaching based on student reactions. This format works particularly well for beginners who benefit from immediate feedback and encouragement.
Live teaching requires you to be available at specific times, which limits flexibility but creates accountability. Students often appreciate the structure of scheduled sessions and the motivation that comes from showing up to a real class with other participants.
The main challenge is technical difficulties during live sessions. Having a backup plan, such as a recorded version of the lesson, ensures you can still deliver content even when technology fails.
Asynchronous (Pre-Recorded) Lessons
Pre-recorded lessons give students the freedom to learn at their own pace. They can pause, rewind, and rewatch sections they find difficult. This format works well for self-motivated learners who cannot attend scheduled live sessions.
Creating quality pre-recorded content requires more upfront time investment. You need to plan your lessons carefully, film cleanly, and sometimes edit the recordings. However, once created, a single lesson can serve unlimited students indefinitely.
The downside is reduced accountability. Students may start a course but never finish it without the structure of live sessions pushing them forward.
Hybrid Approach
Many successful online art teachers combine live and pre-recorded elements. They offer self-paced courses for independent learning plus optional live Q&A sessions or critique circles. This hybrid model provides flexibility while maintaining community connection.
This approach lets you serve both students who thrive on schedule and those who prefer learning on their own terms. You can record your live sessions and add them to your course library, creating content that works for everyone.
How to Start Teaching Art Online: Step-by-Step
Starting anything new feels daunting until you actually begin. Here is a simple process to get your first online art class running without getting overwhelmed by the technical details.
Step 1: Set Up Your Space
Choose a quiet area with good lighting where you can film comfortably. Clear away clutter from the camera view and ensure your workspace has enough room to demonstrate techniques without bumping things. You do not need a professional setup, but having a dedicated teaching space helps create consistency for your students.
Test your camera angle before your first class. Make sure students can see your artwork clearly and that your hands stay within the frame when you demonstrate. A few practice runs prevent awkward moments during actual teaching sessions.
Step 2: Choose Your Platform
Start with whatever platform feels manageable. If you want live interaction, begin with a free Zoom account and see how it goes. If you prefer creating recorded content, explore Podia or another course platform that matches your budget and goals.
You do not need everything perfect before launching. Many teachers start with basic tools and upgrade as they learn what works for their teaching style. The goal is to start teaching, not to find the perfect platform immediately.
Step 3: Plan Your First Lesson
Keep your first lesson simple and achievable. Choose a single technique or concept that beginners can accomplish in one session. Provide clear instructions, demonstrate the technique at least twice, and give students time to practice while you observe and offer encouragement.
Having a plan prevents the awkwardness of not knowing what to teach next. Write down the key points you want to cover, estimate how long each section takes, and leave room for questions and practice time. Beginners appreciate structure while they build confidence.
Step 4: Launch and Iterate
After your first class, ask students for honest feedback about what worked and what could improve. Use this input to refine your teaching approach, adjust your equipment, or clarify instructions for future sessions. Improvement comes from teaching regularly and making small changes based on what you observe.
Do not compare yourself to established online teachers who have been doing this for years. Every expert started exactly where you are now, figuring things out as they went. Your authentic teaching voice and unique perspective are valuable, even if your setup is simple.
Keeping Beginners Engaged in Online Art Classes
Student engagement determines whether people come back for more classes or disappear after the first session. Online art teaching requires different techniques than in-person instruction to maintain attention and motivation.
Demonstration Techniques
Talk through your actions while you demonstrate. Students cannot see your face and your hands simultaneously, so narrating your process helps them follow along. Describe what brush you are using, how much paint you are loading, and the motion you are making.
Speed matters when teaching art online. Beginners need time to process new techniques and replicate them on their own canvas. Pause frequently and check in with students to see if they are following. It always takes longer than you expect for someone learning something new.
Student Participation
Ask students to hold up their work to the camera at various points during the lesson. This participation creates accountability and lets you offer specific feedback. It also breaks the passive listening pattern that leads to disengagement.
Encourage students to ask questions in the chat or raise their hand during live sessions. Create an environment where beginners feel comfortable admitting confusion. The first time someone asks a question, others often realize they had the same question but were afraid to ask.
Providing Constructive Feedback
Feedback helps beginners improve and feel recognized for their effort. Focus on what students did well before pointing out areas for growth. Frame suggestions as possibilities rather than corrections. Instead of saying “that is wrong,” try saying “have you considered trying it this way?”
Written feedback on submitted work works well for pre-recorded courses. For live classes, verbal encouragement during the session often resonates more deeply than written comments afterward.
Marketing Your Online Art Classes
Great teaching skills mean nothing without students to teach. Marketing your art classes online requires showing up consistently and demonstrating your expertise in ways that attract your ideal students.
Building Your Presence
Start by teaching wherever you can find an audience. Offer free introductory sessions to build testimonials and refine your teaching style. Share behind-the-scenes content of your creative process on social media to attract people who connect with your artistic voice.
Building an email list gives you direct contact with people interested in your teaching. Offer a free resource, like a simple drawing guide or art-themed printable, in exchange for email signups. This list becomes your most reliable audience for new class announcements.
Community matters in art education. Create spaces where your students can share their work, ask questions, and connect with each other. A private Facebook group or Discord server builds loyalty and encourages word-of-mouth referrals.
Pricing Strategies
Start with lower pricing to attract your first students and gather reviews. As you build a reputation and refine your curriculum, gradually increase your rates. Many teachers offer early-bird pricing or launch discounts to generate initial interest.
Consider multiple pricing tiers. A single-session workshop costs less than a multi-week course, which costs less than ongoing coaching. This tiered approach lets students choose the level of commitment that matches their interest and budget.
Conclusion
Learning how to teach art to beginners online is entirely achievable, regardless of your current setup or experience level. The key is starting before you feel ready, learning as you go, and keeping the focus on helping students discover their creative potential.
You do not need expensive equipment to begin. A basic camera, good lighting, clear audio, and genuine enthusiasm for teaching art are enough to start. Choose a platform that matches your comfort level, plan simple lessons that build confidence, and launch before waiting for perfection.
The demand for online art education continues to grow as more people discover the joy of creative expression. By taking the first step today, you join thousands of artists who have found fulfillment in sharing their skills with beginners around the world. Your unique perspective and teaching voice are needed by someone who is ready to learn.
FAQs
What are the 3 C’s of art?
The 3 C’s of art are typically Creativity, Composition, and Color. These foundational elements help beginners understand the building blocks of visual art and guide their artistic development.
What is the best platform to teach art online?
The best platform depends on your needs. Zoom and Google Meet work well for live classes with small groups. Dedicated platforms like Podia or Skillshare offer course hosting, but general video platforms give you more control over live interaction.
Does art increase dopamine?
Yes, creating art triggers dopamine release in the brain, which is why people feel good while painting or drawing. Teaching art online lets you share this feel-good experience with students who may be discovering art for the first time.
What are the 7 basic elements of art?
The 7 basic elements of art are: Line, Shape, Form, Space, Color, Value, and Texture. Teaching these fundamentals helps beginners build a strong foundation for their artistic journey.