
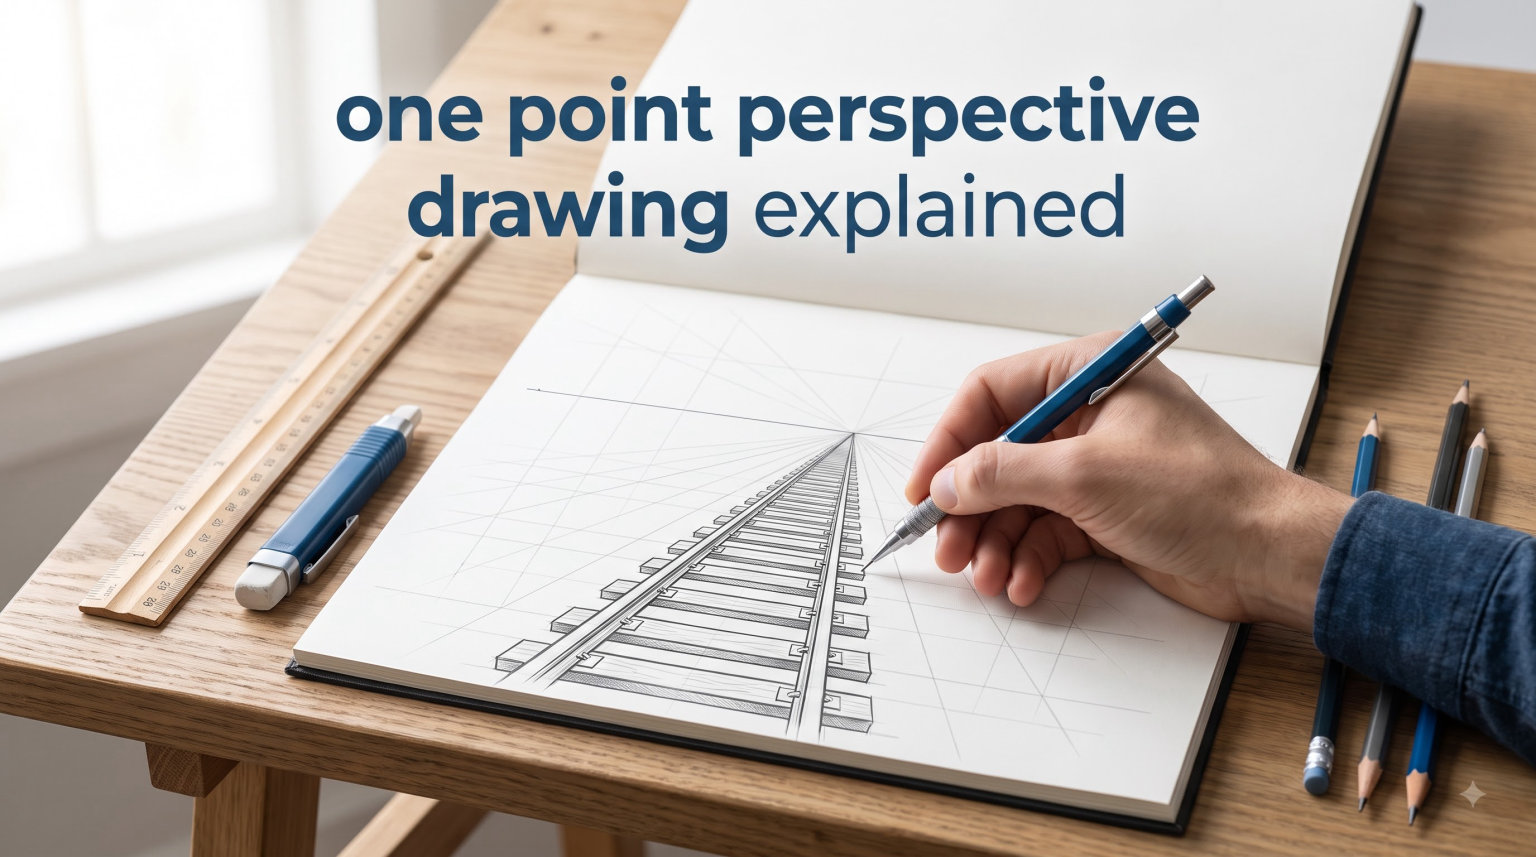
One point perspective drawing is one of the most fundamental techniques in art and design, capable of transforming flat surfaces into convincing three-dimensional spaces. Whether you are an aspiring artist, an architecture student, or simply someone who wants to understand how artists create depth on paper, mastering one point perspective will give you a powerful foundation that applies to everything from interior room sketches to expansive cityscapes. This comprehensive guide breaks down every element of one point perspective, explains the theory behind it, and walks you through step-by-step tutorials so you can practice drawing in one point perspective with confidence.
Table of Contents
What is One Point Perspective Drawing?
One point perspective is a type of linear perspective that uses a single vanishing point to create the illusion of depth and distance on a flat surface. In one point perspective, all lines that are parallel to each other and perpendicular to the picture plane converge toward a single point, called the vanishing point. This convergence creates the visual impression that objects are receding into the distance, even though they are drawn on a flat sheet of paper or canvas.
The technique is called “one point” perspective precisely because it relies on just one vanishing point. Every object in your composition that follows the rules of one point perspective will have its lines pointing toward this single location. This creates a cohesive, unified sense of depth that feels natural and realistic to the viewer.
One point perspective is particularly effective when you are drawing subjects that face the viewer directly, such as a straight road stretching toward the horizon, a corridor seen from the entrance, or the interior of a room where the back wall is directly facing you. The front-facing planes of objects remain parallel to the picture plane, while the vertical and horizontal edges that go into the distance angle toward the vanishing point.
This technique has been used by artists for centuries to create convincing spatial illusions. Renaissance masters like Filippo Brunelleschi and Leon Battista Alberti developed the mathematical principles underlying perspective drawing, and their discoveries continue to inform how artists and architects work today. Understanding one point perspective connects you to this rich tradition while giving you a practical skill you can apply immediately in your own artwork.
Key Terms You Need to Know: Vanishing Point, Horizon Line, and Orthogonal Lines
Before you can master one point perspective drawing, you need to understand the three core elements that make it work. These terms appear throughout every lesson on perspective, so taking time to truly grasp them will make all your subsequent practice much easier.
Vanishing Point: The vanishing point is the single point on the horizon line where all parallel lines that are perpendicular to the picture plane appear to converge. Imagine standing on a straight, flat road that stretches to the horizon. The edges of the road appear to come together at a single point on the horizon, even though they remain parallel in reality. That convergence point is your vanishing point. Every line that represents depth or distance in one point perspective will point toward this location.
Horizon Line: The horizon line, also called the eye level, represents the viewer’s eye level in the composition. It is the horizontal line that runs across the page at the same height as the viewer’s eyes would be if they were standing in the scene. The horizon line is critical because it determines where the vanishing point sits and how objects appear to recede above or below the viewer’s sight line. In outdoor scenes, the horizon typically coincides with the actual horizon of the landscape. In interior scenes, it represents the eye level of someone standing in the room.
Orthogonal Lines: Orthogonal lines are the diagonal lines that converge toward the vanishing point. The word “orthogonal” comes from mathematics and means “right-angled” or “interecting at a right angle,” but in perspective drawing, the term refers specifically to those lines that create the sense of depth by converging toward the vanishing point. These lines are not necessarily at right angles in the three-dimensional scene; they simply represent the edges of objects that go into the distance, angling toward the vanishing point as they recede.
Picture Plane: The picture plane is the flat surface of your drawing. Think of it as an invisible wall standing between you and the scene you are drawing. Everything you create exists on this plane, yet the illusion of three-dimensional space comes from how you represent objects relative to the picture plane and the vanishing point beyond it. Objects that are parallel to the picture plane keep their true shape, while objects that angle away from the picture plane appear to shorten and converge.
How One Point Perspective Works: The Theory Behind the Illusion
One point perspective works because of a fundamental aspect of human vision: when we look at parallel lines that extend into the distance, our brains interpret them as converging toward a single point on the horizon. This happens because our eyes actually perceive the world in two dimensions on the retina, and our brains have learned to interpret certain visual cues as indicators of depth and distance.
When an artist draws in one point perspective, they are essentially creating a geometric map of how rays of light from a three-dimensional scene would pass through an imaginary window (the picture plane) and converge at a single point behind it (the vanishing point). This is why perspective drawing is sometimes described as a system for translating three-dimensional space onto a two-dimensional surface while preserving the visual relationships that create the illusion of depth.
The key principle is that lines which are parallel to each other in three-dimensional space will appear to converge toward a single point when drawn in perspective. In one point perspective, all lines that are perpendicular to the picture plane converge at the vanishing point. Meanwhile, lines that are parallel to the picture plane remain vertical or horizontal and do not converge. This combination creates the distinctive look of one point perspective where objects appear to stretch back into the distance from a single focal point.
Consider a simple example: a cube facing you directly. The front face of the cube is parallel to the picture plane, so it appears as a perfect square or rectangle. The edges that go backward into the distance, however, angle toward the vanishing point, getting shorter as they recede. The top and bottom edges of those retreating sides also angle toward the vanishing point. The result is a cube that looks convincingly three-dimensional despite being drawn on a flat surface.
The “true shape” concept is also important in one point perspective. Surfaces that are parallel to the picture plane display their true shape without distortion. A square remains a square, a circle remains a circle, and proportions remain accurate. This is why one point perspective works so well for drawing interiors where the back wall faces the viewer directly: the back wall shows its true shape while the side walls retreat symmetrically toward the vanishing point.
Step-by-Step: Drawing a Simple Room in One Point Perspective
Drawing a room in one point perspective is one of the best exercises for beginners because it combines all the core elements into a single, comprehensible project. By following these steps, you will create a convincing interior space with a floor, back wall, and side walls that all recede toward a central vanishing point.
Step 1: Draw the horizon line and locate your vanishing point. Use a ruler to draw a light horizontal line across the middle of your paper. This is your horizon line. Place a small dot or cross at the center of this line. This is your vanishing point. For a room interior, placing the vanishing point at the center of the page creates a balanced, symmetrical composition that feels natural.
Step 2: Draw the front face of the room. In a one point perspective room, the front wall faces you directly, so it should be drawn as a rectangle whose edges are parallel or perpendicular to the horizon line. Draw a vertical line near the left edge of your paper, and another vertical line near the right edge. Connect the tops of these lines with a horizontal line above your vanishing point, and connect the bottoms with a horizontal line below your vanishing point. This creates a rectangular opening that represents the front wall of your room.
Step 3: Draw the back wall edges. From the top left and top right corners of your front wall rectangle, draw diagonal lines that converge at the vanishing point. Do the same from the bottom left and bottom right corners. These lines represent the top and bottom edges of the side walls as they retreat into the distance. Where these diagonal lines intersect the horizon line should be exactly at your vanishing point.
Step 4: Complete the back wall. Draw a vertical line where the two diagonal lines from the top meet. This vertical line represents the right edge of the back wall. Draw another vertical line where the two diagonal lines from the bottom meet. This represents the left edge of the back wall. Connect the tops and bottoms of these vertical lines with horizontal lines. You now have a complete room with front and back walls and two side walls receding toward the vanishing point.
Step 5: Add details to make the room convincing. Add a floor line by drawing a horizontal line across the middle of the side walls. Add a door or window on the back wall by drawing a rectangle whose vertical sides are parallel and whose top and bottom lines angle toward the vanishing point. Add a ceiling line by drawing a horizontal line near the top of your room. You can add a picture frame, a rug, or furniture shapes using the same principle: faces parallel to the picture plane show their true shape, while edges that recede into the distance angle toward the vanishing point.
Step-by-Step: Drawing a Cityscape with One Point Perspective
Once you have practiced drawing interiors, you can apply the same principles to outdoor scenes. Drawing a cityscape in one point perspective allows you to depict buildings, roads, and urban environments with convincing depth. This exercise demonstrates how one point perspective creates dramatic compositions that draw the viewer’s eye toward a central vanishing point.
Step 1: Establish your horizon line and vanishing point. Draw a light horizon line across your paper. Place your vanishing point slightly off-center to create a more dynamic composition. For a city scene, placing the vanishing point to the left or right of center often produces a more interesting result than centering it exactly, as it mimics how we might stand slightly to the side of a street looking toward buildings ahead.
Step 2: Draw the road or street scene. Draw two lines that start from the bottom of your paper and converge at the vanishing point. These represent the edges of the road. Add horizontal lines across the road at intervals to create the illusion of distance. Lines closer to the bottom of the page should be spaced farther apart, while lines closer to the horizon should be closer together. This spacing mimics the way objects appear to get closer together as they recede into the distance.
Step 3: Draw the buildings along the street. For the building closest to the viewer, draw a rectangle at the side of the road. The front face of the building should be parallel to the picture plane, so its edges should be vertical and horizontal. The side of the building that faces down the street should have its edges angle toward the vanishing point. Add windows and doors to the front face using true shapes. On the side face, windows and doors should angle toward the vanishing point to maintain perspective consistency.
Step 4: Add more buildings into the distance. For buildings farther away, simplify the level of detail. At a distance, you might draw just the basic shape of each building with its roof line angling toward the vanishing point. Smaller buildings near the horizon line should have less detail than larger buildings closer to the viewer. This reduction of detail with distance mimics how our eyes perceive depth and is a key technique in creating convincing perspective drawings.
Step 5: Add environmental details. Add street lamps, sidewalks, and people to give the scene scale and context. A street lamp can be drawn as a vertical pole with a diagonal line representing the arm, both angles carefully toward the vanishing point. People can be simplified to basic shapes but should appear smaller as they get closer to the horizon line, reinforcing the sense of depth in your composition.
Step-by-Step: Drawing a Railway Track Scene
The classic railway track scene is one of the most effective exercises for understanding one point perspective because it is simple, visually clear, and demonstrates the core principle of converging parallel lines. Once you have drawn a railway scene, you will intuitively understand why parallel lines appear to meet at the horizon, and this knowledge will transfer to every other perspective drawing you create.
Step 1: Draw the horizon line and vanishing point. Place your horizon line roughly in the upper third of your paper. Place the vanishing point directly on this line at the center. This composition creates a sense of distance and openness in the sky above the tracks.
Step 2: Draw the two rails of the track. Draw a line from the bottom center of your paper angling upward to the left, meeting at the vanishing point. Draw another line from the bottom center angling upward to the right, also meeting at the vanishing point. These two lines represent the outer edges of the railway tracks as they recede into the distance. In a one point perspective drawing, these lines will appear to converge even though they are parallel in reality.
Step 3: Draw the sleepers (railroad ties). The sleepers are the horizontal beams that support the rails. In one point perspective, sleepers closer to the viewer should be wide and spaced far apart, while sleepers near the horizon should be narrow and close together. Draw several horizontal lines across the tracks, spacing them progressively closer together as they approach the vanishing point. This simple technique creates the illusion of depth along the track.
Step 4: Add the landscape. Draw a simple hill or ground line beneath the tracks. Add a sky above the horizon line. You might add a sun or clouds in the sky, or a distant tree line on the horizon. These background elements give context to the railway scene and make the perspective feel like part of a larger world rather than an abstract exercise.
Step 5: Consider adding a train or signal post. To add scale and interest, draw a simple train car or locomotive in the foreground. The train should have its front face parallel to the picture plane (showing its true rectangular shape) while its length extends back toward the vanishing point. A signal post or telegraph pole can be drawn using a simple vertical line with diagonal crossbars, all angling slightly toward the vanishing point to maintain the consistency of the perspective system.
Common Mistakes to Avoid in One Point Perspective Drawing
Even experienced artists sometimes make errors in one point perspective drawing. Being aware of these common mistakes will help you avoid them in your own work and allow you to recognize and correct errors when they occur.
Mistake 1: Misplacing the vanishing point. The vanishing point must be on the horizon line. If you place it above or below the horizon line, your drawing will feel psychologically wrong even if the geometry appears correct. The horizon line represents the viewer’s eye level, so the vanishing point must align with it. When in doubt, use a ruler to verify that your vanishing point sits exactly on your horizon line.
Mistake 2: Forgetting that vertical lines remain vertical. In one point perspective, vertical lines do not converge toward the vanishing point. They remain vertical and parallel to each other. A common beginner error is to tilt vertical lines inward, which makes buildings appear to lean backward. Keep your vertical lines straight and perpendicular to the horizon line throughout your drawing.
Mistake 3: Inconsistent spacing of receding elements. Objects that are farther away should appear smaller and closer together along the line of recession. A common mistake is to space objects evenly regardless of their apparent distance, which flattens the sense of depth. Train your eye to notice that the space between sleepers on a railway track gets smaller as they approach the horizon, and replicate this effect throughout your drawings.
Mistake 4: Drawing shapes on receding faces with true proportions. When drawing windows, doors, or other features on a face that recedes into the distance, these features must also recede in perspective. A window on the side wall of a building should appear narrower and shorter as it gets closer to the vanishing point. Beginners often draw windows with their true rectangular shape even on receding surfaces, which creates a geometric inconsistency that undermines the illusion of depth.
Mistake 5: Using too many vanishing points. The defining characteristic of one point perspective is that all receding lines converge to a single vanishing point. If you find yourself using multiple vanishing points, you are no longer working in one point perspective. Sometimes this happens gradually as you add details, and you may accidentally introduce a second vanishing point without realizing it. Step back from your drawing regularly and check that all your receding lines truly point toward the same location.
Mistake 6: Forgetting the picture plane concept. Objects that are parallel to the picture plane should maintain their true shape and proportions. Only edges that recede away from the picture plane should angle toward the vanishing point. When drawing interior rooms, the back wall faces you directly and should show its true shape, while the side walls show their retreating edges angling toward the vanishing point.
One Point Perspective vs. Two Point Perspective: Which Should You Use?
Understanding when to use one point perspective versus two point perspective is an important skill for any artist. Both techniques create convincing illusions of depth, but each is suited to different types of subjects and compositions.
When to use one point perspective: One point perspective works best when you are drawing subjects that face you directly, with no visible corners or angles turning away to the side. A straight road, a corridor viewed from the entrance, a room seen from the doorway, a building looking at its front facade, or a railway track stretching into the distance are all ideal candidates for one point perspective. One point perspective creates a sense of stillness, directness, and focus because the viewer’s eye is drawn toward the vanishing point at the center of the composition.
When to use two point perspective: Two point perspective uses two vanishing points on the horizon line, and it is used when you are drawing subjects that show a corner facing the viewer. Imagine standing at the corner of a building looking at two walls that meet at a 90-degree angle. Both walls recede away from you in different directions, and each wall has its own vanishing point on the horizon line. Two point perspective is the standard choice for drawing buildings and architectural scenes where corners are visible, interior corners are visible, or objects are turned at an angle to the viewer.
Visual effect differences: One point perspective tends to feel more formal, symmetrical, and focused. The central vanishing point creates a natural focal point that draws the viewer’s eye inward. Two point perspective feels more dynamic and energetic because the viewer’s attention moves between two vanishing points on the horizon. Compositions using two point perspective can feel more alive and less static than those using one point perspective.
When to consider three point perspective: For dramatic overhead or worm’s-eye views, you may need three point perspective, which adds a third vanishing point above or below the horizon. Three point perspective is rarely used in everyday drawing but is common in dramatic illustration, conceptual architecture, and comic book art where extreme angles are required. For most everyday drawing situations, one point or two point perspective will serve you well.
The connection to atmospheric perspective: While one point perspective is a form of linear perspective that deals with how lines converge, atmospheric perspective (sometimes called aerial perspective) deals with how colors and details change with distance. In atmospheric perspective, distant objects appear hazier, bluer, and less detailed than nearby objects. Skilled artists combine linear perspective with atmospheric perspective to create deeply convincing spatial illusions. Understanding both systems gives you a more complete vocabulary for representing space in your artwork.
Tips and Best Practices for Beginners
Practice is the most important factor in developing your one point perspective skills, but there are techniques and habits you can adopt to accelerate your progress and avoid common pitfalls.
Start with light construction lines. When you are first learning, draw very light construction lines that you can easily erase. Your first lines for the horizon line, vanishing point, and orthogonal lines should be barely visible. This allows you to make corrections without leaving visible marks on your finished work. As you gain confidence, you will need to erase less often, but even experienced artists use light construction lines for complex perspective drawings.
Use a ruler or straightedge consistently. One point perspective requires precision. Using a ruler ensures that your lines meet exactly at the vanishing point and that parallel lines truly are parallel. As you practice, you will develop a steadier hand, but until then, let your tools do the work of keeping your lines precise.
Check your work by stepping back. Perspective errors are easier to spot when you view your drawing from a distance. Hold your drawing at arm’s length or step back from your workspace. Errors that are invisible up close often become obvious from a few feet away. Make a habit of stepping back regularly to check your progress.
Study real-world spaces with a critical eye. Look at rooms, buildings, streets, and landscapes with the intention of noticing how perspective works. Notice how edges seem to converge, how distant objects appear smaller, and how the horizon line relates to your eye level. Making this a habit trains your brain to think in perspective, and this understanding will naturally inform your drawing.
Practice drawing simple shapes before complex scenes. Master drawing cubes, rectangles, and simple architectural forms in one point perspective before attempting complex cityscapes or detailed interior rooms. The skills you develop with simple shapes transfer directly to more complex compositions.
Use grid paper for initial practice. Grid paper with equally spaced lines provides a built-in reference system that can help you understand how spacing changes with distance. Drawing perspective exercises on grid paper helps you internalize the principles before you transition to blank paper.
Keep the concept of eye level constantly in mind. Your horizon line should always represent your eye level in the scene. If you are standing on a hill looking down at a valley, your horizon line is high on the page. If you are lying on the ground looking at the sky, your horizon line is very low. This simple concept governs everything else in perspective drawing, so keep it at the front of your mind as you work.
Frequently Asked Questions
How does one point perspective drawing work?
One point perspective drawing works by representing parallel lines that recede into the distance as converging lines that meet at a single vanishing point on the horizon. Objects that face the viewer directly maintain their true shape because their front surfaces are parallel to the picture plane, while edges that go into the distance angle toward the vanishing point. This system creates the illusion of three-dimensional depth on a flat surface by simulating how our eyes perceive space in the real world.
What are the three rules for one point perspective?
The three essential rules of one point perspective are: first, all lines that are parallel to each other and perpendicular to the picture plane converge toward a single vanishing point on the horizon line; second, lines that are parallel to the picture plane (vertical and horizontal lines) remain parallel and do not converge; third, objects facing the viewer directly show their true shape because their front face is parallel to the picture plane. These rules govern every element of a one point perspective drawing.
What is the difference between one point and two point perspective?
One point perspective uses a single vanishing point and works best for subjects that face the viewer directly, such as a straight road or a room seen from the doorway. Two point perspective uses two vanishing points on the horizon line and is used when drawing subjects that show a corner, such as a building seen from the corner. Two point perspective creates more dynamic, angled compositions while one point perspective creates more formal, symmetrical arrangements.
What is the vanishing point in one point perspective?
The vanishing point is the single point on the horizon line where all parallel lines that are perpendicular to the picture plane appear to converge. It represents the theoretical location in the distance where parallel lines would meet if they continued infinitely. In one point perspective, every line representing depth or distance points directly toward this central location.
Can you draw circles in one point perspective?
Yes, circles can be drawn in one point perspective, but they become ellipses when they are not parallel to the picture plane. A circle that faces you directly (parallel to the picture plane) remains a circle. A circle that tilts away from you becomes an ellipse, with the ellipse getting narrower as it recedes closer to the vanishing point. Drawing circles and curves in perspective requires practice, but the same rules of convergence apply.
Why is it called one point perspective?
It is called one point perspective because it uses a single vanishing point to create the illusion of depth. The name distinguishes it from two point perspective (which uses two vanishing points) and three point perspective (which uses three). The “point” in the name refers to the vanishing point, not to the number of points in the composition.
When should you use one point perspective?
Use one point perspective when you want to draw a subject that faces you directly with no visible corners or angles turning away. Straight roads, corridors, room interiors, railway tracks, and building facades are ideal subjects for one point perspective. It creates a focused, calm composition with a strong central focal point at the vanishing point.
What is the horizon line in perspective drawing?
The horizon line is the horizontal line that represents the viewer’s eye level in the composition. It is called the horizon line because in outdoor scenes it typically coincides with the actual horizon of the landscape. Everything above the horizon line is above the viewer’s eye level, and everything below it is below the viewer’s eye level. The vanishing point is always located on the horizon line.
Continue Your Art Journey
One point perspective drawing is a foundational skill that opens the door to countless creative possibilities. With practice, the principles become second nature, and you will find yourself automatically seeing spatial relationships in terms of vanishing points and converging lines whenever you observe the world around you.
If you found this guide helpful, explore more art education content on our site to continue developing your artistic skills. Understanding perspective is just one piece of the broader puzzle of visual art, and there is always more to learn about composition, color, technique, and creative expression.
The key to mastering one point perspective is consistent practice. Start with the simple exercises outlined in this guide, then challenge yourself with more complex scenes as your confidence grows. Drawing a room, a cityscape, and a railway track are excellent starting points, but you will find that the same principles apply to any three-dimensional space you want to represent on a flat surface. Keep practicing, keep observing, and enjoy the journey of developing your artistic vision.