Diamond painting has taken the crafting world by storm, and if you have been curious about this shimmering hobby, you are in the right place. I remember the first time I opened a diamond painting kit – the tiny colorful drills, the sticky canvas, and the promise of creating something beautiful without any artistic training. That was three years ago, and I have completed over forty pieces since then.
This diamond painting beginner guide will walk you through everything you need to know before you start your first project. We will cover what diamond painting actually is, the tools and materials you need, step-by-step instructions for your first piece, and tips I wish I had known when I began. By the end, you will feel confident enough to pick up that applicator pen and start creating your own sparkling masterpiece.
Table of Contents
What Is Diamond Painting?
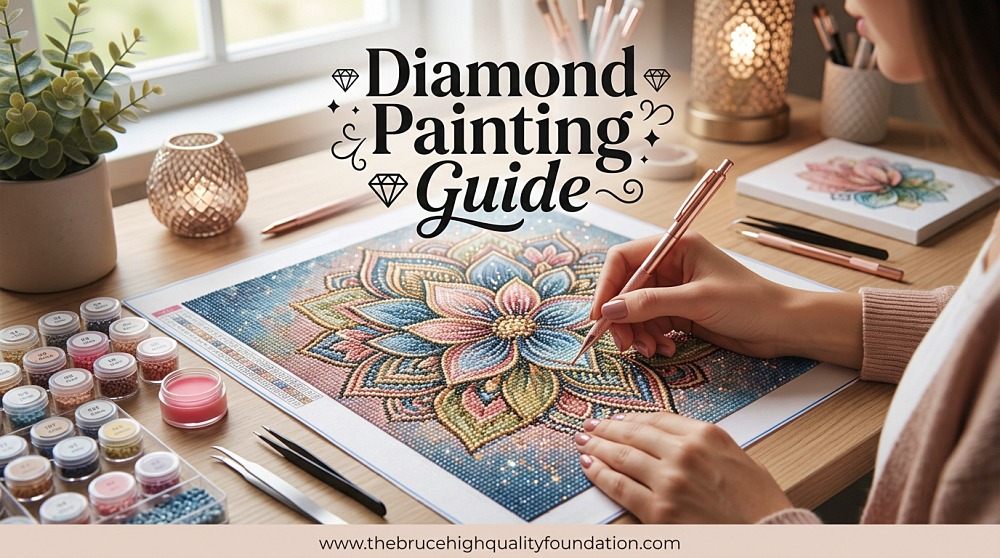
Diamond painting is a craft hobby where you apply tiny resin diamonds (also called drills) to an adhesive, color-coded canvas to create a shimmering, mosaic-style artwork. Think of it as a combination of cross-stitch and paint-by-numbers, but instead of thread or paint, you are using faceted resin gems that catch the light and sparkle.
The concept is simple: your canvas arrives printed with a grid of symbols, much like a paint-by-numbers pattern. Each symbol corresponds to a specific diamond color, typically coded using the DMC thread color standard that cross-stitchers know well. You use a special applicator pen to pick up each diamond and place it onto the matching symbol on the sticky canvas surface.
The “diamonds” are actually small resin rhinestones with flat backs and faceted tops. They come in two shapes: square and round. When placed on the canvas, these drills reflect light from multiple angles, creating a glittering effect that makes your finished artwork shimmer and shine. The result looks professional and impressive, yet requires no drawing or painting skills whatsoever.
Diamond painting originated in Asia around 2010 and has grown into a global phenomenon. What started as a niche craft has become a mainstream hobby embraced by millions of people seeking a relaxing, screen-free activity. The appeal spans all ages, from teenagers looking for a creative outlet to retirees wanting a gentle, engaging pastime. Our team has seen this craft explode in popularity over the past few years, with online communities growing to hundreds of thousands of members.
Diamond Painting Tools and Materials
Before you begin your diamond painting journey, you need to understand the tools and materials that come in a typical kit. Most beginner diamond painting kits include everything you need to get started, though many crafters eventually invest in upgraded tools for comfort and efficiency.
Essential Supplies in Every Kit
- The Canvas: Your canvas is a printed fabric sheet with a grid of symbols and a sticky adhesive layer covered by a protective film. Quality canvases use “poured glue” adhesive, which provides better hold than double-sided tape canvases. The canvas includes a color chart (also called a symbol legend) that shows which diamond color corresponds to each symbol.
- Resin Diamonds (Drills): These are the colorful gems you will place on the canvas. They come pre-sorted in small plastic bags or mixed together depending on your kit type. Each bag is labeled with the DMC color code and symbol from the chart. A typical 30x40cm painting contains between 10,000 and 15,000 individual diamonds.
- Applicator Pen (Stylus): This is your primary tool for placing diamonds. It looks like a pen with a hollow metal tip. You fill this tip with pink wax to create a sticky surface that picks up diamonds. Most kits include a basic single-placer pen, though upgraded kits may include a multi-placer tool that can pick up 3, 6, or 9 diamonds at once.
- Wax Pad: A small pink wax block that you press into the applicator pen tip. This wax creates the stickiness needed to pick up diamonds. You will need to refill the pen periodically as the wax loses its tackiness over time.
- Grooved Tray: A small plastic tray with ridges that help align the diamonds. When you pour diamonds into the tray and shake it gently, the drills line up with their flat sides down, making them easy to pick up with your pen.
- Tweezers: Most kits include plastic or metal tweezers for straightening crooked diamonds or removing misplaced ones. Some crafters prefer tweezers for placing individual diamonds instead of the pen method.
Optional Tools Worth Considering
- LED Light Pad: A thin light box that slides under your canvas, illuminating the symbols from below. This tool reduces eye strain dramatically and makes it much easier to see the symbols, especially on dark areas of the canvas. Many beginners consider this an essential upgrade after their first project.
- Storage Containers: Small organizer boxes with compartments help keep your diamond colors separated and accessible. Pill organizers, craft bead boxes, or specialized diamond painting storage systems all work well.
- Washi Tape: Decorative tape used around the edges of your canvas to keep diamonds aligned and prevent them from sliding off the edges. Many experienced painters use washi tape or painters tape to create straight borders.
- Desk Easel or Drafting Table: Working on a flat surface can cause neck and back pain over time. A tabletop easel or angled drafting table allows you to work at a comfortable angle, reducing strain during long sessions.
How to Diamond Paint: Step-by-Step Guide
Now that you understand your materials, let us walk through the actual process of creating your first diamond painting. I will guide you through each step based on my experience completing dozens of projects.
Step 1: Prepare Your Canvas
Unroll your canvas and lay it flat on a clean surface. Most canvases arrive rolled or folded, which creates creases that make placement difficult. To flatten your canvas, place it face-down on a towel and put heavy books, a mattress, or other weights on top overnight. This simple step prevents frustration later.
Once flat, peel back a small corner of the protective film to check the adhesive. Do not remove the entire film yet – you will work in sections to keep the adhesive clean and sticky. If you see any dust or lint on the exposed adhesive, use a baby wipe or damp cloth to gently clean it before starting.
Step 2: Organize Your Diamonds
Sort your diamond bags by color and label them with the corresponding symbol from your color chart. Many beginners skip this step and pay the price later when searching through mixed bags for that one specific color. Use small containers, cups, or even cupcake liners to keep colors separated and easily accessible.
Take time to understand your color chart before diving in. The chart shows each symbol, its DMC color code, and often the approximate diamond count for that color. Knowing this helps you pace your work and ensures you do not run out of any color unexpectedly.
Step 3: Set Up Your Workstation
Choose a comfortable, well-lit area with minimal distractions. Place your canvas on a flat, stable surface where it will not need to move for several hours or days. Arrange your tools within easy reach: tray on your dominant side, diamonds organized in front, pen and wax handy.
If you have a light pad, slide it under your canvas now. The illumination makes a tremendous difference in symbol visibility and reduces eye strain significantly. I personally will not start a project without mine anymore.
Step 4: Load Your Applicator Pen
Press the metal tip of your applicator pen into the pink wax pad. You only need a small amount – about the size of a grain of rice. Too much wax makes it hard to release diamonds onto the canvas; too little means the diamonds will not stick to the pen.
Test the pen by picking up a single diamond from your tray. The diamond should stick to the pen tip but release easily when you press it onto the canvas. If the diamond stays stuck to the pen, you have too much wax. If it falls off immediately, add a bit more.
Step 5: Pour Diamonds into Your Tray
Select your first color and pour a small amount into the grooved tray – about twenty to thirty diamonds at a time. Gently shake the tray side to side, not up and down. The shaking motion helps the diamonds flip to their flat side and line up in the grooves, making them easy to pick up.
Some people prefer to tap the tray lightly, but I find shaking more effective. Experiment to see what works best for you. The goal is having all the diamonds lined up with the flat backs facing down and the faceted tops facing up.
Step 6: Start Placing Your Diamonds
Peel back a small section of the protective film – about 6 to 8 inches square – to expose the adhesive. Use the color chart to identify which symbol corresponds to your chosen diamond color. Find that symbol on your exposed canvas section.
Press the loaded pen tip onto a diamond in your tray, then transfer it to the matching symbol on the canvas. Press down gently but firmly to ensure the diamond adheres. You will hear a satisfying “click” or feel a slight resistance when the diamond seats properly.
Continue placing diamonds of that color in the exposed section before switching colors. This method, called the “color by color” technique, keeps your process efficient and reduces the number of times you need to change pen wax.
Step 7: Cover and Protect Your Work
When you finish a session, replace the protective film over your completed section. This prevents dust, pet hair, and debris from sticking to the adhesive. If you are taking a longer break, place a clean sheet of paper or parchment over the exposed area before applying the film.
For sections where you have placed diamonds, you do not need to cover them – the film only needs to protect exposed adhesive. However, if you have pets or a dusty environment, consider placing a lightweight cloth over your entire canvas when not working.
Step 8: Continue Section by Section
Work your way across the canvas in manageable sections, peeling back the film as you go. Many painters prefer working from bottom to top, especially with square drills, to avoid accidentally knocking loose diamonds with their hand. Others work in a checkerboard pattern or complete entire color sections at once.
There is no single “right” way to diamond paint. Experiment with different approaches to find what feels most comfortable and efficient for you. The key is consistency and patience.
Square vs Round Diamonds: Which Should You Choose?
One of the first decisions you will make is whether to work with square or round diamonds. Both create beautiful finished pieces, but they have distinct characteristics that affect the look, difficulty, and time required for your project.
Round Diamonds: Round drills are generally recommended for beginners. They are more forgiving of slight placement errors because the circular shape leaves small gaps between diamonds. These gaps create a softer, more pixelated look in the finished artwork. Round diamonds are easier to pick up, align faster in the tray, and require less precision when placing.
The gaps between round diamonds mean the finished piece has less coverage and may show some of the canvas background through the spaces. However, this also makes the piece lighter and gives it a slightly textured appearance. If you want a more relaxed, forgiving introduction to diamond painting, round is the way to go.
Square Diamonds: Square drills create a more polished, professional-looking finished piece. When placed correctly, they fit together with no gaps, creating a seamless mosaic that covers the entire canvas. The sharp edges reflect light differently than rounds, producing a more glittering, cohesive appearance.
The downside is that squares require more precision. Misaligned squares create obvious gaps and crooked lines that stand out. The placement takes longer because you must align each diamond carefully with its neighbors. For this reason, many experts recommend starting with rounds and progressing to squares once you have developed your technique.
From my experience, a 40x50cm round drill painting takes me about 15 to 20 hours to complete, while the same size in square drills takes 20 to 25 hours due to the extra precision required. Both are enjoyable, but squares demand more patience and attention to detail.
Essential Diamond Painting Tips for Beginners
After three years and over forty completed paintings, I have learned several lessons that would have saved me time and frustration as a beginner. Here are the diamond painting tips I wish someone had shared with me from the start.
- Work in sections, not all at once. Never peel back the entire protective film. Expose only the area you are actively working on, about 6 to 8 inches at a time. This keeps the adhesive clean and sticky. Dust and lint are the enemies of diamond painting, and exposed adhesive attracts both.
- Invest in a light pad early. I waited six months before buying an LED light pad, and I regret every project I completed before that purchase. The light shining through from below makes symbols visible even on dark canvas areas and reduces eye strain dramatically. For the $15 to $25 investment, it transforms your experience.
- Sort your drills before starting. Spending thirty minutes organizing your diamond colors before you begin saves hours of frustration later. Nothing kills your flow like hunting through mixed bags for that one specific shade. Use whatever containers you have – pill organizers, small cups, or craft storage boxes.
- Use washi tape for straight edges. Apply washi tape or painters tape around the perimeter of your canvas where the printed border meets the adhesive. This creates a clean stopping point for your edges and keeps diamonds from sliding off the sides. It also gives your finished piece a neater appearance.
- Do not compare your pace to others. The diamond painting community includes people who complete massive pieces in days and others who work on the same painting for months. Both approaches are valid. Go at the speed that feels comfortable for you and finish in your own time. This is your hobby, not a race.
- Consider ergonomics from day one. Working hunched over a flat table for hours causes neck and back pain. Use a tabletop easel, drafting table, or even a pillow under your canvas to angle it toward you. Your body will thank you after those long painting sessions.
- Choose quality over quantity for kits. Poured glue canvases hold diamonds better than double-sided tape canvases. Better quality drills have more consistent sizing and faceting. Spending a few extra dollars on a quality kit from a reputable company prevents the frustration of drills popping off or colors not matching the chart.
Common Mistakes to Avoid
Even with the best intentions, beginners make predictable mistakes. Knowing these common errors ahead of time helps you avoid them and enjoy a smoother diamond painting experience.
- Removing the entire protective film immediately. This is perhaps the most common beginner error. Exposing the entire canvas at once invites dust, pet hair, and debris to stick to the adhesive. It also allows the adhesive to lose stickiness over time. Always work in sections, peeling back only what you need.
- Not flattening the canvas before starting. Those creases and rolls from shipping make placement difficult and can cause diamonds to sit crooked. Take the time to flatten your canvas overnight with heavy books or a mattress before you begin. A flat canvas makes everything easier.
- Using too much wax on the pen. A tiny amount of wax is all you need. Excess wax makes diamonds stick to the pen too firmly, causing them to refuse to release onto the canvas. It can also leave wax residue on the diamonds, dulling their sparkle.
- Rushing through the process. Diamond painting is meant to be relaxing and meditative. Rushing leads to placing diamonds crooked, missing symbols, and making errors that require tedious fixing later. Slow down and enjoy the process.
- Working in poor lighting. Struggling to see symbols causes eye strain and leads to misreads and wrong color placement. Ensure you have bright, even lighting and consider investing in that light pad we mentioned earlier.
- Not checking the symbol chart carefully. Similar symbols can be confusing, especially on complex canvases. Take time to verify you are using the correct color for each symbol. Placing a whole section in the wrong color is heartbreaking to fix.
Troubleshooting Common Problems
No craft goes perfectly every time. Here is how to handle the most common diamond painting problems when they arise.
Diamonds popping up after placement: This usually happens with low-quality double-sided tape canvases or in high-humidity environments. Press the diamond down firmly with your fingernail or the flat side of your pen. For persistent poppers, a tiny dab of craft glue on the canvas before placing the diamond solves the problem.
Dust or lint on the adhesive: Use a baby wipe, damp cloth, or piece of tape to gently lift debris from the exposed canvas. For stubborn particles, tweezers can help remove them without touching the adhesive.
Wax losing stickiness: The wax in your pen naturally loses tackiness over time, especially in warm environments. Simply press the pen into the wax pad again to refresh it. If your wax pad seems dried out, a new one costs only a few dollars.
Spilled diamonds mixing colors: This happens to everyone eventually. If you spill a large amount, use a vacuum with pantyhose stretched over the nozzle to suck up the diamonds without losing them. For smaller spills, tweezers work fine. Prevention through good containers is the best cure.
Missing diamond colors in your kit: Contact the seller immediately. Reputable diamond painting companies will send replacement drills at no cost. Keep your leftover diamonds from completed projects organized by color – they often come in handy for future kit shortages.
Crooked diamond placement: Use tweezers to gently nudge crooked squares back into alignment before pressing them firmly. For rounds, slight crookedness is less noticeable and usually not worth adjusting.
Finishing and Displaying Your Diamond Painting
After investing hours into your creation, you want to display it proudly. Here are your options for finishing and showing off your completed diamond painting.
Sealing Your Diamond Painting
Sealing is optional but recommended for pieces that will be handled frequently or hung in high-traffic areas. Sealers protect the diamonds from falling off and make the surface easier to clean. Options include brush-on sealers like Mod Podge, spray sealers, or specialized diamond painting sealants. Apply sealer lightly – you want to secure the diamonds without dulling their sparkle.
Framing Options
Traditional Frame: Standard picture frames work well for diamond paintings. You may need to trim the canvas border or use a mat to fit the frame. The canvas thickness sometimes requires a frame with extra depth.
Stretcher Bars: Canvas stretcher bars allow you to mount your painting like a traditional canvas art piece. Staple or glue the edges around the bars for a gallery-wrapped look that requires no glass.
Magnetic Hanger Bars: These wooden bars clamp onto the top and bottom of your canvas with magnets, creating a scroll-like hanging method that is easy and attractive. No framing required.
Foam Board Mounting: Glue your completed canvas to a piece of foam board, then trim the edges for a clean, lightweight display option. This works well for larger pieces that would be heavy in a traditional frame.
Storage Before Framing
If you are not framing immediately, store completed paintings flat with the protective film still covering the surface, or place them between sheets of parchment paper. Roll loosely if necessary, but flat storage prevents diamonds from shifting. Keep away from direct sunlight to prevent fading.
Frequently Asked Questions
Is diamond painting hard for beginners?
No, diamond painting is not hard for beginners. It is often described as a relaxing, meditative craft that requires no prior artistic skill. The process is similar to paint-by-numbers – you simply match colored resin diamonds to corresponding symbols on a coded adhesive canvas. Most beginners can complete their first small project successfully with patience and attention to detail.
How long does diamond painting take to complete?
Completion time depends on the canvas size, your pace, and how much time you dedicate daily. A small 20x20cm painting might take 6 to 10 hours, while a large 50x70cm piece could require 40 to 60 hours or more. Working just 30 minutes daily means a medium project takes several weeks. The key is not to rush – this is a relaxing hobby meant to be enjoyed.
What is the difference between full drill and partial drill?
Full drill means the entire canvas is covered with diamonds, creating a complete mosaic image. Partial drill means only certain areas (usually focal points like a face or flower) have diamonds, while the background remains printed canvas. Full drill produces a more glittering, complete look but requires significantly more time and diamonds. Beginners often start with partial drill pieces to get comfortable with the process.
What are AB diamonds in diamond painting?
AB stands for Aurora Borealis, a special coating applied to some diamonds that gives them an iridescent, rainbow-like shimmer. These diamonds catch light differently than standard drills and add extra sparkle to focal points in the artwork. They are typically used sparingly for eyes, water, or other highlight areas to create dimension and interest.
How do I flatten my diamond painting canvas?
Place the canvas face-down on a clean towel and lay heavy books, a mattress, or other flat weights on top. Leave it overnight or for 24 hours to allow the creases to relax. For stubborn creases, you can also try gently ironing the back of the canvas on low heat with a cloth between the iron and canvas. Never iron the adhesive side.
Why are my diamonds popping off the canvas?
Popping diamonds usually indicate a quality issue with the canvas adhesive. Double-sided tape canvases tend to have weaker hold than poured glue canvases. Humidity and temperature changes can also affect adhesion. Press diamonds down firmly with your fingernail when placing them. For persistent issues, apply a tiny dab of craft glue to the canvas before placing the diamond.
What supplies do I need beyond the basic kit?
While basic kits include everything essential, many painters invest in an LED light pad for better visibility, storage containers for organizing diamonds, washi tape for edge alignment, and a tabletop easel for ergonomic comfort. These upgrades are not required but significantly improve the experience, especially for larger or longer projects.
Should beginners choose square or round diamonds?
Beginners should start with round diamonds. They are more forgiving of placement errors, easier to align in the tray, and create a softer finished look. Square diamonds require more precision and take longer to place, but produce a more polished, professional appearance. Many painters begin with rounds and progress to squares as their skills develop.
Conclusion
Diamond painting offers a unique combination of creativity, relaxation, and satisfaction that few other hobbies can match. Whether you are looking for stress relief after work, a screen-free activity for your evenings, or a way to create beautiful art without drawing skills, this craft delivers.
Remember that every expert diamond painter started exactly where you are now – staring at their first canvas wondering if they could really create something beautiful. You can. Start with a small round-drill project, work in sections, and go at your own pace. Before you know it, you will be hooked on that satisfying click of each diamond finding its place, creating a sparkling masterpiece one tiny gem at a time.
Welcome to the wonderful world of diamond painting. Your first project awaits.