
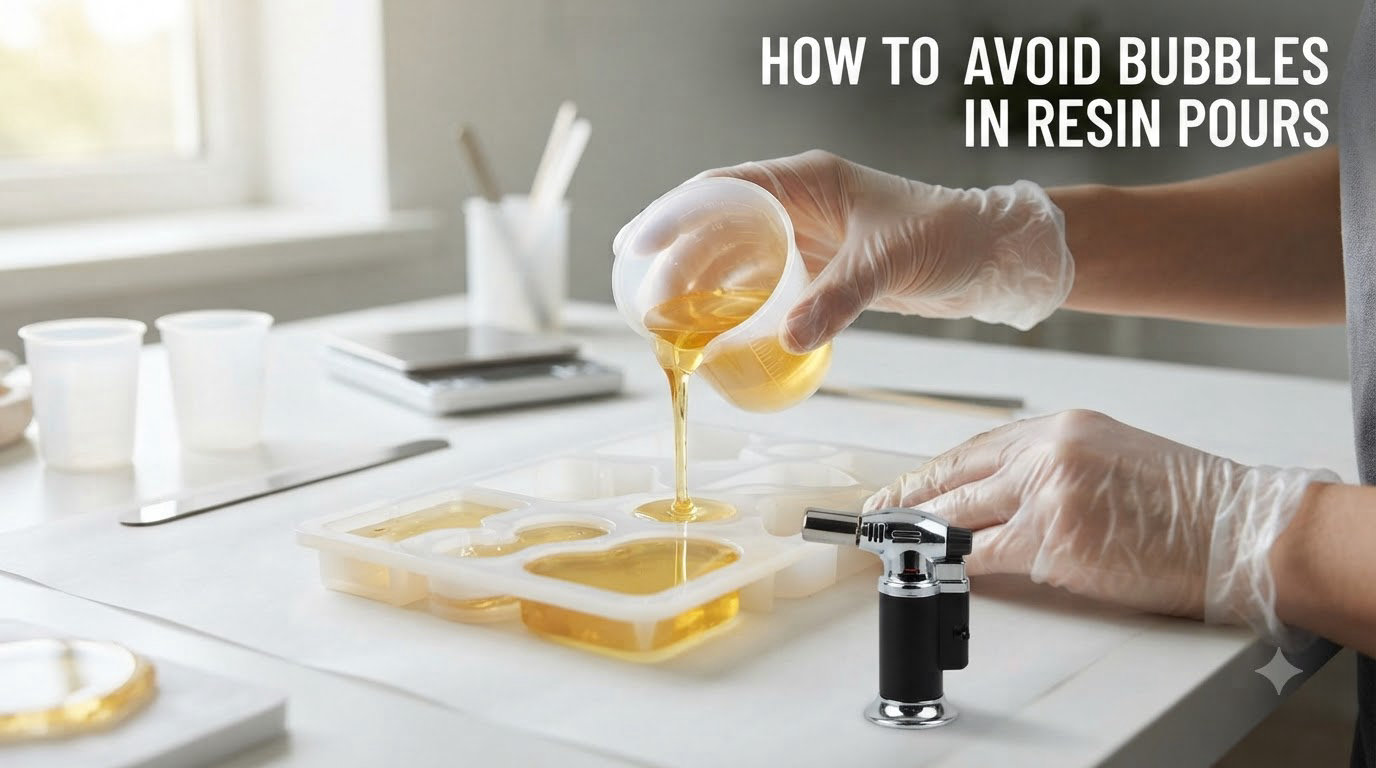
Nothing ruins a resin project faster than pulling it from the mold to find it riddled with tiny bubbles. I have been there, staring at what should have been a crystal-clear coaster or jewelry piece, now looking like it is filled with microscopic trapped air pockets. After years of trial and error, countless forum discussions, and testing every technique I could find, I have learned that preventing bubbles in resin is less about having expensive equipment and more about understanding why bubbles form in the first place.
In this guide, I will walk you through exactly how to avoid bubbles in resin pours using methods that actually work. We will cover everything from temperature control and mixing techniques to advanced methods like pressure pots and vacuum chambers. Whether you are making your first resin coaster or casting intricate dice, these techniques will help you achieve that flawless, glass-like finish you are after.
Table of Contents
Why Do Bubbles Form in Resin?
Before diving into prevention techniques, you need to understand what causes bubbles in the first place. Bubbles form through several mechanisms, and each requires a different prevention approach.
Air Introduced During Mixing
The most common source of bubbles comes from the mixing process itself. When you stir resin and hardener together, you are literally folding air into the mixture. Rapid stirring, whisking motions, and scraping too aggressively all introduce thousands of micro bubbles that can become trapped in your finished piece. The viscosity of the resin determines how easily these bubbles can escape, which is why temperature matters so much.
Outgassing From Porous Materials
When you pour resin over wood, paper, fabric, or other porous materials, air trapped within those materials escapes into the liquid resin. This process, called outgassing, releases bubbles that rise through your pour and often get trapped at the surface. Without proper sealing, even perfectly mixed resin will develop bubbles when poured over these materials.
Temperature and Viscosity Relationship
Cold resin is thick and syrupy, making it difficult for trapped air bubbles to rise to the surface before the material starts to cure. Warmer resin has lower viscosity, allowing bubbles to travel upward more easily and escape before the chemical reaction hardens the mixture. This is why working in a cold garage often results in more bubbles than working in a climate-controlled room.
Surface Tension Trapping Bubbles
The surface tension of curing resin creates a barrier that can trap bubbles just below the surface. This is why you often see tiny bubbles that seem stuck, refusing to rise no matter how long you wait. Breaking this surface tension is exactly what heat guns and torches accomplish.
How to Avoid Bubbles in Resin Pours: Prevention Techniques
Prevention is always easier than fixing bubbles after the fact. Follow these steps in order for the best results.
Step 1: Control Your Temperature and Environment
The ideal working temperature for most epoxy resin falls between 22C and 28C (72F to 82F). Below this range, resin becomes too viscous and traps bubbles. Above this range, your working time shortens dramatically, and you might face curing issues.
Humidity also matters. Keep your workspace below 60% relative humidity if possible. High humidity can cause moisture-related issues and affect how resin cures. Work in a draft-free area because moving air can introduce dust and debris while also cooling your resin faster than intended.
I learned this lesson the hard way when I tried to rush a project in my garage during winter. The temperature was around 15C, and my resin looked like sparkling water by the time it cured, filled with micro bubbles that never had a chance to escape.
Step 2: Seal Porous Surfaces Before Pouring
Any porous material you embed in resin needs sealing first. Wood, paper, fabric, dried flowers, and even some stones contain trapped air that will outgas into your resin if not sealed properly.
To seal these materials, brush on a thin layer of resin or use a clear spray sealant. Let it dry completely before your main pour. For wood especially, apply a thin seal coat of resin first, let it become tacky, then pour your flood coat. This seal coat fills the wood pores and prevents air from escaping during the main pour.
The seal coat technique transformed my river table projects. Before I started sealing the wood edges, I consistently got bubbles along the wood-resin interface. After sealing, those edge bubbles disappeared completely.
Step 3: Warm Your Resin Before Mixing
Warming your resin and hardener before mixing is one of the most effective bubble prevention methods. Warm resin flows more easily, allowing bubbles to rise and escape before curing begins.
Place your resin bottles in a warm water bath for 5 to 8 minutes before measuring and mixing. The water should feel warm to the touch but not hot, around 30C to 35C. Remove the bottles and dry them completely before opening to prevent water contamination.
Keep in mind that warming your resin reduces working time. A resin that normally gives you 45 minutes of working time might only give you 30 minutes when warmed. Plan accordingly and work efficiently once mixed.
Step 4: Mix Slowly and Thoroughly
How you mix matters just as much as how long you mix. Stir slowly and deliberately, scraping the sides and bottom of your mixing cup as you go. Aim for a smooth, controlled motion rather than vigorous stirring.
Mix for 3 to 5 minutes, ensuring the resin and hardener are completely combined. Look for a consistent, streak-free appearance. Avoid using whisks or anything that creates a beating motion. A simple wooden stir stick or silicone spatula works best.
Forum discussions on Reddit consistently emphasize this point. Users who switched from fast, aggressive mixing to slow, methodical stirring reported dramatic reductions in bubble formation. One user mentioned that stirring slowly for 5 minutes created fewer bubbles than fast mixing for 2 minutes.
Step 5: Let Resin Rest Before Pouring
After mixing, let your resin sit undisturbed for 5 to 10 minutes before pouring. This rest time allows bubbles introduced during mixing to rise to the surface and escape naturally.
Cover your mixing cup with a dust cover or plastic wrap during this rest period to keep debris out. You will see bubbles rising and popping at the surface, which is exactly what you want. The longer you can let it rest within your working time window, the fewer bubbles will remain when you pour.
This technique, sometimes called “stand time” in the resin community, is particularly effective for thicker resins. Some experienced crafters let their resin rest for up to 15 minutes when working time allows.
Step 6: Master Your Pouring Technique
How you pour resin into your mold or onto your surface affects bubble formation significantly. Pour from a moderate height, about 6 to 12 inches above the surface, in a thin, steady stream. This thin stream minimizes air entrapment compared to dumping resin all at once.
For deep pours or thick castings, pour in layers rather than all at once. Each layer should be no more than 1/4 inch to 1/2 inch deep, allowing bubbles to escape between pours. Let each layer become tacky before adding the next.
When working with intricate silicone molds, try drizzling and brushing resin into crevices first before the main pour. This technique, shared frequently in Facebook resin groups, helps resin flow into detailed areas where bubbles love to hide.
Another community tip is the “pour and spread” method. Pour a small amount first, tilt your mold to coat all surfaces, then add the rest of your resin. This prevents trapping air in corners and detailed sections.
How to Remove Bubbles After Pouring
Even with perfect prevention, some bubbles may appear after pouring. Here is how to deal with them before the resin cures.
Heat Gun Method
A heat gun is the most accessible tool for bubble removal. Hold it 6 to 8 inches above the resin surface and move it constantly in sweeping motions. Do not hold it in one place, as concentrated heat can damage the resin or cause uneven curing.
The heat gun works by warming the surface, which reduces viscosity and breaks surface tension, allowing trapped bubbles to pop. Apply heat immediately after pouring and then check again at 15-minute intervals during the first hour of curing. New bubbles can rise during this time.
For larger surfaces like river tables or bar tops, work in sections and make multiple passes. Be patient and thorough. Missing bubbles during this window means they will be permanent once curing completes.
Propane Torch Technique
For serious resin work, many crafters prefer a propane torch or artist torch over a heat gun. The flame breaks surface tension instantly and heats the resin more effectively than hot air alone.
Use a quick sweeping motion, passing the flame over the surface for just 2 to 3 seconds per area. Keep the torch moving constantly and maintain a safe distance of about 6 inches. Never hold the flame in one spot, and never torch a surface that has started to gel.
Safety matters here. Work in a well-ventilated area, keep a fire extinguisher nearby, and remove any flammable materials from your workspace. The torch method is powerful but requires respect for the open flame.
Tap and Pinch Technique
This community-discovered technique is perfect for silicone molds and does not require heat. After pouring, gently tap the sides of your mold with your fingers or a soft tool. The vibration helps bubbles rise to the surface.
For flexible silicone molds, you can also pinch the mold material itself, squeezing it gently to shift the resin and release trapped air. Combine tapping and pinching for maximum effectiveness.
Some crafters place their molds on a vibrating surface during pouring, such as a washing machine or a tool with vibration function. This mechanical vibration helps bubbles escape from detailed molds where heat guns cannot reach.
Isopropyl Alcohol Spray Method
A lesser-known technique involves using isopropyl alcohol in a fine mist sprayer. Lightly mist the surface of your poured resin immediately after pouring. The alcohol breaks surface tension and pops bubbles instantly.
Use 70% to 90% isopropyl alcohol and hold the sprayer high above the resin to create a very fine mist. Heavy droplets can cause issues, so mist lightly and from a distance. This method works particularly well for surface bubbles but will not help with bubbles trapped deeper in the resin.
Advanced Bubble Prevention Methods
Once you have mastered the basics, these advanced techniques can take your bubble-free results to the next level.
Pressure Pot Technique
A pressure pot compresses bubbles so small they become virtually invisible in the cured resin. This method is considered the gold standard for casting, dice making, and any project where absolute clarity is essential.
After pouring your resin, place the entire mold inside a pressure pot and pressurize to 40 to 60 PSI. The pressure crushes bubbles to microscopic size while the resin cures. When you depressurize, the bubbles are too small to see with the naked eye.
Pressure pots require an initial investment and some setup, but they eliminate the need for torching and other surface treatments. Dice makers and jewelry casters on Reddit consistently praise pressure pots as game-changing for their work.
Vacuum Chamber Degassing
Vacuum chambers work opposite to pressure pots by pulling bubbles out of the resin before pouring. Place your mixed resin in the chamber and draw a vacuum. You will see bubbles expanding and rising rapidly as the vacuum pulls air from the resin.
Keep the vacuum applied until bubbles stop rising, typically 2 to 5 minutes. Then release the vacuum slowly and pour immediately. This method removes bubbles from the resin itself before it ever touches your mold.
Vacuum chambers work best for smaller batches and high-detail molds. They are particularly effective for silicone mold making as well, removing bubbles from the silicone itself before it sets.
UV Resin Specific Tips
UV resin behaves differently than two-part epoxy and requires modified techniques. UV resin typically has lower viscosity, which helps bubbles escape, but it cures so quickly that you have less time to remove them.
Pour UV resin in thinner layers, curing each layer before adding the next. This layer approach prevents bubbles from getting trapped deep in thick pours. Use a UV lamp with sufficient power, as underpowered lamps can cause incomplete curing that traps bubbles.
Some UV resin artists use a quick “flash cure” technique. Hit the surface with UV light for just 10 to 20 seconds to gel the surface slightly, then torch any bubbles that rise. Complete the cure after torching.
Fixing Bubbles in Cured Resin
Sometimes bubbles happen despite your best efforts. Here is how to fix them after the resin has cured.
For surface bubbles, sanding is your first option. Sand the affected area with fine-grit sandpaper (220 to 400 grit) until the bubbles are removed. Clean the surface thoroughly, then pour a thin layer of fresh resin to restore clarity. This technique works well for small imperfections and edge bubbles.
For deeper bubbles or large affected areas, you might need to sand down significantly and build back up with fresh resin layers. Some professionals recommend sanding the entire surface and applying a full flood coat for severe cases.
Drilling and filling works for isolated bubbles. Drill into the bubble cavity with a small bit, fill with fresh resin, and cure. Sand smooth and recoat if needed. This is labor-intensive but can save a piece with just a few problematic bubbles.
Prevention is always better than repair, so treat every project as a learning experience. Note what went wrong and adjust your technique next time.
Frequently Asked Questions
How do you pour resin without bubbles?
Pour bubble-free resin by controlling temperature (22-28C), sealing porous surfaces, warming resin before mixing, mixing slowly for 3-5 minutes, letting resin rest 5-10 minutes, and pouring in a thin steady stream. Remove remaining bubbles with a heat gun or torch immediately after pouring.
How long until epoxy stops bubbling?
Epoxy resin typically releases bubbles during the first 45-60 minutes after pouring while it remains in liquid form. Bubbles will continue rising until the resin reaches the gel phase. Monitor your piece during this window and apply heat as needed to pop bubbles before the surface begins to harden.
How to cure bubbles in resin?
You cannot cure bubbles that have already formed in cured resin. You must remove them mechanically by sanding and re-pouring a fresh layer, or drilling and filling individual bubbles. Prevention during the pouring process is the only way to achieve truly bubble-free results.
What do you spray on resin to get rid of bubbles?
A fine mist of 70-90% isopropyl alcohol can help break surface tension and pop bubbles immediately after pouring. Hold the sprayer high above the resin surface and apply lightly. This method only works for surface bubbles and must be done before the resin begins to cure.
Can you use a hairdryer on resin?
A hairdryer is not recommended for bubble removal. Hairdryers blow dust and debris onto your resin surface and do not get hot enough to effectively break surface tension. Use a heat gun designed for resin work or a propane torch instead for proper bubble removal.
Why do bubbles form in resin?
Bubbles form from air introduced during mixing, outgassing from porous materials like wood, cold temperatures increasing viscosity, and surface tension trapping rising bubbles. Understanding these causes helps you prevent bubbles through proper temperature control, slow mixing, surface sealing, and heat application.
How do I prevent bubbles when embedding objects in resin?
Seal porous objects before embedding, warm your resin to reduce viscosity, pour in thin layers around the object, and use a toothpick to release trapped air from crevices. Apply heat after pouring to pop any bubbles that form around the embedded item.
Do pressure pots really eliminate bubbles?
Yes, pressure pots effectively eliminate visible bubbles by compressing them to microscopic size under 40-60 PSI pressure. The bubbles still exist but become too small to see. This method is considered the most reliable for professional-grade bubble-free castings, especially for dice making and detailed jewelry.
Final Thoughts on How to Avoid Bubbles in Resin Pours
Achieving bubble-free resin is a skill that develops with practice. Start with the fundamentals: temperature control, slow mixing, proper sealing, and heat application. As you gain confidence, experiment with advanced techniques like pressure pots and vacuum chambers.
Remember that even experienced resin artists occasionally deal with bubbles. The key is understanding why they form and having multiple techniques in your toolkit to prevent and remove them. Each project teaches you something new about your specific resin, your workspace conditions, and your personal technique.
Keep experimenting, keep learning from the community, and keep refining your process. With the techniques outlined in this guide, you now have everything you need to dramatically reduce bubbles in your resin pours and achieve that crystal-clear, professional finish you are aiming for.